

Learn through the super-clean Baeldung Pro experience:
>> Membership and Baeldung Pro.
No ads, dark-mode and 6 months free of IntelliJ Idea Ultimate to start with.
Last updated: August 30, 2024
Learn through the super-clean Baeldung Pro experience:
>> Membership and Baeldung Pro.
No ads, dark-mode and 6 months free of IntelliJ Idea Ultimate to start with.
Generally, file transfers between Windows and Linux machines are necessary for interoperability and collaboration between them. For example, developers often work on applications that run on both Windows and Linux. Consequently, they might need to transfer files between such settings for testing and deployment.
Similarly, while migrating from a Windows machine to a Linux machine, we may need to transfer files. While backing up data from a Windows machine to a Linux backup server, we again usually transfer files.
In this tutorial, we’ll look at several ways to move files from a Windows machine to an Ubuntu Linux machine. The steps should be applicable directly, or with minor modifications to most major Linux distributions.
Secure File Transfer Protocol (SFTP) and Secure Copy (SCP) are useful for securely transferring files between systems. They are both based on Secure Shell (SSH), which is implemented by the OpenSSH suite. Therefore, they’re just as secure as SSH itself, and can employ the same authentication methods.
However, the use of SCP and SFTP requires us to install an SSH server, like OpenSSH, on either Windows or Linux machines.
For this article, we’ll install the OpenSSH suite on our Ubuntu Linux system using the apt command:
$ sudo apt install openssh-serverOnce installed, we can then use the OpenSSH client tools on the other side to transfer files.
One of the most common secure ways to transfer files from Windows to Linux is to use the scp (Secure Copy) client. To do that, we need an scp client for our Windows system.
In fact, a popular scp client for Windows is the pscp (PuTTY Secure Copy Protocol) utility, part of the PuTTY suite. After installing it, we can transfer files from Windows to Linux using the command format:
pscp <Source_File> <Linux_Username>@<Destination_Address>:<Destination_Directory>Here, we used several options with placeholders for each:
For example, let’s take the file pscp.txt residing on the C drive of our Windows system, i.e., C:\pscp.txt. We can transfer it to the home directory of the Linux user baeldung:
$ pscp C:\pscp.txt baeldung@linux_server:/home/baeldung/Of course, we confirm the operation by authenticating to the Linux machine to make the transfer:
$ pscp C:\pscp.txt baeldung@linux_server:/home/baeldung/Documents
[...]
baeldung@linux_server's password:
pscp.txt                  | 0 kB |   0.0 kB/s | ETA: 00:00:00 | 100%
After a successful operation, the file should appear in the specified directory on our Linux machine:
$ ls /home/baeldung/Documents
 pscp.txt
Notably, like SFTP, SCP uses the SSH protocol to securely transfer files between systems.
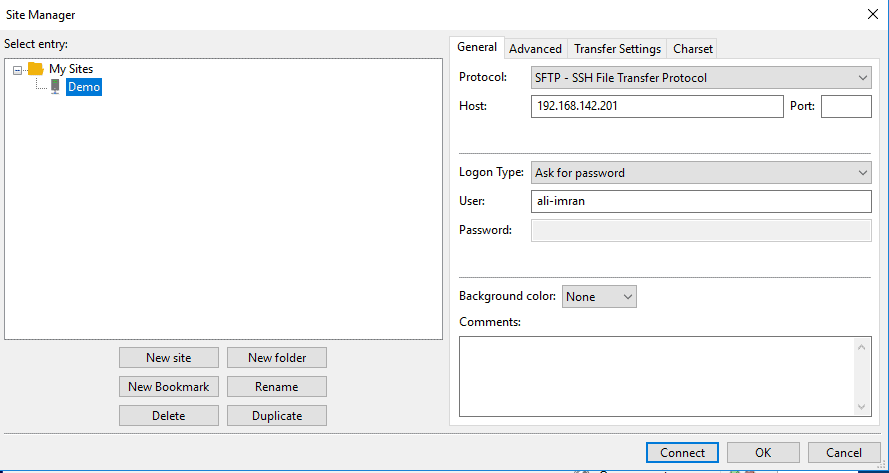
Transferring files from Windows to Linux using SFTP is usually straightforward. In fact, security and authentication for SFTP connections are handled by the SSH protocol. Further, we can install the SSH server on either the Linux or Windows machines. We already installed the OpenSSH server on our Ubuntu machine earlier.
Next, we need an SFTP client on the Windows system. There are several free and premium SFTP clients available for Windows:
For this article, we’re using the FileZilla SFTP client. Let’s launch it and see how to leverage it for a file transfer:
Once we’re connected, we can interactively locate files to be transferred from the FileZilla interface. Optionally, we can set the destination directory on the Linux system.
To transfer files, we can simply drag and drop files to the Linux system:
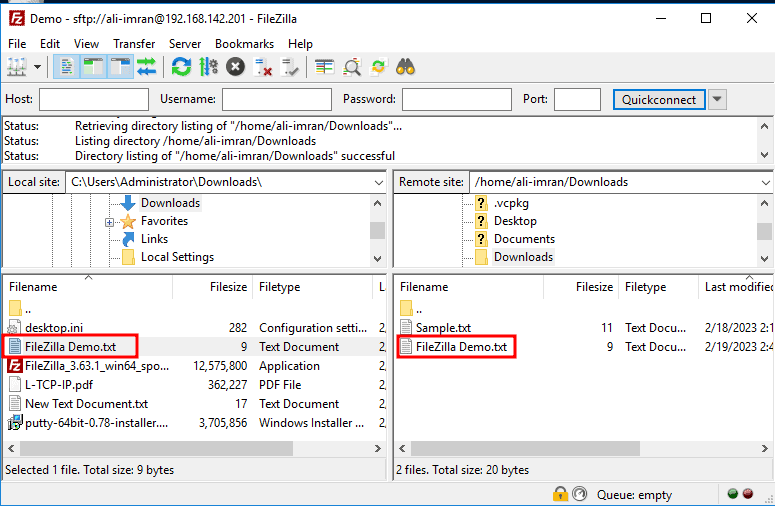
Notably, files can be transferred from and to either side. Basically, to transmit data, SFTP relies on the SSH protocol. Thus, it creates an encrypted connection between the systems.
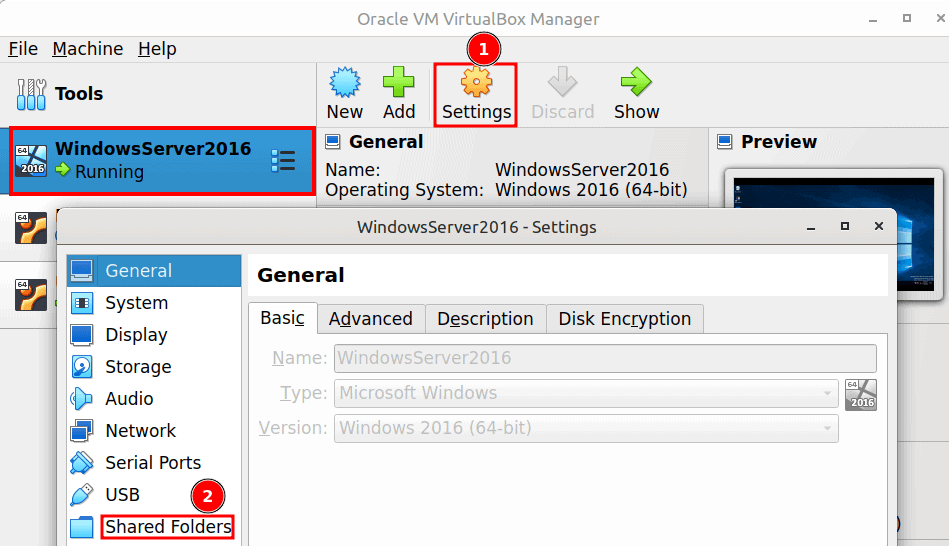
VirtualBox includes a Shared Folders feature for transferring files between the host and guest machines. In fact, this works both ways. On the one hand, Linux can be a host machine with Windows as the guest machine. Conversely, we can have a Linux guest on a Windows host machine. Above all, Shared Folders is a fairly simple way to transfer files between two systems, as long as they’re in a guest-host relationship.
Let’s assume we’ve got a Windows host machine and a Linux guest machine. Next, suppose our host has a directory named vbox_share.
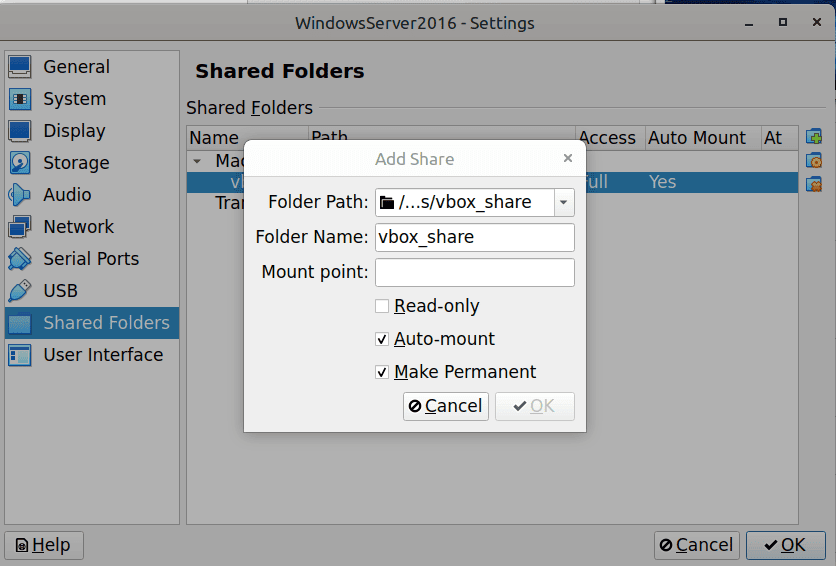
To use Shared Folders in VirtualBox, we’ll launch the VirtualBox Manager and follow several steps:
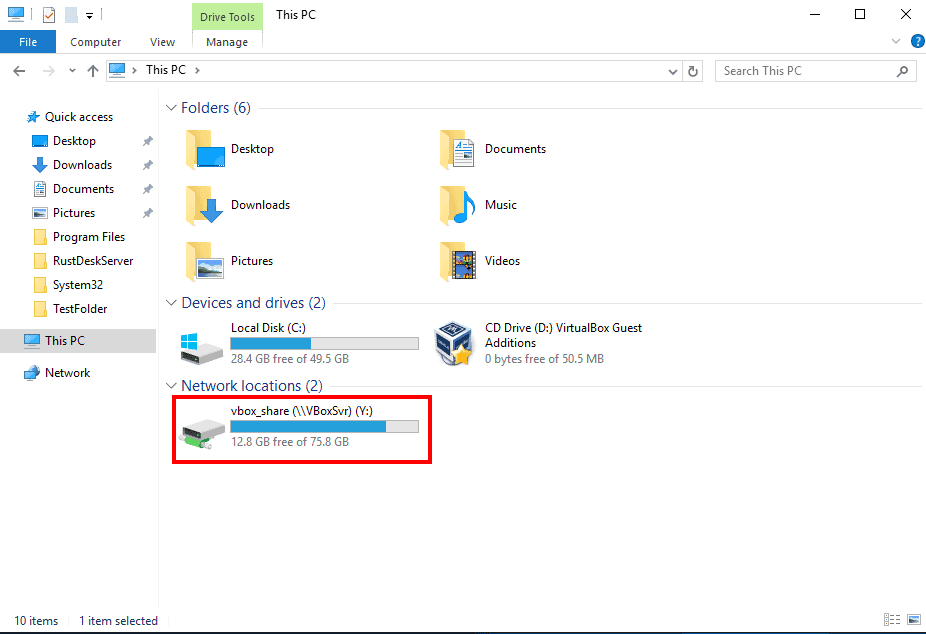
Next, we can access the shared folder from the Windows virtual machine by going to Windows Explorer and looking under the Network locations section in This PC:
Finally, we can open the shared folder drive where we put the files we want to transfer. These files will automatically appear on the Linux machine:
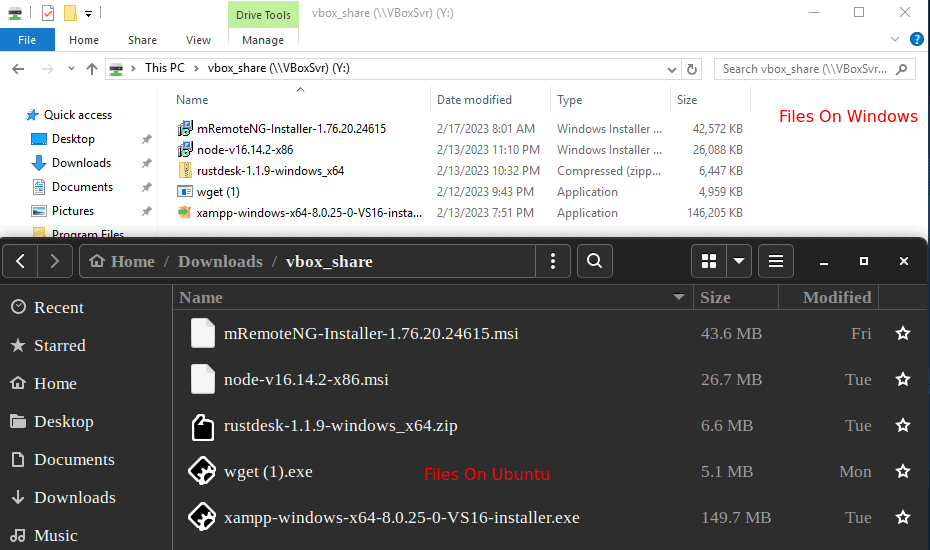
In fact, data can be added from either side. Consequently, files appear on both machines due to the shared nature of the folder.
We can also use the Remote Desktop Protocol (RDP) to transfer files between a Windows and Linux machine. Again, by installing an RDP server on either side and using a client on the other, we can simply move files.
In this case, we’ll use xrdp, an RDP server for Linux.
So let’s install xrdp on our Ubuntu system:
$ sudo apt install xrdp -yNext, we’ll install the Xfce environment on our Ubuntu system:
$ sudo apt install xfce4 -yAfter this, we’ll configure xrdp to use this newly-installed desktop environment:
$ sudo sed -i.bak '/fi/a #xrdp multiple users configuration \n xfce-session \n' /etc/xrdp/startwm.shThen we’ll enable the default RDP port 3389 via ufw:
$ sudo ufw allow 3389/tcpFinally, we’ll restart the xrdp server:
$ sudo systemctl restart xrdpOnce everything is set, we can transfer files with the Windows RDP client:
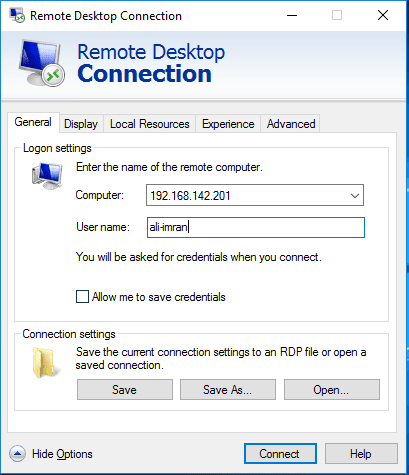

At this point, a new remote desktop connection window should show up:

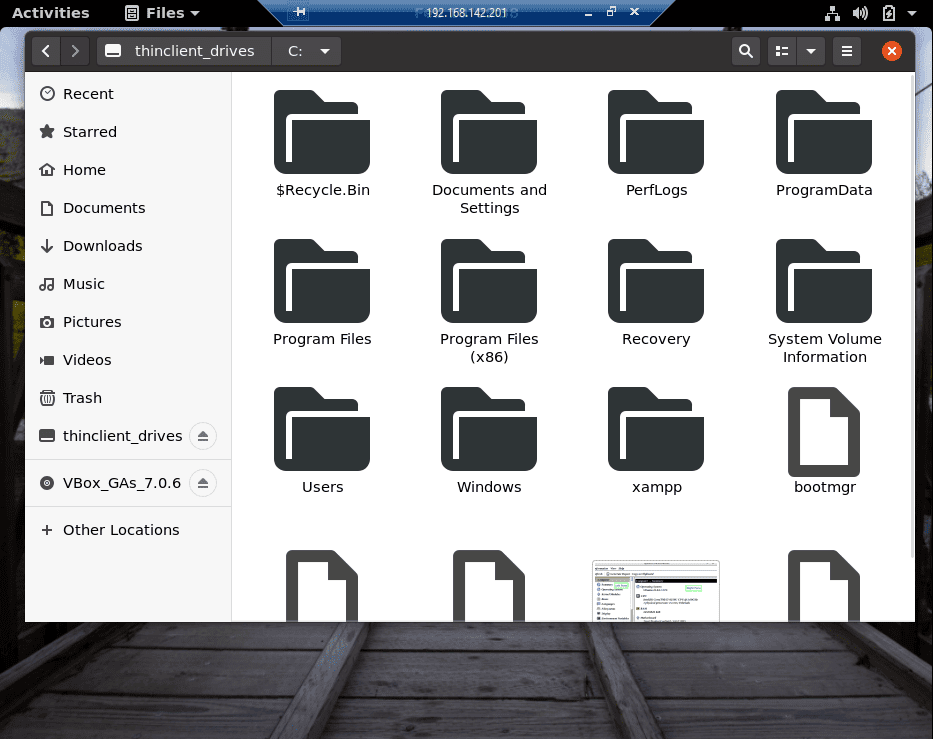
Finally, we can simply transfer files using copy and paste.
Interestingly, we can transfer files from a Windows machine to a Linux machine using an HTTP server. For this, we can either set up our own (like Apache), or use an online service.
On the one hand, a local HTTP server can be on the Windows machine. Then, on the Linux machine, we’d use wget or a web browser to download the files via the GET method. Alternatively, we can use some server-side scripting to leverage the POST method and upload files if the HTTP server is on the Linux machine.
In this article, we’ll install the XAMPP server on a Windows machine. After installation, we’ll start the Apache web server from the XAMPP control panel:

Now we’ll follow several steps on our Windows machine:
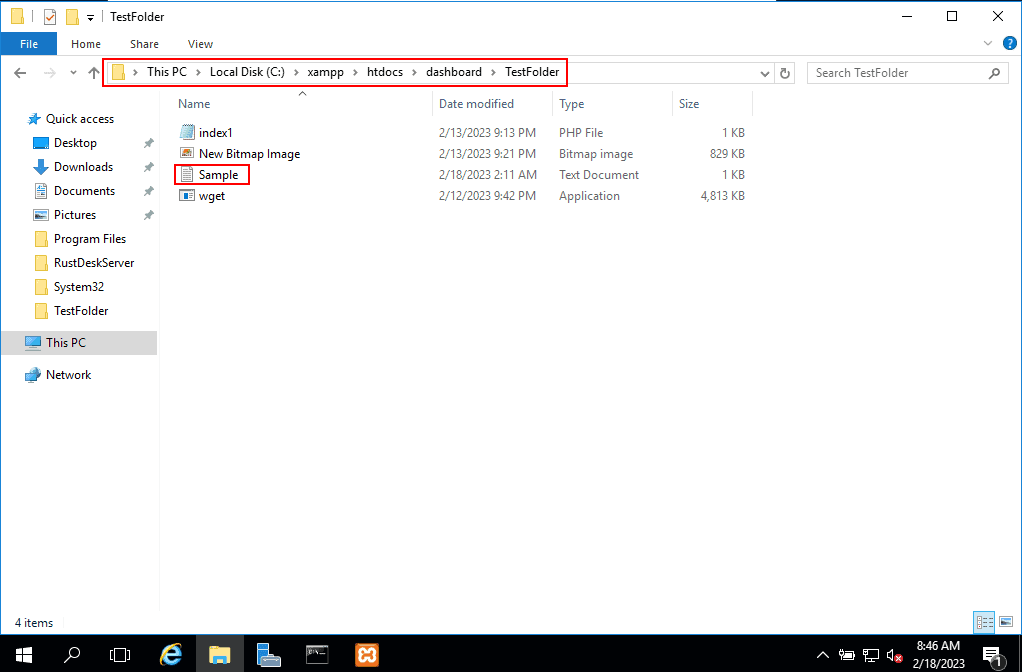
Next, we’ll move to a shell on the Linux machine and just download the file via the URL:
$ wget http://windows_machine/dashboard/TestFolder/Sample.txt
--2023-02-21 18:20:55-- http://windows_machine/dashboard/TestFolder/Sample.txt
Connecting to windows_machine:80... connected.
HTTP request sent, awaiting response... 200 OK Length: 11 [text/plain]
Saving to: ‘Sample.txt’ Sample.txt 100%[===================>] 11 --.-KB/s in 0s
2023-02-21 18:20:55 (784 KB/s) - ‘Sample.txt’ saved [11/11]
Here, we used the wget utility. Alternatively, we can also use a web browser to get the files from the Windows machine.
Additionally, we can use online services, like transfer.sh, keep.sh, and others. In this case, we simply upload files from the Windows machine, and then download these files on the Linux machine using a tool like curl.
Let’s take the example of uploading a file to keep.sh from our Windows machine:
$ curl --upload-file sample.txt https://free.keep.sh
https://free.keep.sh/JK0oRjDZYM3Sb3lY/sample.txt
This curl command uploads our sample.txt file to the cloud storage of the service. Also, it outputs a globally-accessible link to the location of our file.
Next, we can use this link to download the file on our Linux machine:
$ curl -L https://free.keep.sh/JK0oRjDZYM3Sb3lY/sample.txt > file.txtHere, we downloaded the file as file.txt.
In essence, there are several potential disadvantages to this method:
On the other hand, the main advantage of using online transfer services is the fact that it uses the Internet and cloud storage to conveniently transfer and preserve our data with no additional setup.
RustDesk, like many remote desktop software, allows controlling a remote computer from a local machine. Let’s see how we can use RustDesk for transferring files from Windows to Linux.
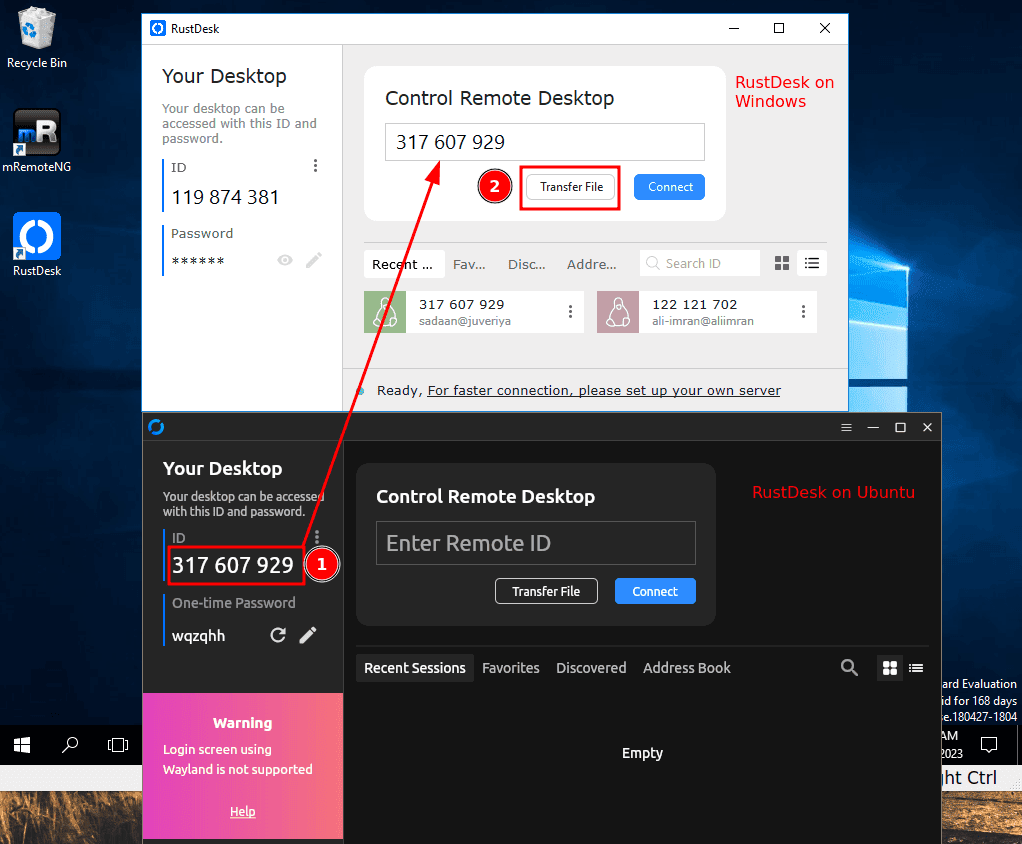
Of course, we’ll start by installing and starting RustDesk on both machines. Now we can use the remote ID of these machines to start communication between them.
Moreover, this can happen in either direction. In fact, we’ll input the RustDesk remote ID of the Linux machine in the RustDesk interface of the Windows machine and hit the Transfer File button:
After entering the Linux machine password, we can see a window with two sections: Local Computer and Remote Computer. At this point, we can use the Send and Receive buttons to transfer the files: 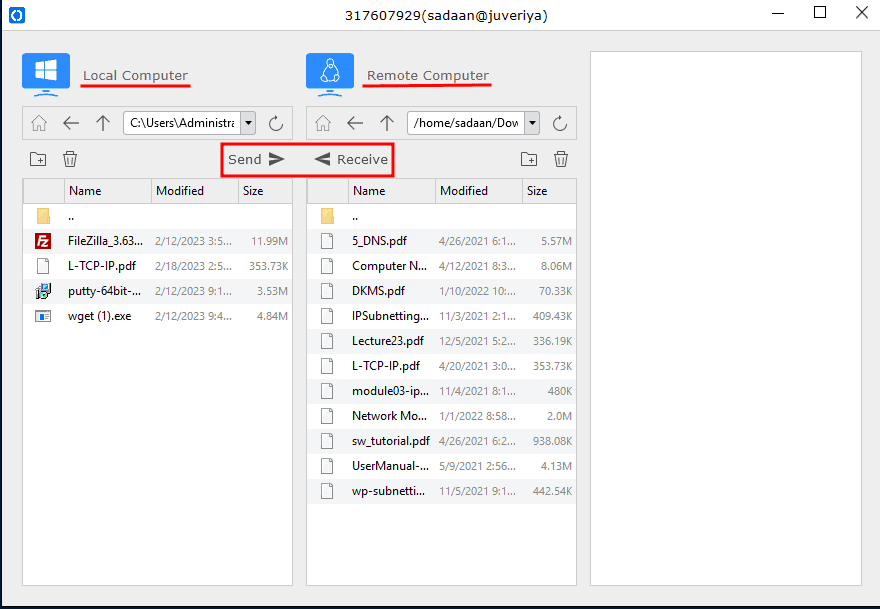
In fact, the RustDesk interface is very intuitive. We can select files for transmission from either side.
In this article, we detailed many methods to transfer a file from Windows to Linux.
Each method has its own advantages and disadvantages, and the method we use should depend on the specific requirements of the file transfer. It’s important to consider factors such as file size, security, and ease of use when selecting a file transfer method. For example, in all of the preceding cases, RustDesk has a very simple and straightforward approach, but online web services require no setup.
Overall, transferring files between the two system types can be relatively easy and seamless with the right tools.