

Learn through the super-clean Baeldung Pro experience:
>> Membership and Baeldung Pro.
No ads, dark-mode and 6 months free of IntelliJ Idea Ultimate to start with.
Last updated: August 9, 2024
Learn through the super-clean Baeldung Pro experience:
>> Membership and Baeldung Pro.
No ads, dark-mode and 6 months free of IntelliJ Idea Ultimate to start with.
PuTTY is a popular open-source SSH client software for Windows. However, we can also use PuTTY on a Linux machine.
In this tutorial, we explore a way to connect a Linux machine to a Windows machine using PuTTY.
OpenSSH is an open-source application that offers both client and server SSH utilities. Also, OpenSSH is free as an additional feature on Windows systems from version 10.
Here, we’ll install an SSH server on a Windows system. Again, we can install the OpenSSH Server from the Optional features settings on Windows. To illustrate, let’s start with the following steps on a Windows 10 system:
We should have a link to the Optional features:

Further, let’s select Optional features and scan the list to see if the OpenSSH Server is already installed. If not, let’s do so now:
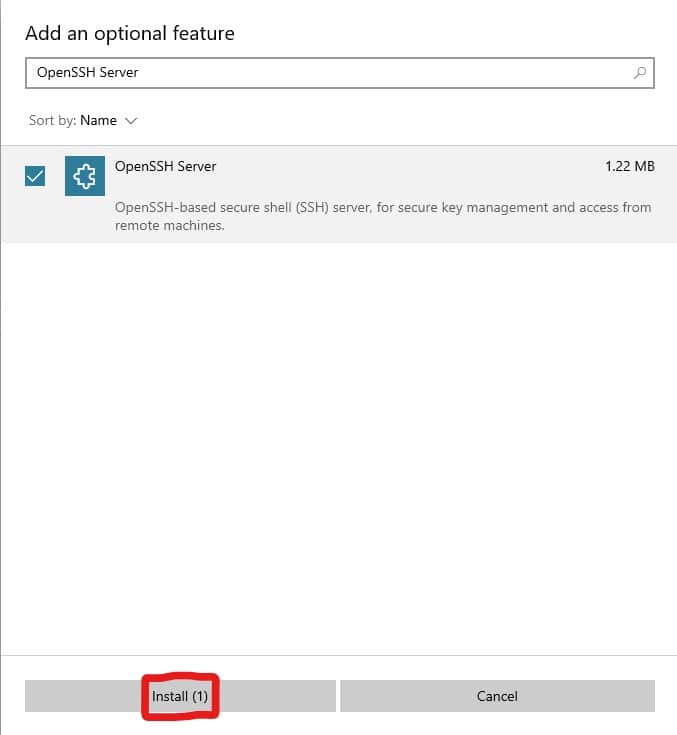
Once the process concludes, we can return to Optional features. Now, we should see OpenSSH Server in the list.
Alternatively, we can install the OpenSSH Server from the command line. First, let’s check if we already have the OpenSSH Server on our system. To do so, we need administrative access to PowerShell:
PS C:\> Get-WindowsCapability -Online | Where-Object Name -like 'OpenSSH*'

Name : OpenSSH.Client~~~~0.0.1.0
State : Installed

Name : OpenSSH.Server~~~~0.0.1.0
State : NotPresent
The result shows that we don’t have the OpenSSH Server on our system. Now, we’ll install the program from PowerShell with the Add-WindowsCapability command:
PS C:\> Add-WindowsCapability -Online -Name OpenSSH.Server~~~~0.0.1.0

Operation
     Running
       [ooooooooooooooooooooooooooooooooooo                                   ]

Path          :
Online        : True
RestartNeeded : False
Next, we’ll proceed to start the OpenSSH Server process and prepare it for connection.
Following the setup of the OpenSSH Server, we can start it. sshd is the OpenSSH Server process.
To start sshd, we’ll launch PowerShell as an administrator.
First, let’s check the state of the sshd service:
PS C:\> Get-Service sshd

Status   Name               DisplayName
------   ----               -----------
Stopped  sshd               OpenSSH SSH Server
Here, we see that sshd is not running, so we’ll start it:
PS C:\> Start-Service sshd
WARNING: Waiting for service 'OpenSSH SSH Server (sshd)' to start...
Further, let’s check the status of the service:
PS C:\> Get-Service sshd

Status   Name               DisplayName
------   ----               -----------
Running  sshd               OpenSSH SSH Server
In addition, we can configure the sshd service to start on system start-up:
PS C:\> Set-Service -Name sshd -StartupType 'Automatic'Also, the OpenSSH Server creates and enables the OpenSSH-Server-In-TCP firewall rule. This opens up port 22 for inbound SSH traffic. Of course, we can check to ensure the port is active:
PS C:\> Get-NetFirewallRule -Name *ssh*

Name                  : OpenSSH-Server-In-TCP
DisplayName           : OpenSSH SSH Server (sshd)
Description           : Inbound rule for OpenSSH SSH Server (sshd)
DisplayGroup          : OpenSSH Server
Group                 : OpenSSH Server
Enabled               : True
Profile               : Any
Platform              : {}
Direction             : Inbound
Action                : Allow
EdgeTraversalPolicy   : Block
LooseSourceMapping    : False
LocalOnlyMapping      : False
Owner                 :
PrimaryStatus         : OK
Status                : The rule was parsed successfully from the store. (65536)
EnforcementStatus     : NotApplicable
PolicyStoreSource     : PersistentStore
PolicyStoreSourceType : Local
To clarify, the output shows that the firewall allows for inbound SSH traffic via Action:Allow and Direction:Inbound. If it’s missing, we can always add it:
PS C:\> New-NetFirewallRule -Name 'OpenSSH-Server-In-TCP' -DisplayName 'OpenSSH Server (sshd)' -Enabled True -Direction Inbound -Protocol TCP -Action Allow -LocalPort 22Next, let’s install and set up PuTTY on Linux.
Initially, we set up an SSH server on the host Windows machine. Now, we’ll install the PuTTY SSH client on a Linux system.
Notably, under Ubuntu, PuTTY is available in the Universe repository. It’s usually enabled by default, but we can also enable the repository manually:
$ sudo add-apt-repository universeThen, let’s update our Linux system package repository:
$ sudo apt-get updateNext, let’s install PuTTY:
$ sudo apt-get install -y putty
Reading package lists... Done
Building dependency tree
Reading state information... Done
The following additional packages will be installed:
putty-tools
...
Here, the -y flag confirms any prompts during the process. In addition, the command installs PuTTY with putty-tools, which includes several utilities:
Lastly, we can verify the process is complete by checking the version we installed:
$ putty --version
PuTTY: Release 0.73
Build platform: 64-bit Unix (GTK + X11)
Compiler: gcc 9.3.0
Compiled against GTK version 3.24.14
Source commit: 745ed3ad3beaf52fc623827e770b3a068b238dd5
Next, we’ll create the public authentication key.
PuTTY allows for public key authentication using the puttygen tool. Importantly, puttygen saves the key in a .ppk key file format.
Let’s use puttygen to enable public key authentication:
$ puttygen -t rsa -b 2048 -o pubkey.ppk
++++++++++++++++++++++++++++++++++++++++++++++++++++++++++++++++++++++++++++++++++++++++++++++++++++++++++++++++++++++++++++++++++++++
++++++++++++++++++++++++++++++++
+++++
Enter passphrase to save key:
Re-enter passphrase to verify:
Here are the flags we used in the command:
Notably, we can leave the passphrase empty. To do so, we just press Enter on passphrase prompts. Then, to get the public key, we just use puttygen again:
$ puttygen -L pubkey.ppkLastly, we’ll copy the public key to the Users\USERNAME\.ssh\authorized_keys file on the server. Of course, if the .ssh folder and the authorized_keys file do not already exist, we can create them.
Next, let’s establish an SSH link from our Linux machine to the Windows system using PuTTY.
Finally, having set up both the SSH client and server, let’s proceed to link to our server using PuTTY.
Since the initial steps for setting up the OpenSSH Server on Windows, our server is already listening for a connection. Now, let’s run PuTTY from the Linux command line:
$ putty
...
This command opens the PuTTY Configuration window:
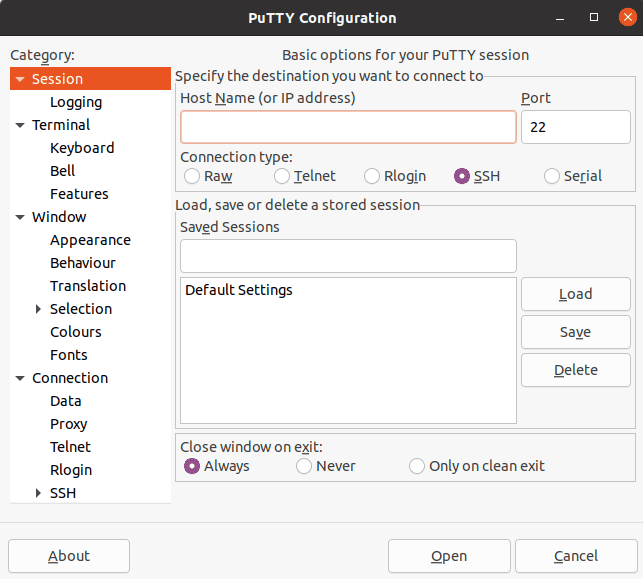
Further, to connect to the host system:
Then, we’ll bring on our security key for authentication:
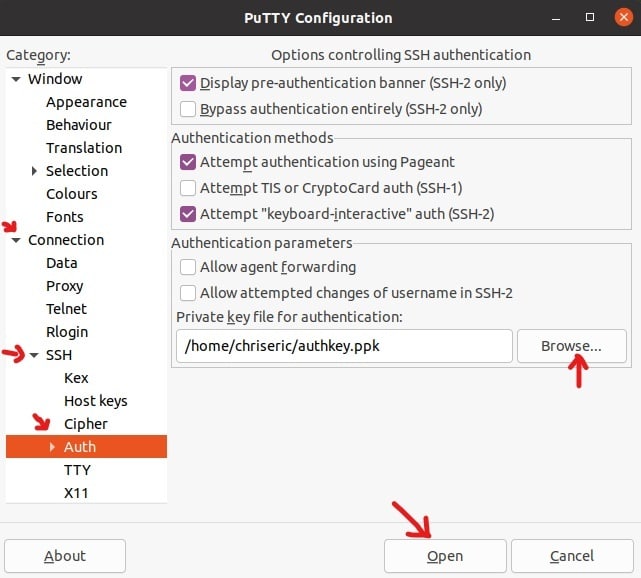
On clicking Open, the PuTTY Security Alert pops up. We’ll click Accept to continue the connection:
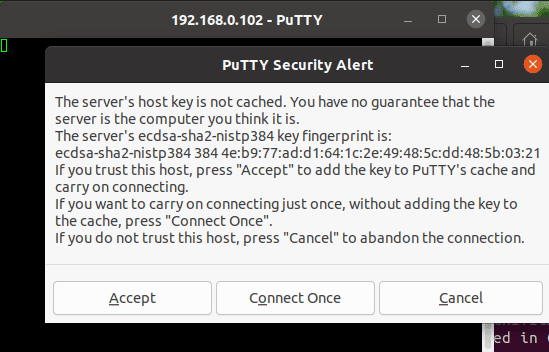
Following the security alert, we’ll provide our login credentials for authentication:
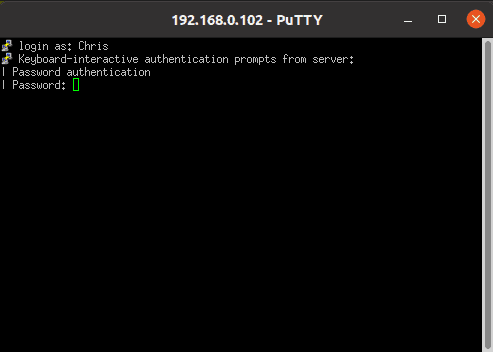
Now, we’ve successfully set up an SSH link to our host machine:
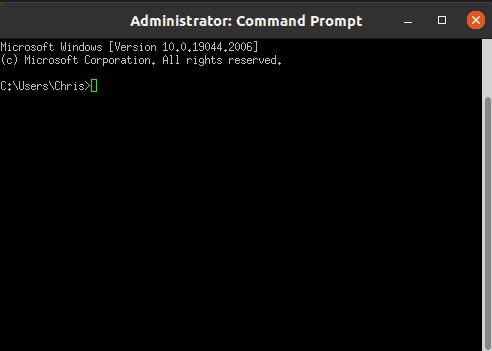
Lastly, we can type exit and press Enter to quit the session.
In summary, we’ve seen how to connect a Linux machine to an OpenSSH server on a Windows machine using PuTTY. Also, we created a public security key for a secure SSH connection.