

Learn through the super-clean Baeldung Pro experience:
>> Membership and Baeldung Pro.
No ads, dark-mode and 6 months free of IntelliJ Idea Ultimate to start with.
Last updated: March 18, 2024
Learn through the super-clean Baeldung Pro experience:
>> Membership and Baeldung Pro.
No ads, dark-mode and 6 months free of IntelliJ Idea Ultimate to start with.
Virtualization allows multiple operating systems to easily co-exist on the same machine. In this tutorial, we'll demonstrate how to access the host machine from the guest machine. In the end, we should have a setup where the guest machine can:
Now, let's take a look at the procedure and tools we'll employ in this guide.
In this article, we'll employ the Oracle VirtualBox virtualization software and an Ubuntu virtual machine (VM) to access a Microsoft Windows host.
Generally, the procedure to access the host machine from the guest involves:
After this, other tools and software rely on this access to the host machine.
Virtual machines can connect to physical and virtual networks using virtual network adapters. In VirtualBox, we can set up VMs to connect to different networks using multiple network modes.
The following network mode configuration gives the VM access to the host:
Let's set up the virtual network adapters from the graphical user interface (GUI).
In fact, the NAT network mode is the default virtual network adapter in VirtualBox. NAT networks allow guest machines to access the host and external networks, including the Internet.
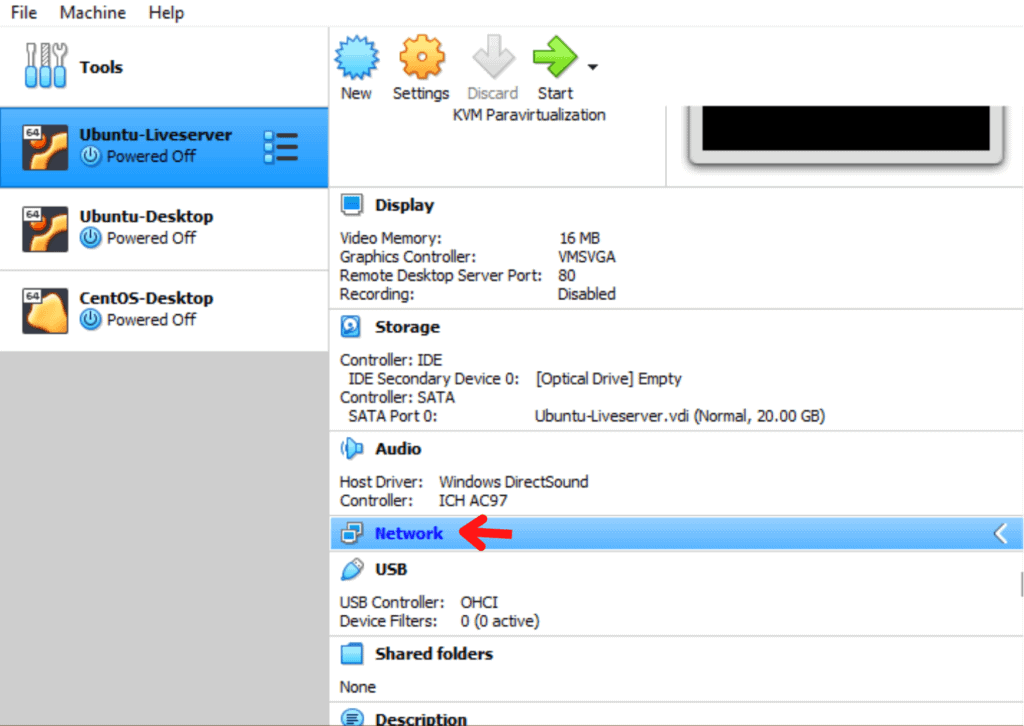
Next, to configure this network mode, we'll click on the guest virtual machine. Then, we'll go to its settings and select the Network menu:
Then, to enable a network adapter, let's check the Enable Network Adapter checkbox on Adapter 1. Also, we'll select NAT from the dropdown menu (usually the default setting):
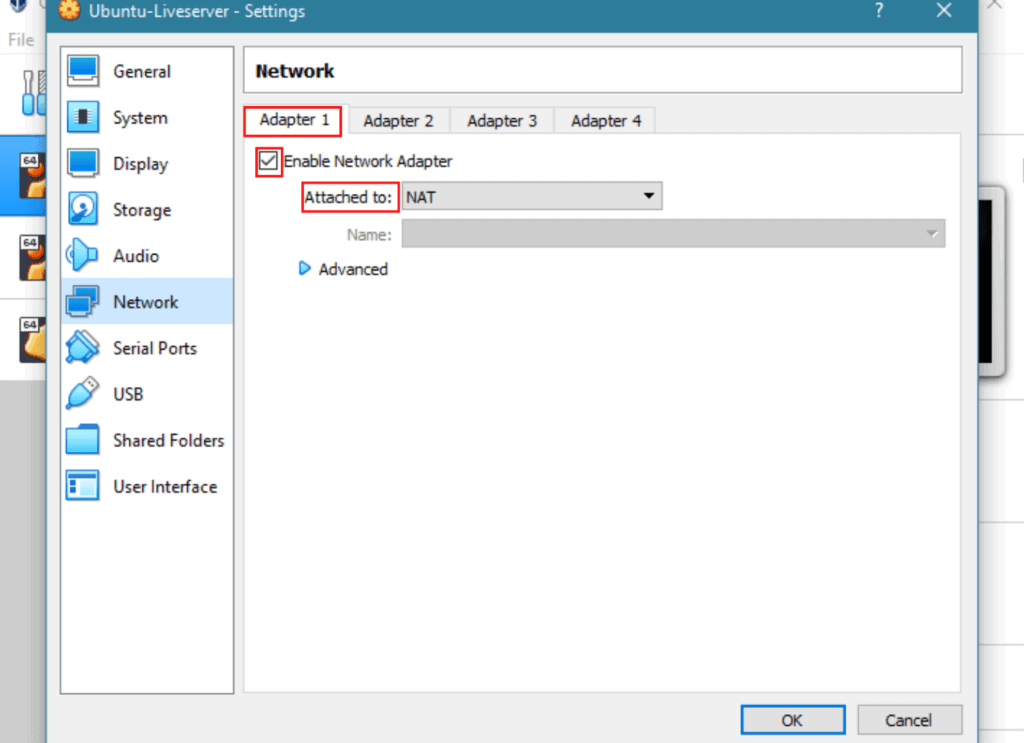
Furthermore, we'll ensure the Adapter type is in tandem with the system hardware specifications. If not, from the dropdown menu, let's select the matching Adapter Type for our system:
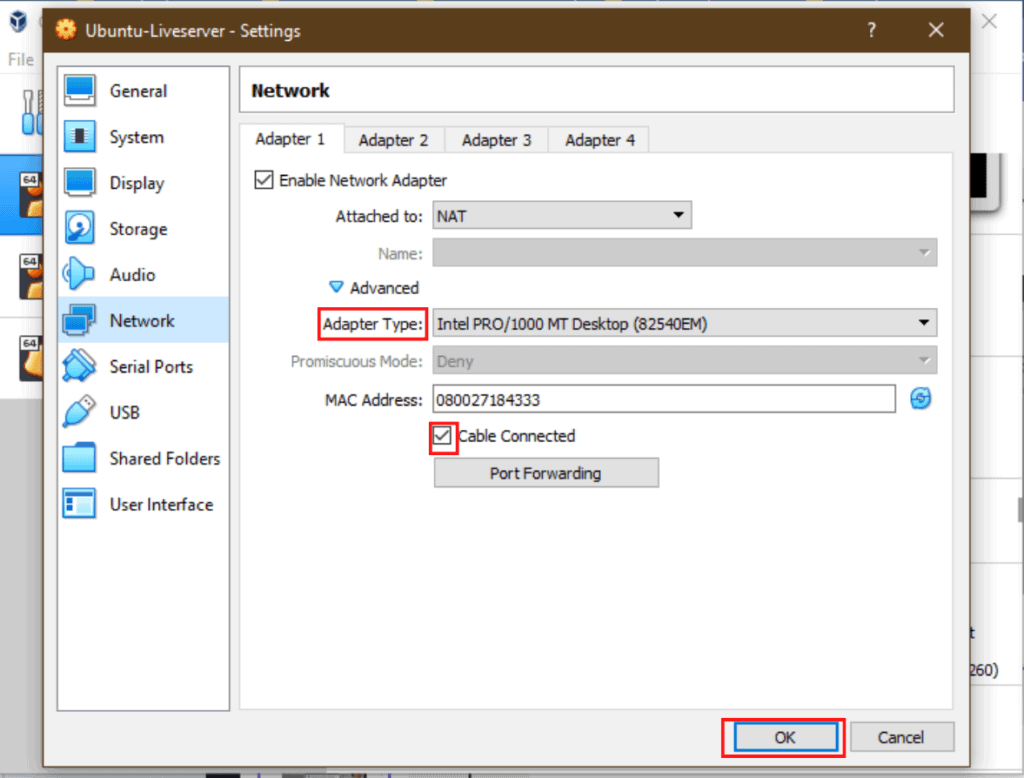
Lastly, we'll check the Cable Connected checkbox, enabling the connection, and click OK to save our settings:
Additionally, the Host-only Adapter allows the virtual machine to communicate with the host machine. Also, the adapter allows access to other guest machines connected to the host-only network.
To illustrate, let's set up the second virtual network adapter with Host-only Adapter mode. Following our previous procedure for selecting NAT, we'll:

Lastly, we'll click OK to save our settings.
Having set the network adapters correctly, we can now access the host machine from the guest over the network. To illustrate, we'll ping the host from the guest machine using the ping command. Also, we'll establish an SSH connection to an SSH server running on the host.
Before the ping, let's check for the host IP address using the command ipconfig:
PS C:\Users\baeldung> ipconfig

Windows IP Configuration

Ethernet adapter VirtualBox Host-Only Network:

   Connection-specific DNS Suffix  . :
   Link-local IPv6 Address . . . . . : fe80::f58c:1377:4796:d1cd%16
   IPv4 Address. . . . . . . . . . . : 192.168.56.1
   Subnet Mask . . . . . . . . . . . : 255.255.255.0
   Default Gateway . . . . . . . . . :
...
From the output, the IP address of the host on the Ethernet adapter VirtualBox Host-Only Network is 192.168.56.1. Now, let's ping the host from the guest using the host's IP address:
$ ping 192.168.56.1 -c 1
PING 192.168.56.1 (192.168.56.1) 56(84) bytes of data.
64 bytes from 192.168.56.1: icmp_seq=1 ttl=127 time=0.593 ms
--- 192.168.56.1 ping statistics ---
1 packets transmitted, 1 received, 0% packet loss, time 0ms
rtt min/avg/max/mdev = 0.593/0.593/0.593/0.000 ms
Accordingly, we see that the ping was successful. The -c flag allows us to specify the count (number of packet requests).
Now, we can connect to an SSH server on the host. To do this, our host needs to have an SSH server running on the standard SSH port 22. Also, we have to install an SSH client on our guest machine. Using this IP address and the user login, let's connect to the host:
baeldung@guest $ ssh [email protected]
The authenticity of host '192.168.56.1 (192.168.56.1)' can't be established.
ECDSA key fingerprint is SHA256:9jqmhko9Yo1EQAS1QeNy9xKceHFG5F8W6kp7EX9U3Rs.
This key is not known by any other names
Are you sure you want to continue connecting (yes/no[fingerprint])? yes
Warning: Permanently added '192.168.56.1' (ECDSA) to the list of known hosts.

[email protected] $
Now, we have an SSH session with the host. Usually, we need to provide the user and password or a key to gain access.
In this article, we've seen how to set up a VirtualBox guest machine to access its host machine over the network. Also, we confirmed the setup by pinging and accessing the host using the SSH protocol.