

Learn through the super-clean Baeldung Pro experience:
>> Membership and Baeldung Pro.
No ads, dark-mode and 6 months free of IntelliJ Idea Ultimate to start with.
Last updated: August 30, 2024
Learn through the super-clean Baeldung Pro experience:
>> Membership and Baeldung Pro.
No ads, dark-mode and 6 months free of IntelliJ Idea Ultimate to start with.
The Basic Input/Output System (BIOS) is the underlying system firmware. Modern computers depend on it to initialize devices and hand over control to the operating system. Usually, the BIOS configurations don’t need frequent inspection. However, it’s occasionally necessary to review the type of firmware. For example, we may want to check if it’s legacy BIOS or UEFI. This is particularly useful when dual-booting Windows and Linux. Additionally, we may need to examine the BIOS to see whether an update is available.
In this tutorial, we’ll explore how we can get the details of the BIOS of a Linux-based system.
The dmidecode command can render the system’s hardware information from the DMI table.
For example, with the -s option, we can use dmidecode to print the BIOS version details:
$ sudo dmidecode -s bios-version
F.02
Here, we only see the details corresponding to the specified string keyword. Consequently, this command prints the BIOS version as F.02.
Similarly, we can specify several keywords here:
In fact, the -t option prints a summary of SMBIOS data from sysfs:
$ sudo dmidecode -t bios
...
Getting SMBIOS data from sysfs.
SMBIOS 3.0.0 present.
Handle 0x0000, DMI type 0, 24 bytes
BIOS Information
Vendor: Insyde
Version: F.02
Release Date: 05/24/2018
Address: 0xE0000
Runtime Size: 128 kB
ROM Size: 6 MB
Characteristics
...
The Linux kernel keeps the DMI data in sysfs at /sys/class/dmi/id. So, we can directly use it to retrieve BIOS information:
$ cat /sys/class/dmi/id/bios_date
05/24/2018
In this example, we use the cat command to display the BIOS version date. Many of the tools use /sys/class/dmi/id to get their information.
Notably, to get all BIOS information, we might need to run dmidecode many times.
Interestingly, we can also use a for loop here to iterate over all the details we need at once:
for d in bios-vendor bios-release-date bios-version;
do
  echo "${d^}: "$(sudo dmidecode -s $d);
done
As a result, the above loop will list the BIOS information for each member in the list of items:
Bios-vendor: Insyde
Bios-release-date: 05/24/2018
Bios-version: F.02
Thus, the for loop simplifies the task of gathering BIOS information.
We can also use the hwinfo tool to retrieve system hardware information. In addition to the basic queries, it supports data logging, so we can use it for later analysis.
Furthermore, to install hwinfo on Ubuntu and Debian-based distributions, we use the apt command:
$ sudo apt install hwinfoLet’s see how we can use the hwinfo command to see the BIOS information. To accomplish this, we simply run the hwinfo command with the –bios flag:
$ sudo hwinfo --bios | less
01: None 00.0: 10105 BIOS
[Created at bios.186]
Unique ID: rdCR.lZF+r4EgHp4
Hardware Class: bios
BIOS Keyboard LED Status:
Scroll Lock: off
Num Lock: off
Caps Lock: off
SMBIOS Version: 3.0
BIOS Info: #0
Vendor: "Insyde"
Version: "F.02"
Date: "05/24/2018"
Start Address: 0xe0000
ROM Size: 6144 kB
Here, the less command makes the output scrollable. This command lets us see all the details of our BIOS. The hwinfo tool is available for both SUSE and Debian-based Linux distributions.
The lshw command is another universal command available in most Linux distributions. In general, it provides a way to get system hardware information.
Let’s see the output when we invoke the command without any option:
$ sudo lshw
Baeldung
    description: Notebook
    product: HP Laptop 15-da0xxx (4TT02PA#ACJ)
    vendor: HP
    version: Type1ProductConfigId
    serial: CND8334RSS
    width: 64 bits
    capabilities: smbios-3.0.0 dmi-3.0.0 smp vsyscall32
    configuration: administrator_password= ...
  *-core
       description: Motherboard
       product: 84A7
       vendor: HP
       physical id: 0
       version: 80.24
       serial: PHJELE41VB7G30
...
We’ll use the grep command to make the output more comprehensible and only extract the BIOS information we need:
$ sudo lshw | grep -A8 '*-firmware'
*-firmware
description: BIOS
vendor: Insyde
physical id: 0
version: F.02
date: 05/24/2018
size: 128KiB
capacity: 6MiB
capabilities: pci upgrade shadowing cdboot bootselect ...
int13floppytoshiba int13floppy360 int13floppy1200 ...
int9keyboard int10video acpi usb ...
Notably, the -A8 flag prints only the eight lines after the keyword.
Consequently, we can view the vendor, physical ID, version, and other information about the BIOS.
Ubuntu repositories have a GUI Utility known as Hardinfo. It’s a Linux system benchmark and profiler.
Moreover, it can collect data from both hardware and basic software. What’s more, it presents this data in an intuitive graphical user interface.
Further, we can simply install it using the apt tool:
$ sudo apt install hardinfoOnce we have Hardinfo, we can launch it from the command line:
$ sudo hardinfoAlthough Hardinfo can run without using sudo, some information remains hidden in that case. So, it’s a good idea to use sudo here.
Let’s see how to find the BIOS information using the hardinfo tool. To clarify, let’s consider a screenshot of the tool:
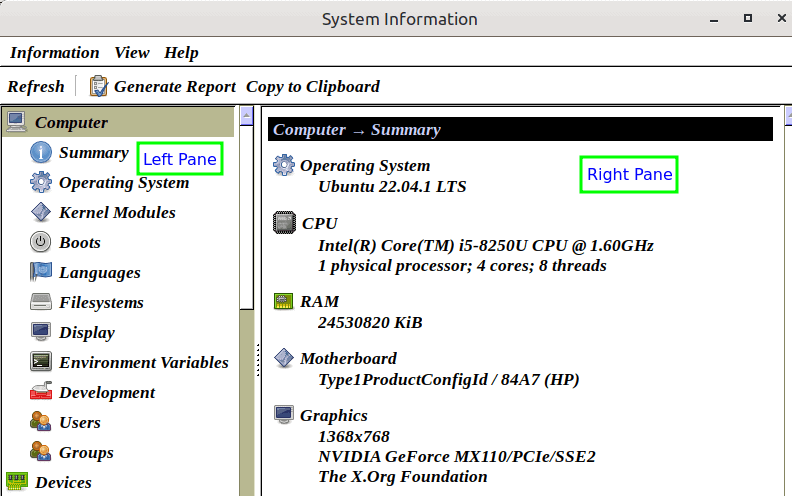
The Hardinfo Interface
Scrolling down the left pane, we can locate the DMI label and click it. By doing so, we can see BIOS information in the right panel:
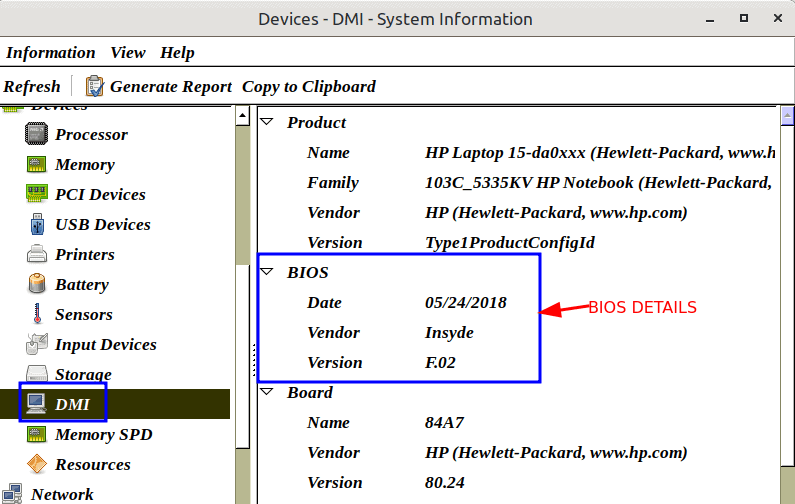
Hardinfo Showing BIOS Details
Similar to other utilities, hardinfo lists the BIOS date, vendor, and version information.
In this article, we’ve discussed different ways to obtain BIOS information.
In fact, many commands provide varying hardware summaries. Therefore, we may choose the one that best suits our needs and preferences. In this regard, Hardinfo is an excellent GUI option for obtaining BIOS and other hardware details.
Notably, sudo privileges might be necessary to extract in-depth details from the system.