

Yes, we're now running our only Summer Sale. All Courses are 30% off until 20th July, 2026:
Learn through the super-clean Baeldung Pro experience:
>> Membership and Baeldung Pro.
No ads, dark-mode and 6 months free of IntelliJ Idea Ultimate to start with.
1. Overview
When viewing files in the Linux terminal, we may need to inspect the differences in content between two or more files. We can make this task easier by using color to highlight the differences.
In this tutorial, we’ll look at how to use color when comparing the content of files from the command line. We’ll see how to do this using various commands.
The commands in this article were tested using Bash version 5 and should work on most Linux systems.
2. Output Line Differences in Color
The diff command in Linux is widely used to perform line-by-line comparisons between files and is included in most Linux distributions. Starting with version 3.4, diff provides the –color option to highlight the differences.
We can use the –version flag to see which version of diff is provided by the operating system:
$ diff --version
diff (GNU diffutils) 3.8
To get our diff results in color, we’ll pass the –color=always option followed by the names of the files we want to compare. For our first example, let’s compare two sample configuration files:
$ diff --color=always example_httpd.conf configured_httpd.conf
153c153
< ServerAdmin [email protected]
---
> ServerAdmin [email protected]
162c162
< #ServerName www.example.com:80
---
> #ServerName www.baeldung.com:80
169c169
< DocumentRoot "/Library/WebServer/Documents"
---
> DocumentRoot "/QA/WebServer/Documents"class="language-bash">
Our command found three line differences between the files. These are displayed in the order in which they were found. Helpfully, diff also provides the line number where the differences appear.
This image shows the results using the default color scheme. Lines from the first file are denoted by < and highlighted in red, while lines from the second file are denoted by > and highlighted in green:
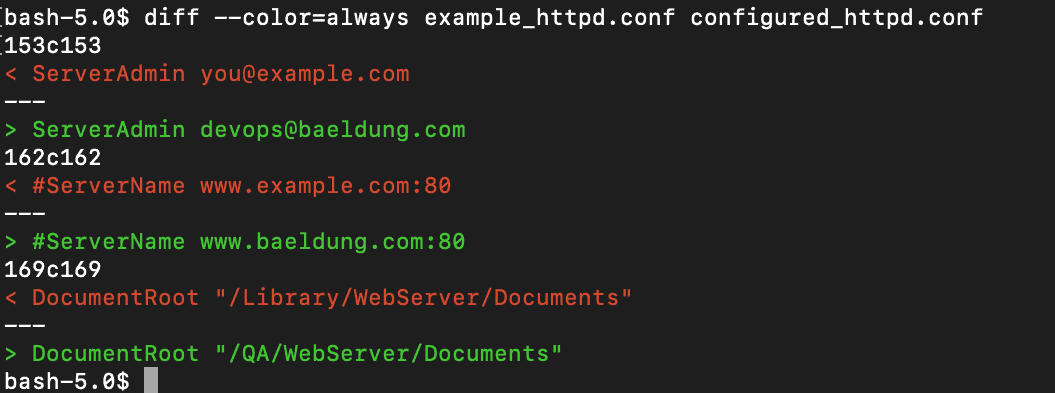
This screenshot shows how the diff command uses color to show differences between the files it’s comparing. If the contents of these files were the same, diff would produce no output on the command line.
3. Compare File Content Side-by-Side
If we have multiple files to compare, it can be useful to view their content side-by-side. To achieve this, we’ll use the vimdiff tool.
vimdiff opens files in diff mode and provides the ability to edit the files while comparing. The command can accept between two and eight filenames for comparison.
Let’s compare three files by passing the filenames as parameters to vimdiff. For these examples, we’ll use three small files where the content of file1 differs by one word from that of file2 and file3:
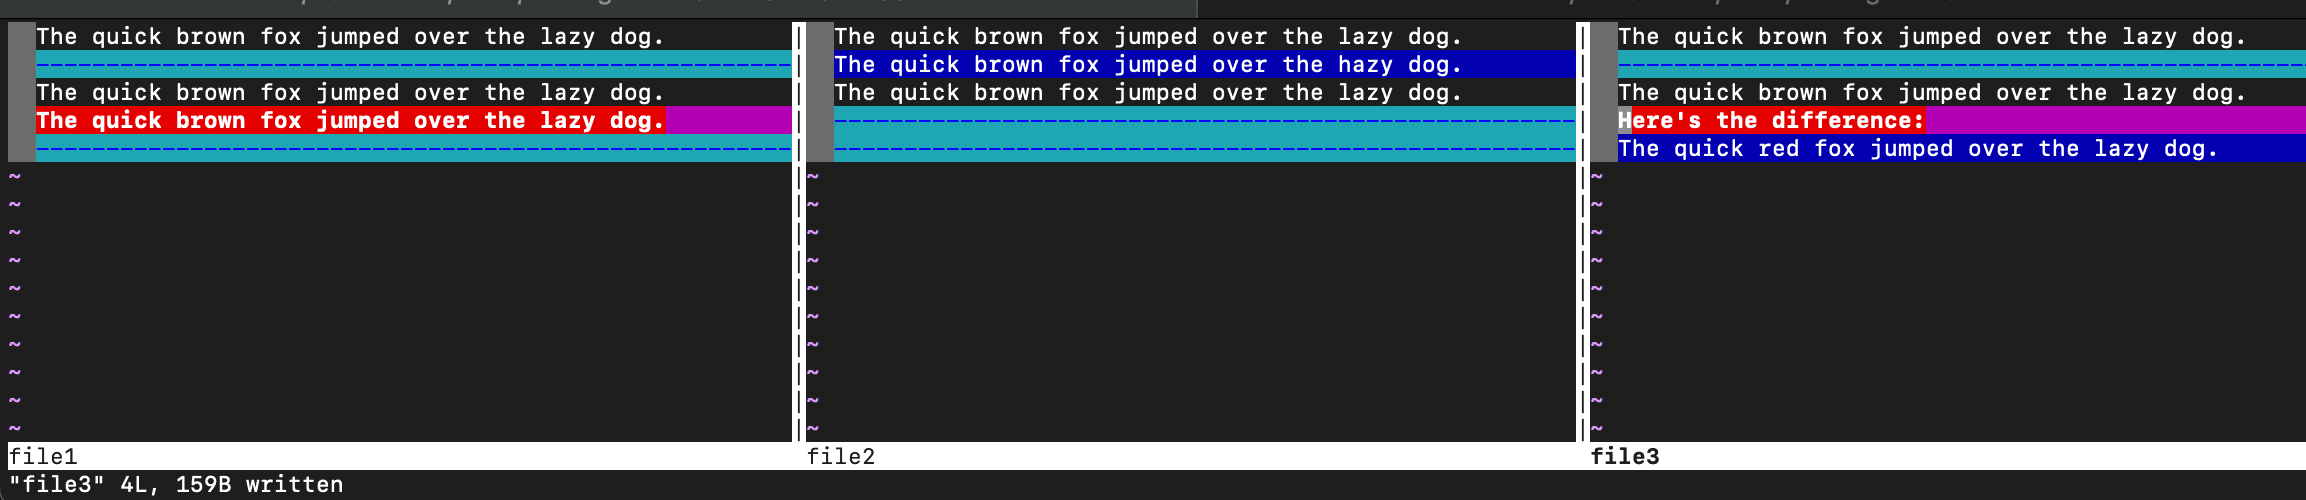
$ vimdiff file1 file2 file3vimdiff shows each of the files in a separate window and colors the differences in the content:

Notably, vimdiff highlights line two of file2 in blue in the middle pane. Additionally, it highlights the last line of file3 in purple in the third window.
By default, the panes are split vertically, but if we prefer, we can use horizontal splits instead by adding the -o option:
$ vimdiff -o file1 file2 file3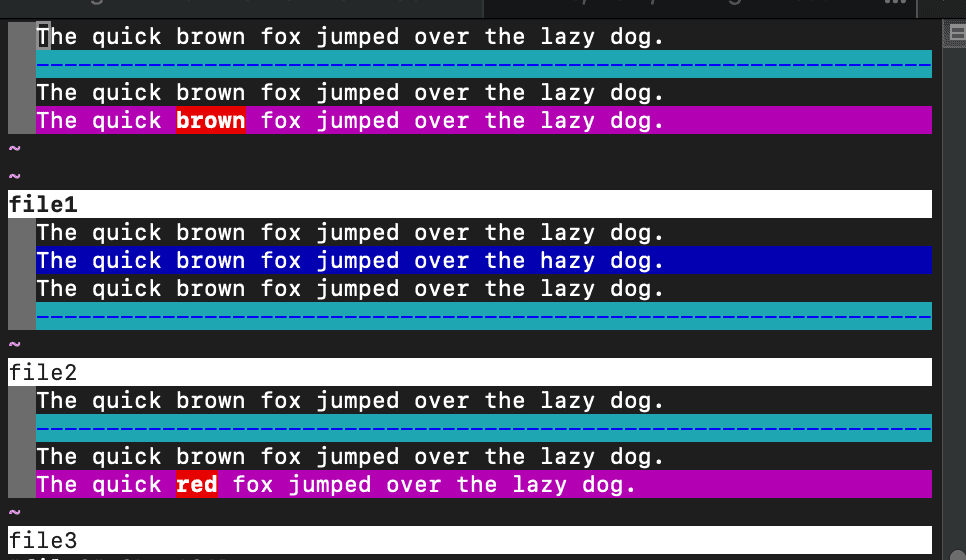
It’s possible to edit the files while viewing them in diff. So, we can use vim text editing on one file at a time. To move between the panes, we would type Ctrl + w twice.
When finished editing, we can save the changes by typing :w to write the file:
:wA confirmation appears at the bottom of the vimdiff screen with the filename followed by the word written. Here, we added a line to file3, and we can see the confirmation at the bottom of the screen:
To quit editing the files, we can type :q for each open file:
:qSo, to close all open files in this example, we type :q three times.
4. Output Word Differences in Color
We’ve seen how to color file differences line-by-line, but what if we’d like to color differences by word?
The git version control system provides the diff subcommand with the –word-diff option to highlight words. Additionally, the directory that contains the files doesn’t need to be under git control to use this feature.
Many operating systems come preinstalled with git. We can verify the installation with the git version command:
$ git version
git version 2.34.1
If the output shows command not found, we’ll need to install git for our operating system.
Now, let’s pass git the command to highlight the word differences between our files. We’ll use the git diff command followed by –word-diff=color and the names of two files to compare:
$ git diff --word-diff=color file1 file2
diff --git a/file1 b/file2
index 0376af6..858ca52 100644
--- a/file1
+++ b/file2
@@ -1,3 +1,3 @@
The quick brown fox jumped over the lazy dog.
The quick brown fox jumped over the lazyhazy dog.
The quick brown fox jumped over the lazy dog.
Since we’re using git, the output appears in unified format. Instead of line numbers, the output shows the file comparison area of each difference enclosed in @@ symbols. We can see this in the fifth line of our output: @@ -1,3 +1,3 @@. Then, we can see the word differences from file1 and file2, colored in red and green, respectively:
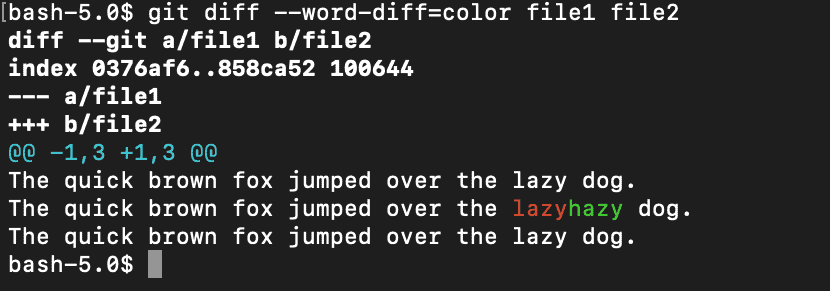
This is a simple example, but it shows how highlighting word differences in color can be helpful when comparing content that has long strings.
5. Conclusion
In this article, we explored how to use color when comparing files on the command line to make viewing content differences easier.
We started by setting up the diff command, which outputs line differences in color. Then, we examined multiple files side-by-side using vimdiff. We saw how to edit and save changes while working in the vimdiff windows. We also used the vertical and horizontal window display options.
Finally, we used git diff with the –word-diff option to examine two files and color their differences by word.