

Learn through the super-clean Baeldung Pro experience:
>> Membership and Baeldung Pro.
No ads, dark-mode and 6 months free of IntelliJ Idea Ultimate to start with.
Learn through the super-clean Baeldung Pro experience:
>> Membership and Baeldung Pro.
No ads, dark-mode and 6 months free of IntelliJ Idea Ultimate to start with.
One of the features that Linux provides is the ability to customize the appearance and behavior of the terminal and the shell.
In this tutorial, we’ll explore how to enhance the readability, aesthetics, and functionality of the terminal and the shell by customizing their colors.
First, let’s understand the methods and mechanisms that enable us to colorize the terminal. There are two main ways to do this.
Basically, ANSI escape codes are sequences of characters that we can use to control the formatting and display of the terminal:
Further, they’re called escape codes because they start with the escape character, usually represented by \e or \033. Then, they’re followed by a bracket [ and a number or a combination of numbers separated by a semi-colon that specifies the code. Finally, they’re followed by a letter indicating the code’s type.
Notably, to use escape codes in the terminal, we enclose them in single or double quotes and echo them.
Now, let’s look at some examples to understand the use of escape codes and the -e option of the echo command:
$ echo -e "\e[34;47mThis is blue text on white background\e[0m"
The output of this code snippet is the text that we enclose in double quotes. Also, the -e option enables the interpretation of backslash escapes in the string. Without this option, the terminal treats any backslashes in the string as literal characters.
The escape code [34;47m does two things:
Finally, [0m resets the text attributes to their default values. Due to this, any text printed after uses the default color and formatting.
Another example is formatting a text to be bold and underlined:
$ echo -e "\e[1;4mThis is a bold and underlined text\e[0m"
In this code snippet, 1 is the escape code for bolding a text while 4 underlines it.
We can also edit the configuration files that store the settings and preferences of the terminal and the shell programs. By editing these files, we ensure the color changes are persistent.
For instance, we can change the text color of the Bash terminal to cyan by adding a line to the .bashrc file:
$ cat .bashrc
...
export TERM=xterm-color
PS1="\[\e[36m\]\u@\h:\w\$ \[\e[0m\]"
The export command sets the value of the TERM variable to xterm-color. In addition, xterm-color is a terminal type that supports colorization. We can also interpret the other parts of the script:
After saving and closing the file, we source it with the source command, so the changes take effect. We can also restart the terminal. The result is a terminal with cyan text color.
Basically, the ls command lists the files and directories in the current or specified directory. To make the output more legible, we can colorize the displayed files and directories.
In particular, the ls command can show files and directories in different colors via the –color option which can take one of these three values:
For example, we can list all filesystem objects in the current directory with colorization:
$ ls --color=auto
This displays the files and directories in different colors according to their type and attributes:
In addition, files that have the setuid bit set and are executable are displayed in white text with a red background by default. Also, files that have the setgid bit set are displayed in black text with a yellow background.
Next, we’ll look at how we can customize these colors.
In this case, we use a special environment variable called LS_COLORS. In particular, this environment variable defines the colors and styles for different file types and attributes. It contains pairs of codes separated by colons, each pair consisting of a file type or attribute code and a color or style code.
To clarify, the file type specifies the filesystem object type:
Finally, the color or style code specifies the color or style of the file or directory.
We can edit the LS_COLORS variable in the .bashrc file:
$ cat .bashrc
...
LS_COLORS="di=34:ex=32:fi-1;37:*.jpg=32:*.png=32:*.zip=31:*.tar.gz=31"
...
This changes the color of the regular files to white and the type to bold, the color of the image files to green, and the color of the compressed files to red.
To see the full list of the file type, color, and style codes, we can use the dircolors command:
$ dircolors -pThe purpose of the -p option is to print the default color configuration database. Thus, the LS_COLORS variable and its meaning are shown in a human-readable format.
Notably, dircolors is part of the GNU coreutils package and it’s usually installed by default on most Linux distributions.
The tree command is a useful tool that can display files and directories in a tree-like structure. Thus, we can visualize the hierarchy and organization of the file system.
Further, the tree command can also colorize its output with the help of its -C option:
$ tree -C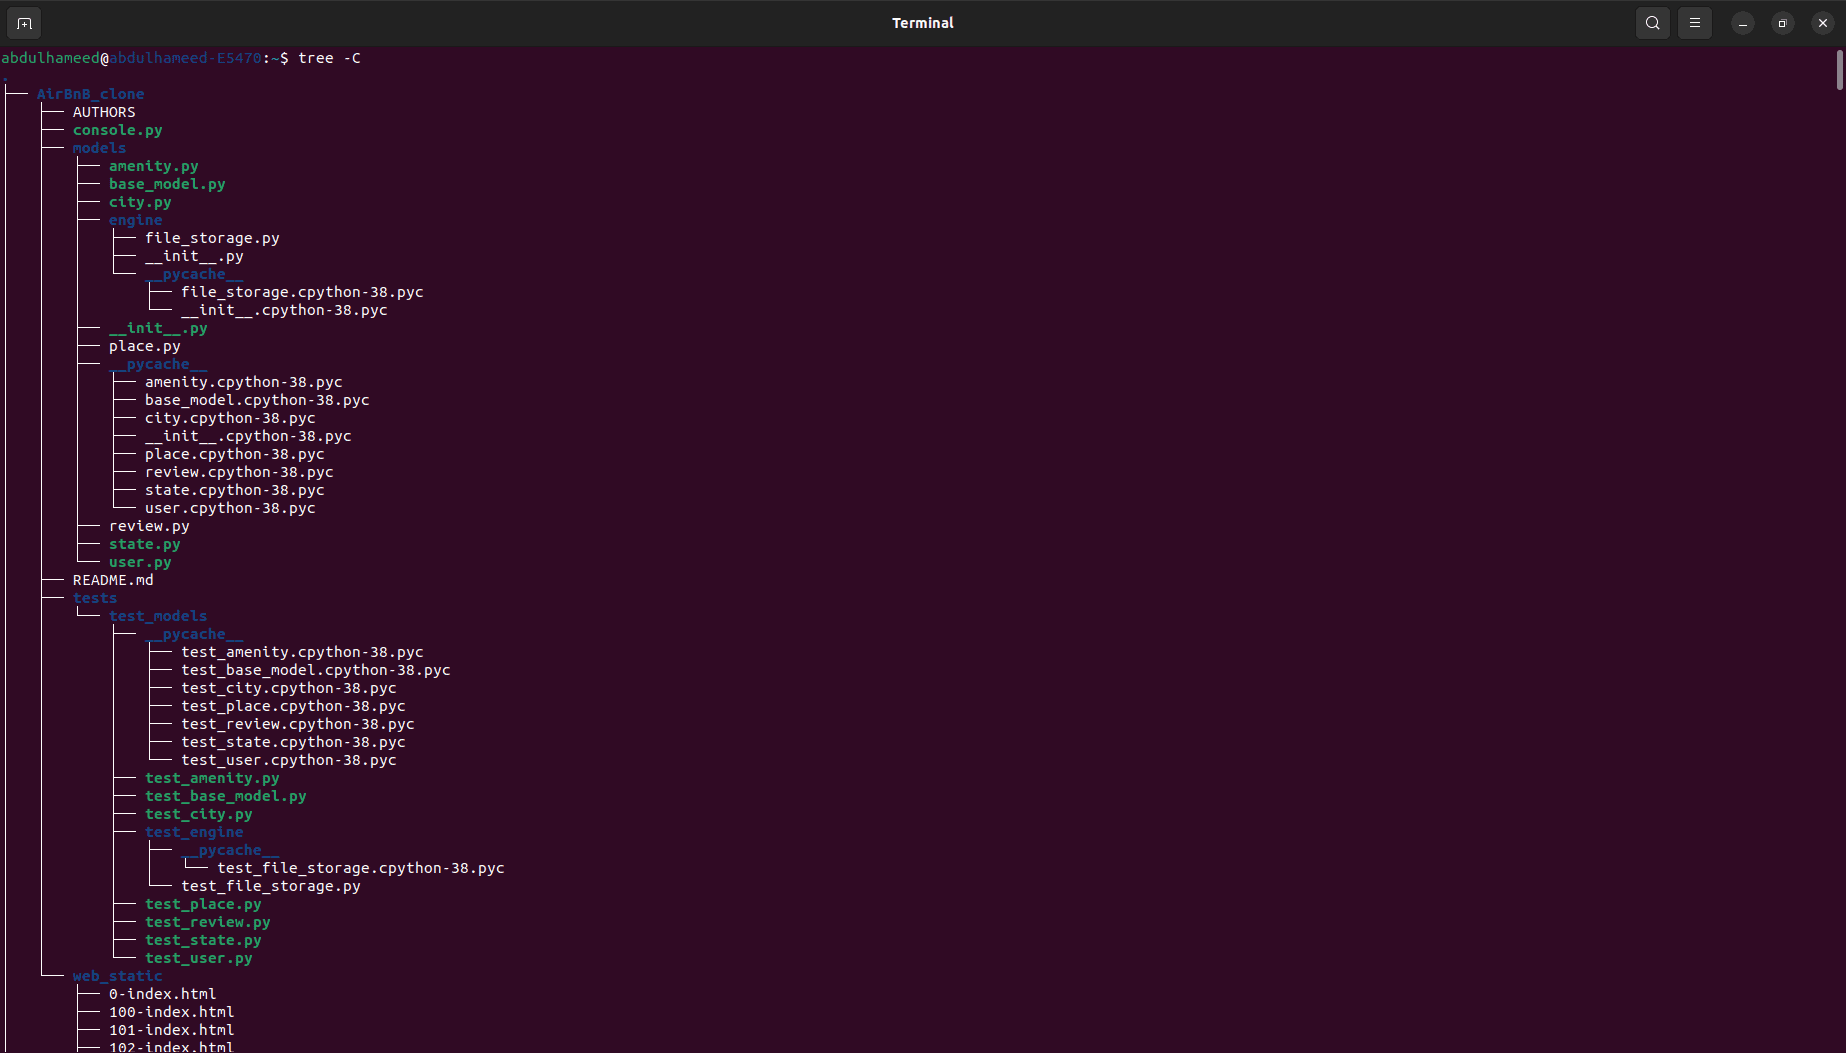
The -C option uses the built-in color defaults if the LS_COLORS variable isn’t set. Otherwise, if it’s set, it uses the custom colors defined by the LS_COLORS variable.
In this article, we learned how to use ANSI escape codes to colorize the terminal. We also learned how to edit the LS_COLORS environment variable to colorize the output according to its type and attributes. Finally, we looked at ways to colorize the output of the ls and tree commands and how that colorization works.
Colorizing the terminal can improve the readability, aesthetics, and functionality of the command-line interface. It also improves the user experience and satisfaction.