Learn through the super-clean Baeldung Pro experience:
>> Membership and Baeldung Pro.
No ads, dark-mode and 6 months free of IntelliJ Idea Ultimate to start with.
Last updated: November 19, 2024
We use tmux, a popular terminal multiplexer on Linux, to manage multiple sessions, windows, and panes within a single terminal. One of tmux‘s key features is its status bar, or status line, which acts as a customizable taskbar at the bottom of our tmux session. It provides insights into the current session, system status, time, and more.
While the default status bar is functional, we can customize it to suit our specific workflow and preferences, from changing its color, to making it transparent, or even disabling it entirely. In this tutorial, we’ll explore various ways to customize the tmux status bar.
Before we begin, we need to ensure that tmux is installed on our system. If it’s not, we can install it using our default package manager, such as APT or DNF.
Let’s install it on Debian/Ubuntu:
$ sudo apt install tmuxNext, we’ll set up a ~/.tmux.conf file. This file is where we’ll add commands to modify tmux settings, including the status bar’s color, style, and more.
If the file doesn’t exist, we can create it with the touch command:
$ touch ~/.tmux.confOnce created, we can open the file in our preferred text editor and begin making changes to the tmux status bar.
We can customize tmux colors with predefined options, such as red or green, or with 256-color codes (0 to 255). Additionally, we can make tmux transparent or turn it off completely.
Let’s start our customization by changing the tmux status bar background color to black and the foreground color to white. First, we open the ~/.tmux.conf file using any text editor, such as nano:
$ nano ~/.tmux.confNext, we add the status-bg and status-fg commands to our configuration file:
set -g status-bg black
set -g status-fg white
After saving and closing the editor, we reload our tmux configuration to apply the changes without restarting:
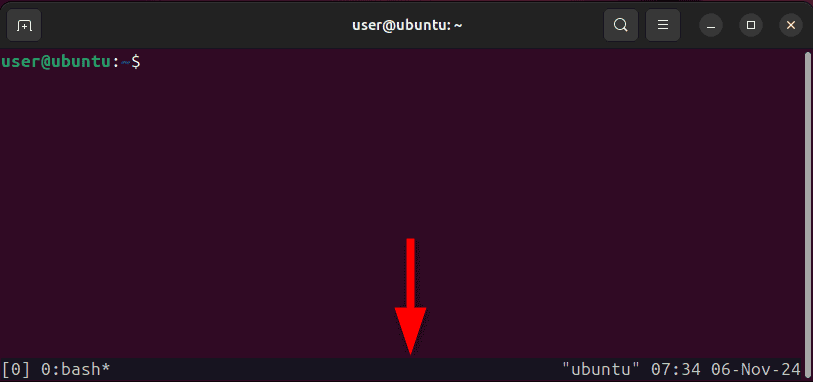
$ tmux source-file ~/.tmux.confNow, we can view the status bar with the new color settings:

If we want to apply a broader range of colors, we can use 24-bit true color hex codes, but only if our terminal emulator supports true color and contains a recent tmux version (v3.1 and later).
For instance, let’s set the status bar background to a turquoise color by modifying the configuration file:
set -g status-bg "#003366"To apply the new color without restarting the session, let’s use the source-file command:
$ tmux source-file ~/.tmux.confAlso, we can reset the tmux bar’s color settings by removing the set commands from the configuration file.
We can also make the tmux status bar blend with the terminal background. Let’s specify the status-style option with default value in the ~/.tmux.conf file:
set -g status-style bg=defaultOnce again, let’s apply the change by reloading the configuration:
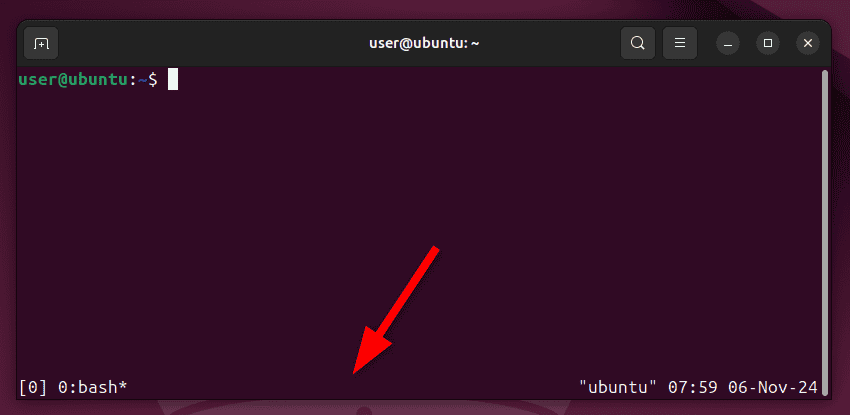
$ tmux source-file ~/.tmux.confNow, let’s view the status bar:

With this setup, we give our status bar a cohesive look that draws minimal attention.
If we prefer to work without the tmux status bar, we can hide it from the tmux window.
To do this, we need to set the status option to off in the configuration file:
set -g status offAfter saving the file and reloading the session, the status bar will be completely removed.
The tmux status bar appears at the bottom of the terminal and is divided into three main sections:
To customize the left and right sides of the status line, we specify the status-left and status-right commands in the ~/.tmux.conf file.
For example, to display the current time in 24-hour format (for example, 15:38) without seconds, we use the %H and %M options in the configuration file:
set -g status-right "%H:%M"We can also get a more detailed display with the time, day of the week, and date:
set-option -g status-right "%a %d %b %I:%M %p"These variables are processed by strftime in tmux, allowing us to use standard time-formatting options. To explore more formatting options, we can check the Linux manual page of strftime documentation.
Now, let’s modify the left section of the tmux status bar to display system information using tmux‘s built-in variables:
set -g status-left "#H - Session #S"Here, we use #H to display the hostname and #S to show the current session index on the left side of the status line.
Although tmux doesn’t have a direct status-center option, we can customize the center section using the window-status-format and status-justify options.
Let’s display both the window name and its index in the center of the status bar:
set -g window-status-format "#[fg=green]#I: #W"
set -g window-status-current-format "#[fg=white,bg=blue]#I: #W"
In this configuration, we use #I to represent the window index and #W to represent the window name. We can further enhance this section by setting colors and including other variables.
We can also make our tmux status bar more appealing by adding icons and vibrant colors. For example, we can add a battery icon and its percentage to the status bar.
To start, we need to download a patched font like Nerd Fonts, extract the zip file, and install the font file on our system.
First, we create a directory for the fonts using the mkdir command with the -p flag:
$ mkdir -p ~/.local/share/fontsNext, we extract the font files from the ZIP archive directly into ~/.local/share/fonts using the unzip command:
$ unzip path/to/font.zip -d ~/.local/share/fontsWe replace path/to/font.zip with the original path of the downloaded zip file.
Now, we update the system’s font cache to make these fonts available to applications:
$ fc-cache -fvHere, the -f option forces a cache rebuild, while -v (verbose) provides detailed output to track the update process.
After performing all the above processes, we can now use the fonts in our applications and terminal emulators.
Let’s first identify the battery device path using the upower command:
$ upower -eThis command lists our battery path, typically something like /org/freedesktop/UPower/devices/battery_BAT0.
For the final step, let’s open the tmux configuration file and set the status bar style and battery icon:
set -g status-style "bg=black,fg=white"
set -g status-left "#(echo '\uf240') #(upower -i /org/freedesktop/UPower/devices/battery_BAT0 | grep 'percentage' | awk '{print $2}')"
We need to replace the /battery_BAT0 path with our actual battery path if it differs.
Finally, we need to reload the tmux configuration to apply the changes:
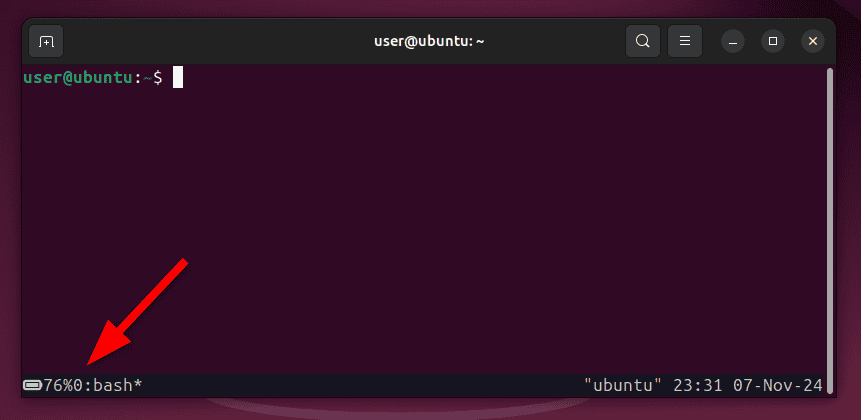
$ tmux source-file ~/.tmux.confThat’s it! The status bar should now display a battery icon and a percentage of our Linux system using the patched font we installed:

Furthermore, we can add system metrics like memory usage, battery status, and other statistics using third-party tools such as lm-sensors, the free command, and powerline.
In this article, we’ve explored how to modify each section of the tmux status bar, change colors, add icons, and include system information like battery percentage.
With these adjustments, we can create a unique status bar that not only looks visually appealing, but also enhances our productivity. Additionally, we can choose to hide the tmux status bar entirely, or make it transparent for a cleaner look.