Learn through the super-clean Baeldung Pro experience:
>> Membership and Baeldung Pro.
No ads, dark-mode and 6 months free of IntelliJ Idea Ultimate to start with.
Last updated: October 16, 2025

Learn through the super-clean Baeldung Pro experience:
>> Membership and Baeldung Pro.
No ads, dark-mode and 6 months free of IntelliJ Idea Ultimate to start with.
In this tutorial, we’ll learn how to install and configure Powerline in Linux. We’ll begin with a brief overview of Powerline and configure the fonts that are required for it. Next, we’ll source the various bindings for applications like Vim.
Finally, we’ll take a glimpse at the vim-airline plugin that works similarly to Powerline with no dependencies.
Powerline is a plugin that provides a customizable statusline for Vim, tmux, and shells like Zsh and Bash. In addition, it can also be used with tiling window managers like i3 and Awesome.
A statusline is a UI component that displays or indicates the state of an application. It includes information like time and date, internet connectivity, directory information, filename, file size, file types, and more.
Initially, Powerline was written in Vimscript. However, it was very restrictive in terms of extensibility. Therefore, it was rewritten from scratch in Python with very few external dependencies. This gave Powerline the ability to be used with many applications as well as to be extended.
Before we install and use Powerline, there are a few things that we need to configure first.
Powerline enhances its UI with certain glyphs to provide custom symbols. For that, it relies on symbol fonts or patched fonts. Fortunately, Powerline also provides fonts that are compatible with it.
We can install the Powerline fonts by cloning its repository:
$ git clone --depth 1 https://github.com/powerline/fonts pl-fonts && cd pl-fontsThe repository contains two shell scripts: one for installing the fonts and the other for uninstalling. So, let’s install these fonts by running install.sh:
$ ./install.sh
Resetting font cache, this may take a moment...
Powerline fonts installed to /home/baeldung/.local/share/fonts
Alternatively, we can also use Powerline fonts from the official package repository:
# Ubuntu and derivatives
$ sudo apt install -y fonts-powerline

# Red Hat and derivatives
$ sudo dnf install -y powerline-fonts

# Arch and derivatives
$ sudo pacman -S powerline-fonts
In addition, if we don’t want the Powerline fonts, we can use other patched fonts like Nerd Fonts. We can simply download a font from the release page and extract it to the fonts directory:
$ curl -LO "https://github.com/ryanoasis/nerd-fonts/releases/download/v3.1.1/DejaVuSansMono.zip" \
  && unzip DejaVuSansMono.zip -d $HOME/.local/share/fonts
Afterward, we shouldn’t forget to update the fonts cache:
$ fc-cacheFurthermore, we can use multiple fonts as a fallback if a glyph is missing in our preferred fonts.
There is an official terminal matrix for Powerline that compares each terminal and its supported features. Notably, for terminals that rely on fontconfig, we use the official fontconfig config file. For that, we’ll need to create the required directory:
$ mkdir ~/.config/fontconfig/conf.dNow, let’s download the config file into it:
$ curl -L "https://github.com/powerline/powerline/blob/develop/font/10-powerline-symbols.conf" \
-o ~/.config/fontconfig/conf.d/10-powerline-symbols.confNow, we’re ready to install the generic Powerline package that we use in our applications. The recommended way to install the latest Powerline release is through pip:
$ pip install --user --break-system-packages powerline-statusNext, we add ~/.local/bin to $PATH:
$ echo 'export PATH="$HOME/.local/bin:$PATH"' >> ~/.bashrcLet’s test it out:
$ which powerline
/home/baeldung/.local/bin/powerlineIn addition, Powerline comes with a daemon. By default, it’s not started. So, we need to run powerline-daemon:
$ powerline-daemonSimilarly, we can stop the daemon by passing -k:
$ powerline-daemon -kIt gets a bit repetitive across reboots. So, let’s add a simple script to our shell config like ~/.bashrc, so that, when the daemon isn’t running, the script starts it:
if ! pgrep -x "powerline-daemon" > /dev/null; then
    # If not running, start powerline-daemon
    powerline-daemon -q
fiWe can also install it from the official package repository:
# Ubuntu and derivatives
$ sudo apt install -y powerline

# Red Hat and derivatives
$ sudo dnf install -y powerline

# Arch and derivatives
$ sudo pacman -S powerline
Once installed, let’s verify it:
$ which powerline
/usr/bin/powerline
In the next sections, we’ll see how to use Powerline in various applications.
Powerline comes with built-in bindings for many applications like Vim, Zsh, Bash, and so on. So, we’ll use the Vim binding for Vim. However, we should know that it requires Vim to be compiled with Python support. vim-gtk3 binaries come with Python support.
In ~/.vimrc, let’s add the following config for Powerline:
set rtp+=$HOME/.local/lib/python3.11/site-packages/powerline/bindings/vim/
set laststatus=2
set t_Co=256
Now, let’s run GVim or Vim:
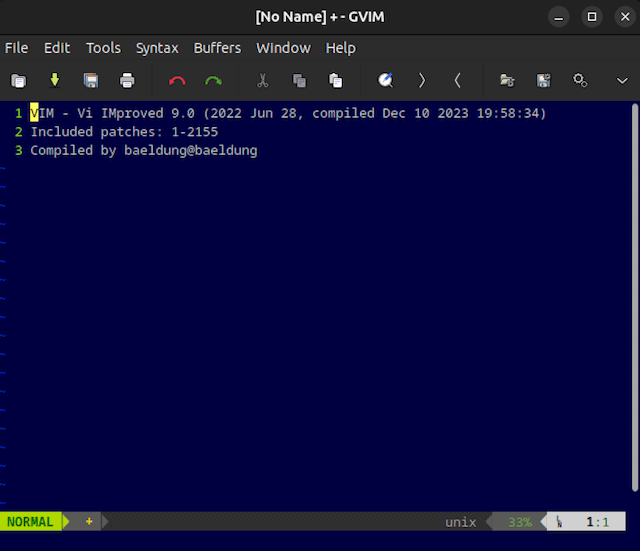
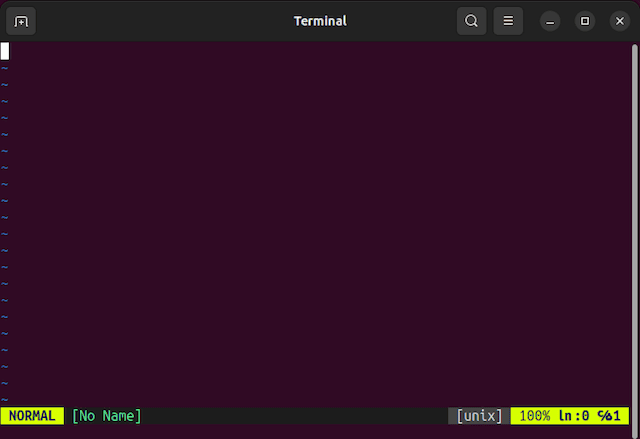
Notably, the statusline looks much better as compared to the vanilla statusline. Furthermore, we can customize it with the built-in segments.
Similarly, for Bash, we’ll source the script in the Powerline bindings:
$ source ~/.local/lib/python3.11/site-packages/powerline/bindings/bash/powerline.shUpon sourcing, we should instantly get the Powerline prompt:
As we can see, Powerline stylized the prompt by adding shapes and colors. It will be updated as we add more components to the prompt.
Moreover, we can automate this by sourcing the Bash powerline script in ~/.bashrc:
 if [ -f ~/.local/lib/python3.11/site-packages/powerline/bindings/bash/powerline.sh ]; then
    source ~/.local/lib/python3.11/site-packages/powerline/bindings/bash/powerline.sh
fiIn the same way, we can source the Zsh bindings as well:
$ source ~/.local/lib/python2.7/site-packages/powerline/bindings/zsh/powerline.sh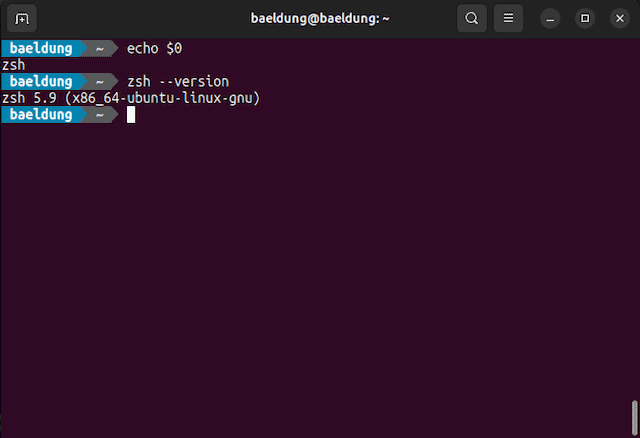
We can source the script in ~/.zshrc to automate this:
if [ -f ~/.local/lib/python3.11/site-packages/powerline/bindings/zsh/powerline.sh ]; then
    source ~/.local/lib/python3.11/site-packages/powerline/bindings/zsh/powerline.sh
fiFor tmux, we’ll need to source the Powerline binding for tmux inside ~/.tmux.conf:
source ~/.local/lib/python3.11/site-packages/powerline/bindings/tmux/powerline.conf
set-option -g default-terminal "screen-256color"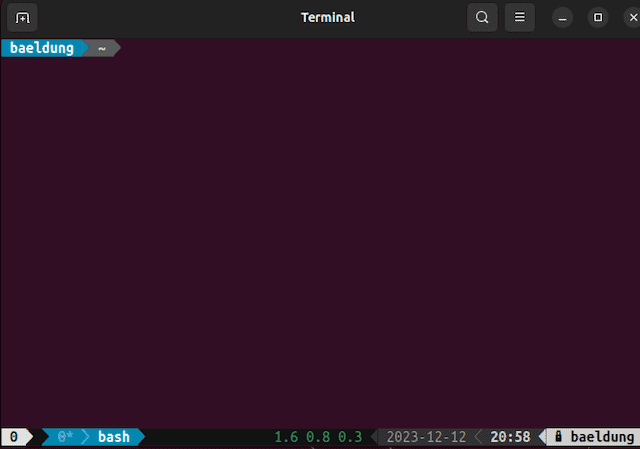
In the image, we can see that the status bar is now more aesthetic. As we add more components, Powerline styles it appropriately.
We know that Powerline requires Vim to be built with Python support. However, that requires manual effort, and we might not have the time for that. For that reason, if we’re using Powerline solely for Vim, then we can use vim-airline.
vim-airline is a statusline plugin for Vim that’s written entirely in Vimscript. It aims to be a standalone replacement for Powerline. So, there is no need for Python or any other external dependencies.
So, let’s install vim-airline using a plugin manager like vim-plug:
call plug#begin()
  'vim-airline/vim-airline'
call plug#end()
Now, let’s run :PlugInstall inside Vim to install it. Afterward, let’s restart Vim to get the statusline:
Additionally, we can integrate it with other plugins and configure it further if we need to.
In this article, we learned how to install and configure the Powerline plugin in Vim. We begin with setting up fonts for Powerline to correctly display glyphs. In addition, we explored the different ways to install Powerline.
Afterward, we loaded Powerline in applications and shells using the Powerline bindings.
Finally, we took a look at the vim-airline plugin, which is an alternative to Powerline.