

Yes, we're now running our only Summer Sale. All Courses are 30% off until 20th July, 2026:
Learn through the super-clean Baeldung Pro experience:
>> Membership and Baeldung Pro.
No ads, dark-mode and 6 months free of IntelliJ Idea Ultimate to start with.
1. Overview
tmux is a terminal multiplexer tool in Linux. Essentially, it enables us to create and maintain multiple pseudo-terminal (PTS) instances. Concretely, it maintains these pseudo-terminals through a server process that’s started whenever a tmux command is executed.
Because these terminal processes are maintained by a server process, tmux provides us the flexibility to detach from any terminal session without killing it. Furthermore, we can reattach any of the terminal sessions at a later time to regain control. This makes it ideal for any long-running process that we can run in the background and reattach to get control once in a while.
In this tutorial, we’ll learn about the tmux command in Linux. Particularly, we’ll look at some of the features and subcommands offered by tmux as well as specific applications for many of them.
2. tmux
Normally, many Linux installations don’t include a terminal multiplexer by default. However, one can come in handy in many situations.
2.1. Installation
We can install tmux on Debian-based Linux (such as Ubuntu) using the apt package manager:
$ sudo apt-get update -qq
$ sudo apt-get install -y tmux
Similarly, we can install tmux on RHEL-based Linux (such as CentOS) using the yum package manager:
$ sudo yum update -qq
$ sudo yum install -y tmux
Either way, we should now have tmux available.
2.2. Basic Usage
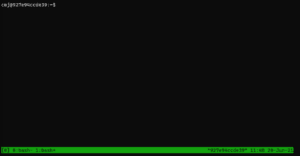
We can launch a new tmux session by entering the command alone:
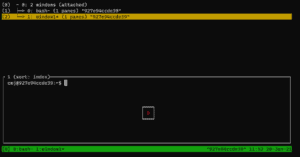
$ tmuxWithout any argument, tmux creates a new session with one window and one pane. Additionally, the session is given a default name: 0.
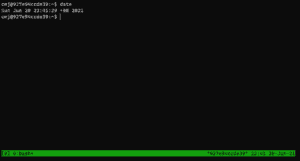
Immediately after the creation, we’re dropped into the tmux session:
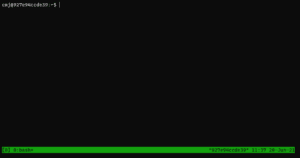
Here, we can see the shell prompt at the top, as well as some session status information at the bottom.
3. Key Bindings
The tmux documentation provides information about its many subcommands. They are usually intended for configuring the tmux instance. For example, there are commands for creating new windows, splitting panes, and detaching.
To make these commands easier to input, tmux defines a number of key bindings, also known as shortcuts or hotkeys. We can utilize the latter to boost our productivity. In fact, we mainly use these key bindings in this article.
When it comes to key bindings in the prefix key table, we can input them via a meta key. By default, tmux sets the prefix key as Ctrl+B. For clarity, we annotate the prefix key with <prefix> in the rest of the article.
4. Sessions in tmux
A session in tmux can group together several pseudo terminals. They are directly under the tmux server’s management.
4.1. Creating a Session
We can create a new session in tmux using the new-session command. The command supports several option flags that enable us to customize the session.
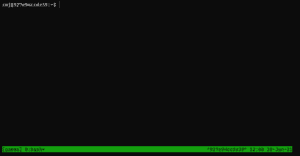
For example, we can create a session and give it a name using the -s flag:
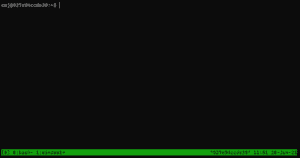
$ tmux new-session -s gammaAt this point, we should see the gamma session:
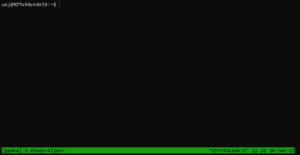
In addition to the session name, we can specify the window name using the -n flag:
$ tmux new-session -s gamma -n observationAt this point, we have a named session and a named window:
Using the -d flag, we can choose not to attach to the newly created session:
$ tmux new-session -s gamma -d
$ tmux list-session
alpha: 2 windows (created Sun Jun 20 11:37:35 2021)
gamma: 1 windows (created Sun Jun 20 12:11:41 2021)
After we enter the new-session command, we’ll not see the session due to the -d
4.2. Detaching From a Session
To detach the client from a session, we can use d after <prefix>:
<prefix> + dAt this point, the session disappears and the tmux server remains operational only in the background.
4.3. Attaching to a Session
To attach to a session, we can use the attach-session command followed by the -t flag and the name or number of the session.
For instance, we can attach to the gamma session:
$ tmux attach-session -t gammaAlternatively, we can use the session number.
4.4. Listing All the Sessions
To view a list of all the sessions currently on the tmux server, we can use the list-session command:
$ tmux list-session
alpha: 2 windows (created Sun Jun 20 11:37:35 2021)
gamma: 1 windows (created Sun Jun 20 12:11:41 2021)
From the output, we can see that there are currently two sessions running on the tmux server: alpha and gamma. Both of them also have numbers.
4.5. Renaming a Session
To rename an existing session, we can use the rename-session command:
$ tmux rename-session -t alpha beta
$ tmux list-session
beta: 2 windows (created Sun Jun 20 11:37:35 2021)
gamma: 1 windows (created Sun Jun 20 12:11:41 2021)
The rename-session command requires us to specify the target session to be renamed using the -t flag. In this example, we’re renaming our session alpha to beta.
4.6. Terminating a Session
To kill a session, we’ll need to first identify the name or number of the session. Then, we can terminate the session using the kill-session command with the -t flag.
So, let’s kill one of the sessions we already have:
$ tmux kill-session -t gamma
$ tmux list-session
beta: 2 windows (created Sun Jun 20 11:37:35 2021)
The -t flag specifies the session to kill, which is session gamma in our example.
5. Windows in tmux
Within each tmux session, there are one or more windows. Similar to the session, windows can be created, removed, named, and switched.
5.1. Creating a New Window
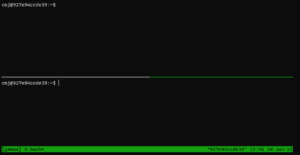
To create a new window in a session, we can again use a hotkey:
<prefix> + cFrom the status bar at the bottom of the screen, we see that there are currently two windows in this session:
Similar to sessions, each window is assigned an index starting from 0. Additionally, each window can have a name. By default, the name is the command the window is currently executing. In our example, both of the windows are named bash because that’s the currently running process in both windows.
Finally, tmux indicates the active window by placing an asterisk beside the window’s name. From the screenshot, we can tell that we’re looking at the window index number 1.
5.2. Listing All the Windows
We can display a list of all the windows in this session:
<prefix> + wThus, we see a tree-like view of the windows and associated panes:
While on the list, we can navigate the list using the Up and Down arrow keys. Then, we press Return to select the window we want to display.
5.3. Renaming a Window
To make identification easier, tmux enables us to change the window name:
<prefix> + ,Notably, the status bar at the bottom of the screen turns yellow. This indicates that tmux is expecting our input, so it currently holds stdin.
Let’s change the name of our window to window1:

Now, we change the name and press Return:
Thus, the name change is reflected in the status bar.
5.4. Terminating a Window
To terminate a window, we can use another hotkey:
<prefix> + &Before a window is terminated, tmux usually prompts for confirmation. To confirm the termination, we enter y and press Return.
Destroying a window kills all its associated panes as well.
6. Panes in tmux
Windows in tmux can be further split into panes. Furthermore, each of the panes runs exactly one standalone terminal instance.
6.1. Splitting Window Into Panes
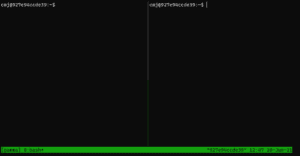
Let’s split a window along the horizontal axis into two different panes of equal sizes:
<prefix> + "Once we enter the command, the current window should get split into two panes with one at the top and one at the bottom:
Alternatively, we can split a window into two panes vertically:
<prefix> + %This time, the split is vertical:
When we use one or another view depends on the current applications and text wrapping.
6.2. Terminating a Pane
The shortcut for pane termination is simpler than that of windows, since a pane often holds a single process:
<prefix> + xSimilar to terminating a window, tmux should prompt for verification. To confirm the termination, we key in y and then press Return.
6.3. Breaking a Pane Out to Window
Importantly, we can make a pane into a standalone window.
For example, if we want to turn a window with two panes into two windows, we can explode it via !:
<prefix> + !Once entered, the effect will take place immediately and we’ll see the new windows.
6.4. Switching to Different Pane
Within a window with several panes, we can switch to a different pane using <prefix> and arrow keys:
<prefix> + <arrow key>For instance, to switch to the right pane from the left pane, we just press the <prefix> key followed by the Right arrow key.
Similarly, to switch to the bottom pane, we do the same, but this time with the Down arrow key.
7. Copy Mode in tmux
As with other textual interfaces, how we copy text is an important part of the interaction.
7.1. Copy and Paste With the tmux Clipboard
Copying text in tmux is a bit more involved than the simple Ctrl+C and Ctrl+V we have in many other interfaces.
Generally, we first need go into copy mode. Only then can we select a portion of text to copy. Finally, we can paste the text from the tmux clipboard.
So, let’s look at the exact steps to copy and paste in tmux.
To make the explanation easier, we copy the output from the date command while we’re still inside tmux:
First, we use the shortcut to go into copy mode:
<prefix> + [When in copy mode, there’s an annotation with two numbers at the top right:
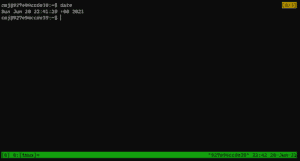
The first number from the left represents the line number our cursor is on. Then, the number at the right represents the total number of lines we have in the standard output. Notably, while in copy mode, we can also scroll via the arrow keys
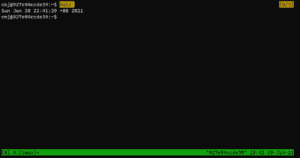
To copy the text, we move our cursor one line above using the Up arrow key. Once the cursor is in place, we input a shortcut to start a selection:
<prefix> + SpaceWhen we begin the selection, we can see that the background color of our cursor turns yellow. This indicates that the cursor is now in selection mode. To select the line, we can move the cursor to the left using the Left arrow key:
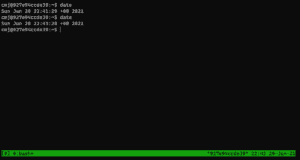
Once we’ve confirmed the selection, we just hit Return to copy the text into the tmux clipboard.
Finally, we use another shortcut to paste the text from the tmux clipboard:
<prefix> + ]At this point, we can see the text pasted back in the terminal:
Notably, the tmux clipboard is isolated from other applications and works only within tmux sessions.
7.2. Scrolling Standard Output
To see the standard output that’s beyond the display in tmux, we’ll need to first go into copy mode.
Then, we can navigate the cursor using the arrow keys. Alternatively, we can press Page Up or Page Down to scroll by pages instead of lines.
7.3. Other Commands in Copy Mode
In copy mode, tmux supports a myriad of functions akin to the ones we usually find in text editors like vi.
For instance, we can move to the next word by pressing the w key while in copy mode. Similarly, we can move to the start of the line using the key 0. Furthermore, we can jump straight to a given line by pressing the colon key and then entering the line number.
The commands we’ve mentioned thus far are just a small subset of what’s possible while in copy mode. For a full list of supported commands and their shortcuts, we can refer to the tmux documentation.
8. Unicode Handling
Although tmux is fairly versatile in terms of textual formatting and representation, it doesn’t employ Unicode by default unless the proper locale has been set. Further, how UTF-8 characters appear within a tmux session depends on several factors.
8.1. Automatic Detection
To begin with, the terminal multiplexer attempts to detect UTF-8 support by checking several variables in order:
- LC_ALL
- LC_CTYPE
- LANG
Since these are standard locale variables, if the first of them that has a value also contains UTF-8, tmux assumes the terminal supports the encoding. If it doesn’t, the multiplexer sends _ to the terminal instead of the relevant Unicode.
However, this isn’t always a reliable way to confirm this support.
8.2. tmux Environment
If we want to ensure that we have the correct locale environment variables set, we can use the setenv subcommand:
$ tmux setenv 'LC_ALL' 'en_US.UTF-8'
$ tmux setenv 'LANG' 'en_US.UTF-8'
$ tmux show-environment
-DISPLAY
LANG=en_US.UTF-8
LC_ALL=en_US.UTF-8
-WINDOWID
-XAUTHORITY
This way, we have the proper values explicitly assigned for tmux sessions.
8.3. -u Flag
Finally, the tmux command also provides the -u flag. When we don’t want to rely on automatic detection, we can use -u to indicate to tmux that we verify the terminal supports Unicode.
Even if none of the local environment variable values indicate Unicode support, tmux still accepts UTF-8 characters. Notably, -u is a shorthand for -T UTF-8.
9. Conclusion
In this article, we’ve taken a thorough look at the tmux command-line tool.
We started with some basic usage. Then, we looked at the different components of tmux. For each component, we also learned some of the shortcut keys we can use to configure it within a session.
Finally, we explored the copy mode in tmux and some of the commands we can issue in copy mode, as well as Unicode support.