

Yes, we're now running our only Summer Sale. All Courses are 30% off until 20th July, 2026:
Learn through the super-clean Baeldung Pro experience:
>> Membership and Baeldung Pro.
No ads, dark-mode and 6 months free of IntelliJ Idea Ultimate to start with.
1. Overview
QEMU enables us to run various guest operating systems within our host environment. But how do we effectively interact with the virtual machines and host? Luckily, the Secure Shell (SSH) protocol is helpful here. OpenSSH helps us in setting the communication path between the two.
In this tutorial, we’ll see how to establish SSH connectivity from our host machine to a guest OS running under QEMU.
2. Prerequisites
Before getting started, some prerequisites must be met:
- the host has QEMU/KVM installed and configured
- the guest VM image is created in qcow2 format
- the guest OS has an OpenSSH server installed and enabled
- user accounts exist on both the host and guest
Specifically, we’re using a qcow2 format Parrot OS for our guest machine. We’ve chosen the qcow2 format due to its support for advanced features. For instance, these features include snapshotting, copy-on-write, and compression.
Other possible options, for example, raw and vmdk, are less suitable for QEMU setups. For example, raw images lack compression and snapshotting capabilities. While vmdk (VMware Disk Format) doesn’t support incremental data processing. Moreover, it has limited interoperability and feature availability in QEMU environment.
Also, Ubuntu 22.04 is our host machine.
3. Using QEMU Command-Line Options
QEMU comes with a basic bridge network configuration out of the box. This enables the VM to be connected to any other computer on the local network. However, we can also create a new one.
Let’s see how to configure a QEMU bridge network on our host machine.
3.1. Creating a Bridge Interface
To create a bridge network, first, we create a bridge interface using the brctl command.
Let’s name this bridge br0:
$ sudo brctl addbr br0
Next, we attach our host’s network interface (e.g., enp0s3) to the bridge:
$ sudo brctl addif br0 enp0s3This step effectively bridges the host’s network connection with the virtual machines.
Then, we bring up the bridge interface:
$ sudo ip link set up dev br0Finally, we add the bridge interface, br0, to the 192.168.141.101/24 network:
$ sudo ip addr add dev br0 192.168.141.101/24This new network coincides with the host network. Thus, both the guest and host machine can use the same network.
3.2. ACL Configuration
To use the new bridge interface, we need to set the minimum permissions to the /etc/qemu/bridge.conf file on the host machine.
Let’s create the file and add a basic rule enabling connections to the bridge br0:
$ cat /etc/qemu/bridge.conf
allow br0
Moving on, we set the required permission:
$ sudo chmod 644 /etc/qemu/bridge.confSpecifically, we can also allow all bridges if we want to.
3.3. Launching the VM
We’re now ready to launch the VM with the qemu-system-x86_64 command:
$ sudo qemu-system-x86_64 \
  -drive file=/var/lib/libvirt/images/Parrot.qcow2,format=qcow2 \
  -m 4G \
  -smp 2 \
  -enable-kvm \
  -netdev bridge,id=mynet0,br=br0 \
  -device virtio-net,netdev=mynet0
Let’s break down the above options:
- -drive file=/var/lib/libvirt/images/Parrot.qcow2,format=qcow2: the path to our VM image
- -m 4G: the RAM size for the VM
- -smp 2: sets the number of virtual CPU cores
- -netdev bridge,id=mynet0,br=br0: configures a network device using the br0 bridge.
- -device virtio-net,netdev=mynet0: associates the VM with the mynet0 network device using the virtio-net model
- -enable-kvm: enable KVM hardware virtualization
Consequently, this launches a KVM virtual machine with 4GB RAM, 2 CPUs, bridged networking, and Parrot OS.
3.4. Testing the SSH Connectivity
Let’s check the VM’s IP once it has fully booted:
$ip a
...
2: enp1s0: <BROADCAST,MULTICAST,UP,LOWER_UP> mtu ...
    inet 192.168.141.107/24 brd 192.168.141.255 ...
...
Next, we connect through SSH:
$ ssh [email protected]
The authenticity of host '192.168.141.107...
Thus, the SSH connection is successful.
Alternatively, QEMU can be used directly from the graphical interface. This provides more flexibility than the command line option.
4. Using virt-manager
The virt-manager GUI provides an easy way to create and manage KVM VMs. We’ll launch a VM through it and connect with OpenSSH.
4.1. Setting up VM and Configuring Networking
First, we’ll use the same bridge network interface, br0, which we used earlier with the QEMU command.
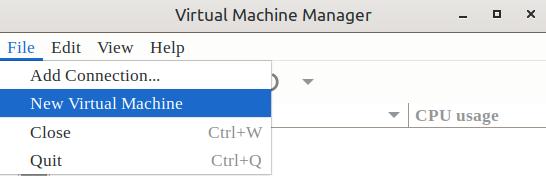
Further, we open the virtual machine manager from the Application menu:
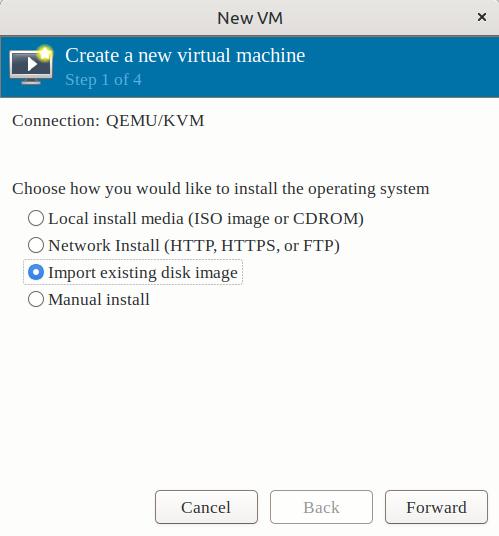
 Next, we select the Import existing disk image option:
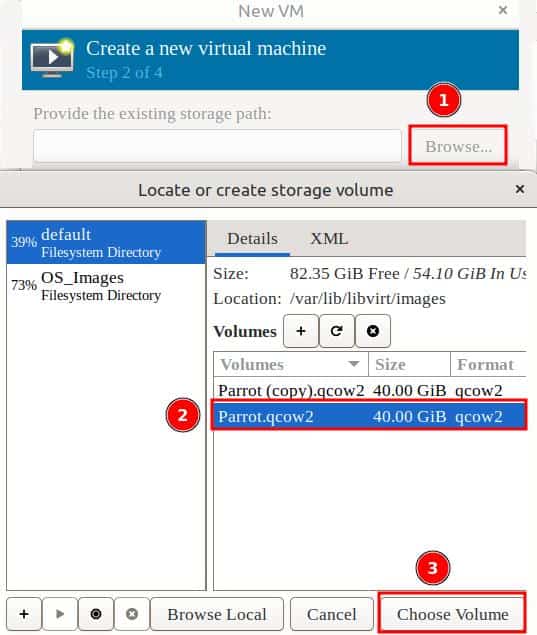
Then, we choose the storage path for the disk image of Parrot OS:
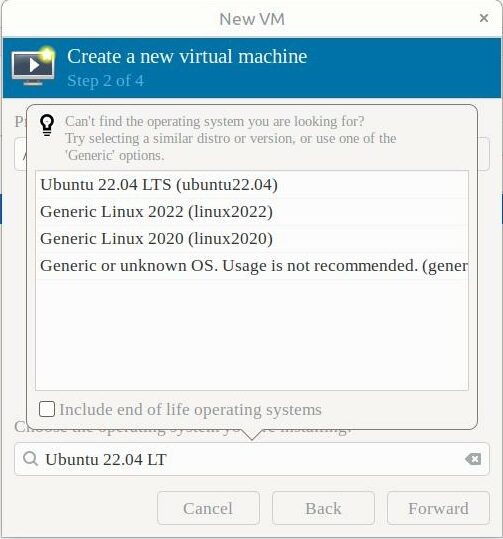
Also, we select the OS type as Ubuntu 22.04 from the bottom search box:
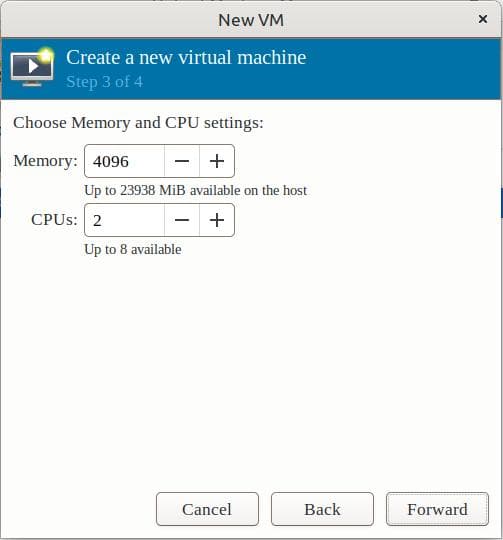
Further, we select the Memory and CPU for the VM:
Finally, we select Bridge device under the Network selection option. Then, we enter br0 for Device name and click Finish:
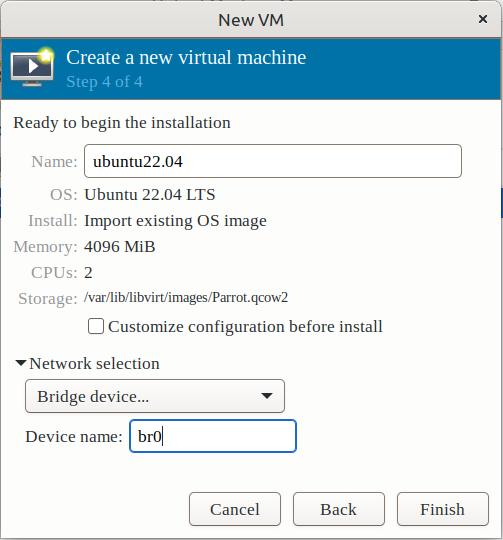
The br0 interface is the same one we used earlier with the QEMU command line option.
4.2. Launching the VM
Finally, the virtual machine starts and we can log in to it.
Let’s check the assigned IP address to the machine using the ip command:
$ip a
...
2: enp1s0: <BROADCAST,MULTICAST,UP,LOWER_UP> mtu ...
    inet 192.168.141.115/24 brd 192.168.141.255 ...
...
We can now use this IP to connect to the VM from the host over SSH.
4.3. Testing SSH Connectivity
We now head to the host machine to start an SSH session to the guest VM.
Let’s use the ssh command to connect to the VM:
$ ssh [email protected]
The authenticity of host '192.168.141.115 (192.168.141.115)' can't be established.
...
[email protected]'s password:
Linux parrot 6.1.0-1parrot1-amd64 #1 SMP PREEMPT_DYNAMIC Parrot ...
 ____                      _     ____
|  _ \ __ _ _ __ _ __ ___ | |_  / ___|  ___  ___
| |_) / _` | '__| '__/ _ \| __| \___ \ / _ \/ __|
|  __/ (_| | |  | | | (_) | |_   ___) |  __/ (__
|_|   \__,_|_|  |_|  \___/ \__| |____/ \___|\___|

...
Consequently, the connection is successful.
5. Using libvirt
We can configure a bridge network and manage the virtual machines using the libvirt module.
It’s an open-source Linux module used for managing different virtualization technologies. The main purpose of the libvirt module is to provide a user-friendly interface that hides the complexity of different hypervisors and facilitates the management of virtualized environments. Additionally, we can use it for networking, storage management, resource management, and monitoring virtual machine’s resource usage.
5.1. Configuration of Bridge Network
The first step is to configure the bridge network. To do so, we create a bridge configuration file for the bridge bro using the nano editor in the directory /etc/network/interfaces:
$ sudo nano /etc/network/interfaces.d/br0.cfgNow, we fill the configuration file with some instructions:
auto br0
iface br0 inet static
    address 192.168.141.101
    netmask 255.255.255.0
    bridge_ports enp0s3
    bridge_stp off
    bridge_fd 0
    bridge_maxwait 0
Here, we create a bridge network interface. First, we assign a static IP address to the network interface. Furthermore, we specify the subnet mask for the interface, which allows the network to connect with 254 hosts. Moreover, we add a physical network interface enp0s3, which ensures traffic exchange between the virtual machines and host network.
Moreover, for a faster setup, we disable some features, including STP, forwarding delay, and maximum wait time.
After saving the configuration file, we restart the network services using the systemctl command:
$ sudo systemctl restart networking
Now, we’ve completed the configuration step for the bridge network.
5.2. Launching the VM
We can manage virtual machines using different Linux tools that are part of the libvirt module.
First, we create a virtual machine by running the virt-install command:
$ virt-install \
  --name test-vm \
  --memory 4096 \
  --vcpus 4 \
  --disk path=/var/lib/libvirt/images/Parrot.qcow2,format=qcow2 \
  --network bridge=br0,model=virtio \
  --os-variant ubuntu22.04 \
  --import --noautoconsole
Here, we set a name, memory, CPU, disk path, networking bridge, and operating system for the virtual machine.
After the successful creation of the virtual machine, let’s start it using the virsh command:
$ sudo virsh start test-vm
Moreover, we need the IP address of the virtual machine to establish the SSH connection. Hence, we check the IP address of the virtual machine using the virsh domifaddr command:
$ sudo virsh domifaddr test-vm
Name       MAC address          Protocol     Address
------------------------------------------------------------------
test-vm  52:54:00:ab:cd:ef    ipv4         192.168.141.115/24
As soon as we get the IP address of the virtual machine, we can proceed with the establishment of the SSH connection:
$ ssh [email protected]
Finally, it’s important to install and run the OpenSSH server before we try to establish the SSH connection.
6. Conclusion
In this article, we discussed launching QEMU/KVM VMs using virt-manager, QEMU command line, and libvirt module. In all cases, bridged networking and SSH connectivity enable remote management of the headless VM guest from the host. This is a vital technique for working with Linux VMs.