

Learn through the super-clean Baeldung Pro experience:
>> Membership and Baeldung Pro.
No ads, dark-mode and 6 months free of IntelliJ Idea Ultimate to start with.
Last updated: July 20, 2024
Learn through the super-clean Baeldung Pro experience:
>> Membership and Baeldung Pro.
No ads, dark-mode and 6 months free of IntelliJ Idea Ultimate to start with.
Booting from a live USB is a common way to test out Linux distributions without making any changes to the system. QEMU is a popular open-source virtualization tool. It enables us to boot ISO files as well as physical disks like USB drives. In fact, booting from a live USB using QEMU is a straightforward way to preview a live image.
In this tutorial, we’ll see how to boot a live USB using QEMU. For this, we’ll use the command line approach, Virtual Machine Manager, and the MultiBootUSB utility.
The first step is to prepare the live USB with our preferred Linux distribution.
For this, we can use a utility like UNetbbootin. Similarly, we can use utilities like YUMI to create a multi-boot USB drive on Linux.
Importantly, we should select the correct target device with any of these utilities. This ensures that we don’t overwrite any important data on other drives. In any case, we should back up important data as flashing a USB drive completely wipes out all the data.
Once the USB drive is ready, we can first boot into it on a test system before trying it on QEMU. This ensures the USB works properly.
Some distributions like Ubuntu also have a check disc for defects option while booting into a live mode. Thus, it can help validate the integrity of the live USB.
With the live USB ready, we can now boot it using QEMU in a few different ways.
To begin with, let’s attempt to pass the USB device path directly to QEMU on the command line:
$ qemu-system-x86_64 -enable-kvm -m 1024 -drive file=/dev/sdcFurther, we can break down the options in the above command:
Equivalently, we can use the kvm command to run qemu-system-x86_64:
$ kvm -hdb /dev/sdcThe -hdb option specifies the USB drive file path /dev/sdc to be used as a hard disk.
In this case, qemu-system executes with the preferences for hardware-based or native virtualization.
Consequently, QEMU launches the live USB in a basic emulated system. We can then install or test out the Linux distribution as needed.
virt-manager (Virtual Machine Manager) usually provides more control over VM configuration.
Let’s see how to boot a live USB drive using virt-manager.
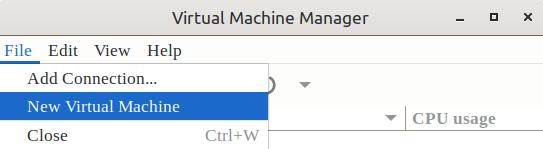
First, we start Virtual Machine Manager from the application menu. Then, we click on New Virtual Machine from the File menu:
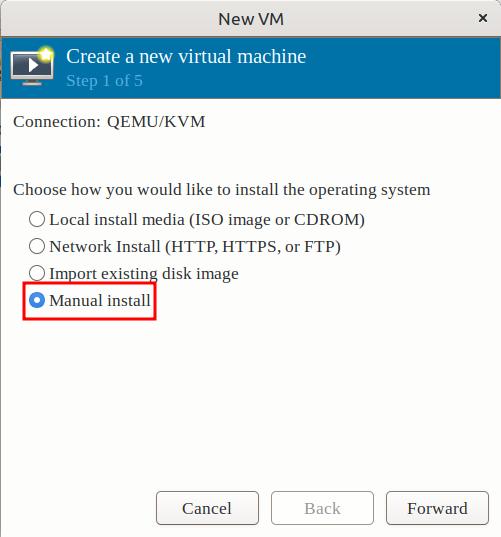
Next, we select the installation medium. In this case, we use the Manual Install option:
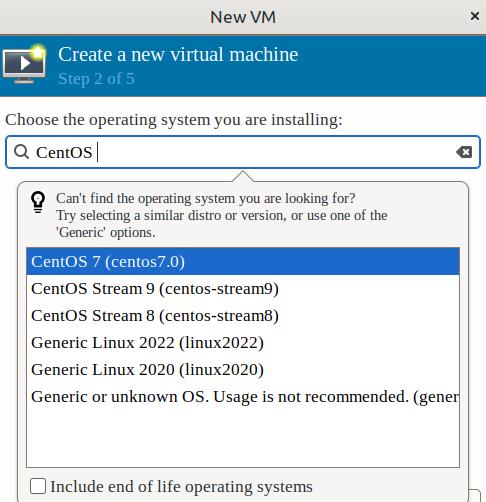
Further, we choose the desired OS type. For example, we choose CentOS:
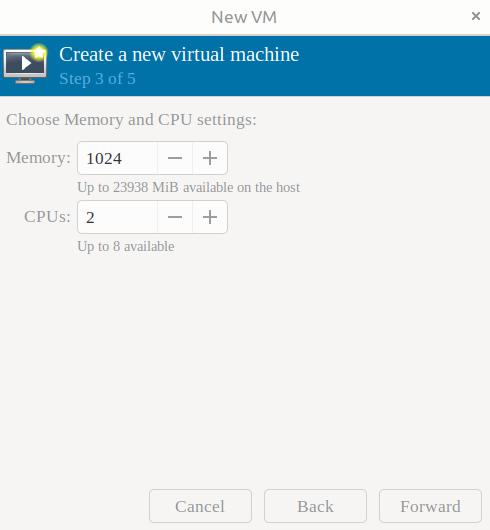
Moving forward, we set system Memory and assign CPUs to the VM:
Now, in this next step, we deselect the Enable Storage checkbox:
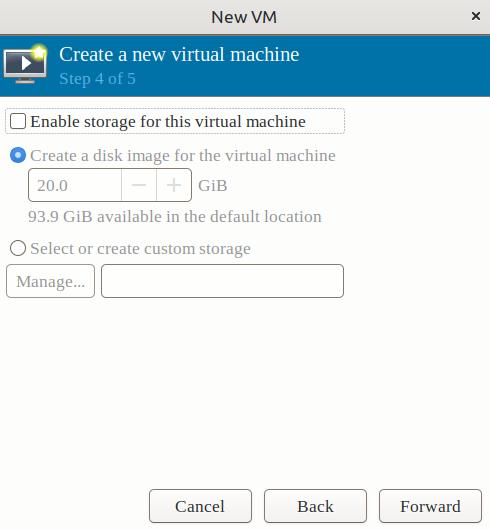
Thus, we can use our USB drive as storage.
In the next window, we can review our VM configuration. Notably, we select the check box corresponding to Customize configuration:
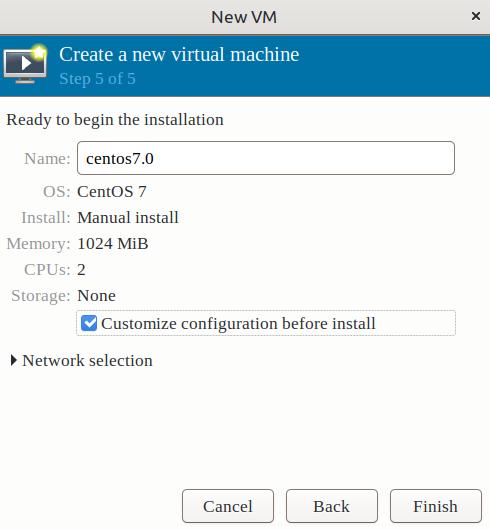
Finally, we click Finish.
On the next window, we can configure the VM preferences.
First, we click the Add Hardware button. Here, we choose the USB Host Device option. Then, we select our USB device from the list:

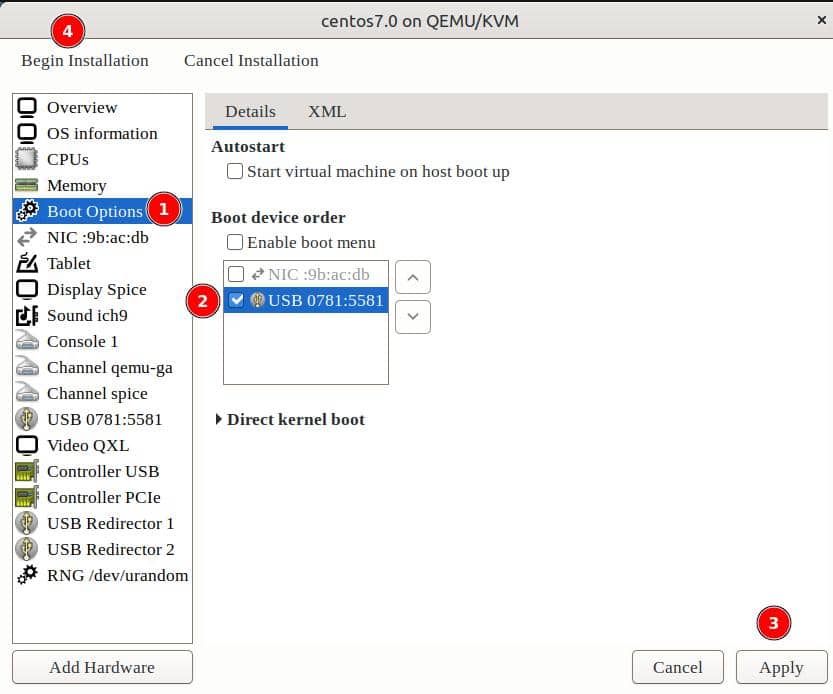
Next, we go to Boot Options and checkmark the USB option under Boot device order. Finally, we apply the changes and click on Begin Installation:
Consequently, the boot menu appears for the OS installed on Live USB:

Thus, we can select the OS to boot from.
MultiBootUSB is a handy utility that can help create and boot multiple ISOs from a single USB drive.
Let’s launch it from the command line:
$ sudo multibootusbImportantly, we need sudo privileges for MultiBootUSB to work.
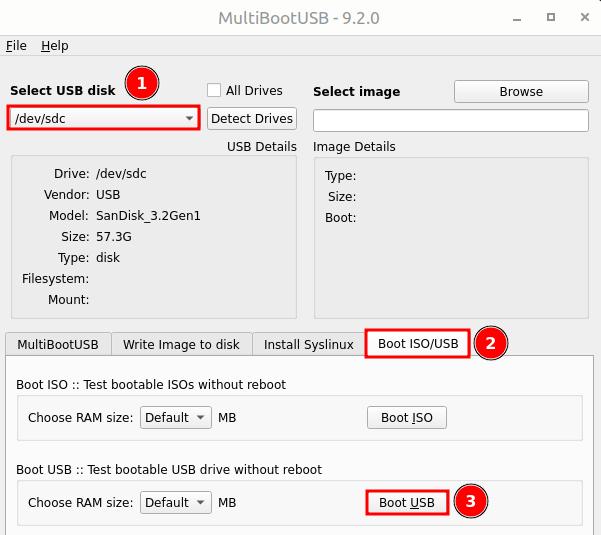
On the main window, we can see our USB drive under the Select USB disk option.
Next, we move to the Boot ISO/USB tab in the bottom panel.
Now, we can simply click on the Boot USB button to boot from USB:
Finally, the boot screen should appear as before.
In this article, we saw different ways to boot from a live USB using QEMU.
First, we boot the live USB directly from the command line. Then, we used the virtual machine manager. We saw that it facilitates more VM customization over other options.
Finally, we used the MultiBootUSB utility. Besides booting the live USB, it can also install multiple ISOs on a single USB.
Overall, QEMU provides a flexible and user-friendly way to test out Linux distros in an emulated environment.