

Learn through the super-clean Baeldung Pro experience:
>> Membership and Baeldung Pro.
No ads, dark-mode and 6 months free of IntelliJ Idea Ultimate to start with.
Last updated: July 31, 2024
Learn through the super-clean Baeldung Pro experience:
>> Membership and Baeldung Pro.
No ads, dark-mode and 6 months free of IntelliJ Idea Ultimate to start with.
In this tutorial, we’ll look at how to create a bootable USB flash drive. To achieve this, we’ll use the UNetbootin application.
UNetbootin can create bootable USB drives for various operating systems. It has a graphical interface, which makes it easier to create Live USB drives from ISO files. Before we start, we must have a USB flash drive. The tool recommends an 8 GB flash drive. A 4 GB flash drive can work, but that will depend on the size of the OS we’re installing.
Additionally, we need to download the ISO file for the OS we want to install. For this example, we’ll use Ubuntu:
$ wget -O ubuntu22 https://releases.ubuntu.com/22.04.3/ubuntu-22.04.3-desktop-amd64.isoWe also can create and download the ISO for Windows OS.
Next, let’s download and install the UNetbootin application. We’ll first need to add a repository to our package manager:
$ sudo add-apt-repository ppa:gezakovacs/ppa
sudo: add-apt-repository: command not found
If we get the error above, the add-apt-repository package isn’t installed in our system.
We’ll need to install it from the software-properties-common package:
$ sudo apt-get install software-properties-commonOnce we’ve installed the software-properties-common, we should update the system and then add the PPA (Personal Package Archives). Through PPAs, we can upload Ubuntu source packages to Launchpad for building and publishing as an apt repository:
$ sudo apt-get update
$ sudo add-apt-repository ppa:gezakovacs/ppa
$ sudo apt-get update
$ sudo apt install unetbootin
$ sudo unetbootinAlternatively, if we experience any error while adding the PPA or installing UNetbootin, we can use the binaries:
$ wget -O unetbootin-linux32-702.bin https://github.com/unetbootin/unetbootin/releases/download/702/unetbootin-linux-702.bin
$ wget -O unetbootin-linux64-702.bin https://github.com/unetbootin/unetbootin/releases/download/702/unetbootin-linux64-702.bin
If our system is 32-bit, let’s use the first link.
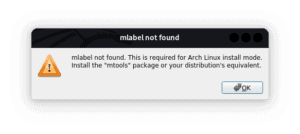
To ensure our UNetbootin will run successfully, let’s install mtools:
$ sudo apt-get -y install mtoolsThe mtools package provides utilities to access DOS disks in Unix. For example, mlabel is required for MS-DOS volume labeling. Systems that lack it will display “mlabel not found” when we run UNetbootin:
Now, let’s check the drive listing so that we’re sure of the label assigned to our USB drive. For example, in this listing, our USB drive is assigned sdb1:
$ lsblk -l
NAME  MAJ:MIN RM   SIZE RO TYPE MOUNTPOINTS
sda     8:0    0 465.8G  0 disk
sda1    8:1    0    50M  0 part
sda6    8:6    0   975M  0 part [SWAP]
sdb     8:16   1 115.3G  0 disk
sdb1    8:17   1 115.3G  0 part /media/gt2/PINY DUO
sr0    11:0    1  1024M  0 rom
Later, when we’re creating the bootable USB drive, we must ensure the drive selected is /dev/sdb1.
Lastly, let’s give the application execute permission:
$ sudo chmod +x ./unetbootin-linux64-702.binNow, after giving the UNetbootin application the required permission, let’s run it:
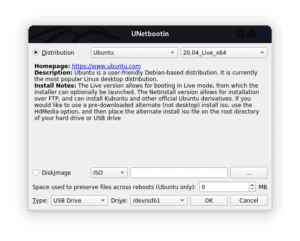
$ sudo ./unetbootin-linux64-702.binWhen UNetbootin starts up, we’ll see the application’s main window:

This window allows us to choose between Distribution and Disk image. By default, the UNetbootin application offers versions of free and open-source operating systems. We can download the options provided by UNetbootin by selecting a Distribution and choosing a specific version:
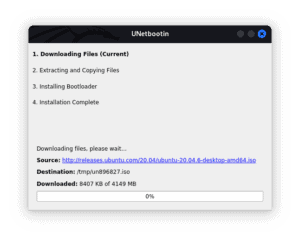
Next, we click “ok” and the application will proceed to download the specified version:
Otherwise, if we’ve already downloaded an ISO file, we select “Disk image”:
After we click “ok“, it will load the necessary files and install them on the USB:
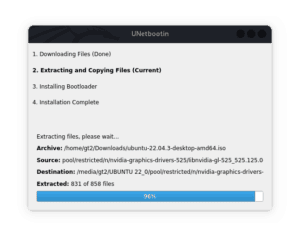
Subsequently, it installs the bootloader and finishes the installation:

Finally, when the installation is complete, it notifies us, and we can restart our computer.
For some systems, we must enable USB boot from the BIOS before attempting to use the bootable USB.
Let’s restart it to test if our bootable USB is working right. Upon restarting, let’s access the boot menu to select the USB drive as the boot device (for most systems, we do this by pressing F9 or F12).
Afterward, it should boot from the USB and display:
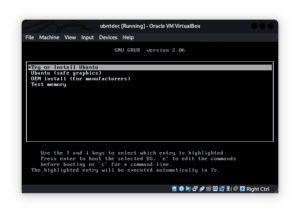
We must note that the UNetbootin utility only creates a bootable USB with a single OS image. In case we want to create a bootable USB with multiple OSes, we can use an application like Ventoy.
In this article, we’ve looked at how to create a bootable USB drive using the UNetbootin utility. Before starting, we should back up the contents of the USB drive as it will be formatted. The UNetbootin application allows us to either download an ISO or choose from the ones we’ve already downloaded.