

Yes, we're now running our only Summer Sale. All Courses are 30% off until 20th July, 2026:
Creating a Wireless Access Point and Sharing Internet Using nmcli
Last updated: July 31, 2024
Learn through the super-clean Baeldung Pro experience:
>> Membership and Baeldung Pro.
No ads, dark-mode and 6 months free of IntelliJ Idea Ultimate to start with.
1. Overview
In this tutorial, we’ll learn how to create a wireless access point using the nmcli command. This tool is incredibly useful for creating an internet access point for multiple devices to establish a temporary network for sharing files and resources.
We’ll briefly discuss the NetworkManager, some of its features, and the prerequisites we need for the access point to work. Lastly, we’ll look at the configurations and create three access points (hotspots).
2. The NetworkManager in Brief
The NetworkManager is a network system service that manages network connections and devices. It manages Ethernet, Wi-Fi, and mobile broadband devices, as well as PPPoE connections, with VPN integration.
In Ubuntu and other Debian-related systems, network management is handled by systemd’s networkd and netplan or the NetworkManager.
If NetworkManager isn’t installed, upon installation, it takes control of all networking devices in the system and creates its netplan configuration file.
Network management in most Linux systems is handled by the system’s networkd and netplan or the NetworkManager. The following are some advantages of NetworkManager:
- The NetworkManager provides a D-Bus interface and a library (libnm) that makes APIs available to other system applications.
- NetworkManager supports shared connection
- It provides DHCP and DNS service to devices in a shared connection
- Lastly, it configures routing tables to direct traffic between the devices on the shared connection and the internet.
The NetworkManager package comes with a daemon, a command-line interface (nmcli), a curses-based test user interface (nmtui), and lastly, a desktop GUI (Gnome, KDE, nm-applet).
If we’re using NetworkManager, we’ll be able to manage our network connections in an efficient and effective manner. If it doesn’t exist, let’s install it:
$ sudo apt-get update
$ sudo apt-get install network-manager
For RedHat-based systems, lets run:
# dnf install dnsmasq NetworkManager-wifiAfter installation is complete, the service should be up and running:
$ systemctl status NetworkManager
● NetworkManager.service - Network Manager
     Loaded: loaded (/lib/systemd/system/NetworkManager.service; enabled; prese>
     Active: active (running) since Fri 2023-08-25 03:08:04 EAT; 16h ago
       Docs: man:NetworkManager(8)
   Main PID: 818 (NetworkManager)
      Tasks: 4 (limit: 9274)
3. Creating a Wireless Access Point Using nmcli
Before we begin making any configurations, let’s ensure that our systems meet the following requirements:
- It must have two network interfaces (preferably wired and wireless)
- The Wi-Fi adapter should support AP mode.
- Lastly, we should have administrative privileges on our Debian system.
As we start our configurations, let’s check the interfaces available in our system using iwconfig:
$ iwconfig
lo        no wireless extensions.
wlan0     IEEE 802.11  ESSID:"Wess"
          Mode:Managed  Frequency:2.412 GHz  Access Point: Y7:67:12:01:62:08
          Bit Rate=300 Mb/s   Tx-Power=15 dBm
          Retry short limit:7   RTS thr:off   Fragment thr:off
          Power Management:off
          Link Quality=70/70  Signal level=-33 dBm
          Rx invalid nwid:0  Rx invalid crypt:0  Rx invalid frag:0
          Tx excessive retries:0  Invalid misc:168   Missed beacon:0
usb0      no wireless extensions.
We’ll use the usb0 interface to provide internet to our system while we turn the wlan0 into an access point. Otherwise, if we don’t have a second interface providing internet, our connected devices won’t be able to access the internet.
Next, let’s verify that our Wi-Fi card supports AP mode:
$ nmcli -f WIFI-PROPERTIES.AP device show wlan0
WIFI-PROPERTIES.AP:                     yes
It’s possible to create a Wi-Fi access point with the NetworkManager using a single line of command.
Let’s run the following command to create an access point with the name testpot and a password 12345678:
$ nmcli d wifi hotspot ifname wlan0 ssid testspot password 12345678
Device 'wlan0' successfully activated with '149d0e97-0958-46ff-a748-e71ccc21d0cd'.
Hint: "nmcli dev wifi show-password" shows the Wi-Fi name and password.
In this command, wifi is an argument that sets the connection name to hotspot. We use the ifname argument to select the interface we’ll be using while SSID specifies the name of the access point we’re creating. The SSID will be visible to devices connecting to it. Lastly, we use the password argument to create a password for the access point.
The NetworkManager will create a connection called hotspot if the command runs successfully. This access point will share the internet connection if the secondary interface has a network. So the devices connected to it will access the internet because the hosting device is connected to the internet (a shared connection is created between wlan0 and usb0).
Next, let’s view all the connections we have in the system:
$ nmcli con show
NAME                UUID                                  TYPE      DEVICE
Hotspot             149d0e97-0958-46ff-a748-e71ccc21d0cd  wifi      wlan0
Wired connection 1  7fb46fdc-3505-49f6-aeb7-edb17e26611c  ethernet  usb0
lo                  3dcbbd88-d7f0-4426-b87c-9c7ab3ae0e37  loopback  lo
From the snippet above, both wifi and ethernet are active. We’re using the ethernet to provide internet to the computer. If we lack a second interface, the hotspot we created won’t have internet access, but it can be used to share resources locally.
We can verify that the access point is up:
$ nmcli device wifi
IN-USE  BSSID              SSID        MODE   CHAN  RATE
*       60:67:20:7A:A6:8C  testspot  Infra  11    0 Mbit/s
Importantly, we’ll often use the term connection to refer to the full configuration specified for a specific device or interface. For example, if we create specific settings for eth0, we can refer to those settings as a connection.
4. Creating the Access Point Sequentially
Alternatively, we can create a wireless access point sequentially running one command after another.
Let’s begin by running the following command to create the SSID for our hotspot on the wlan0 interface:
$ sudo nmcli connection add type wifi ifname wlan0 con-name testhotspot autoconnect yes ssid testhotspot
Connection 'testhotspot' (23429383-f83f-4fbe-bbcc-9d64fcf5c7b9) successfully added.
Next, let’s add more properties to our connection:
$ sudo nmcli connection modify testhotspot 802-11-wireless.mode ap 802-11-wireless.band bg ipv4.method sharedThen, we must configure WPA2-PSK security for our access point:
$ sudo nmcli connection modify testhotspot wifi-sec.key-mgmt wpa-psk
$ sudo nmcli connection modify testhotspot wifi-sec.psk 12345678
Lastly, let’s activate the access point we’ve created:
$ sudo nmcli connection up testhotspot
Connection successfully activated (D-Bus active path: /org/freedesktop/NetworkManager/ActiveConnection/7)
We must note that for the access point to start automatically on boot, we must enable ‘autoconnect‘:
$ sudo nmcli connection modify testhotspot connection.autoconnect yes
To turn it down, we run:
$ sudo nmcli connection down testhotspot
Connection 'testhotspot' successfully deactivated (D-Bus active path: /org/freedesktop/NetworkManager/ActiveConnection/7)
We can also view the active connection on our system:
$ nmcli con show --active
NAME                UUID                                  TYPE      DEVICE
testhotspot         23429383-f83f-4fbe-bbcc-9d64fcf5c7b9  wifi      wlan0
Wired connection 1  7fb46fdc-3505-49f6-aeb7-edb17e26611c  ethernet  usb0
lo                  3dcbbd88-d7f0-4426-b87c-9c7ab3ae0e37  loopback  lo
We can see that testhotspot is the connection we’ve created while Wired connection 1 is the secondary interface (usb0) which provides our system with an internet connection.
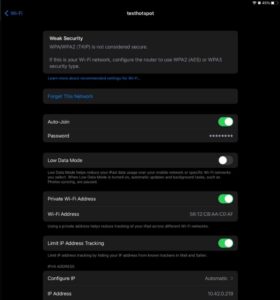
Using a separate device, we can access the access point we created and use it:
5. Creating a Wireless Access Point in a Redhat System
Finally, in Redhat systems, we can use the following approach to create an access point.
First, we create the access point and its properties:
$ nmcli device wifi hotspot ifname wlan0 con-name RedHotspot ssid RedHotspot password 12345678
Device 'wlan0' successfully activated with '31adcef4-6d35-4727-844d-06934a3d5f56'.
Hint: "nmcli dev wifi show-password" shows the Wi-Fi name and password.
Optionally, we can set the security protocol:
$ nmcli connection modify RedHotspot 802-11-wireless-security.key-mgmt wpa-psk
If we don’t set the security protocol, nmcli will automatically set it.
In some configurations, sae (Simultaneous Authentication of Equals) is used instead of wpa-psk. The danger of using this option is that not all interfaces support it. So if we set it and our Wi-Fi card doesn’t support wpa3-sae, we’ll experience an error.
Next, let’s run:
$ nmcli connection modify RedHotspot ipv4.addresses 192.0.1.254/24By default, the NetworkManager uses the 10.24.0.0/24 network to assign addresses. Using the above command, we can specify a network range of our choice. This command will work in both Debian and RedHat systems.
Lastly, let’s activate the connection profile:
$ sudo nmcli connection up RedHotspot
Connection successfully activated (D-Bus active path: /org/freedesktop/NetworkManager/ActiveConnection/9)
6. Shared Connection in NetworkManager
One of the Network Manager’s key features is its ability to create shared connections, occasionally referred to as Internet Connection Sharing (ICS).
Through this functionality, a device with an active internet connection, such as a computer connected to Ethernet or Wi-Fi, can share its internet connection with other devices. This virtually turns the host device into an access point or router.
For illustration, if we check the network configuration, we’ll realize that we have two networks (network 192.0.1.0/24 and 192.168.40.0/24):
$ ip addr show
2: wlan0: <BROADCAST,MULTICAST,UP,LOWER_UP> mtu 1500 qdisc mq state UP group default qlen 1000
    link/ether 60:67:20:7a:a6:8c brd ff:ff:ff:ff:ff:ff
    inet 192.0.1.254/24 brd 192.0.1.255 scope global noprefixroute wlan0
       valid_lft forever preferred_lft forever
    inet6 fe80::6267:20ff:fe7a:a68c/64 scope link
       valid_lft forever preferred_lft forever
4: usb0: <BROADCAST,MULTICAST,UP,LOWER_UP> mtu 1500 qdisc fq_codel state UNKNOWN group default qlen 1000
    link/ether 16:8a:99:9f:07:99 brd ff:ff:ff:ff:ff:ff
    inet 192.168.40.153/24 brd 192.168.40.255 scope global dynamic noprefixroute usb0
       valid_lft 2675sec preferred_lft 2675sec
    inet6 fe80::148a:99ff:fe9f:799/64 scope link noprefixroute
       valid_lft forever preferred_lft forever
This difference results from the NetworkManager utilizing NAT (Network address translation). It ensures that IP forwarding and masquerading are set effectively and we don’t have to worry about it:
$ sudo nft list ruleset
table ip nm-shared-wlan0 {
	chain nat_postrouting {
		type nat hook postrouting priority srcnat; policy accept;
		ip saddr 192.0.1.0/24 ip daddr != 192.0.1.0/24 masquerade
	}
	chain filter_forward {
		type filter hook forward priority filter; policy accept;
		ip daddr 192.0.1.0/24 oifname "wlan0" ct state { established, related } accept
		ip saddr 192.0.1.0/24 iifname "wlan0" accept
		iifname "wlan0" oifname "wlan0" accept
		iifname "wlan0" reject
		oifname "wlan0" reject
	}
}
The NetworkManager also starts the dnsmasq service which listens on ports 67 and 53 (DHCP and DNS respectively):
$ sudo ss -tulpn | egrep ":53|:67"
udp   UNCONN 0      0        192.0.1.254:53        0.0.0.0:*    users:(("dnsmasq",pid=5077,fd=6))
udp   UNCONN 0      0            0.0.0.0:67        0.0.0.0:*    users:(("dnsmasq",pid=5077,fd=4))
tcp   LISTEN 0      32       192.0.1.254:53        0.0.0.0:*    users:(("dnsmasq",pid=5077,fd=7))
The dnsmasq service provides DHCP and DNS services to the clients connected to the access point.
7. Conclusion
In this article, we successfully created a wireless access point using nmcli in Debian and RedHat systems. Earlier we discussed the NetworkManager and looked at some of its features.
Importantly, through connection sharing and NAT, the NetworkManager enables internet sharing. We can connect multiple devices to our created network and provide seamless internet access. Finally, the NetworkManager allows us to create several network profiles that we can change depending on the need and configuration.