

Learn through the super-clean Baeldung Pro experience:
>> Membership and Baeldung Pro.
No ads, dark-mode and 6 months free of IntelliJ Idea Ultimate to start with.
Learn through the super-clean Baeldung Pro experience:
>> Membership and Baeldung Pro.
No ads, dark-mode and 6 months free of IntelliJ Idea Ultimate to start with.
In this tutorial, we’ll cover how to install and use the i3 window manager. In addition, we’ll also discuss how to configure its various aspects, such as keyboard shortcuts, window management, and setting a notification daemon.
A Tiling Window Manager (TWM) is a type of window manager that arranges the opened windows in a non-overlapping layout. The windows are organized, resized, and positioned on the screen automatically, thereby, using all the screen real estate more efficiently.
Most tiling window managers rely heavily on virtual desktops. These virtual desktops are called workspaces or tags. We can assign windows to different workspaces using a combination of keyboard shortcuts.
In addition, we can choose from a pre-defined set of layouts like side by side, stacked, grid, and floating. The floating layout allows us to float a window, which we can freely resize and position on the screen:

Moreover, tiling window managers tend to be more light on resources by default. Indeed, we can customize it to be more aesthetically pleasing by adding visual effects if needed.
There are numerous tiling window managers available for different uses. For instance, if we want a minimal setup, we can opt for window managers like DWM. In contrast, we can choose AwesomeWM, Qtile, or XMonad for a more customizable experience.
However, we’ll focus on i3 because it’s the most popular tiling window manager in the Linux ecosystem. i3 strikes a good balance between customizability and user experience. In addition, it relies on a traditional config file that we can modify and see the changes immediately.
i3 is available on most official package repositories. We can install it from a package manager using its canonical name, i3:
# Debian, Ubuntu, and derivatives
$ sudo apt install -y i3

# Fedora, Redhat, and CentOS Stream
$ sudo dnf install -y i3

# openSUSE
$ sudo zypper install --non-interactive i3

# Arch Linux and derivatives
$ sudo pacman -S --noconfirm i3
i3 is a meta-package that also includes screen lock widgets, a status bar, and a notification daemon.
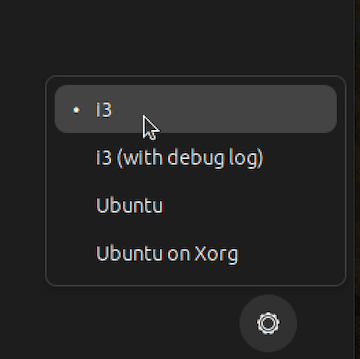
Once i3 is installed, we can launch it from either a display manager or the TTY console. In the display manager, we can simply select i3 from the dropdown:
In the TTY console, we can launch i3 by passing it to exec:
$ exec i3Once i3 launches, it will load the i3 status bar and a configuration message:
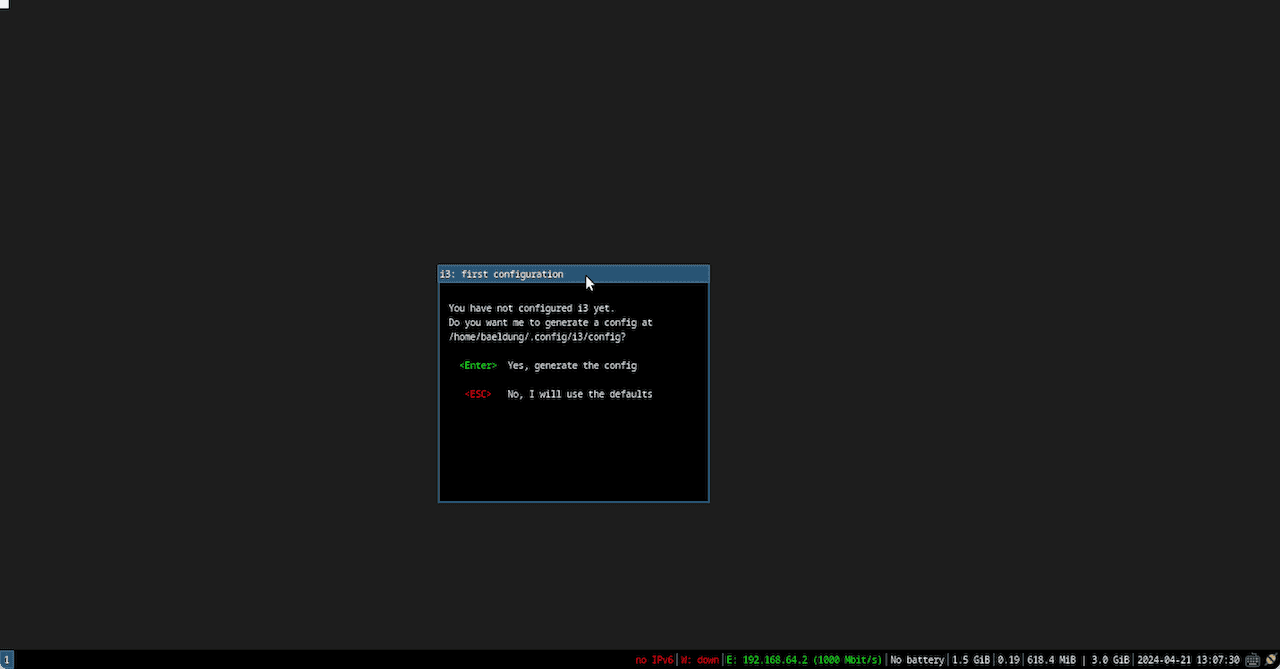
Here, we simply press Return to generate the default config. Now, if we press Mod4+Return, it will launch a supported terminal. Usually, Mod4 is defined to be the Super key.
Similarly, if we want to launch applications, we can simply press Mod4+D. i3 uses dmenu by default, which is a lightweight menu that we can use for various tasks like selecting an item from a set of given options.
Now, let’s go ahead and launch several terminal windows:
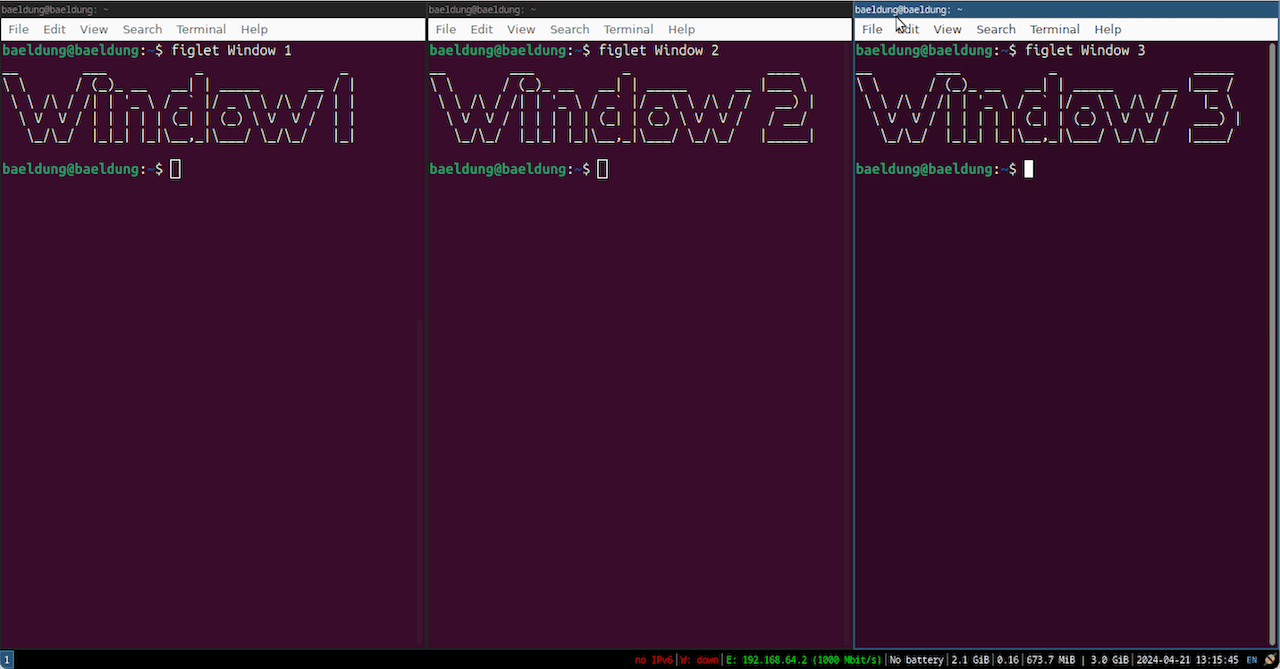
Notably, by default, i3 uses a column layout. However, there are pre-defined bindings that we can use to change the tiling layout however we like. In the same way, there are bindings for navigating windows as well.
For instance, we can move the windows to the left, right, top, and bottom using Mod4+J, Mod4+;, Mod4+L, and Mod4+K, respectively. The active window has a border around it. We can move the active window around using the same key combinations and Left Shift.
Apart from that, we can switch to workspaces with Mod4+n, where n is the number of the workspace. By default, there are 10 workspaces, but we can change that if needed. We can move an active window to the nth workspace by holding Mod4+Shift+n.
The default configuration is located in the ~/.config/i3/config file. Before moving on, let’s create a backup of this original configuration so that we can revert if required:
$ cp ~/.config/i3/config ~/.config/i3/config.backupNow, we can edit the file to change the required settings. After making changes to the file, we can reload i3 by pressing Mod4+R.
At the top of the config, we set the $mod to Mod4, which maps to the Super key. We’ll see it all over the config file. For instance, if we want to launch thunderbird, we’ll run:
bindsym $mod+ctrl+t exec thunderbirdbindsym binds the keyboard shortcut to a command.
Let’s look at a snippet showing some of the keybindings that we can change accordingly:
# change focus
bindsym $mod+j focus left
bindsym $mod+k focus down
bindsym $mod+l focus up
bindsym $mod+semicolon focus right

# move focused window
bindsym $mod+Shift+j move left
bindsym $mod+Shift+k move down
bindsym $mod+Shift+l move up
bindsym $mod+Shift+semicolon move right

# alternatively, you can use the cursor keys:
bindsym $mod+Shift+Left move left
bindsym $mod+Shift+Down move down
bindsym $mod+Shift+Up move up
bindsym $mod+Shift+Right move right

# split in horizontal orientation
bindsym $mod+h split h

# split in vertical orientation
bindsym $mod+v split v

# enter fullscreen mode for the focused container
bindsym $mod+f fullscreen

# change container layout (stacked, tabbed, toggle split)
bindsym $mod+s layout stacking
bindsym $mod+w layout tabbed
bindsym $mod+e layout toggle split
Similarly, we can also customize how we use workspaces:
# switch to workspace
bindsym $mod+1 workspace 1
bindsym $mod+2 workspace 2
bindsym $mod+3 workspace 3
...
bindsym $mod+0 workspace 10

# move focused container to workspace
bindsym $mod+Shift+1 move container to workspace 1
bindsym $mod+Shift+2 move container to workspace 2
bindsym $mod+Shift+3 move container to workspace 3
...
bindsym $mod+Shift+0 move container to workspace 10
Additionally, we can also assign a default workspace to specific applications:
for_window [class="Firefox"] move container to workspace 1
for_window [class="Spotify"] move container to workspace 5
So, when Firefox launches, it will be moved to the first workspace, and Spotify will be moved to the fifth workspace.
Some GUI applications don’t play well with tiling window managers. For that reason, we can set their mode to floating. Usually, we toggle the floating mode for a window by pressing Mod4+Shift+Space.
However, it can be annoying to do this every time for that one specific program. Luckily, we can make rules for specific windows to float by default:
for_window [title="Preferences$"] floating enable
for_window [title="^Calculator"] floating enable
In the first instance, we float the window whose title ends with “Preferences”. Similarly, we also float the window whose title starts with “Calculator”.
In addition, we can also move the floating window around by holding the Super key and dragging the window.
We can customize the status bar by modifying the bar block in the configuration:
bar {
    output            LVDS1
    status_command    i3status
    position          top
    mode              hide
    workspace_buttons yes
    tray_output       none

    font -misc-fixed-medium-r-normal--13-120-75-75-C-70-iso10646-1

    colors {
        background #000000
        statusline #ffffff

        focused_workspace  #ffffff #285577
        active_workspace   #ffffff #333333
        inactive_workspace #888888 #222222
        urgent_workspace   #ffffff #900000
    }
}
At the top, we set the monitor name using the output option. We can retrieve the names of the connected monitors by running xrandr. The status bar will then be displayed on the given monitor.
In addition, we can also change the status bar command if we need to use a different status bar, like polybar. However, the default status bar is suitable for most use cases.
In the subsequent lines, we set additional options for the status bar. Finally, the colors block lets us customize the theme for the workspace buttons based on the status of the workspace.
By default, i3 uses dunst as its notification daemon. dunst is a lightweight notification daemon that’s usually used with tiling window managers. It’s highly configurable through a config file located at ~/.config/dunst/dunstrc.
However, we need to explicitly launch it once i3 starts. Usually, we launch it at the bottom of the config file:
exec --no-startup-id dunst -config ~/.config/dunst/dunstrcThe –no-startup-id flag prevents dunst from creating a new process group. We can test it out by sending a test notification to the daemon:
$ notify-send "Test" "Hello, world!"feh is a lightweight image viewer that we can also use to change the desktop wallpaper. It can be installed from the official package repositories.
Once feh is installed, we can add the wallpaper to the i3 config:
exec --no-startup-id feh --bg-scale ~/Pictures/background.jpgIn this article, we discussed the use of tiling window managers in the Linux ecosystem. Specifically, we focused on the i3 window manager, which is the most popular tiling window manager. We learned how to install and use i3, as well as how to configure it to meet our requirements.