Learn through the super-clean Baeldung Pro experience:
>> Membership and Baeldung Pro.
No ads, dark-mode and 6 months free of IntelliJ Idea Ultimate to start with.
Last updated: March 25, 2025

Learn through the super-clean Baeldung Pro experience:
>> Membership and Baeldung Pro.
No ads, dark-mode and 6 months free of IntelliJ Idea Ultimate to start with.
Knowing the resolution of our monitor is important for several reasons, such as display configuration, setting up a desktop environment, gaming, or even selecting the best wallpaper.
Linux offers tools, such as xrandr and hwinfo, that we can use to get the resolution of one or more monitors.
In this tutorial, we’ll explore various methods to determine the monitor’s resolution using CLI commands and the GUI.
xrandr is a command-line utility used in the X Window system. The X Window system is the underlying implementation of the Linux GUI.
The xrandr command lets us view and set the display size, refresh rates, and screen orientation of monitors. We can also set up multi-monitor configurations and diagnose display issues.
To install xrandr on Debian-based distros, we can use the APT package manager:
$ sudo apt-get install x11-xserver-utilsAlternatively, we can use Pacman for Arch Linux:
$ pacman -S xrandrFinally, for Fedora Linux, we can use the DNF package manager:
$ sudo dnf install xrandrOnce installed, we can proceed with using it to get resolutions for all connected monitors.
Let’s display the monitor resolution using xrandr:
$ xrandr
Screen 0: minimum 320 x 200, current 3286 x 1200, maximum 16384 x 16384
eDP-1 connected primary 1366x768+0+0 (normal left inverted right x axis y axis) 309mm x 174mm
   1366x768      59.99*+  40.00
   1360x768      59.80    59.96
   1280x720      60.00    59.99    59.86    59.74
   1024x768      60.04    60.00
...
HDMI-1 connected 1920x1200+1366+0 (normal left inverted right x axis y axis) 518mm x 324mm
   1920x1200     59.95*+
   1920x1080     60.00    50.00    59.94    24.00    23.98
   1920x1080i    60.00    50.00    59.94
   1600x1200     60.00
   1280x1024     75.02    60.02
   1152x864      75.00
...
DP-1 disconnected (normal left inverted right x axis y axis)
HDMI-2 disconnected (normal left inverted right x axis y axis)
The xrandr command lists all the available display settings by default, including the current resolution.
Lines starting with “HDMI-1” or “eDP-1” show the connected display’s name, and the current resolution is marked with the “*+” characters.
From the output above, the current screen resolution is 1366×768 pixels with a refresh rate of 59.99Hz. We also have a secondary monitor connected through a HDMI cable with a resolution of 1920×1200 pixels.
We can also pipe the xrandr command with the grep and awk commands to only display the resolution of all connected monitors and exclude any extra information:
$ xrandr | grep "*" | awk '{ print $1 }'
1366x768
1920x1200
Here, we’re using grep to match all lines with an asterisk “*”, we then pipe the output to the awk command that only prints the first column containing the resolution.
The first line in the output represents the resolution of the primary display, while the second line represents the resolution of another connected monitor.
The Extended Display Identification Data (EDID) is a metadata format for display devices and describes their capabilities to a video source such as a graphics card.
EDID is a data structure stored in the monitor’s EEPROM (Electrically Erasable Programmable Read-Only Memory), and it contains detailed information about the monitor’s capabilities. This includes supported display modes, resolutions, refresh rates, manufacturer details, and more.
The data structure includes the manufacturer name and serial number, product type, display size, filter type, and more.
We can use the Linux get-edid utility to extract and interpret this information.
Let’s start with installing the get-edid utility from the local package manager in case it isn’t available.
On Debian-based systems, we can use this command:
$ sudo apt install read-edidAlternatively, on Arch Linux, we can employ this command:
$ pacman -S read-edidFinally, on Fedora Linux, we can use the DNF package manager:
$ sudo dnf install read-edidThe read-edid utility comprises the get-edid and parse-edid tools that we’ll use to get and parse EDID data.
Let’s retrieve and parse EDID data:
$ get-edid | parse-edid
...
2 potential busses found: 3 7
Will scan through until the first EDID is found.
...
Section "Monitor"
	Identifier "DELL U2410"
	ModelName "DELL U2410"
...
Modeline 	"Mode 17" 148.50 1920 2008 2052 2200 1080 1084 1089 1125 +hsync +vsync
...
Option "PreferredMode" "Mode 17"
The monitor EDID data shows information about all supported resolutions for the monitor. So, we should see multiple entries if the monitor supports different resolution modes.
We should note that this command displays information about all supported resolutions, not the current screen resolution.
In the command above, we’re using the get-edid command to retrieve EDID data. However, the information is retrieved in binary format, so we’re piping it to the parse-edid command that converts it to a human-readable format.
The Linux hwinfo command-line utility is a free and open-source tool for probing and reporting hardware information.
It searches through all hardware present in a Linux system and displays extensive details of each hardware device available, including Monitors.
hwinfo was initially developed for openSUSE operating systems. However, it was later embraced by several other Linux distros, including Debian, Arch Linux, Fedora, and more.
To install hwinfo in Debian, we can use APT:
$ sudo apt install hwinfoOn Arch Linux, we can use Pacman:
$ sudo pacman -S hwinfoFinally, on Fedora Linux, we need to first enable the EPEL repository:
$ sudo dnf install epel-releaseThen we can install hwinfo on Fedora Linux:
$ sudo yum install hwinfoOnce installed, let’s find out how we can use it to display information about connected monitors.
Let’s display monitor resolution with the hwinfo command:
$ sudo hwinfo --monitor
...
Model: "DELL U2410"
  Vendor: DEL "DELL"
...
Detailed Timings #0:
     Resolution: 1920x1200
     Horizontal: 1920 1968 2000 2080 (+48 +80 +160) -hsync
       Vertical: 1200 1203 1209 1235 (+3 +9 +35) +vsync
    Frequencies: 154.00 MHz, 74.04 kHz, 59.95 Hz
  Driver Info #0:
    Max. Resolution: 1920x1200
...
The output gives us detailed information about all monitors available on the system.
The information includes the monitor’s name, manufacturer, manufacturing date, current resolution, max resolution, and more.
We can also use the GUI to display resolutions for all monitors connected to the system.
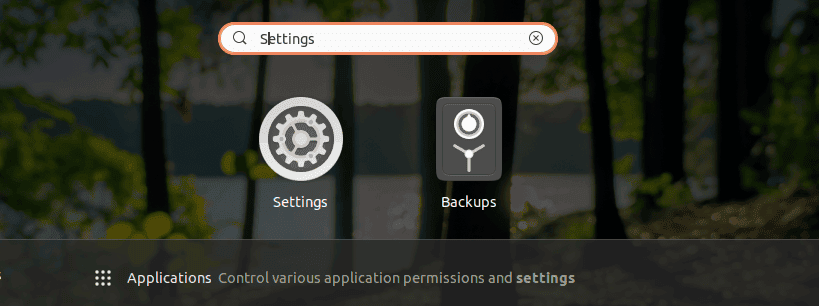
To display monitor resolution information through the GUI, we need to search for Settings on the application menu and click on it:
Once open, we’ll see an option that reads “Displays” on the left navigation sidebar:
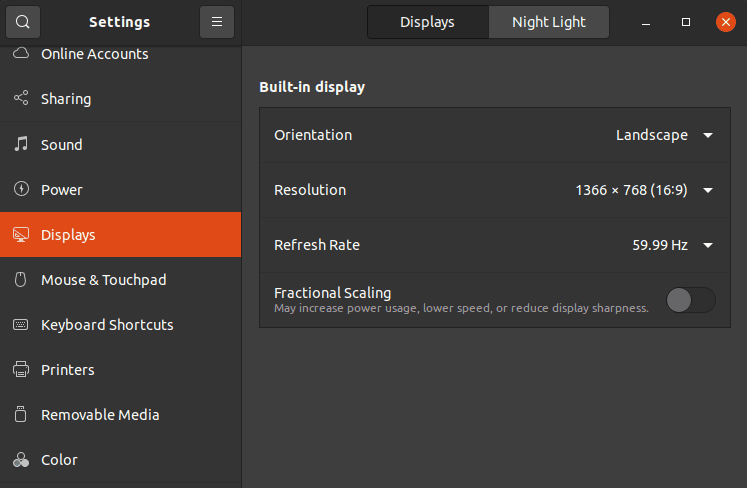
From the Displays menu, we can see all the information about all the available monitors. This information includes the orientation, resolution, and refresh rate. We can also tweak the details to match our preference from the same section.
In the example above, the monitor has a resolution of 1366×768 pixels, with a refresh rate of 59.99Hz.
In this article, we’ve explored different methods of displaying the monitor resolution on Linux systems.
The first three methods represent command-line utilities we can use to display monitor resolution information, and each method displays varying amounts of information about the monitors available. However, we can filter the information with tools such as grep to only output the desired information.
Finally, we covered how to display monitor resolution information through the GUI. This method is more beginner-friendly and suitable for users who don’t have much experience with the terminal.