

Learn through the super-clean Baeldung Pro experience:
>> Membership and Baeldung Pro.
No ads, dark-mode and 6 months free of IntelliJ Idea Ultimate to start with.
Learn through the super-clean Baeldung Pro experience:
>> Membership and Baeldung Pro.
No ads, dark-mode and 6 months free of IntelliJ Idea Ultimate to start with.
Screenshot applications are essential utilities for capturing and saving on-screen content. They’re helpful in creating how-to guides, notes, tutorials, etc. There are numerous GUI based utilities available. In this article, we’ll focus on terminal commands for taking screenshots on Linux using terminal commands.
We’ll explore five terminal commands for capturing screenshots, covering import, Scrot, Gnome Screenshot, Shutter, and Flameshot.
The import utility is part of the ImageMagick suite of command line utilities that are used to modify and manipulate images. It’s very simple to take a screenshot using the import utility. All we need is to type import followed by the file name we want to save it with:
$ import image.pngThis transforms the cursor into crosshairs, enabling us to drag and select the desired area for capture.
Sometimes, we’re interested in capturing the entire screen. We can do this using the -window root option followed by the capture name:
$ import -window root image.pngWe might also like to save a screenshot with a date stamp. Let’s say we want to save the screenshot as 2024-01-17.png:
$ import -window root `date +%Y-%m-%d`.pngWith import, we can also capture an open window by its ID or title. Let’s capture a screenshot of the Calculator application and save it with the name image.png:
$ import -window "Calculator" image.pngTo find the ID or title of an opened window, we can use:
$ wmctrl -lx
0x026099b1  0 gnome-terminal-server.Gnome-terminal  ubuntu ubuntu@ubuntu: ~
0x03400008  0 org.gnome.Nautilus.Org.gnome.Nautilus  ubuntu Home
0x02c003e3  0 display-im6.q16.Display-im6.q16  ubuntu ImageMagick:
0x02800008  0 gnome-calculator.Gnome-calculator  ubuntu Calculator
The wmctrl -lx command lists currently opened windows, displaying the window ID in the first column and the window title in the last column.
Scrot (SCReenshOT) is a simple and lightweight screenshot utility that helps capture screenshots from the command line. With Scrot, we can grab the full screen, a particular window or any area on the screen.
Let’s take a screenshot using Scrot:
$ scrotScrot takes a screenshot of the entire screen. However, we can also take a screenshot of a particular window by using different command-line options.
For instance, to take a screenshot of the currently focused window which is most likely the terminal, we’d run:
$ scrot -uUsing the -s option with Scrot, we can interactively select a window or any rectangular portion of the screen using a mouse pointer:
$ scrot -sIt saves a screenshot with a date stamp in the current directory. However, we can also change the filename and the directory. To save the screenshot with a specific file name let’s say image.jpg, we’d specify it as:
$ scrot image.jpgSimilarly, to save the screenshot in another directory, we go inside that directory using the cd command and run the scrot command.
Scrot immediately takes a screenshot after running the command. For a delayed capture, we can use the -d option followed by the desired time in seconds:
$ scrot -d 10This would take a screenshot after 10 seconds of running the command.
The GNOME Screenshot is a Gnome utility to capture screenshots from command line. Similar to Scrot, it also enables us to capture the whole screen, the current active window, or a specific area on the screen.
Let’s capture the whole screen using the GNOME Screenshot utility:
$ gnome-screenshotAny screenshot we take with gnome-screenshot ends up in the ~/Pictures directory with the date and time stamp as a filename.
We can also save the screenshot under a different name rather than the default naming style. We can do this using the -f option followed by the file name:
$ gnome-screenshot -f image.pngTo capture the active window instead of the whole screen, we can use the -w option:
$ gnome-screenshot -wSimilarly, if we’re only interested in capturing a specific area, we can use the -a option:
$ gnome-screenshot -aThis allows us to select the rectangular area manually using the mouse for capturing.
Now, let’s use the delay feature. Using the -d option, we can add a delay before running the command:
$ gnome-screenshot -d 5This would capture a screenshot after a delay of 5 seconds.
Shutter is another command-line screenshot utility with plenty of features to fill out most of our screenshot needs. Beyond capturing screenshots, Shutter also provides the option to edit the images.
Let’s capture a screenshot of the whole screen from the terminal using the Shutter utility:
$ shutter -fLike other utilities, it’s also possible to capture a screenshot of the active window we’re working in:
$ shutter -aSimilarly, to capture screenshots of a particular area, we can use:
$ shutter -sTo save the screenshot with a specific filename, we can use the -o option with the shutter command:
$ shutter -o image.pngThis would save the file as image.png instead of default naming style.
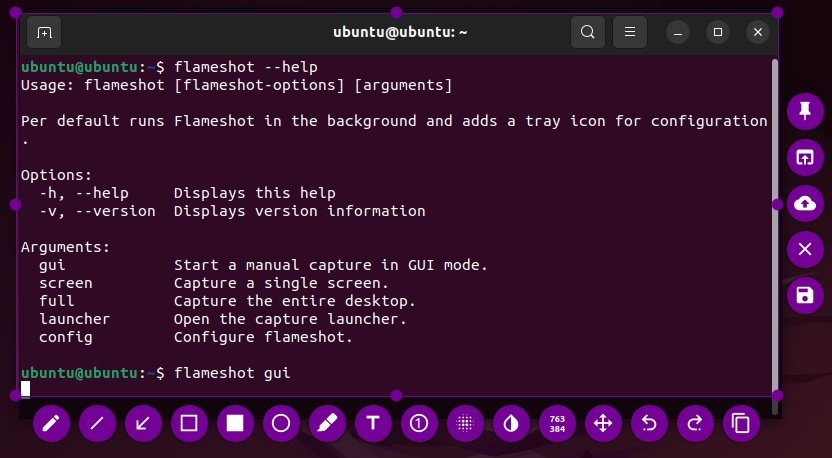
Now, let’s look at the Flameshot utility that is another simple but powerful utility to capture screenshots on Linux. Flameshot is a free and open-source command line utility that comes with a lot of essential features.
To capture a screenshot interactively in a GUI mode, we’d type:
$ flameshot guiThis runs the Flameshot utility in GUI mode letting us capture the entire screen or select a clipping region.
Once the screenshot is taken, we can then annotate it using different shapes, arrows, and text and then save it to a specific location:
Alternatively, we can also capture the entire screen and save it to a desired path:
$ flameshot full -c -p <path>The -c option in the above command copies the captured screenshot to a clipboard, while the -p option saves it to the specified path.
Like other screenshot utilities, it also enables capturing a screenshot with a delay:
$ flameshot full -p <path> -d 3000This command captures the full screen after a delay of 3000 milliseconds.
In this guide, we discussed some terminal commands to take a screenshot in a Linux system. Using command-line screenshot tools can increase efficiency by quickly capturing screenshots without the need for navigating through GUI menus. Whether it’s an entire screen or a portion of a screen, all of the tools we discussed do a pretty good job of capturing and saving images.