

Yes, we're now running our only Summer Sale. All Courses are 30% off until 20th July, 2026:
Learn through the super-clean Baeldung Pro experience:
>> Membership and Baeldung Pro.
No ads, dark-mode and 6 months free of IntelliJ Idea Ultimate to start with.
1. Overview
In this tutorial, we’ll learn how to annotate images in Linux. First, we’ll get familiar with the ImageMagick tool and see how we can annotate images through the command line. This would help us in scenarios where we need to automate the image annotation process via scripting.
Afterward, we’ll use tools like Shutter and Pinta to quickly annotate images via a GUI.
2. ImageMagick
ImageMagick is a set of tools that lets us create, edit, and convert images.
It comes in handy if we have a bunch of images and we want to quickly annotate, convert, and optimize using a script, thereby making the process more efficient. However, it should be used for simple annotations because there’s no GUI.
2.1. Installation
By default, it’s not installed on most Linux distributions. However, we can install it with a package manager using its canonical name imagemagick:
$ sudo apt install -y imagemagickOnce installed, let’s verify it:
$ identify --version
Version: ImageMagick 7.1.1-15 Q16-HDRI x86_64 21298 https://imagemagick.org
In the next sections, we’ll add annotations to images using these tools.
2.2. Adding Text to Images
ImageMagick comes with the convert utility, which lets us crop, edit, apply filters, convert between image formats, and more.
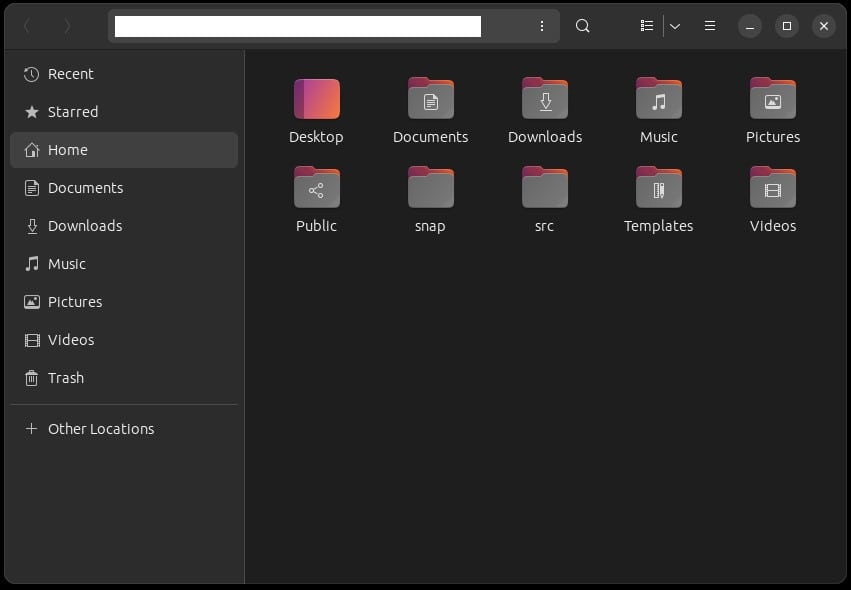
As an example, we’ll use a simple screenshot image and add subtitle text to it on the bottom left:
$ convert gnome-files.png -gravity SouthWest -pointsize 16 -fill white -font "Futura-Bold" -annotate +25+25 "Nautilus on Ubuntu 22.04" gnome-files.jpgLet’s break this down:
- -gravity sets the positioning reference point to SouthWest, which is the bottom left of the image
- -pointsize sets the font size to 16
- -fill specfies the font color, which is white
- -font selects the font to be Futura Bold
- -annotate specfies the position of the annotations in pixels, which is 25 from the left and 25 from the bottom
- the second last argument is the text that we want to place in the image
- gnome-files.jpg is the output file name
The command takes the PNG image and processes it. Then, it converts the image to JPG based on the output file extension. Once executed, it produces an image:

2.3. Adding Shapes to Images
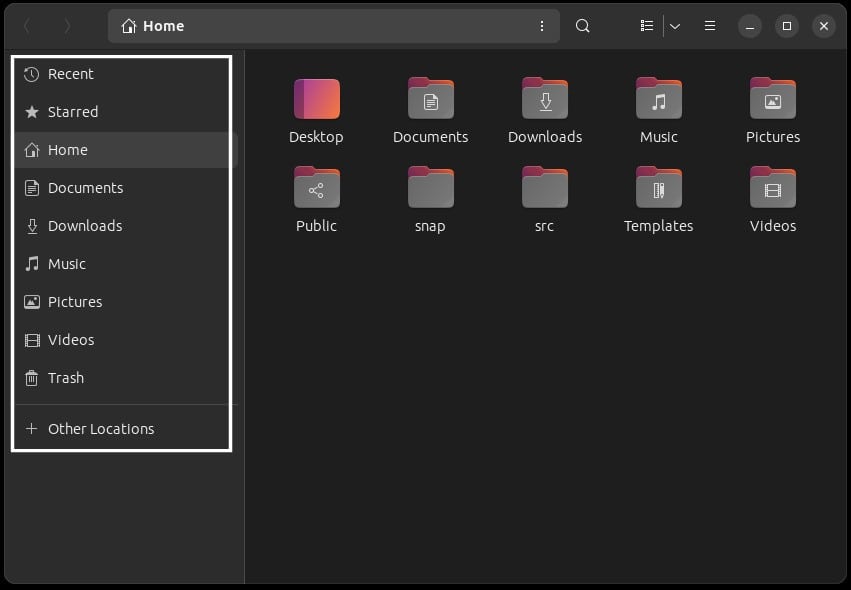
We can also add shapes to images with the -draw action. As an example, let’s redact the path bar in our previous screenshot:
$ convert gnome-files.png -fill white -draw "rectangle 115,16,480,36" gnome-files.jpgHere’s a breakdown:
- -fill sets the color of the shape to white
- -draw specifies the drawing options:
- rectangle sets the drawing shape to be a rectangle
- 115,16,480,36 is the geometry for X₁, Y₁, X₂, and Y₂ respectively
Let’s take a look at the output:
We can add as many drawings as we like in a single command:
$ convert gnome-files.png -fill white -draw "rectangle 115,16,480,36" -draw "circle 128,128,50,50" gnome-files.jpgFor the circle, the geometry is Cₓ, Cᵧ, Rₓ, and Rᵧ. Cₓ and Cᵧ are the coordinates for the circle, and Rₓ and Rᵧ are the radii of the circle.
2.4. Adding Outlines to Images
Similarly, we can also add outlines that are made up of strokes instead of color-filled shapes. For instance, let’s wrap the sidebar items in a rectangle outline:
$ convert gnome-files.png -stroke white -strokewidth 3 -fill none -draw "rectangle 12,56,230,450" gnome-files-outline.jpgLet’s break this down:
- -stroke sets the stroke color to white
- -strokewidth selects the stroke size to be 3 pixels
- -fill is set to none because we don’t want to create a color-filled shape
Once run, it generates the following image:
In the same way, we can add as many outlines of different shapes as we need.
2.5. Adding Images to Images
We can also add images to existing images. It comes in handy in scenarios where we need to watermark our images or add branding.
As an example, we’ll add the Ubuntu logo to the image:
$ convert gnome-files.png ubuntu-logo.png -gravity SouthWest -geometry "+25+25" -composite gnome-files-logo.jpgHere’s what happens:
- gnome-files.png and ubuntu-logo.png are two input images that we combine
- -composite tells ImageMagick to overlay the logo image onto the background image
Once run, it outputs a single image file with both images composited:
In the next section, we’ll look at the GUI alternatives to ImageMagick.
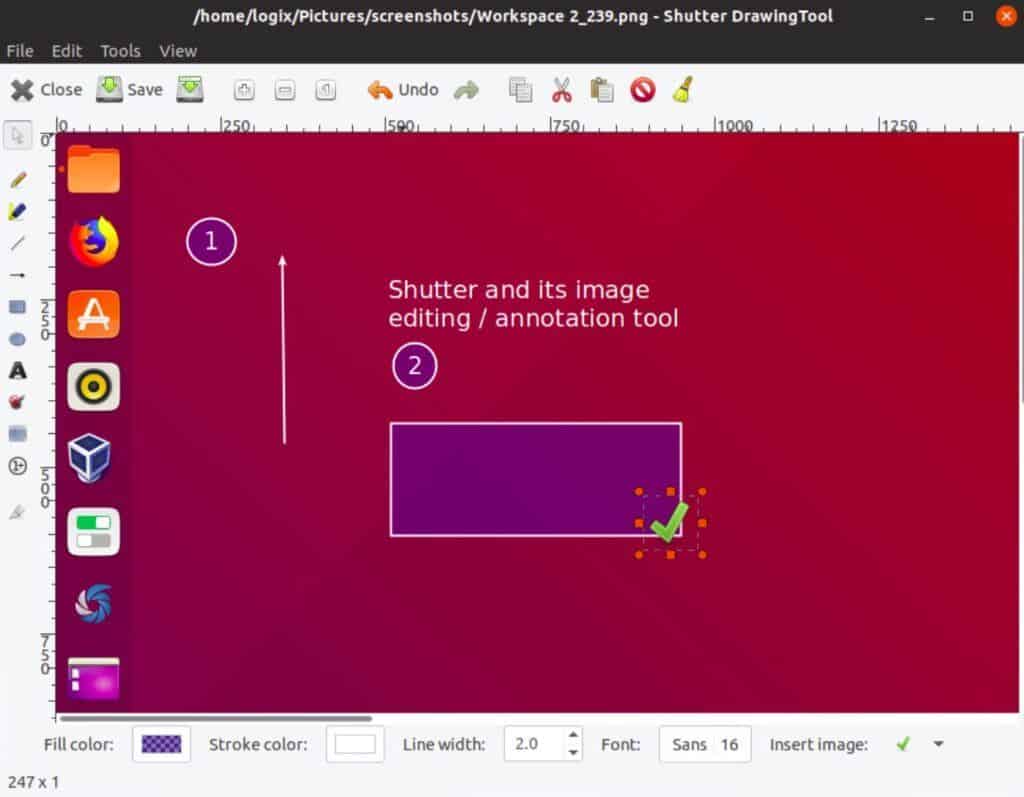
3. Shutter
Shutter is a feature-rich screenshot tool that lets us capture, annotate, and share screenshots.
We can install it from the official package repositories using its canonical name shutter:
$ sudo apt install -y shutterOnce installed, we can launch it from the applications menu or via the shutter command.
Afterward, we can take screenshots using its GUI and annotate the image as illustrated below:
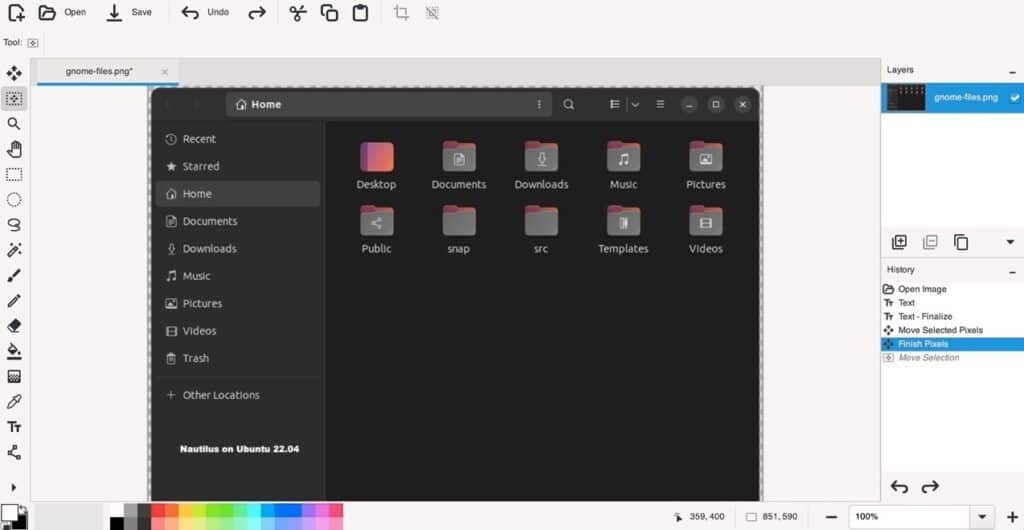
4. Pinta
Pinta is a lightweight bitmap image editing software that provides basic features for annotations and drawing.
We can install it from the official package repository using its canonical name pinta:
$ sudo apt install -y pintaOnce installed, we launch it from the applications menu and open an image file by heading over to File → Open. Then, we can add annotations to the image using the tools from the toolbar:
5. Conclusion
In this article, we learned how we can annotate images in Linux. For that purpose, we used ImageMagick to quickly annotate images by adding text, shapes, and outlines using the Linux CLI.
Apart from that, we also explored two other tools: Shutter and Pinta. The former allows us to take screenshots and annotate the image, while the latter lets us annotate and edit bitmap images.