

Yes, we're now running our only Summer Sale. All Courses are 30% off until 20th July, 2026:
Installing Boot-Repair on a Ubuntu Live Medium
Last updated: January 16, 2024
Learn through the super-clean Baeldung Pro experience:
>> Membership and Baeldung Pro.
No ads, dark-mode and 6 months free of IntelliJ Idea Ultimate to start with.
1. Overview
During the installation of Ubuntu, the bootloader may get configured poorly. Similarly, when dual-booting Linux and Microsoft Windows, the bootloader can become corrupt. This prevents the system from starting up properly.
Luckily, a handy tool known as Boot-Repair exists. This tool can automatically detect and resolve common boot issues.
In this tutorial, we’ll see how to install Boot-Repair on an Ubuntu live USB. Following that, we’ll run this tool in the live environment. Thus, without reinstalling Ubuntu or installing a new operating system, we can potentially fix startup issues.
2. The Boot-Repair Tool
Boot-Repair is a user-friendly tool that can solve many boot issues:
- missing operating systems from the boot options
- failure to boot into Microsoft Windows or a Linux distribution
- system stuck at grub while starting
Boot-Repair tries to automatically reinstall and configure the bootloader. As a result, it ensures all detected operating systems can be booted into.
3. Boot-Repair Installation
We can install Boot-Repair on different devices and in different environments. For example, we can use a live CD or live USB, as well as directly install it within any Debian-based system.
Here, we assume we’ve already created a live USB of Ubuntu. So, let’s install Boot-Repair on our new live USB.
3.1. Add PPA Repository
First, we plug in the live USB and boot the system from it. Next, we select the Try Ubuntu option to start a live OS session.
Further, we enable the Boot-Repair PPA (Personal Package Archives) from the terminal:
$ sudo add-apt-repository ppa:yannubuntu/boot-repairThe above command asks for confirmation on the addition of a new PPA. Here, we simply press the Return key to continue.
Next, we update the source list using apt:
$ sudo apt updateThis adds the new PPA containing the Boot-Repair packages.
3.2. Verify Repository List
Before we install Boot-Repair, let’s confirm the new PPA. For this, we select the tool’s repository using the grep command:
$ grep yannu /etc/apt/sources.list.d/*
/etc/apt/sources.list.d/yannubuntu-...
...
The above command shows the Boot-Repair PPA in the output.
In addition, we can also use the apt-cache command to see the details of Boot-Repair:
$ apt-cache policy boot-repair
...
 Installed: (none)
Candidate: 4ppa2075
Version table:
Let’s now move to the tool’s installation.
3.3. Install Boot-Repair
Now that we have the new PPA, we can install the Boot-Repair package:
$ sudo apt install -y boot-repair
Reading package lists... Done
Reading state information... Done
...
As another option, we can also use the downloadable .deb packages or source code. Both are available on Launchpad.
4. Running Boot-Repair
After installing Boot-Repair, we can start it from the terminal:
$ boot-repairAlternatively, we can use the Application menu to run it.
Boot-Repair has a fairly simple interface. By default, it automatically runs some scanning operations at start-up.
On the main window, there is a Recommended repair button:
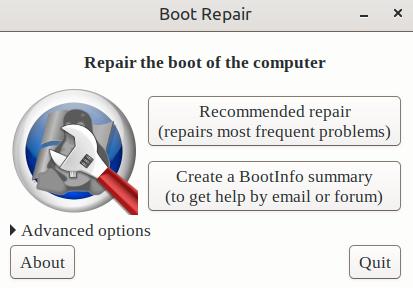
Let’s run the Recommended repair option which automatically fixes common boot problems.
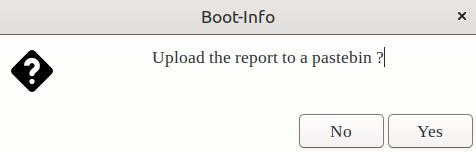
Consequently, Boot-Repair prompts for sending the report to a Pastebin:
Further, it creates a BootInfo summary:

Then, the tool shows a status message for any actions it performed:
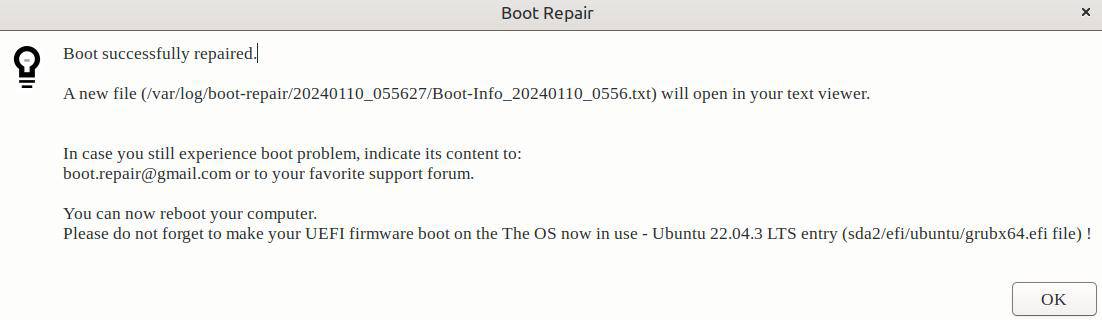
Finally, a full summary opens in a text editor:
boot-repair-xxx
==== Boot Repair Summary ===
Recommended repair:
The default repair of the...
...
Also, on the main window, we have a Create BootInfo Summary button. After the repair work, we can use it to receive a detailed report. Further, the report can be helpful when attempting to get help on community forums.
Finally, we can remove the live USB and reboot the system. This way, we verify whether the boot issues are resolved.
5. Advanced Options
Within the Boot-Repair tool, users also have some advanced options. In particular, the Advanced options section lets us set specific boot-related settings.
In fact, we can perform many operations:
- reinstall GRUB
- repair file systems
- show or hide boot options
Actually, there are many other Advanced options as well.
With these features, users can manually configure the repair and boot process. However, in most cases, the automatic repair is sufficient.
6. Conclusion
In this article, we saw how to install and use Boot-Repair on a live USB. Above all, installing Boot-Repair on a live medium is an easy way to repair boot issues without having a separate machine for the purpose. At the same time, it doesn’t make any permanent changes to our system.
To summarize, there are five key steps to using Boot-Repair:
- boot into a live environment such as Ubuntu
- add Boot-Repair PPA
- install Boot-Repair
- run Boot-Repair and fix issues
- reboot
With these steps, Boot-Repair can fix many common startup problems.