1. Overview
In this tutorial, we’ll demonstrate how to use Swagger annotations to make our documentation more descriptive. First, we’ll learn how to add a description to different parts of the APIs, like methods, parameters, and error codes. Then we’ll see how to add request/response examples.
2. Project Setup
We’ll create a simple Products API that provides methods to create and get products.
To create a REST API from scratch, we can follow this tutorial from Spring Docs to create a RESTful web service using Spring Boot.
The next step will be to set up the dependencies and configurations for the project. We can follow the steps in this article for setting up Swagger 2 with a Spring REST API.
3. Creating the API
Let’s create our Products API and check the documentation generated.
3.1. Model
Let’s define our Product class:
public class Product implements Serializable {
    private long id;
    private String name;
    private String price;

    // constructor and getter/setters
}
3.2. Controller
Let’s define the two API methods:
@RestController
@Tag(name = "Products API")
public class ProductController {

    @PostMapping("/products")
    public ResponseEntity<Void> createProduct(@RequestBody Product product) {
        //creation logic
        return new ResponseEntity<>(HttpStatus.CREATED);
    }

    @GetMapping("/products/{id}")
    public ResponseEntity<Product> getProduct(@PathVariable Long id) {
        //retrieval logic
        return ResponseEntity.ok(new Product(1, "Product 1", "$21.99"));
    }
}
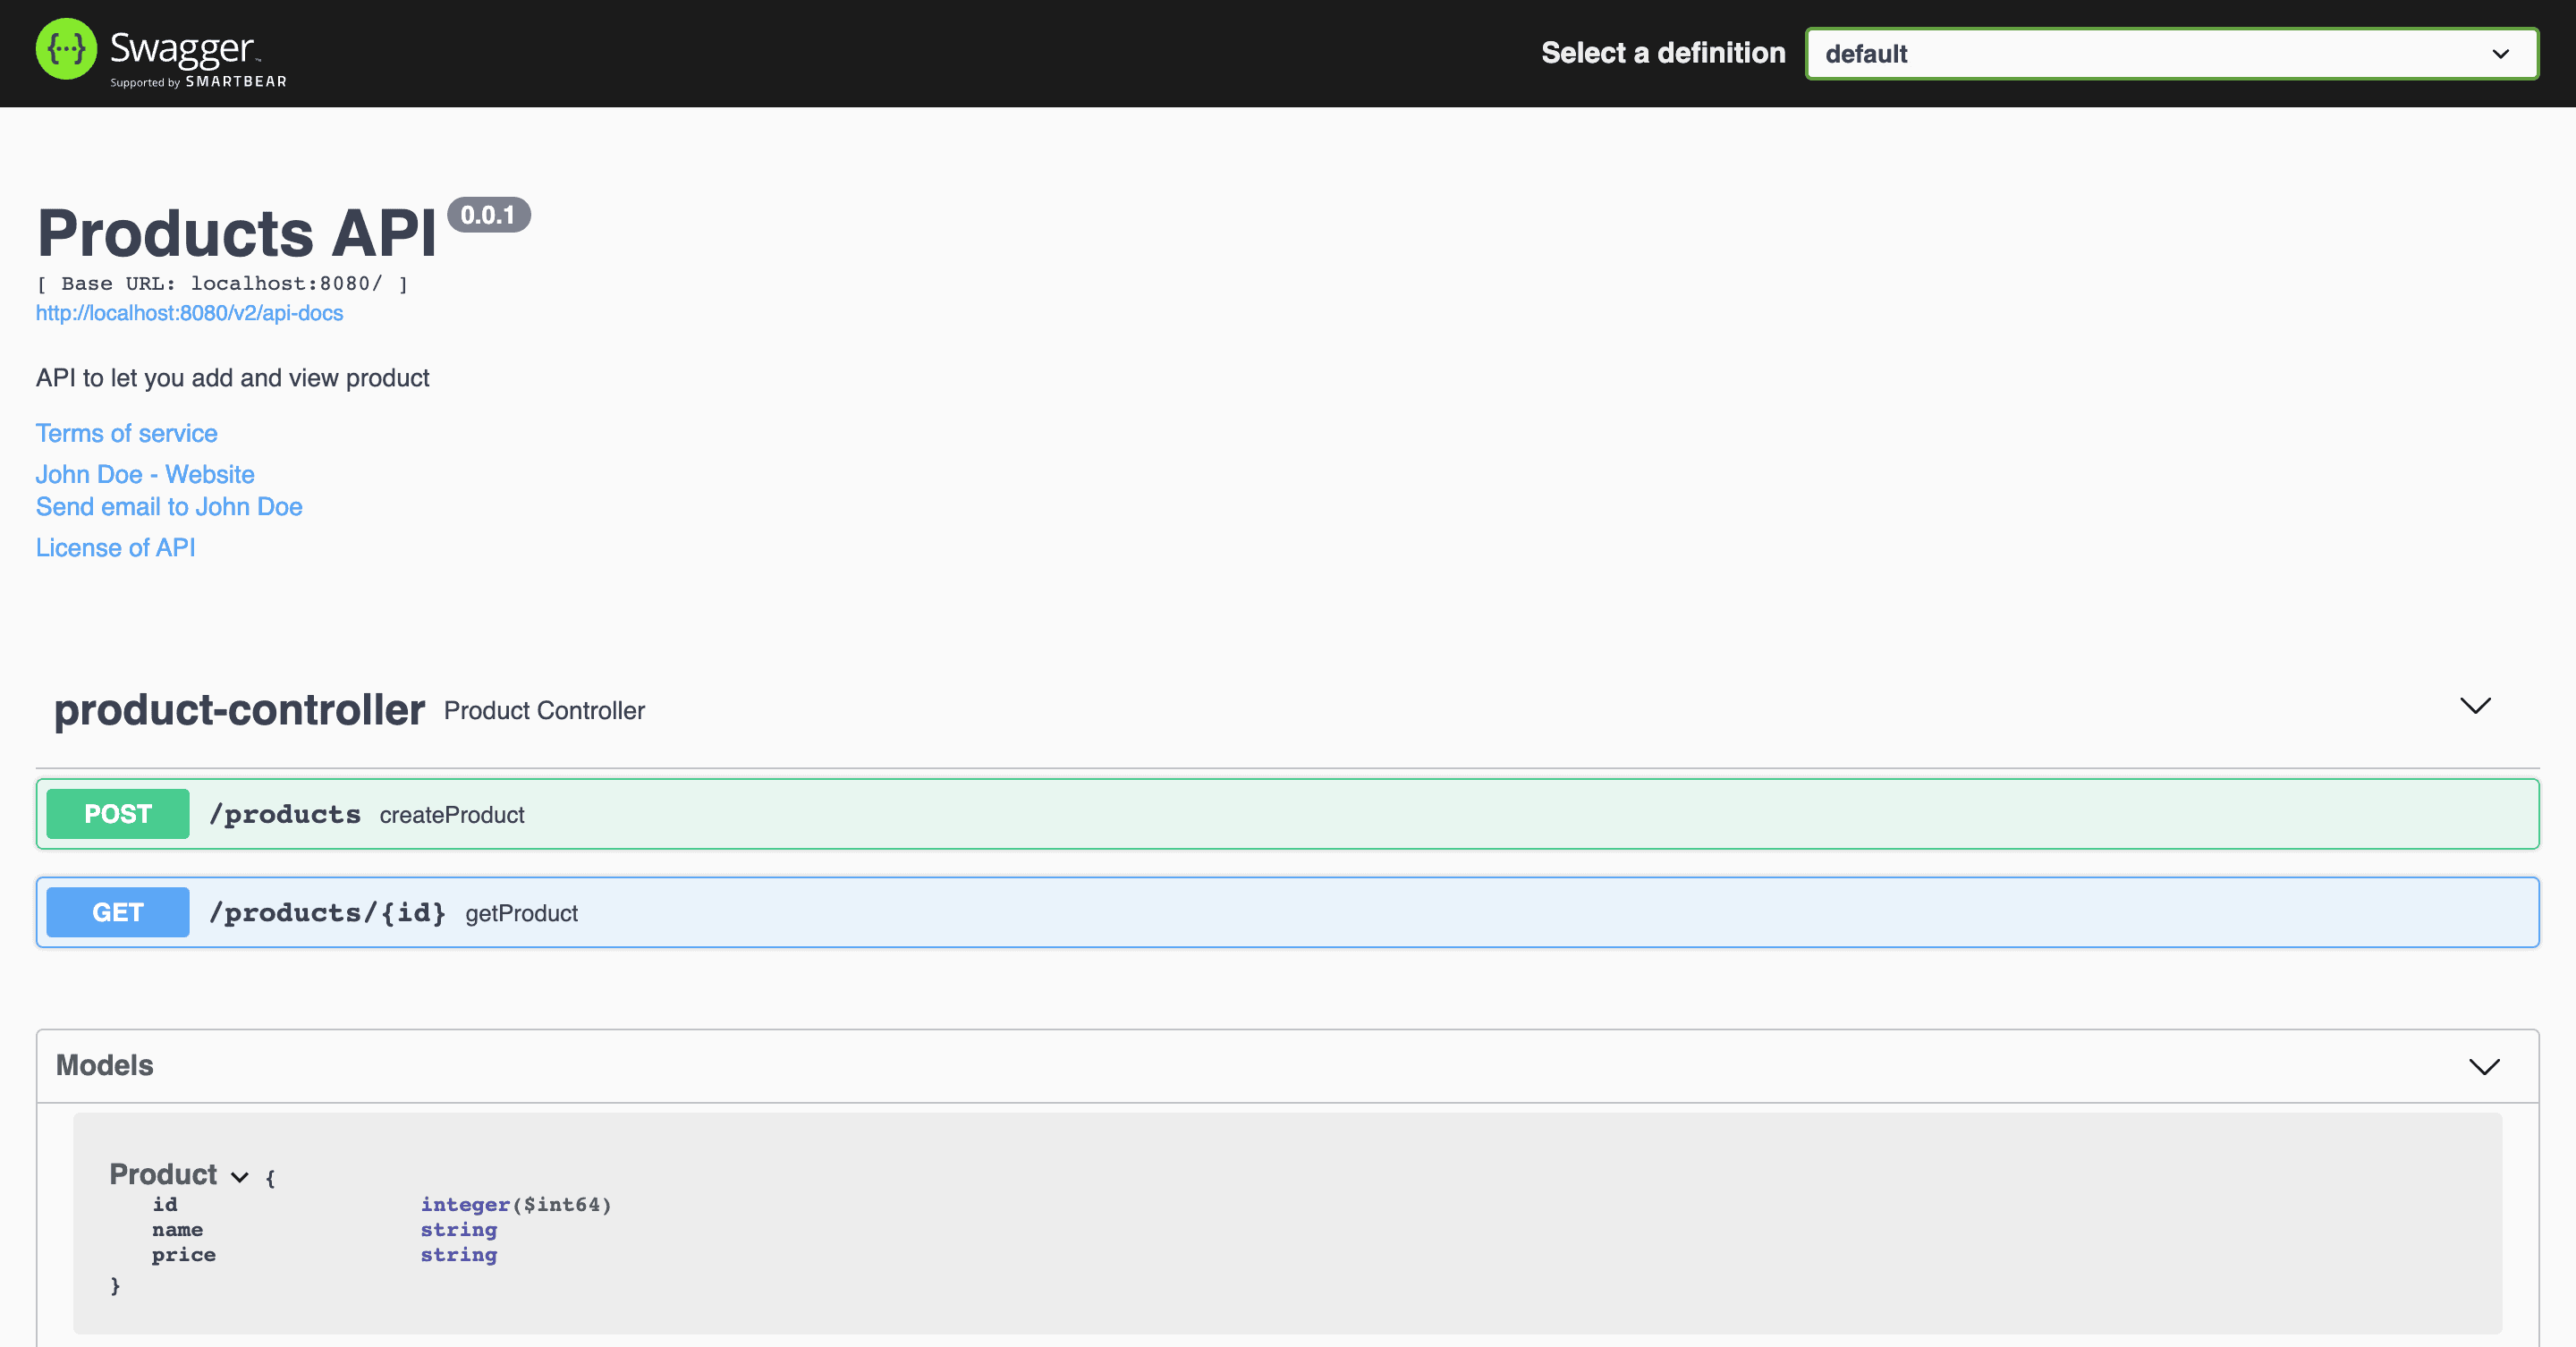
When we run the project, the library will read all the exposed paths and create corresponding documentation.
Let’s view the documentation at the default URL http://localhost:8080/swagger-ui/index.html:

We can further expand the controller methods to look at their respective documentation. Next, we’ll look at them in detail.
4. Making Our Documentation Descriptive
Now let’s make our documentation more descriptive by adding descriptions to different parts of the methods.
4.1. Add Description to Methods and Parameters
Let’s look at a few ways to make the methods descriptive. We’ll add descriptions to the methods, parameters, and response codes. Let’s start with the getProduct() method:
@Operation(summary = "Get a product by id", description = "Returns a product as per the id")
@ApiResponses(value = {
        @ApiResponse(responseCode = "200", description = "Successfully retrieved"),
        @ApiResponse(responseCode = "404", description = "Not found - The product was not found")
    })
@GetMapping("/products/{id}")
public ResponseEntity<Product> getProduct(@PathVariable("id") @Parameter(name = "id", description = "Product id", example = "1") Long id) {
    //retrieval logic
    return ResponseEntity.ok(new Product(1, "Product 1", "$21.99"));
}
@Operation defines the properties of an API method. We added a name to the operation using the value property, and a description using the notes property.
@ApiResponses is used to override the default messages that accompany the response codes. For each response message we want to change, we need to add an @ApiResponse object.
For example, let’s say the product isn’t found, and our API returns an HTTP 404 status in this scenario. If we don’t add a custom message, the original message “Not found” can be hard to understand. The caller may interpret it as the URL is wrong. However, adding a description that “The product was not found” makes it clearer.
@Parameter defines the properties of method parameters. It can be used along with the path, query, header, and form parameters. We added a name, a value (description), and an example for the “id” parameter. If we don’t add the customization, the library will only pick up the name and type of the parameter, as we can see in the first image.
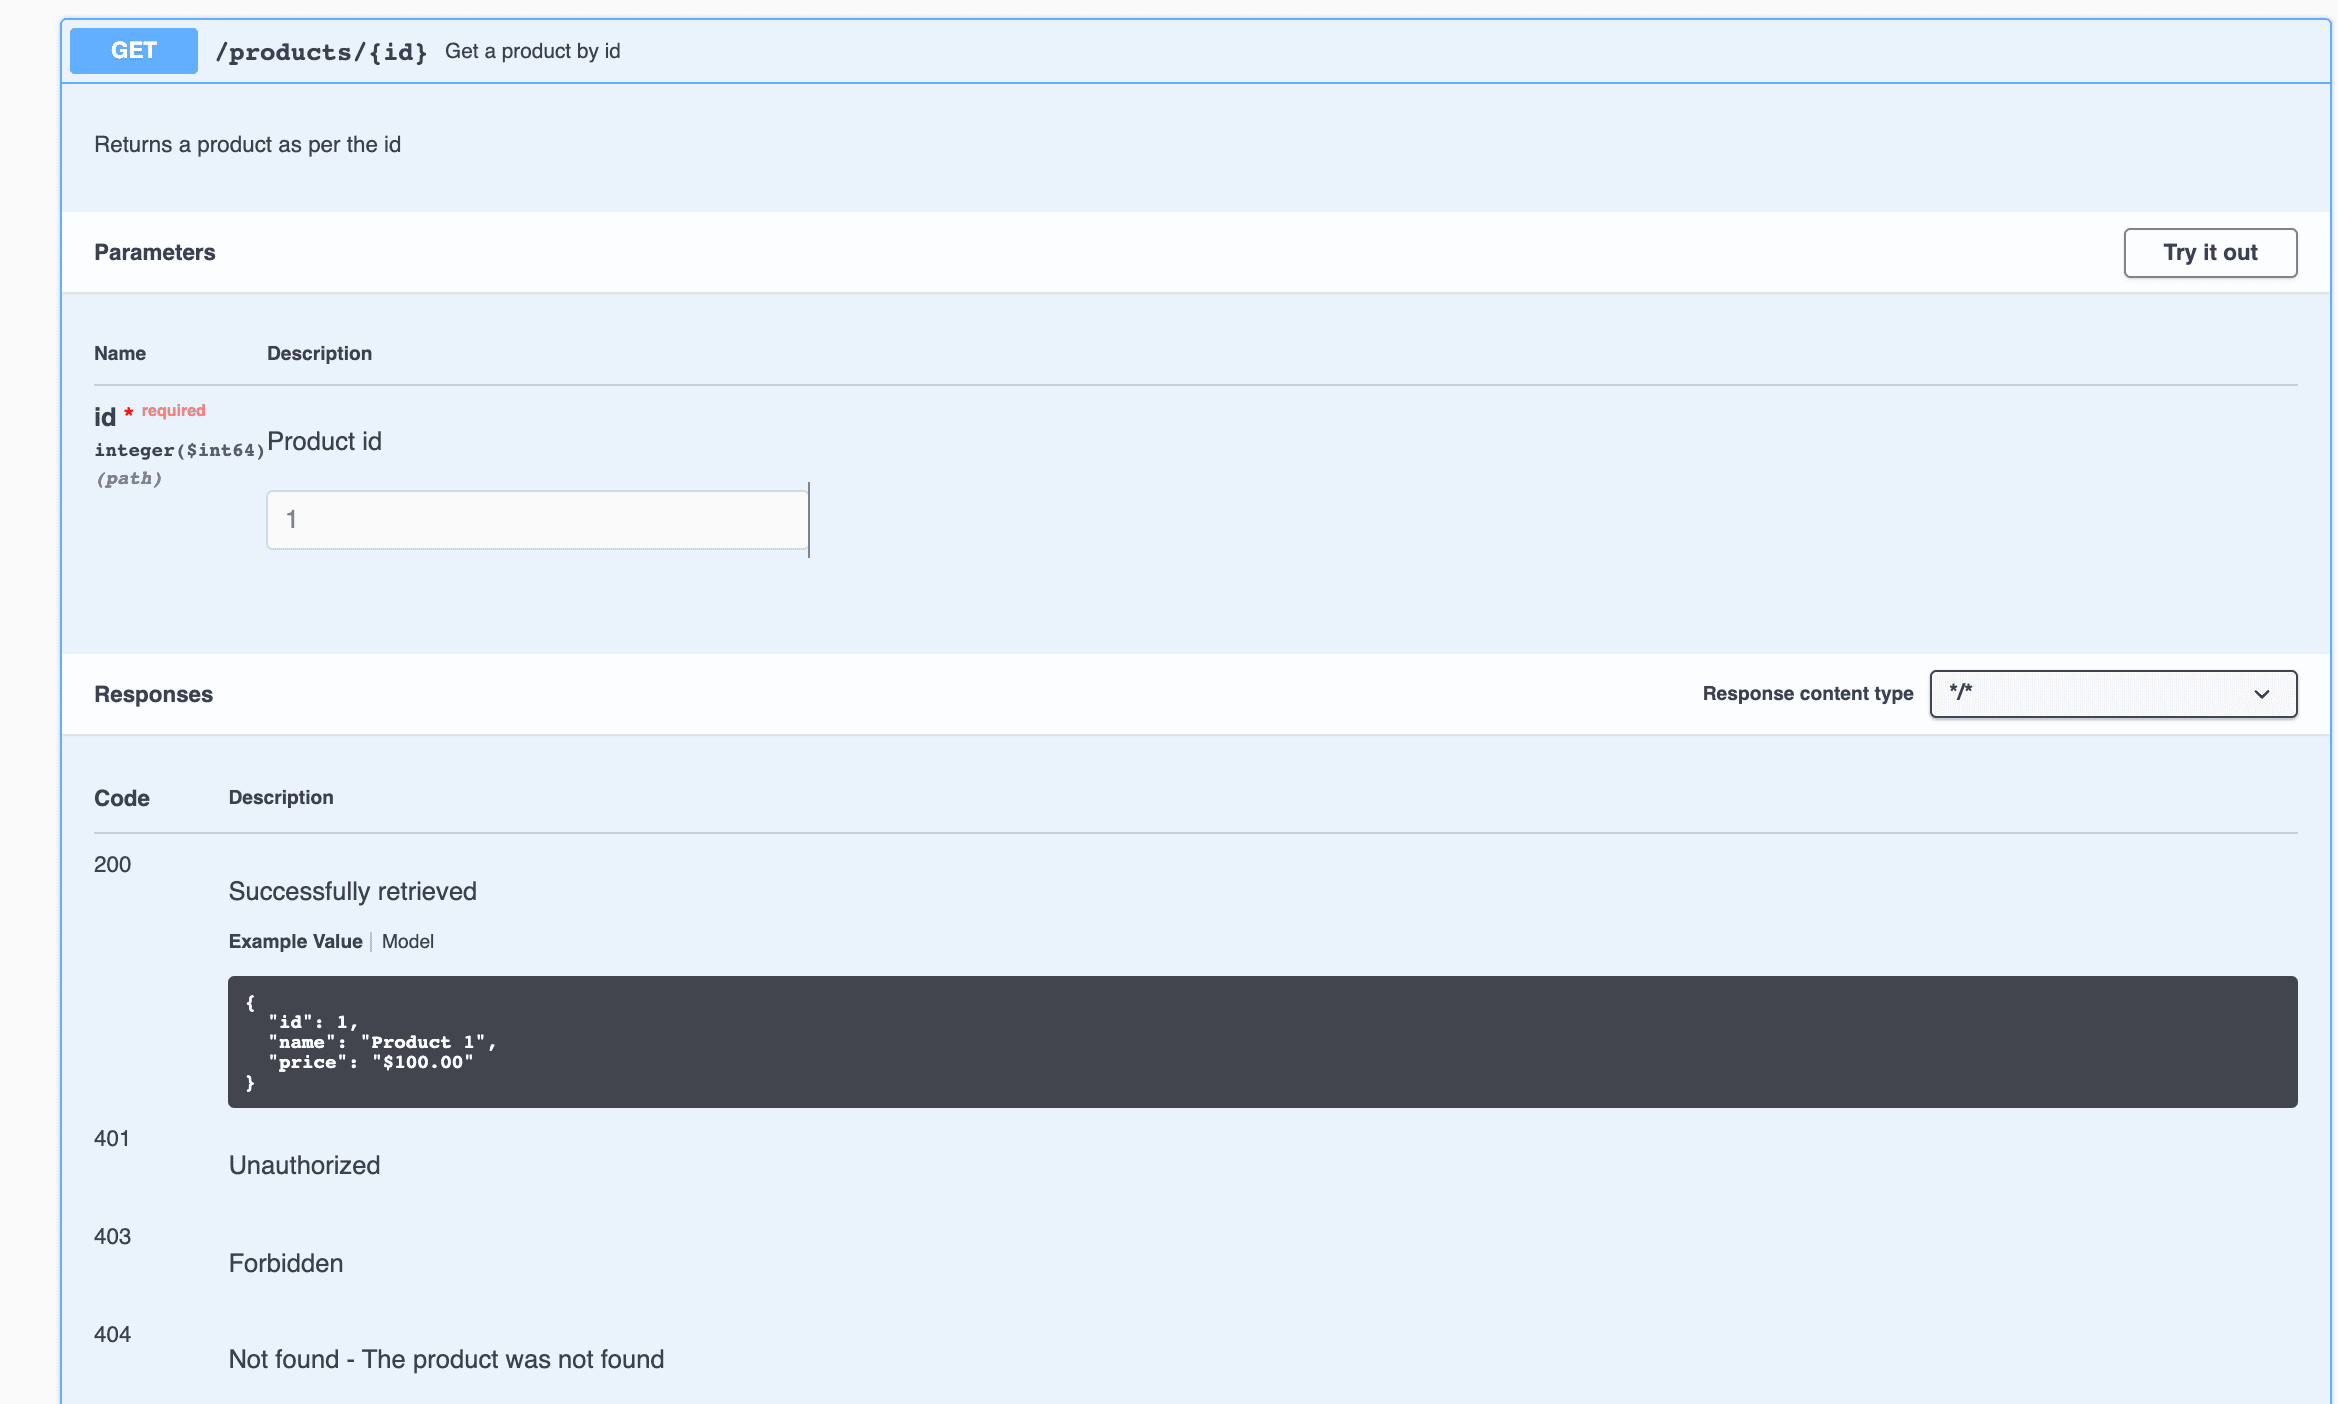
Let’s see how this changes the documentation:

Here we can see the name “Get a product id” alongside the API path /products/{id}. We can also see the description just below it. Additionally, in the Parameters section, we have a description and an example for the field id. Finally, in the Responses section, we can see how the error descriptions for the 200 and 404 codes have changed.
4.2. Add Description and Examples to the Model
We can make similar improvements in our createProduct() method. Since the method accepts a Product object, it makes more sense to provide the description and examples in the Product class itself.
Let’s make some changes in the Product class to achieve this:
@Schema(name = "Product ID", example = "1", required = true)
private Long id;
@Schema(name = "Product name", example = "Product 1", required = false)
private String name;
@Schema(name = "Product price", example = "$100.00", required = true)
private String price;
The @Schema annotation defines the properties of the fields. We used this annotation on each field to set its name, example, and required properties.
Let’s restart the application and take a look at the documentation of our Product model again:

If we compare this to the original documentation image, we’ll find that the new image contains examples, descriptions, and red asterisks(*) to identify the required parameters.
By adding examples to models, we can automatically create example responses in every method which uses the model as an input or output. For example, from the image corresponding to the getProduct() method, we can see that the response contains an example containing the same values we provided in our model.
Adding examples to our documentation is important because it makes value formats even more precise. If our models contain fields like date, time, or price, an exact value format is necessary. Defining the format beforehand makes the development process more effective for both the API provider and the API clients.
5. Conclusion
In this article, we explored different ways to improve the readability of our API documentation. We learned how to document methods, parameters, error messages, and models using the annotations @Parameter, @Operation, @ApiResponses, @ApiResponse, and @Schema.
As always, the code for these examples is available over on GitHub.


