

Mocking is an essential part of unit testing, and the Mockito library makes it easy to write clean and intuitive unit tests for your Java code.
Get started with mocking and improve your application tests using our Mockito guide:
Handling concurrency in an application can be a tricky process with many potential pitfalls. A solid grasp of the fundamentals will go a long way to help minimize these issues.
Get started with understanding multi-threaded applications with our Java Concurrency guide:
Spring 5 added support for reactive programming with the Spring WebFlux module, which has been improved upon ever since. Get started with the Reactor project basics and reactive programming in Spring Boot:
Since its introduction in Java 8, the Stream API has become a staple of Java development. The basic operations like iterating, filtering, mapping sequences of elements are deceptively simple to use.
But these can also be overused and fall into some common pitfalls.
To get a better understanding on how Streams work and how to combine them with other language features, check out our guide to Java Streams:
Explore Spring Boot 3 and Spring 6 in-depth through building a full REST API with the framework:
Yes, Spring Security can be complex, from the more advanced functionality within the Core to the deep OAuth support in the framework.
I built the security material as two full courses - Core and OAuth, to get practical with these more complex scenarios. We explore when and how to use each feature and code through it on the backing project.
You can explore the course here:
Spring Data JPA is a great way to handle the complexity of JPA with the powerful simplicity of Spring Boot.
Get started with Spring Data JPA through the guided reference course:
Refactor Java code safely — and automatically — with OpenRewrite.
Refactoring big codebases by hand is slow, risky, and easy to put off. That’s where OpenRewrite comes in. The open-source framework for large-scale, automated code transformations helps teams modernize safely and consistently.
Each month, the creators and maintainers of OpenRewrite at Moderne run live, hands-on training sessions — one for newcomers and one for experienced users. You’ll see how recipes work, how to apply them across projects, and how to modernize code with confidence.
Join the next session, bring your questions, and learn how to automate the kind of work that usually eats your sprint time.
1. Introduction
In this tutorial, we’ll learn how to create an application capable of creating, retrieving, updating, and deleting (CRUD) client data. The application will consist of a simple Spring Boot RESTful API and a user interface (UI) implemented with the React JavaScript library.
2. Spring Boot
2.1. Maven Dependencies
Let’s start by adding a few dependencies to our pom.xml file:
<dependencies>
    <dependency>
        <groupId>org.springframework.boot</groupId>
        <artifactId>spring-boot-starter-web</artifactId>
        <version>3.1.5</version>
    </dependency>

    <dependency>
        <groupId>org.springframework.boot</groupId>
        <artifactId>spring-boot-starter-data-jpa</artifactId>
        <version>3.1.5</version>
    </dependency>

    <dependency>
        <groupId>org.springframework.boot</groupId>
        <artifactId>spring-boot-starter-test</artifactId>
        <version>3.1.5</version>
        <scope>test</scope>
    </dependency>

    <dependency>
        <groupId>com.h2database</groupId>
        <artifactId>h2</artifactId>
        <version>2.1.214</version>
        <scope>runtime</scope>
    </dependency>
</dependencies>
Here we added the web, testing, and JPA persistence starters, as well as the H2 dependency, as the application will have an H2 in-memory database.
2.2. Creating the Model
Next, let’s create our Client entity class, with name and email properties, to represent our data model:
@Entity
@Table(name = "client")
public class Client {

    @Id
    @GeneratedValue
    private Long id;

    private String name;
    private String email;

    // getter, setters, contructors
}
2.3. Creating the Repository
Then we’ll create our ClientRepository class extending from JpaRepository to provide JPA CRUD capabilities:
public interface ClientRepository extends JpaRepository<Client, Long> {
}
2.4. Creating the REST Controller
Finally, let’s expose a REST API by creating a controller to interact with the ClientRepository:
@RestController
@RequestMapping("/clients")
public class ClientsController {

    private final ClientRepository clientRepository;

    public ClientsController(ClientRepository clientRepository) {
        this.clientRepository = clientRepository;
    }

    @GetMapping
    public List<Client> getClients() {
        return clientRepository.findAll();
    }

    @GetMapping("/{id}")
    public Client getClient(@PathVariable Long id) {
        return clientRepository.findById(id).orElseThrow(RuntimeException::new);
    }

    @PostMapping
    public ResponseEntity createClient(@RequestBody Client client) throws URISyntaxException {
        Client savedClient = clientRepository.save(client);
        return ResponseEntity.created(new URI("/clients/" + savedClient.getId())).body(savedClient);
    }

    @PutMapping("/{id}")
    public ResponseEntity updateClient(@PathVariable Long id, @RequestBody Client client) {
        Client currentClient = clientRepository.findById(id).orElseThrow(RuntimeException::new);
        currentClient.setName(client.getName());
        currentClient.setEmail(client.getEmail());
        currentClient = clientRepository.save(client);

        return ResponseEntity.ok(currentClient);
    }

    @DeleteMapping("/{id}")
    public ResponseEntity deleteClient(@PathVariable Long id) {
        clientRepository.deleteById(id);
        return ResponseEntity.ok().build();
    }
}
2.5. Starting Our API
With that complete, we’re now ready to start our Spring Boot API. We can do this using the spring-boot-maven-plugin:
mvn spring-boot:runThen we’ll be able to get our clients list by going to http://localhost:8080/clients.
2.6. Creating Clients
Additionally, we can create a few clients using Postman:
curl --location 'http://localhost:8080/clients' \ --header 'Content-Type: application/json' \ --data-raw '{"name": "John Doe", "email": "[email protected]"}'3. React
React is a JavaScript library for creating user interfaces. Working with React requires that Node.js is installed. We can find the installation instructions on the Node.js download page.
3.1. Creating a React UI
Create React App is a command utility that generates React projects for us. Let’s create our frontend app in our Spring Boot application base directory by running:
npx create-react-app frontendAfter the app creation process is complete, we’ll install Bootstrap, React Router, and reactstrap in the frontend directory:
npm install --save [email protected] [email protected] [email protected] [email protected]We’ll be using Bootstrap’s CSS and reactstrap’s components to create a better-looking UI, and React Router components to handle navigability around the application.
Let’s add Bootstrap’s CSS file as an import in app/src/index.js:
import 'bootstrap/dist/css/bootstrap.min.css';3.2. Starting Our React UI
Now we’re ready to start our frontend application:
npm startWhen accessing http://localhost:3000 in our browser, we should see the React sample page:
3.3. Calling Our Spring Boot API
Calling our Spring Boot API requires setting up our React application’s package.json file to configure a proxy when calling the API.
For that, we’ll include the URL for our API in package.json:
...
"proxy": "http://localhost:8080",
...
Next, let’s edit frontend/src/App.js so that it calls our API to show the list of clients with the name and email properties:
class App extends Component {
  state = {
    clients: []
  };

  async componentDidMount() {
    const response = await fetch('/clients');
    const body = await response.json();
    this.setState({clients: body});
  }

  render() {
    const {clients} = this.state;
    return (
        <div className="App">
          <header className="App-header">
            <img src={logo} className="App-logo" alt="logo" />
            <div className="App-intro">
              <h2>Clients</h2>
              {clients.map(client =>
                  <div key={client.id}>
                    {client.name} ({client.email})
                  </div>
              )}
            </div>
          </header>
        </div>
    );
  }
}
export default App;
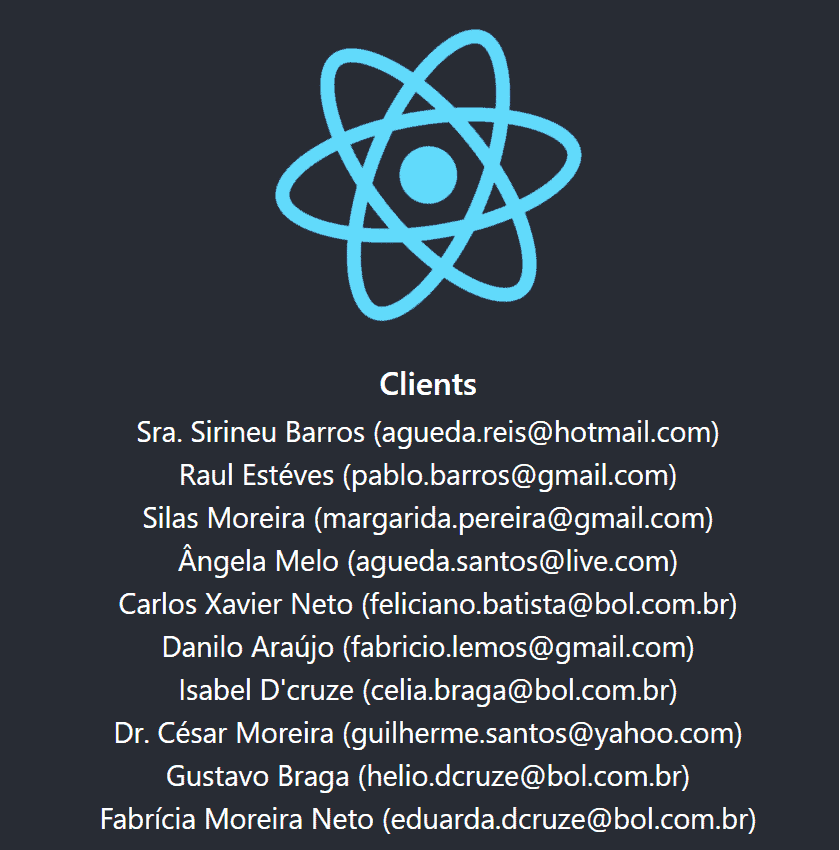
In the componentDidMount function, we fetch our client API and set the response body in the clients variable. In our render function, we return the HTML with the list of clients found in the API.
We’ll see our client’s page, which will look like this:
Note: Make sure the Spring Boot application is running so that the UI will be able to call the API.
3.4. Creating a ClientList Component
We can now improve our UI to display a more sophisticated component to list, edit, delete, and create clients using our API. Later, we’ll see how to use this component and remove the client list from the App component.
Let’s create a file in frontend/src/ClientList.js:
import React, { Component } from 'react';
import { Button, ButtonGroup, Container, Table } from 'reactstrap';
import AppNavbar from './AppNavbar';
import { Link } from 'react-router-dom';

class ClientList extends Component {

    constructor(props) {
        super(props);
        this.state = {clients: []};
        this.remove = this.remove.bind(this);
    }

    componentDidMount() {
        fetch('/clients')
            .then(response => response.json())
            .then(data => this.setState({clients: data}));
    }
}
export default ClientList;
As in App.js, the componentDidMount function is calling our API to load our client list.
We’ll also include the remove function to handle the DELETE call to the API when we want to delete a client. In addition, we’ll create the render function, which will render the HTML with Edit, Delete, and Add Client actions:
async remove(id) {
    await fetch(`/clients/${id}`, {
        method: 'DELETE',
        headers: {
            'Accept': 'application/json',
            'Content-Type': 'application/json'
        }
    }).then(() => {
        let updatedClients = [...this.state.clients].filter(i => i.id !== id);
        this.setState({clients: updatedClients});
    });
}

render() {
    const {clients, isLoading} = this.state;

    if (isLoading) {
        return <p>Loading...</p>;
    }

    const clientList = clients.map(client => {
        return <tr key={client.id}>
            <td style={{whiteSpace: 'nowrap'}}>{client.name}</td>
            <td>{client.email}</td>
            <td>
                <ButtonGroup>
                    <Button size="sm" color="primary" tag={Link} to={"/clients/" + client.id}>Edit</Button>
                    <Button size="sm" color="danger" onClick={() => this.remove(client.id)}>Delete</Button>
                </ButtonGroup>
            </td>
        </tr>
    });

    return (
        <div>
            <AppNavbar/>
            <Container fluid>
                <div className="float-right">
                    <Button color="success" tag={Link} to="/clients/new">Add Client</Button>
                </div>
                <h3>Clients</h3>
                <Table className="mt-4">
                    <thead>
                    <tr>
                        <th width="30%">Name</th>
                        <th width="30%">Email</th>
                        <th width="40%">Actions</th>
                    </tr>
                    </thead>
                    <tbody>
                    {clientList}
                    </tbody>
                </Table>
            </Container>
        </div>
    );
}
3.5. Creating a ClientEdit Component
The ClientEdit component will be responsible for creating and editing our client.
Let’s create a file in frontend/src/ClientEdit.js:
import React, { Component } from 'react';
import { Link, withRouter } from 'react-router-dom';
import { Button, Container, Form, FormGroup, Input, Label } from 'reactstrap';
import AppNavbar from './AppNavbar';

class ClientEdit extends Component {

    emptyItem = {
        name: '',
        email: ''
    };

    constructor(props) {
        super(props);
        this.state = {
            item: this.emptyItem
        };
        this.handleChange = this.handleChange.bind(this);
        this.handleSubmit = this.handleSubmit.bind(this);
    }
}
export default withRouter(ClientEdit);
Let’s add the componentDidMount function to check whether we’re dealing with the create or edit feature; in the case of editing, it’ll fetch our client from the API:
async componentDidMount() {
    if (this.props.match.params.id !== 'new') {
        const client = await (await fetch(`/clients/${this.props.match.params.id}`)).json();
        this.setState({item: client});
    }
}
Then in the handleChange function, we’ll update our component state item property that will be used when submitting our form:
handleChange(event) {
    const target = event.target;
    const value = target.value;
    const name = target.name;
    let item = {...this.state.item};
    item[name] = value;
    this.setState({item});
}
In handeSubmit, we’ll call our API, sending the request to a PUT or POST method depending on the feature we’re invoking. For that, we can check if the id property is filled:
async handleSubmit(event) {
    event.preventDefault();
    const {item} = this.state;

    await fetch('/clients' + (item.id ? '/' + item.id : ''), {
        method: (item.id) ? 'PUT' : 'POST',
        headers: {
            'Accept': 'application/json',
            'Content-Type': 'application/json'
        },
        body: JSON.stringify(item),
    });
    this.props.history.push('/clients');
}
Last, but not least, our render function will be handling our form:
render() {
    const {item} = this.state;
    const title = <h2>{item.id ? 'Edit Client' : 'Add Client'}</h2>;

    return <div>
        <AppNavbar/>
        <Container>
            {title}
            <Form onSubmit={this.handleSubmit}>
                <FormGroup>
                    <Label for="name">Name</Label>
                    <Input type="text" name="name" id="name" value={item.name || ''}
                           onChange={this.handleChange} autoComplete="name"/>
                </FormGroup>
                <FormGroup>
                    <Label for="email">Email</Label>
                    <Input type="text" name="email" id="email" value={item.email || ''}
                           onChange={this.handleChange} autoComplete="email"/>
                </FormGroup>
                <FormGroup>
                    <Button color="primary" type="submit">Save</Button>{' '}
                    <Button color="secondary" tag={Link} to="/clients">Cancel</Button>
                </FormGroup>
            </Form>
        </Container>
    </div>
}
Note: We also have a Link with a route configured to go back to /clients when clicking on the Cancel Button.
3.6. Creating an AppNavbar Component
To give our application better navigability, let’s create a file in frontend/src/AppNavbar.js:
import React, {Component} from 'react';
import {Navbar, NavbarBrand} from 'reactstrap';
import {Link} from 'react-router-dom';

export default class AppNavbar extends Component {
    constructor(props) {
        super(props);
        this.state = {isOpen: false};
        this.toggle = this.toggle.bind(this);
    }

    toggle() {
        this.setState({
            isOpen: !this.state.isOpen
        });
    }

    render() {
        return <Navbar color="dark" dark expand="md">
            <NavbarBrand tag={Link} to="/">Home</NavbarBrand>
        </Navbar>;
    }
}
In the render function, we’ll use the react-router-dom capabilities to create a Link to route to our application Home page.
3.7. Creating Our Home Component
This component will be our application Home page, and will have a button to our previously created ClientList component.
Let’s create a file in frontend/src/Home.js:
import React, { Component } from 'react';
import './App.css';
import AppNavbar from './AppNavbar';
import { Link } from 'react-router-dom';
import { Button, Container } from 'reactstrap';

class Home extends Component {
    render() {
        return (
            <div>
                <AppNavbar/>
                <Container fluid>
                    <Button color="link"><Link to="/clients">Clients</Link></Button>
                </Container>
            </div>
        );
    }
}
export default Home;
Note: In this component, we also have a Link from react-router-dom that leads us to /clients. This route will be configured in the next step.
3.8. Using React Router
Now we’ll use React Router to navigate between our components.
Let’s change our App.js:
import React, { Component } from 'react';
import './App.css';
import Home from './Home';
import { BrowserRouter as Router, Route, Switch } from 'react-router-dom';
import ClientList from './ClientList';
import ClientEdit from "./ClientEdit";

class App extends Component {
  render() {
    return (
        <Router>
          <Switch>
            <Route path='/' exact={true} component={Home}/>
            <Route path='/clients' exact={true} component={ClientList}/>
            <Route path='/clients/:id' component={ClientEdit}/>
          </Switch>
        </Router>
    )
  }
}

export default App;
As we can see, we have our application routes defined for each of the components we’ve created.
When accessing localhost:3000, we now have our Home page with a Clients link:
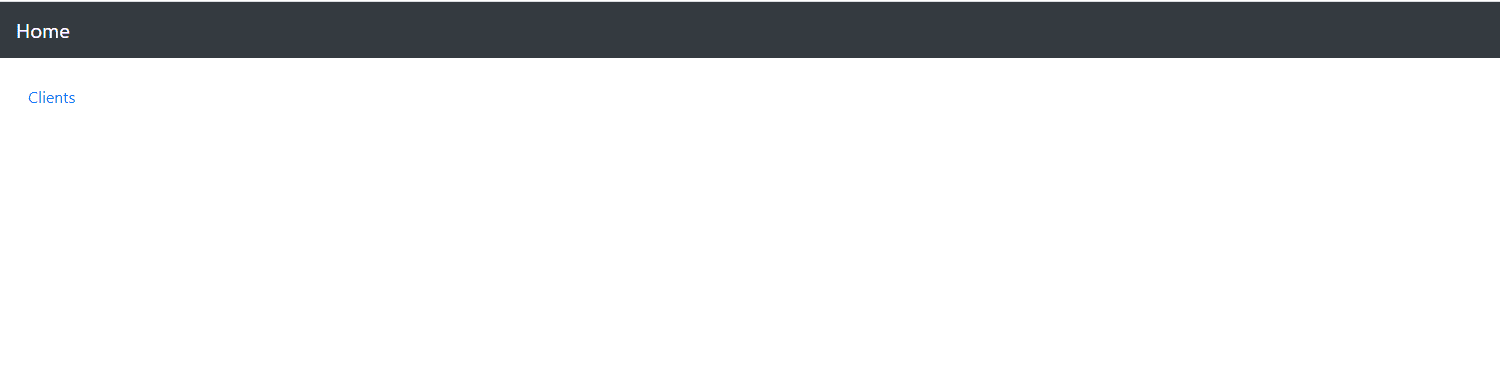
Clicking on the Clients link, we now have our list of clients, and the Edit, Remove, and Add Client features:

4. Building and Packaging
To build and package our React application with Maven, we’ll use the frontend-maven-plugin.
This plugin will be responsible for packaging and copying our frontend application into our Spring Boot API build folder:
<properties>
    ...
    <frontend-maven-plugin.version>1.6</frontend-maven-plugin.version>
    <node.version>v14.8.0</node.version>
    <yarn.version>v1.12.1</yarn.version>
    ...
</properties>
...
<build>
    <plugins>
        <plugin>
            <groupId>org.apache.maven.plugins</groupId>
            <artifactId>maven-resources-plugin</artifactId>
            <version>3.1.0</version>
            <executions>
                ...
            </executions>
        </plugin>
        <plugin>
            <groupId>com.github.eirslett</groupId>
            <artifactId>frontend-maven-plugin</artifactId>
            <version>${frontend-maven-plugin.version}</version>
            <configuration>
                ...
            </configuration>
            <executions>
                ...
            </executions>
        </plugin>
        ...
    </plugins>
</build>
Let’s take a closer look at our maven-resources-plugin, which is responsible for copying our frontend sources to the application target folder:
...
<plugin>
    <groupId>org.apache.maven.plugins</groupId>
    <artifactId>maven-resources-plugin</artifactId>
    <version>3.1.0</version>
    <executions>
        <execution>
            <id>copy-resources</id>
            <phase>process-classes</phase>
            <goals>
                <goal>copy-resources</goal>
            </goals>
            <configuration>
                <outputDirectory>${basedir}/target/classes/static</outputDirectory>
                <resources>
                    <resource>
                        <directory>frontend/build</directory>
                    </resource>
                </resources>
            </configuration>
        </execution>
    </executions>
</plugin>
...
Our front-end-maven-plugin will then be responsible for installing Node.js and Yarn, and then building and testing our frontend application:
...
<plugin>
    <groupId>com.github.eirslett</groupId>
    <artifactId>frontend-maven-plugin</artifactId>
    <version>${frontend-maven-plugin.version}</version>
    <configuration>
        <workingDirectory>frontend</workingDirectory>
    </configuration>
    <executions>
        <execution>
            <id>install node</id>
            <goals>
                <goal>install-node-and-yarn</goal>
            </goals>
            <configuration>
                <nodeVersion>${node.version}</nodeVersion>
                <yarnVersion>${yarn.version}</yarnVersion>
            </configuration>
        </execution>
        <execution>
            <id>yarn install</id>
            <goals>
                <goal>yarn</goal>
            </goals>
            <phase>generate-resources</phase>
        </execution>
        <execution>
            <id>yarn test</id>
            <goals>
                <goal>yarn</goal>
            </goals>
            <phase>test</phase>
            <configuration>
                <arguments>test</arguments>
                <environmentVariables>
                    <CI>true</CI>
                </environmentVariables>
            </configuration>
        </execution>
        <execution>
            <id>yarn build</id>
            <goals>
                <goal>yarn</goal>
            </goals>
            <phase>compile</phase>
            <configuration>
                <arguments>build</arguments>
            </configuration>
        </execution>
    </executions>
</plugin>
...
Note: to specify a different Node.js version, we can simply edit the node.version property in our pom.xml.
5. Running Our Spring Boot React CRUD Application
Finally, by adding the plugin, we can access our application by running:
mvn spring-boot:runOur React application will be fully integrated into our API at the http://localhost:8080/ URL.
6. Conclusion
In this article, we examined how to create a CRUD application using Spring Boot and React. To do so, we first created some REST API endpoints to interact with our database. Then we created some React components to fetch and write data using our API. We also learned how to package our Spring Boot Application with our React UI into a single application package.


