1. Introduction
To thoroughly test a web API, we need some kind of web client to access the API’s endpoints. Postman is a standalone tool that exercises web APIs by making HTTP requests from outside the service.
When using Postman, we don’t need to write any HTTP client infrastructure code just for the sake of testing. Instead, we create test suites called collections and let Postman interact with our API.
In this tutorial, we’ll see how to create a Postman Collection that can test a REST API.
2. Setup
Before we get started with our collection, we’ll need to set up the environment.
2.1. Installing Postman
Postman is available for Linux, Mac, and Windows. The tool can be downloaded and installed from the Postman website.
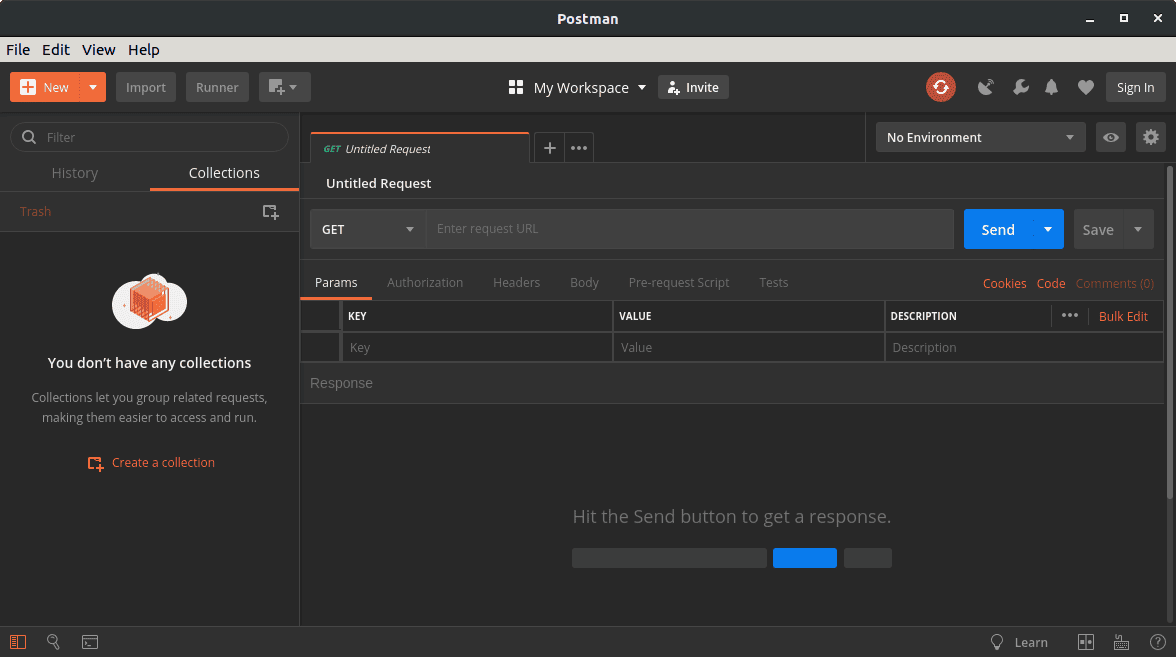
After dismissing the splash screen, we can see the user interface:
2.2. Running the Server
Postman needs a live HTTP server to process its requests. For this tutorial, we’ll use a previous Baeldung project, spring-boot-rest, which is available on GitHub.
As we might guess from the title, spring-boot-rest is a Spring Boot application. We build the app with the Maven goal install. Once built, we launch the server with the custom Maven goal spring-boot:run.
To verify that the server is running, we can hit this URL in our browser:
http://localhost:8082/spring-boot-rest/auth/foos
This service uses an in-memory database. All records are cleared when the server is stopped.
3. Creating a Postman Collection
A collection in Postman is a series of HTTP requests. Postman saves every aspect of the requests, including headers and message bodies. Therefore, we can run the requests in sequence as semi-automated tests.
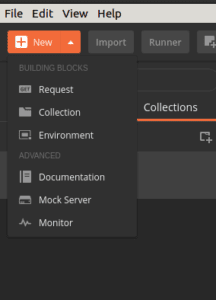
Let’s begin by creating a new collection. We can click the dropdown arrow on the New button and select Collection:
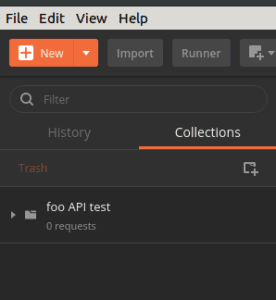
When the CREATE A NEW COLLECTION dialog appears, we can name our collection “foo API test“. Finally, we click the Create button to see our new collection appear in the list to the left:
Once our collection is created, we can hover the cursor over it to reveal two menu buttons. The arrow button opens a pull-right panel that provides access to the Collection Runner. Conversely, the ellipsis button opens a dropdown menu containing a number of operations on the collection.
4. Adding a POST Request
4.1. Creating a New Request
Now that we have an empty collection, let’s add a request that hits our API. Specifically, let’s send a POST message to the URI /auth/foos. To do that, we open the ellipsis menu on our collection and select Add Request.
When the SAVE REQUEST dialog appears, let’s provide a descriptive name, such as “add a foo”. Then, click the button Save to foo API test.
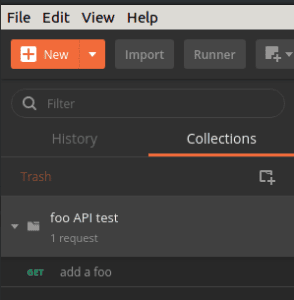
Once the request is created, we can see that our collection indicates one request. However, if our collection has not been expanded, then we can’t see the request yet. In that case, we can click the collection to expand it.
Now, we should see the new request listed under our collection. We can observe that the new request, by default, is an HTTP GET, which is not what we want. We’ll fix that in the next section:
4.2. Editing the Request
To edit the request, let’s click it, thus loading it into the request editor tab:
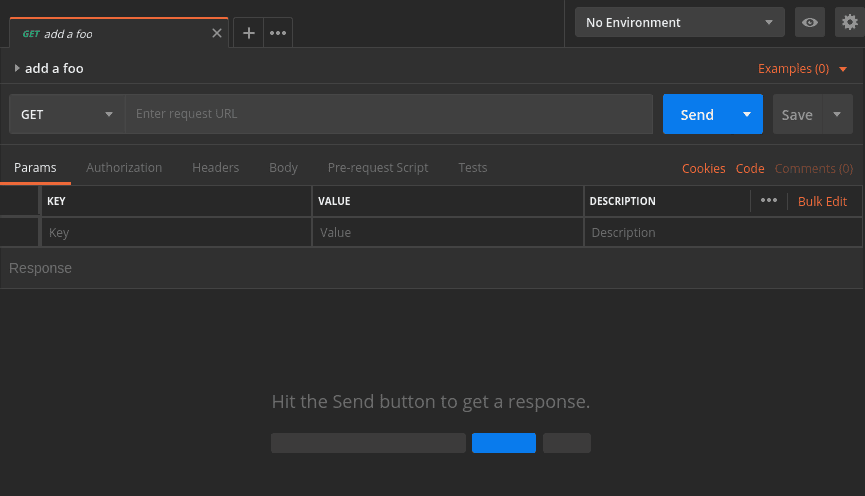
Although the request editor has numerous options, we only need a few of them for now.
Firstly, let’s use the dropdown to change the method from GET to POST.
Secondly, we need a URL. To the right of the method dropdown is a text box for the request URL. So, let’s enter that now:
http://localhost:8082/spring-boot-rest/auth/foos
The last step is to provide a message body. Below the URL address is a row of tab headers. We’ll click the Body tab header to get to the body editor.
In the Body tab, just above the text area, there’s a row of radio buttons and a dropdown. These control the formatting and content type of the request.
Our service accepts JSON data, so we select the raw radio button. In the dropdown to the right, we apply the JSON (application/json) content type.
Once the encoding and content-type have been set, we add our JSON content to the text area:
{
    "name": "Transformers"
}
Finally, let’s be sure to save our changes by pressing Ctrl-S or hitting the Save button. The Save button is located to the right of the Send button. Once we save, we can see that the request has been updated to POST in the list on the left:

5. Running the Request
5.1. Running a Single Request
To run a single request, we just click the Send button to the right of the URL address. Once we click Send, the response panel will open below the request panel. It may be necessary to scroll down to see it:

Let’s examine our results. Specifically, in the header bar, we see that our request succeeded with the status 201 Created. Furthermore, the response body shows that our Transformers record received an id of 1.
5.2. Using the Collection Runner
In contrast to the Send button, the collection runner can execute an entire collection. To launch the collection runner, we hover the cursor over our foo API test collection and click the pull-right arrow. In the pull-right panel we can see a Run button, so let’s click that:
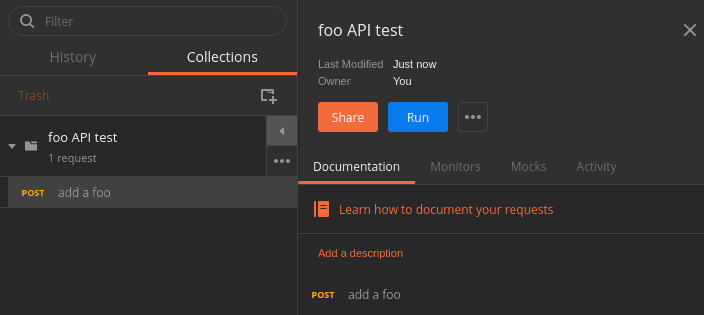
When we click the Run button the collection runner opens in a new window. Because we launched it from our collection, the runner is already initialized to our collection:
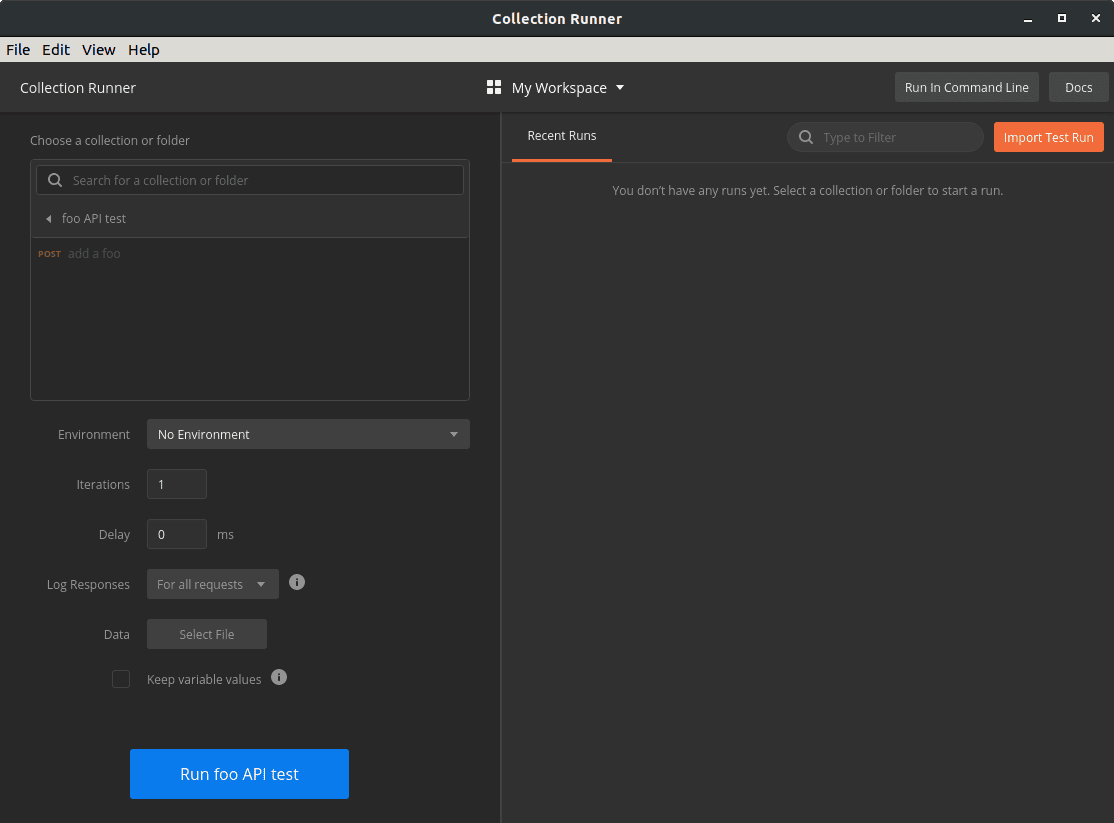
The collection runner offers options that affect the test run, but we won’t need them for this exercise. Let’s go directly to the Run foo API test button at the bottom and click that.
When we run the collection, the view changes to Run Results. In this view, we see a list of tests that are marked green for success and red for failure.
Even though our request was sent, the runner indicates that zero tests passed and zero tests failed. This is because we haven’t added tests to our request yet:

6. Testing the Response
6.1. Adding Tests to a Request
To create a test, let’s return to the request editing panel where we built our POST method. We click the Tests tab which is located under the URL. When we do that, the Tests panel appears:
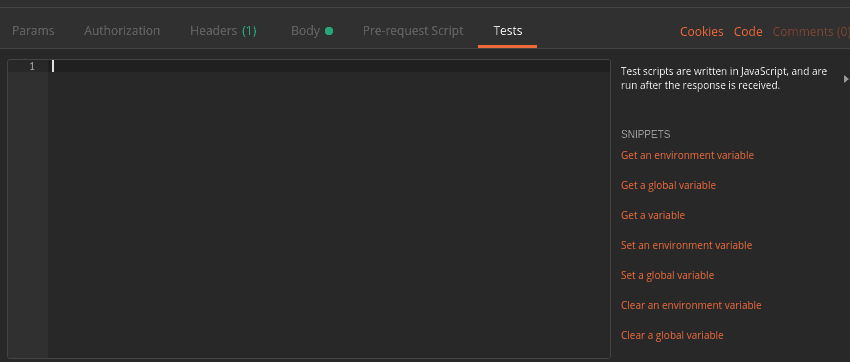
In the Tests panel, we write JavaScript that will be executed when the response is received from the server.
Postman offers built-in variables that provide access to the request and response. Furthermore, a number of JavaScript libraries can be imported using the require() syntax.
There are far too many scripting features to cover in this tutorial. However, the official Postman documentation is an excellent resource on this topic.
Let’s continue by adding three tests to our request:
pm.test("success status", () => pm.response.to.be.success );
pm.test("name is correct", () =>
  pm.expect(pm.response.json().name).to.equal("Transformers"));
pm.test("id was assigned", () =>
  pm.expect(pm.response.json().id).to.be.not.null );
As we can see, these tests make use of the global pm module provided by Postman. In particular, the tests use pm.test(), pm.expect(), and pm.response.
The pm.test() function accepts a label and an assertion function, such as expect(). We’re using pm.expect() to assert conditions on the contents of the response JSON.
The pm.response object provides access to various properties and operations on the response returned from the server. Available properties include the response status and JSON content, among others.
As always, we save our changes with Ctrl-S or the Save button.
6.2. Running the Tests
Now that we have our tests, let’s run the request again. Pressing the Send button displays the results in the Test Results tab of the response panel:

Likewise, the collection runner now displays our test results. Specifically, the summary at the top left shows the updated passed and failed totals. Below the summary is a list that shows each test with its status:

6.3. Viewing the Postman Console
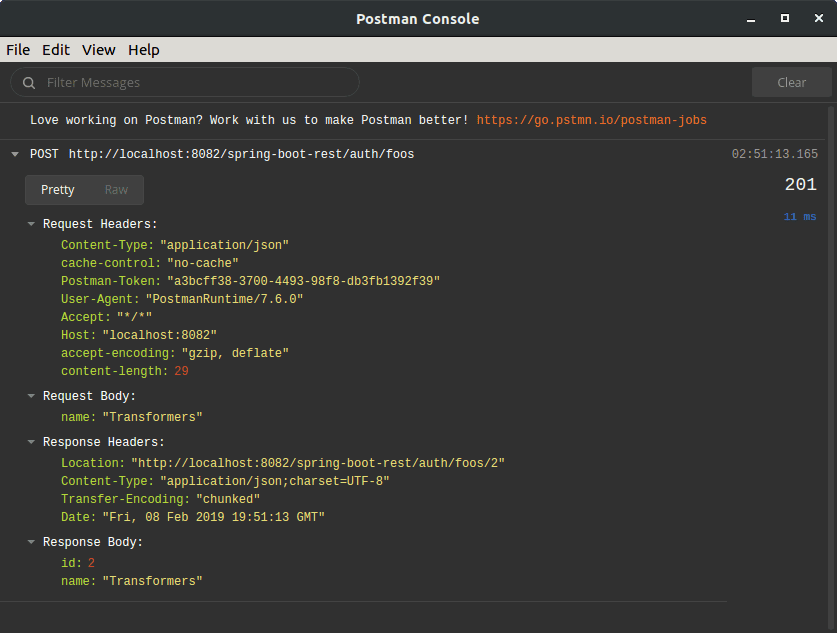
The Postman Console is a useful tool for creating and debugging scripts. We can find the console under the View menu with the item name Show Postman Console. When launched, the console opens in a new window.
While the console is open, it records all HTTP requests and responses. Furthermore, when scripts use console.log(), the Postman Console displays those messages:
7. Creating a Sequence of Requests
So far, we’ve focused on a single HTTP request. Now, let’s see what we can do with multiple requests. By chaining together a series of requests, we can simulate and test a client-server workflow.
In this section, let’s apply what we’ve learned in order to create a sequence of requests. Specifically, we’ll add three more requests to execute after the POST request we have already created. These will be a GET, a DELETE, and finally, another GET.
7.1. Capturing Response Values in Variables
Before we create our new requests, let’s make a modification to our existing POST request. Because we don’t know which id the server will assign each foo instance, we can use a variable to capture the id returned by the server.
To capture that id, we’ll add one more line to the end of the POST request’s test script:
pm.variables.set("id", pm.response.json().id);
The pm.variables.set() function takes a value and assigns it to a temporary variable. In this case, we’re creating an id variable to store our object’s id value. Once set, we can access this variable in later requests.
7.2. Adding a GET Request
Now, using the techniques from previous sections, let’s add a GET request after the POST request.
With this GET request, we’ll retrieve the same foo instance that the POST request created. Let’s name this GET request as “get a foo“.
The URL of the GET request is:
http://localhost:8082/spring-boot-rest/auth/foos/{{id}}
In this URL, we’re referencing the id variable that we previously set during the POST request. Thus, the GET request should retrieve the same instance that was created by the POST.
Variables, when appearing outside of scripts, are referenced using the double-brace syntax {{id}}.
Since there’s no body for a GET request, let’s proceed directly to the Tests tab. Because the tests are similar, we can copy the tests from the POST request, then make a few changes.
Firstly, we don’t need to set the id variable again, so let’s not copy that line.
Secondly, we know which id to expect this time, so let’s verify that id. We can use the id variable to do that:
pm.test("success status", () => pm.response.to.be.success );
pm.test("name is correct", () =>
  pm.expect(pm.response.json().name).to.equal("Transformers"));
pm.test("id is correct", () =>
  pm.expect(pm.response.json().id).to.equal(pm.variables.get("id")) );
Since the double-brace syntax is not valid JavaScript, we use the pm.variables.get() function to access the id variable.
Finally, let’s save the changes as we’ve done before.
7.3. Adding a DELETE Request
Next, we’ll add a DELETE request that will remove the foo object from the server.
We’ll proceed by adding a new request after the GET, and setting its method to DELETE. We can name this request “delete a foo“.
The URL of the delete is identical to the GET URL:
http://localhost:8082/spring-boot-rest/auth/foos/{{id}}
The response will not have a body to test, but we can test the response code. Therefore, the DELETE request will have only one test:
pm.test("success status", () => pm.response.to.be.success );
7.4. Verifying the DELETE
Finally, let’s add another copy of the GET request to verify that the DELETE really worked. This time, let’s duplicate our first GET request instead of creating a request from scratch.
To duplicate a request, we right-click on the request to show the dropdown menu. Then, we select Duplicate.
The duplicate request will have the word Copy appended to its name. Let’s rename it to “verify delete” to avoid confusion. The Rename option is available by right-clicking the request.
By default, the duplicate request appears immediately after the original request. As a result, we’ll need to drag it below the DELETE request.
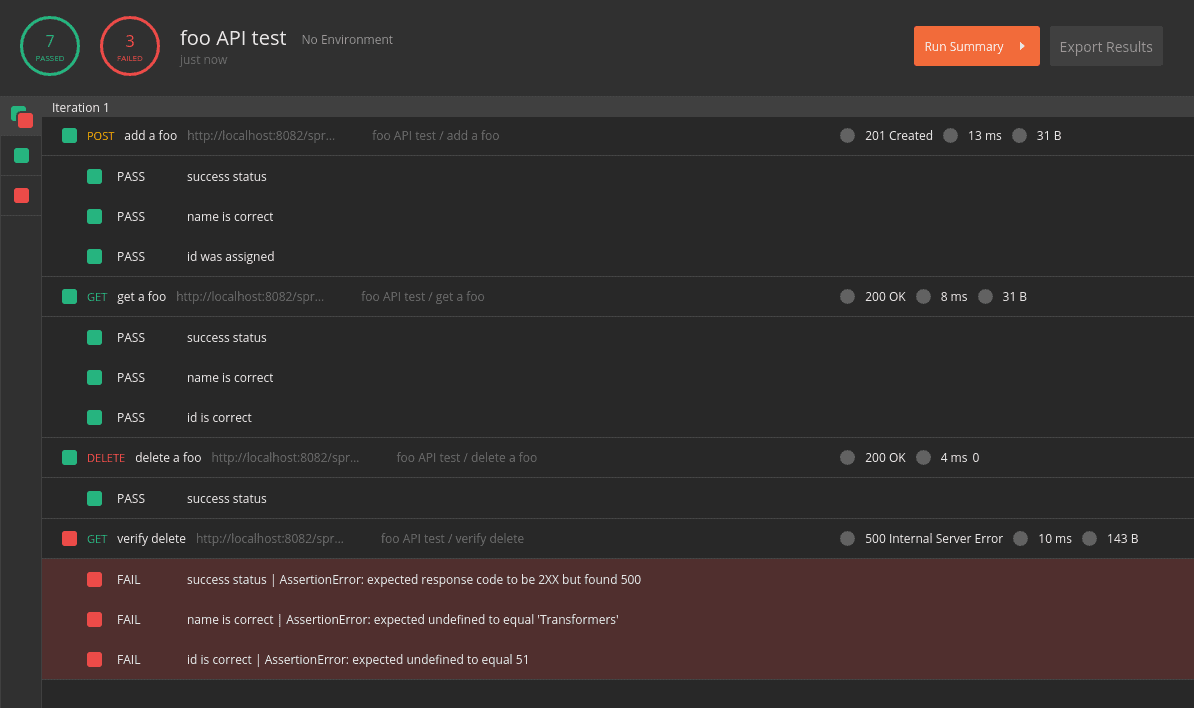
The final step is to modify the tests. However, before we do that, let’s take an opportunity to see a failed test.
We have copied the GET request and moved it after the DELETE, but we haven’t updated the tests yet. Since the DELETE request should have deleted the object, the tests should fail.
Let’s make sure to save all of our requests, then hit Retry in the collection runner. As expected, our tests have failed:
Now that our brief detour is complete, let’s fix the tests.
By reviewing the failed tests, we can see that the server responds with a 500 status. Therefore, we’ll change the status in our test.
Furthermore, by viewing the failed response in the Postman Console, we learn that the response includes a cause property. Moreover, the cause property contains the string “No value present“. We can test for that as well:
pm.test("status is 500", () => pm.response.to.have.status(500) );
pm.test("no value present", () =>
  pm.expect(pm.response.json().cause).to.equal("No value present"));
7.5. Running the Full Collection
Now that we’ve added all of the requests, let’s run the full collection in the collection runner:
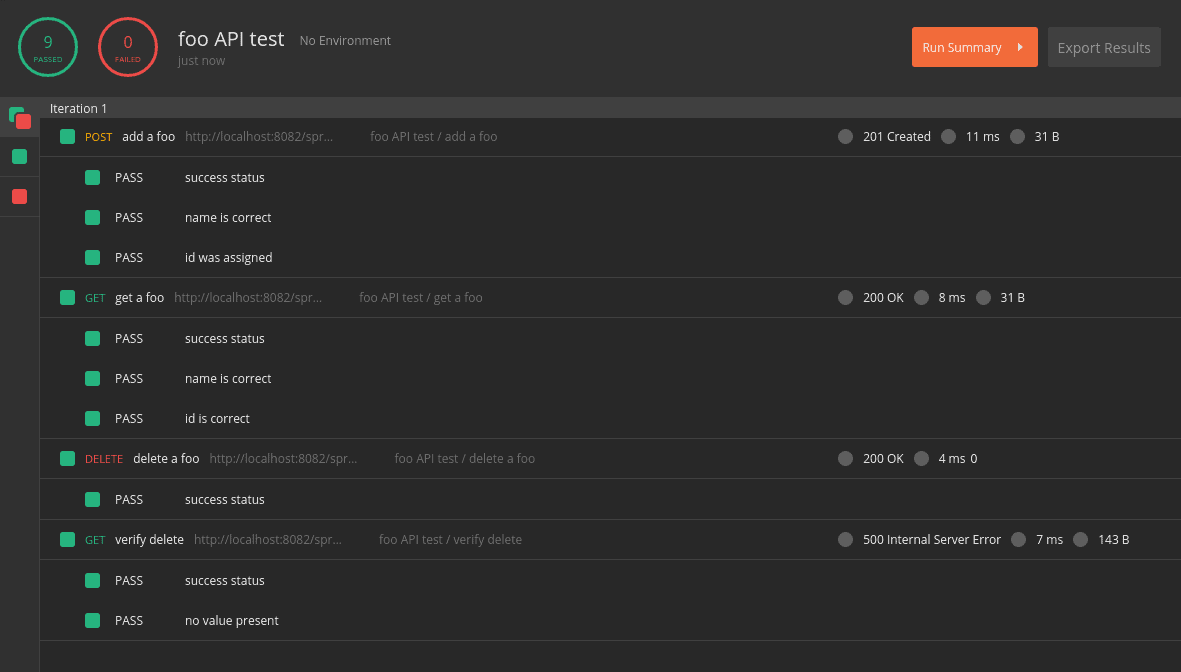
If everything has gone according to plan, we should have nine successful tests.
8. Exporting and Importing the Collection
While Postman stores our collections in a private, local location, we may want to share the collection. To do that, we export the collection to a JSON file.
The Export command is available within the ellipsis menu of the collection. When prompted for a JSON file version, let’s choose the latest recommended version.
After we select the file version, Postman will prompt for a file name and location for the exported collection. We can choose a folder within our GitHub project, for example.
To import a previously exported collection, we use the Import button. We can find it in the toolbar of the main Postman window. When Postman prompts for a file location, we can navigate to the JSON file we wish to import.
It’s worth noting that Postman does not track exported files. As a result, Postman doesn’t show external changes until we re-import the collection.
9. Conclusion
In this article, we have used Postman to create semi-automated tests for a REST API. While this article serves as an introduction to Postman’s basic features, we have barely scratched the surface of its capabilities. The Postman online documentation is a valuable resource for deeper exploration.
The collection created in this tutorial is available over on GitHub.


