Running Spring Boot Applications with the Embedded Camunda Engine
Last updated: September 22, 2025


Mocking is an essential part of unit testing, and the Mockito library makes it easy to write clean and intuitive unit tests for your Java code.
Get started with mocking and improve your application tests using our Mockito guide:
Handling concurrency in an application can be a tricky process with many potential pitfalls. A solid grasp of the fundamentals will go a long way to help minimize these issues.
Get started with understanding multi-threaded applications with our Java Concurrency guide:
Spring 5 added support for reactive programming with the Spring WebFlux module, which has been improved upon ever since. Get started with the Reactor project basics and reactive programming in Spring Boot:
Since its introduction in Java 8, the Stream API has become a staple of Java development. The basic operations like iterating, filtering, mapping sequences of elements are deceptively simple to use.
But these can also be overused and fall into some common pitfalls.
To get a better understanding on how Streams work and how to combine them with other language features, check out our guide to Java Streams:
Explore Spring Boot 3 and Spring 6 in-depth through building a full REST API with the framework:
Yes, Spring Security can be complex, from the more advanced functionality within the Core to the deep OAuth support in the framework.
I built the security material as two full courses - Core and OAuth, to get practical with these more complex scenarios. We explore when and how to use each feature and code through it on the backing project.
You can explore the course here:
Spring Data JPA is a great way to handle the complexity of JPA with the powerful simplicity of Spring Boot.
Get started with Spring Data JPA through the guided reference course:
Refactor Java code safely — and automatically — with OpenRewrite.
Refactoring big codebases by hand is slow, risky, and easy to put off. That’s where OpenRewrite comes in. The open-source framework for large-scale, automated code transformations helps teams modernize safely and consistently.
Each month, the creators and maintainers of OpenRewrite at Moderne run live, hands-on training sessions — one for newcomers and one for experienced users. You’ll see how recipes work, how to apply them across projects, and how to modernize code with confidence.
Join the next session, bring your questions, and learn how to automate the kind of work that usually eats your sprint time.
Yes, we're now running our only Summer Sale. All Courses are 30% off until 20th July, 2026:
Yes, we're now running our only Summer Sale. All Courses are 30% off until 20th July, 2026:
1. Overview
The workflow engine plays an important role in business process automation. Camunda platform is an open-source workflow and Business Process Management System (BPMS) that provides a process engine for Business Process Modeling. Spring Boot has good integration with the Camunda platform. In this tutorial, we’re going to look at how we can leverage the embedded Camunda engine into the Spring Boot application.
2. Camunda Workflow Engine
The Camunda workflow engine is a fork of Activiti and provides a workflow and simulation engine based on the Business Process Modelling Notation 2.0 (BPMN 2.0) standard. Moreover, it consists of tools and APIs for modeling, execution, and monitoring. Firstly, we can model our end-to-end business processes using Modeler. The Camunda provides the Modeler for designing BPMN workflows. The Modeler runs locally as a desktop application. Then, we deploy the business process model to the workflow engine and execute it. We can execute a business process in different ways using the REST APIs and provided Web Applications (Cockpit, Tasklist, and Admin). The Camunda engine can be used in different ways: SaaS, Self-Managed, and Embeddable library. In this tutorial, we focus on the Camunda embedded engine in a Spring Boot application.
3. Creating a Spring Boot Application with Embedded Camunda Engine
In this section, we will create and configure the Spring Boot application with an embedded Camunda engine using the Camunda Platform Initializr.
3.1. Camunda Platform Initializr
We can create a Spring Boot application integrated with the Camunda engine using the Camunda Platform Initializr. It is a web-application tool that is provided by Camunda, similar to Spring Initializr. Let’s create the application with the following information in the Camunda Platform Initializr: 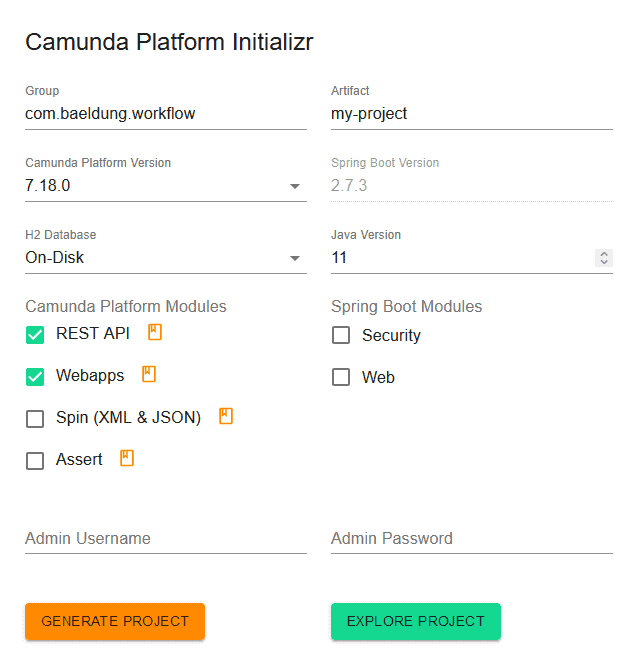 The tool lets us add our project metadata, including Group, Artifact, Camunda BPM Version, H2 Database, and Java Version. Also, we can add Camunda BPM Modules for supporting Camunda REST APIs or Camunda Webapps in our Spring Boot application. In addition, we can add Spring Boot Web and Security modules. The other option we have is to set Admin Username and Password, which is required for use in a Camunda Webapps such as Cockpit application login. Now, we click Generate Project to download the project template as a .zip file. Finally, we extract the files and open pom.xml in our IDE.
3.2. Camunda Configuration
The generated project is a regular Spring Boot application with extra Camunda dependencies and configurations. The directory structure is depicted in below figure:
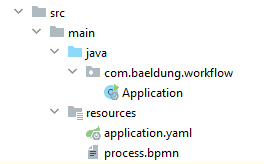
There is a simple workflow diagram process.bpmn in the resources directory. It starts executing the process using the start node. After that, it’ll proceed with the Say hello to demo task. On the completion of this task, the execution stops upon encountering the final node. The Camunda properties exist in application.yaml. Let’s take a look at the generated default Camunda property in the application.yaml:
camunda.bpm.admin-user:
  id: demo
  password: demo
We can change the admin username and password using camunda.bpm.admin-user property.
4. Creating the Application with Spring Boot
Another way of creating the Spring Boot application with an embedded Camunda engine is by using Spring Boot from scratch and adding the Camunda library to it.
4.1. Maven Dependencies
Let’s start by declaring the camunda-bpm-spring-boot-starter-webapp dependency in our pom.xml:
<dependency>
    <groupId>org.camunda.bpm.springboot</groupId>
    <artifactId>camunda-bpm-spring-boot-starter-webapp</artifactId>
    <version>7.18.0</version>
</dependency>
We need a database to store the process definitions, process instances, history info, etc. In this tutorial, we use a file-based H2 database. Therefore, we need to add h2 and spring-boot-starter-jdbc dependencies:
<dependency>
    <groupId>com.h2database</groupId>
    <artifactId>h2</artifactId>
</dependency>
<dependency>
    <groupId>org.springframework.boot</groupId>
    <artifactId>spring-boot-starter-jdbc</artifactId>
</dependency>
4.2. Sample Process Model
We use the Camunda Modeler to define a simple loan request workflow diagram loanProcess.bpmn. Here is a graphical flowchart of the execution order of the loanProcess.bpmn model to aid in our understanding: 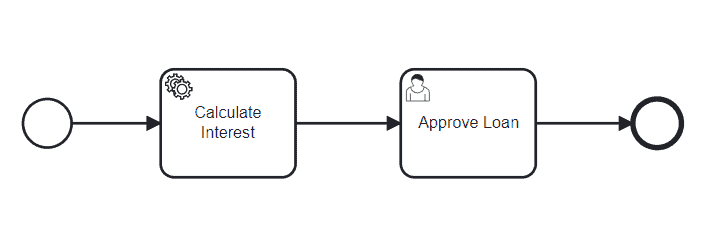
We start executing the process using the start node. After that, the Calculate Interest task is executed. Next, we’ll proceed with the Approve Loan task. On the completion of this task, the execution stops upon encountering the final node. The Calculate Interest task is a service task and invokes the CalculateInterestService bean:
@Component
public class CalculateInterestService implements JavaDelegate {

    private static final Logger LOGGER = LoggerFactory.getLogger(CalculateInterestService.class);

    @Override
    public void execute(DelegateExecution execution) {
        LOGGER.info("calculating interest of the loan");
    }

}
We need to implement the JavaDelegate interface. This class can be used for both service tasks and event listeners. It provides the required logic in the execute() method to be called during process execution. Now, the application is ready to start.
5. Demonstration
Now let’s run the Spring Boot application. We open the browser and enter the URL http://localhost:8080/:
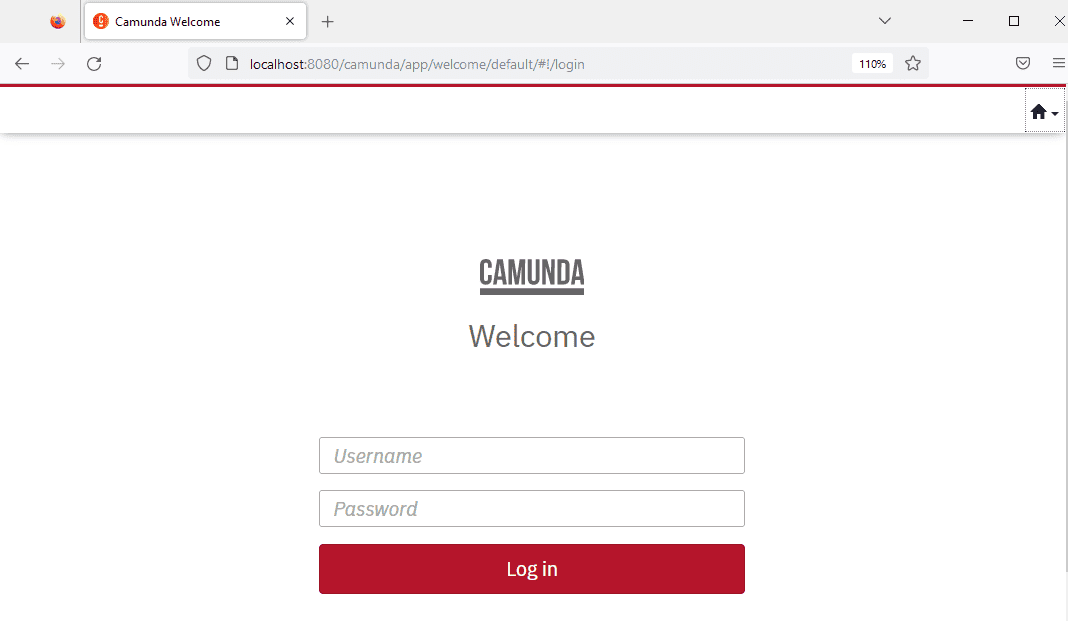
Let’s enter user credentials and access the Camunda web applications Cockpit, Tasklist, and Admin: 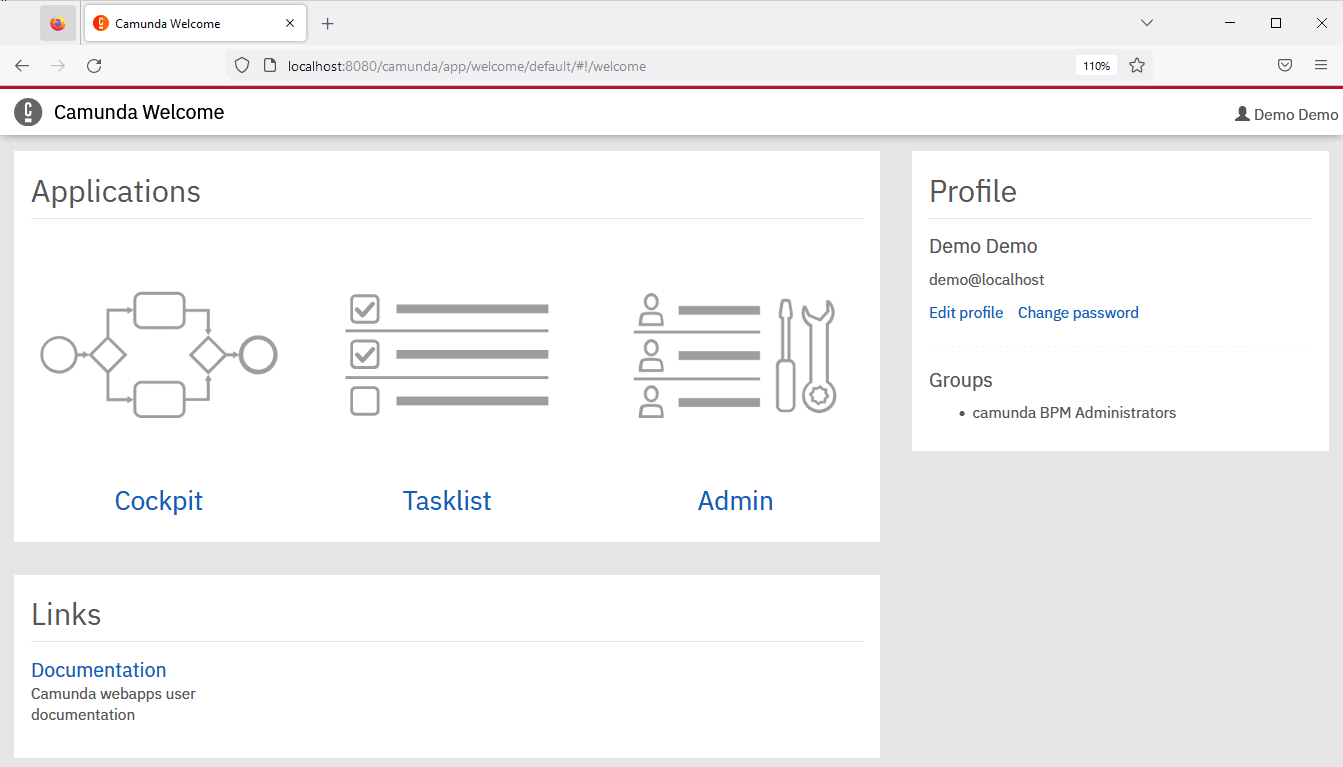
5.1. Cockpit Application
The Camunda Cockpit web application provides the user’s facilities to monitor a real-time view of the implemented process and its operations. We can see the number of processes deployed automatically when the Spring Boot application is started: 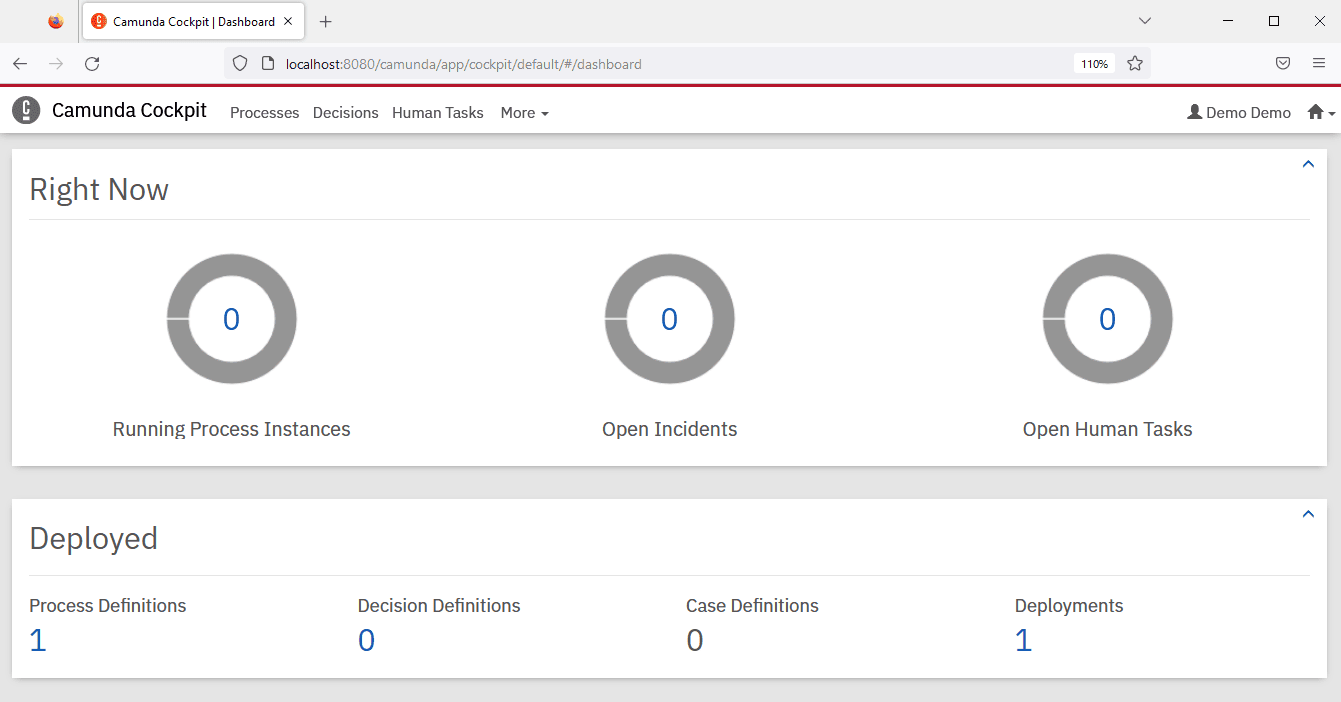 As we can see, there is one deployed process (loanProcess.bpmn). We can view deployed process diagram by clicking on the deployed process:
 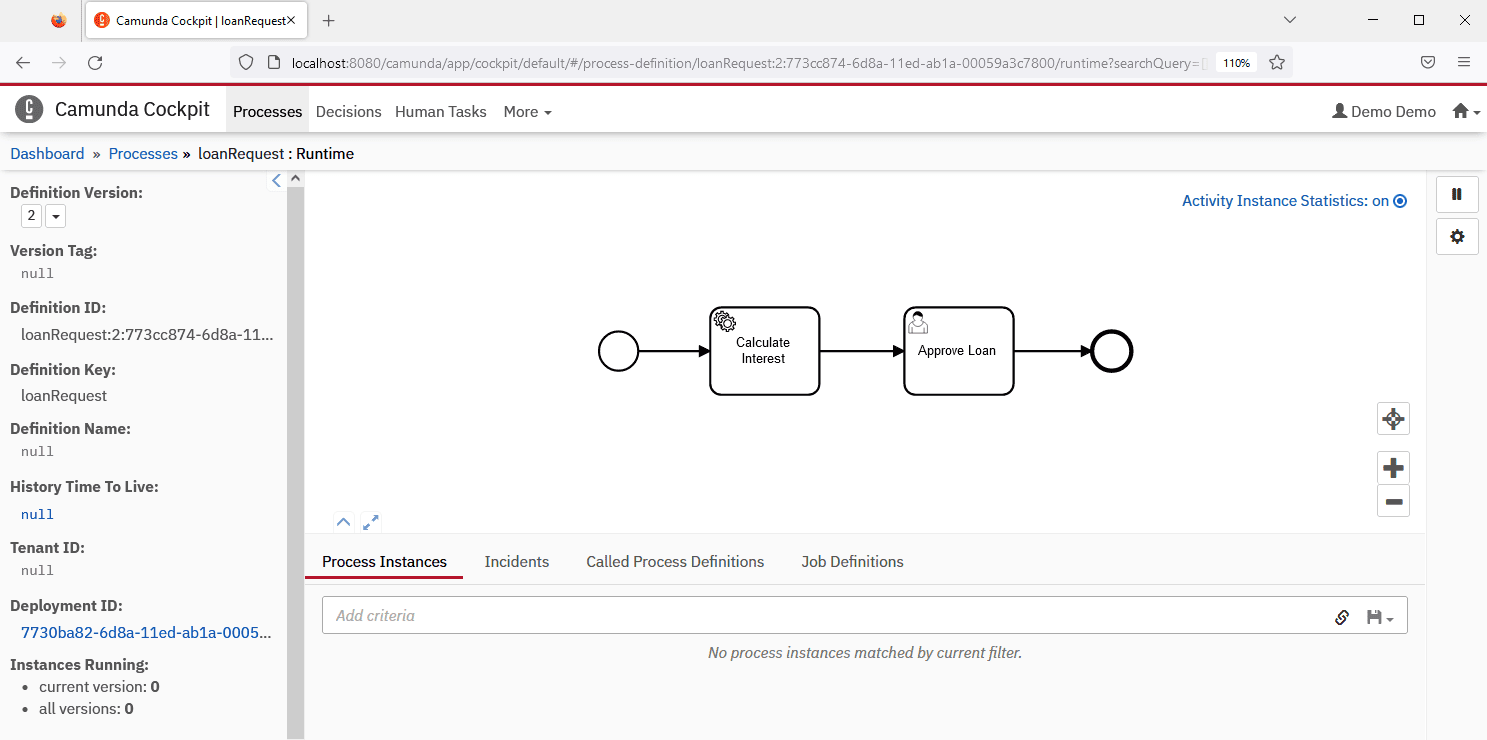 Now, the process is not started. We can start it using the Tasklist application.
5.2. Tasklist Application
The Camunda Tasklist application is used to manage user interactions with their tasks. We can start our sample process by clicking the Start process menu item: 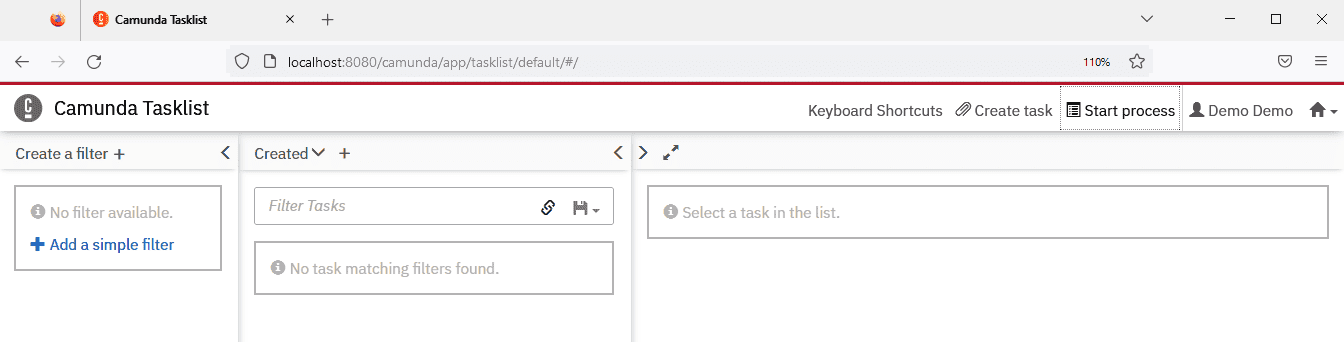 After starting the process, the Calculate Interest task is executed. It logs into the console:
2022-11-27 09:34:05.848 INFO 2748 --- [nio-8080-exec-3] c.e.c.task.CalculateInterestService : calculating interest of the loanNow, we can see the running process instance in the Cockpit application: 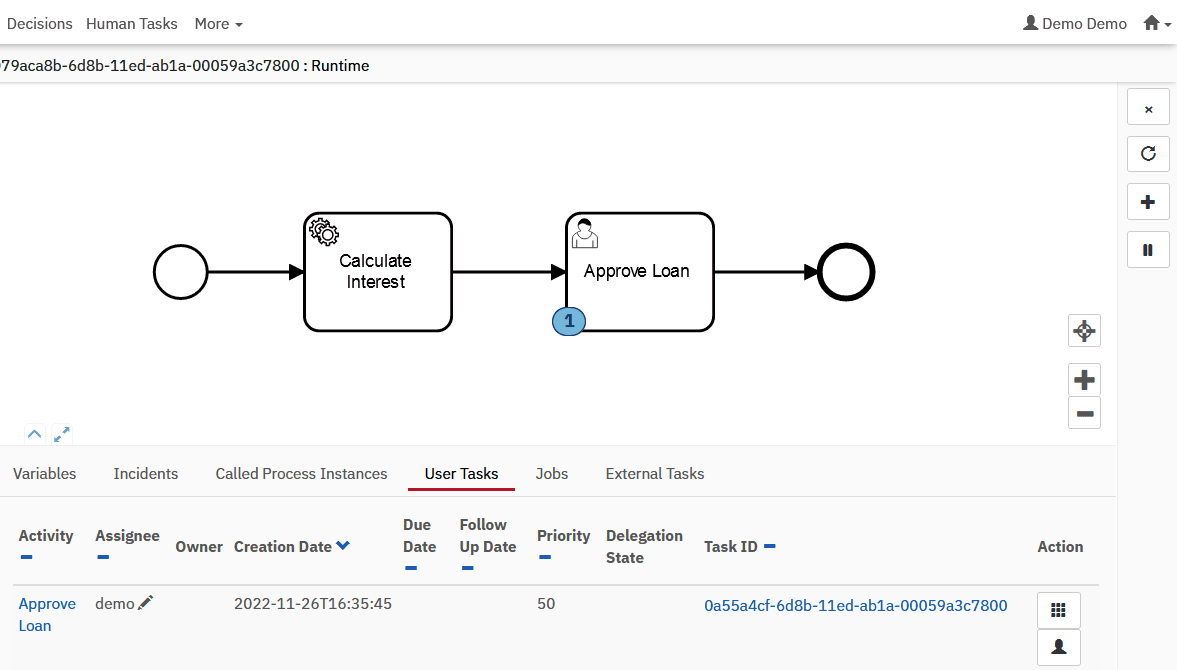 Note that the process is waiting for the Approve Loan user task. In this step, we assign the task to the demo user. So, the demo user can see the task in the Tasklist application:
 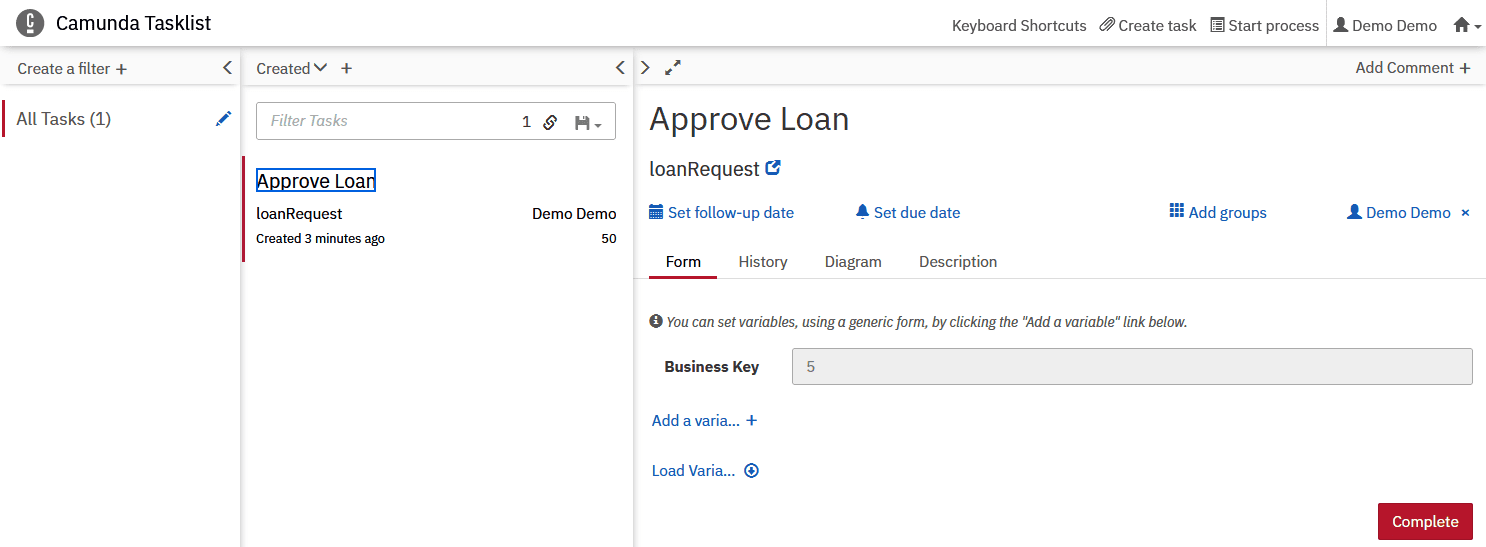 We can complete the task by clicking the Complete button. Finally, we can see the running process is completed in the Cockpit application.
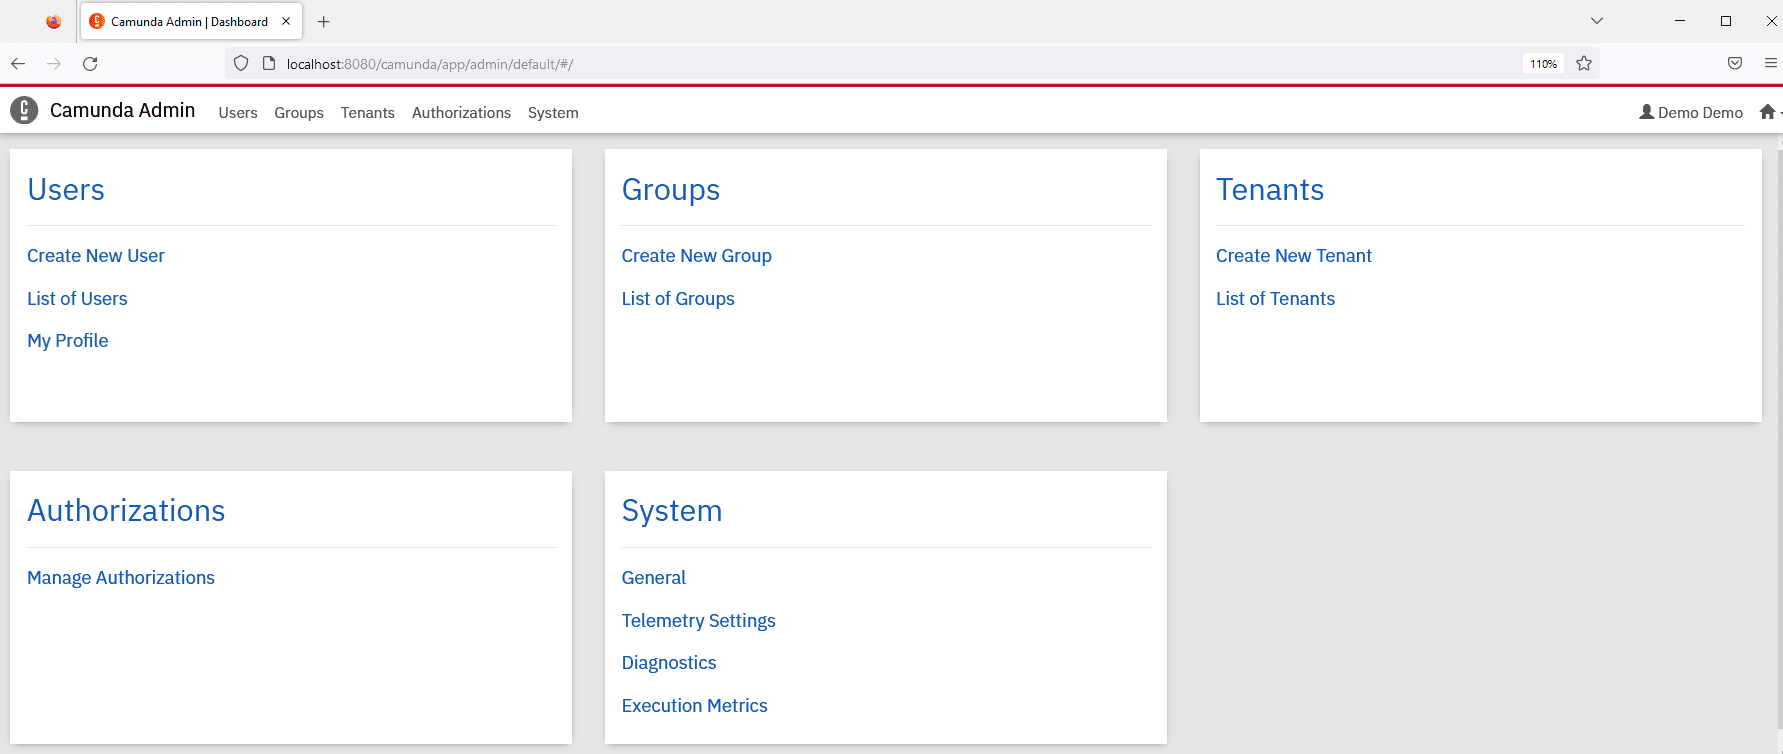
5.3. Admin Application
The Camunda Admin application is used to manage the users and their access to the system. Also, we can manage the tenants and groups:
6. Conclusion
In this article, we discussed the basics of setting up a Spring Boot application with an embedded Camunda engine. We created the application using the Camunda Platform Initializr tool and Spring Boot from scratch. Also, we define a simple loan request process model using Camunda Modeler. Moreover, we start and explore this process model using the Camunda web applications.


