

Mocking is an essential part of unit testing, and the Mockito library makes it easy to write clean and intuitive unit tests for your Java code.
Get started with mocking and improve your application tests using our Mockito guide:
Handling concurrency in an application can be a tricky process with many potential pitfalls. A solid grasp of the fundamentals will go a long way to help minimize these issues.
Get started with understanding multi-threaded applications with our Java Concurrency guide:
Spring 5 added support for reactive programming with the Spring WebFlux module, which has been improved upon ever since. Get started with the Reactor project basics and reactive programming in Spring Boot:
Since its introduction in Java 8, the Stream API has become a staple of Java development. The basic operations like iterating, filtering, mapping sequences of elements are deceptively simple to use.
But these can also be overused and fall into some common pitfalls.
To get a better understanding on how Streams work and how to combine them with other language features, check out our guide to Java Streams:
Explore Spring Boot 3 and Spring 6 in-depth through building a full REST API with the framework:
Yes, Spring Security can be complex, from the more advanced functionality within the Core to the deep OAuth support in the framework.
I built the security material as two full courses - Core and OAuth, to get practical with these more complex scenarios. We explore when and how to use each feature and code through it on the backing project.
You can explore the course here:
Spring Data JPA is a great way to handle the complexity of JPA with the powerful simplicity of Spring Boot.
Get started with Spring Data JPA through the guided reference course:
Refactor Java code safely — and automatically — with OpenRewrite.
Refactoring big codebases by hand is slow, risky, and easy to put off. That’s where OpenRewrite comes in. The open-source framework for large-scale, automated code transformations helps teams modernize safely and consistently.
Each month, the creators and maintainers of OpenRewrite at Moderne run live, hands-on training sessions — one for newcomers and one for experienced users. You’ll see how recipes work, how to apply them across projects, and how to modernize code with confidence.
Join the next session, bring your questions, and learn how to automate the kind of work that usually eats your sprint time.
Yes, we're now running our only Summer Sale. All Courses are 30% off until 20th July, 2026:
Yes, we're now running our only Summer Sale. All Courses are 30% off until 20th July, 2026:
1. Overview
In this article, we’ll create an application with WebSocket and test it using Postman.
2. Java WebSockets
WebSocket is a bi-directional, full-duplex, persistent connection between a web browser and a server. Once a WebSocket connection is established, the connection stays open until the client or server decides to close this connection.
The WebSocket protocol is one of the ways to make our application handle real-time messages. The most common alternatives are long polling and server-sent events. Each of these solutions has its advantages and drawbacks.
One way of using WebSockets in Spring is using the STOMP subprotocol. However, in this article, we’ll be using raw WebSockets because, as of today, STOMP support is not available in Postman.
3. Postman Setup
Postman is an API platform for building and using APIs. When using Postman, we don’t need to write an HTTP client infrastructure code just for the sake of testing. Instead, we create test suites called collections and let Postman interact with our API.
4. Application Using WebSocket
We’ll build a simple application. The workflow of our application will be:
- The server sends a one-time message to the client
- It sends periodic messages to the client
- Upon receiving messages from a client, it logs them and sends them back to the client
- The client sends aperiodic messages to the server
- The client receives messages from a server and logs them
The workflow diagram is as follows:

5. Spring WebSocket
Our server consists of two parts. Spring WebSocket events handler and Spring WebSocket configuration. We’ll discuss them separately below:
5.1. Spring WebSocket Config
We can enable WebSocket support in the Spring server by adding the @EnableWebSocket annotation.
In the same configuration, we’ll also register the implemented WebSocket handler for the WebSocket endpoint:
@Configuration
@EnableWebSocket
public class ServerWebSocketConfig implements WebSocketConfigurer {

    @Override
    public void registerWebSocketHandlers(WebSocketHandlerRegistry registry) {
        registry.addHandler(webSocketHandler(), "/websocket");
    }

    @Bean
    public WebSocketHandler webSocketHandler() {
        return new ServerWebSocketHandler();
    }
}
5.2. Spring WebSocket Handler
The WebSocket handler class extends TextWebSocketHandler. This handler uses the handleTextMessage callback method to receive messages from a client. The sendMessage method sends messages back to the client:
@Override
public void handleTextMessage(WebSocketSession session, TextMessage message) throws Exception {
    String request = message.getPayload();
    logger.info("Server received: {}", request);

    String response = String.format("response from server to '%s'", HtmlUtils.htmlEscape(request));
    logger.info("Server sends: {}", response);
    session.sendMessage(new TextMessage(response));
}
The @Scheduled method broadcasts periodic messages to active clients with the same sendMessage method:
@Scheduled(fixedRate = 10000)
void sendPeriodicMessages() throws IOException {
    for (WebSocketSession session : sessions) {
        if (session.isOpen()) {
            String broadcast = "server periodic message " + LocalTime.now();
            logger.info("Server sends: {}", broadcast);
            session.sendMessage(new TextMessage(broadcast));
        }
    }
}
Our endpoint for testing will be:
ws://localhost:8080/websocket6. Testing with Postman
Now that our endpoint is ready, we can test it with Postman. To test WebSocket, we must have v8.5.0 or higher.
Before starting the process with Postman, we’ll run our server. Now let’s proceed.
Firstly, start the Postman application. Once it started we can proceed.
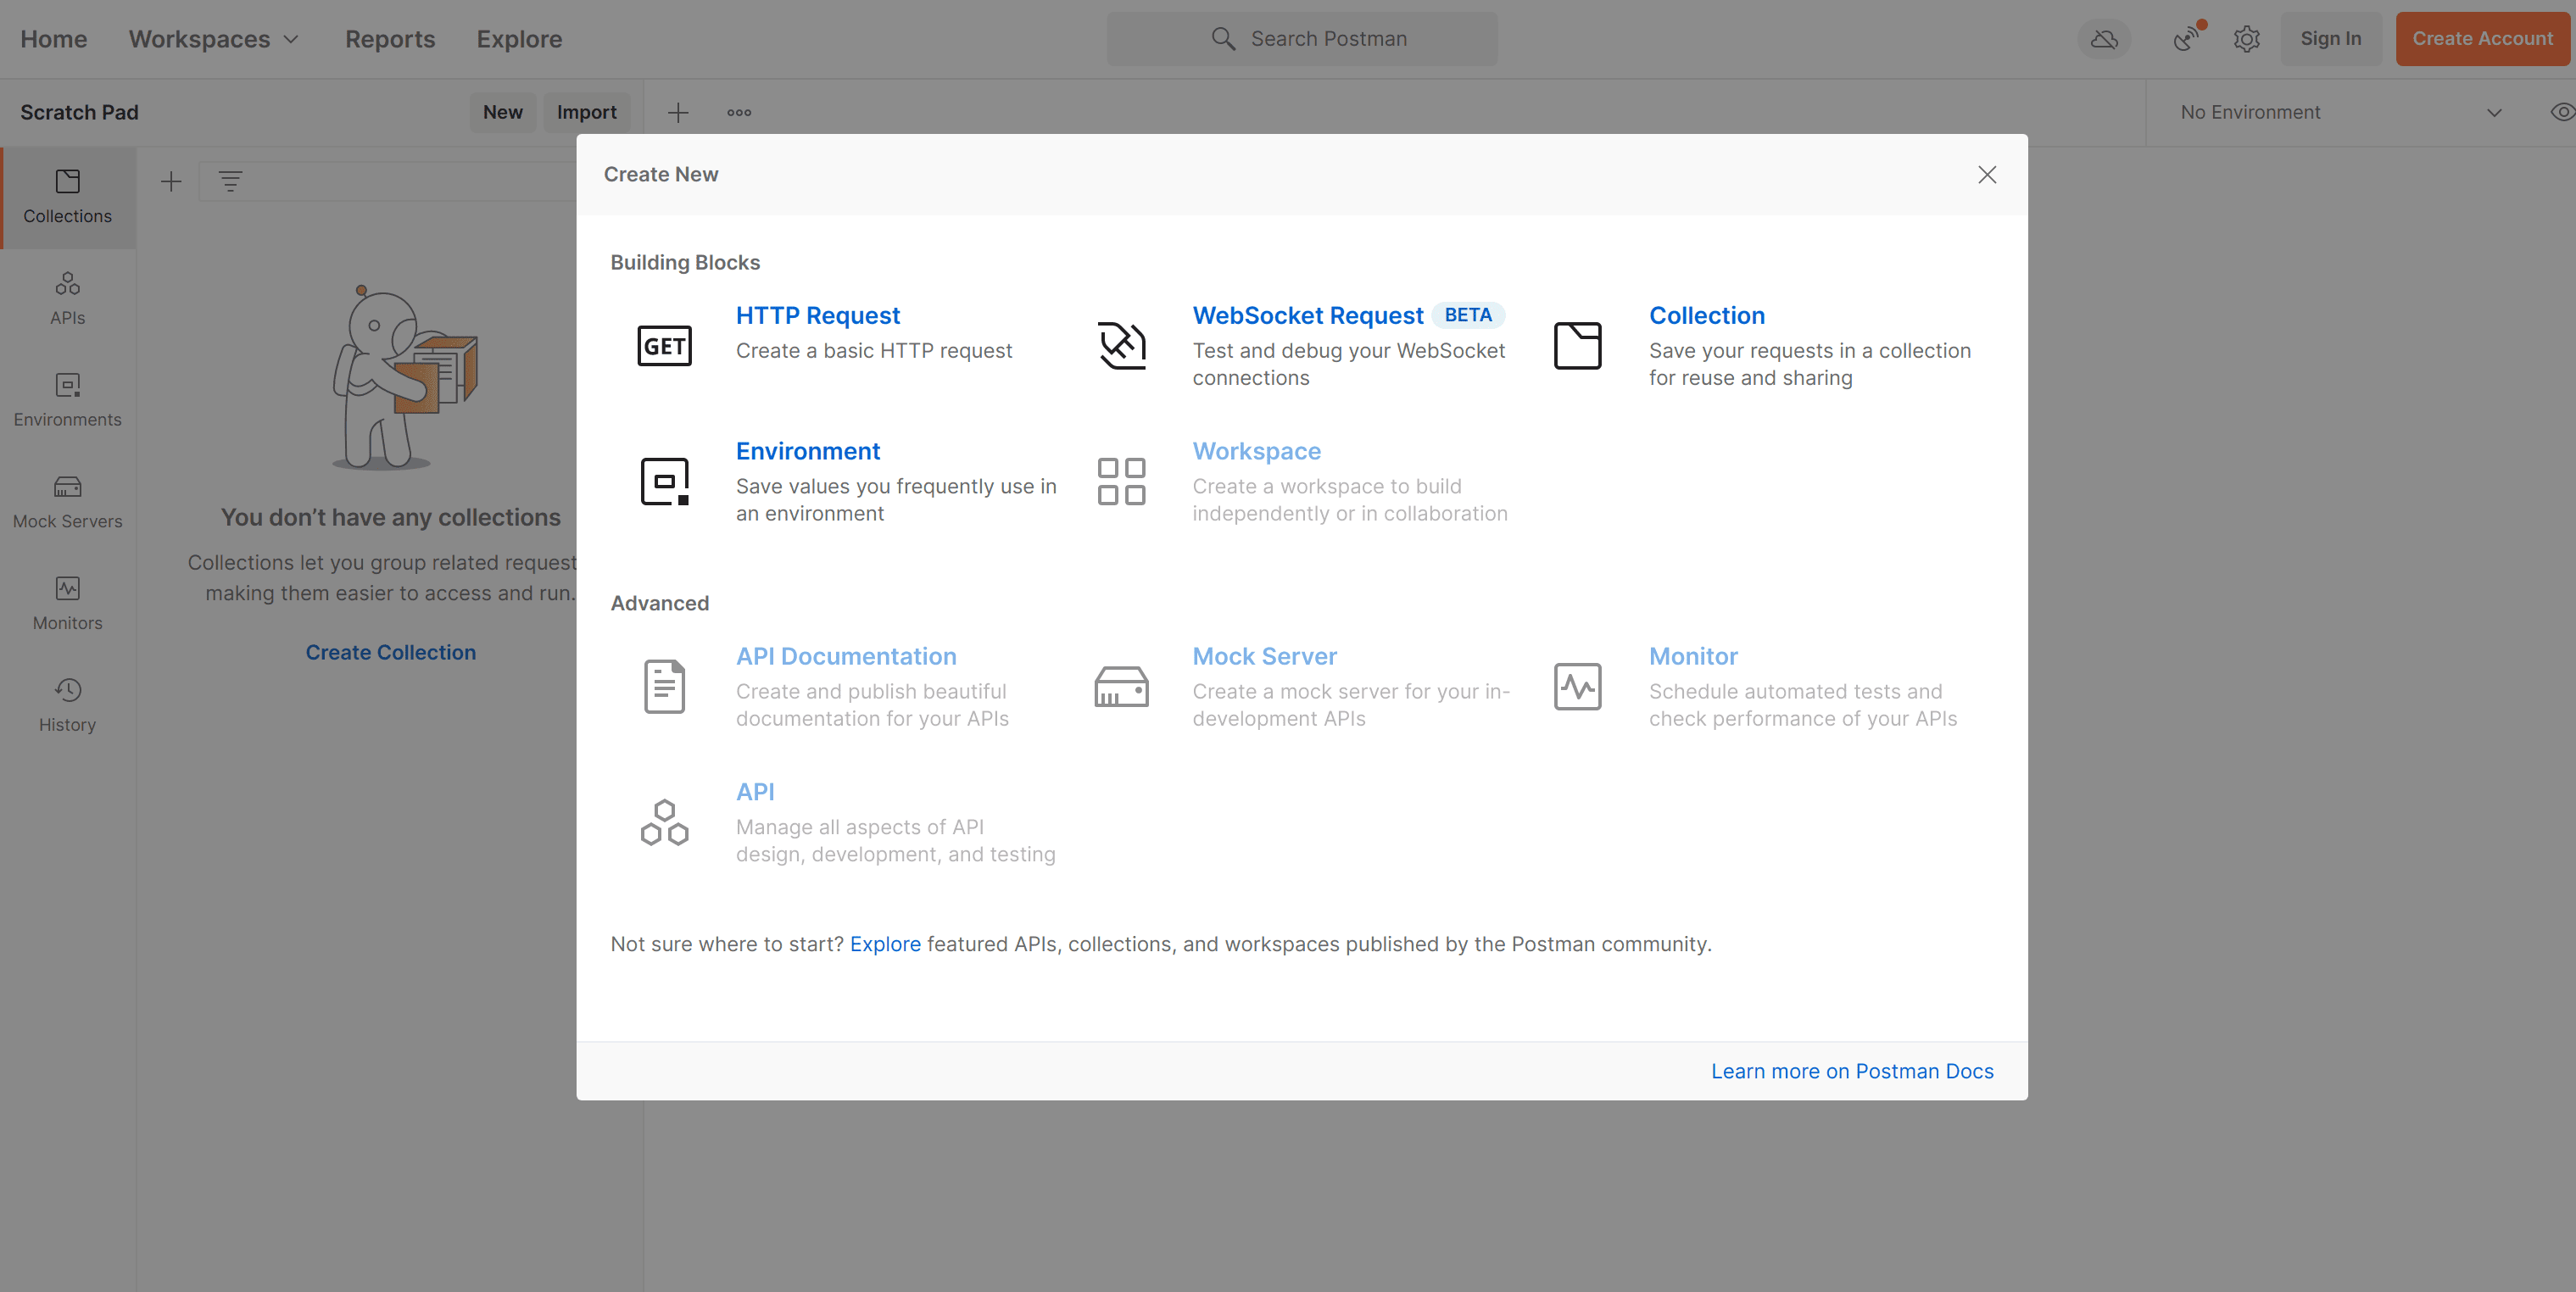
After it has loaded from the UI choose new:

A new pop-up will be opened. From there choose WebSocket Request:
We’ll be testing a raw WebSocket request. The screen should look like this:
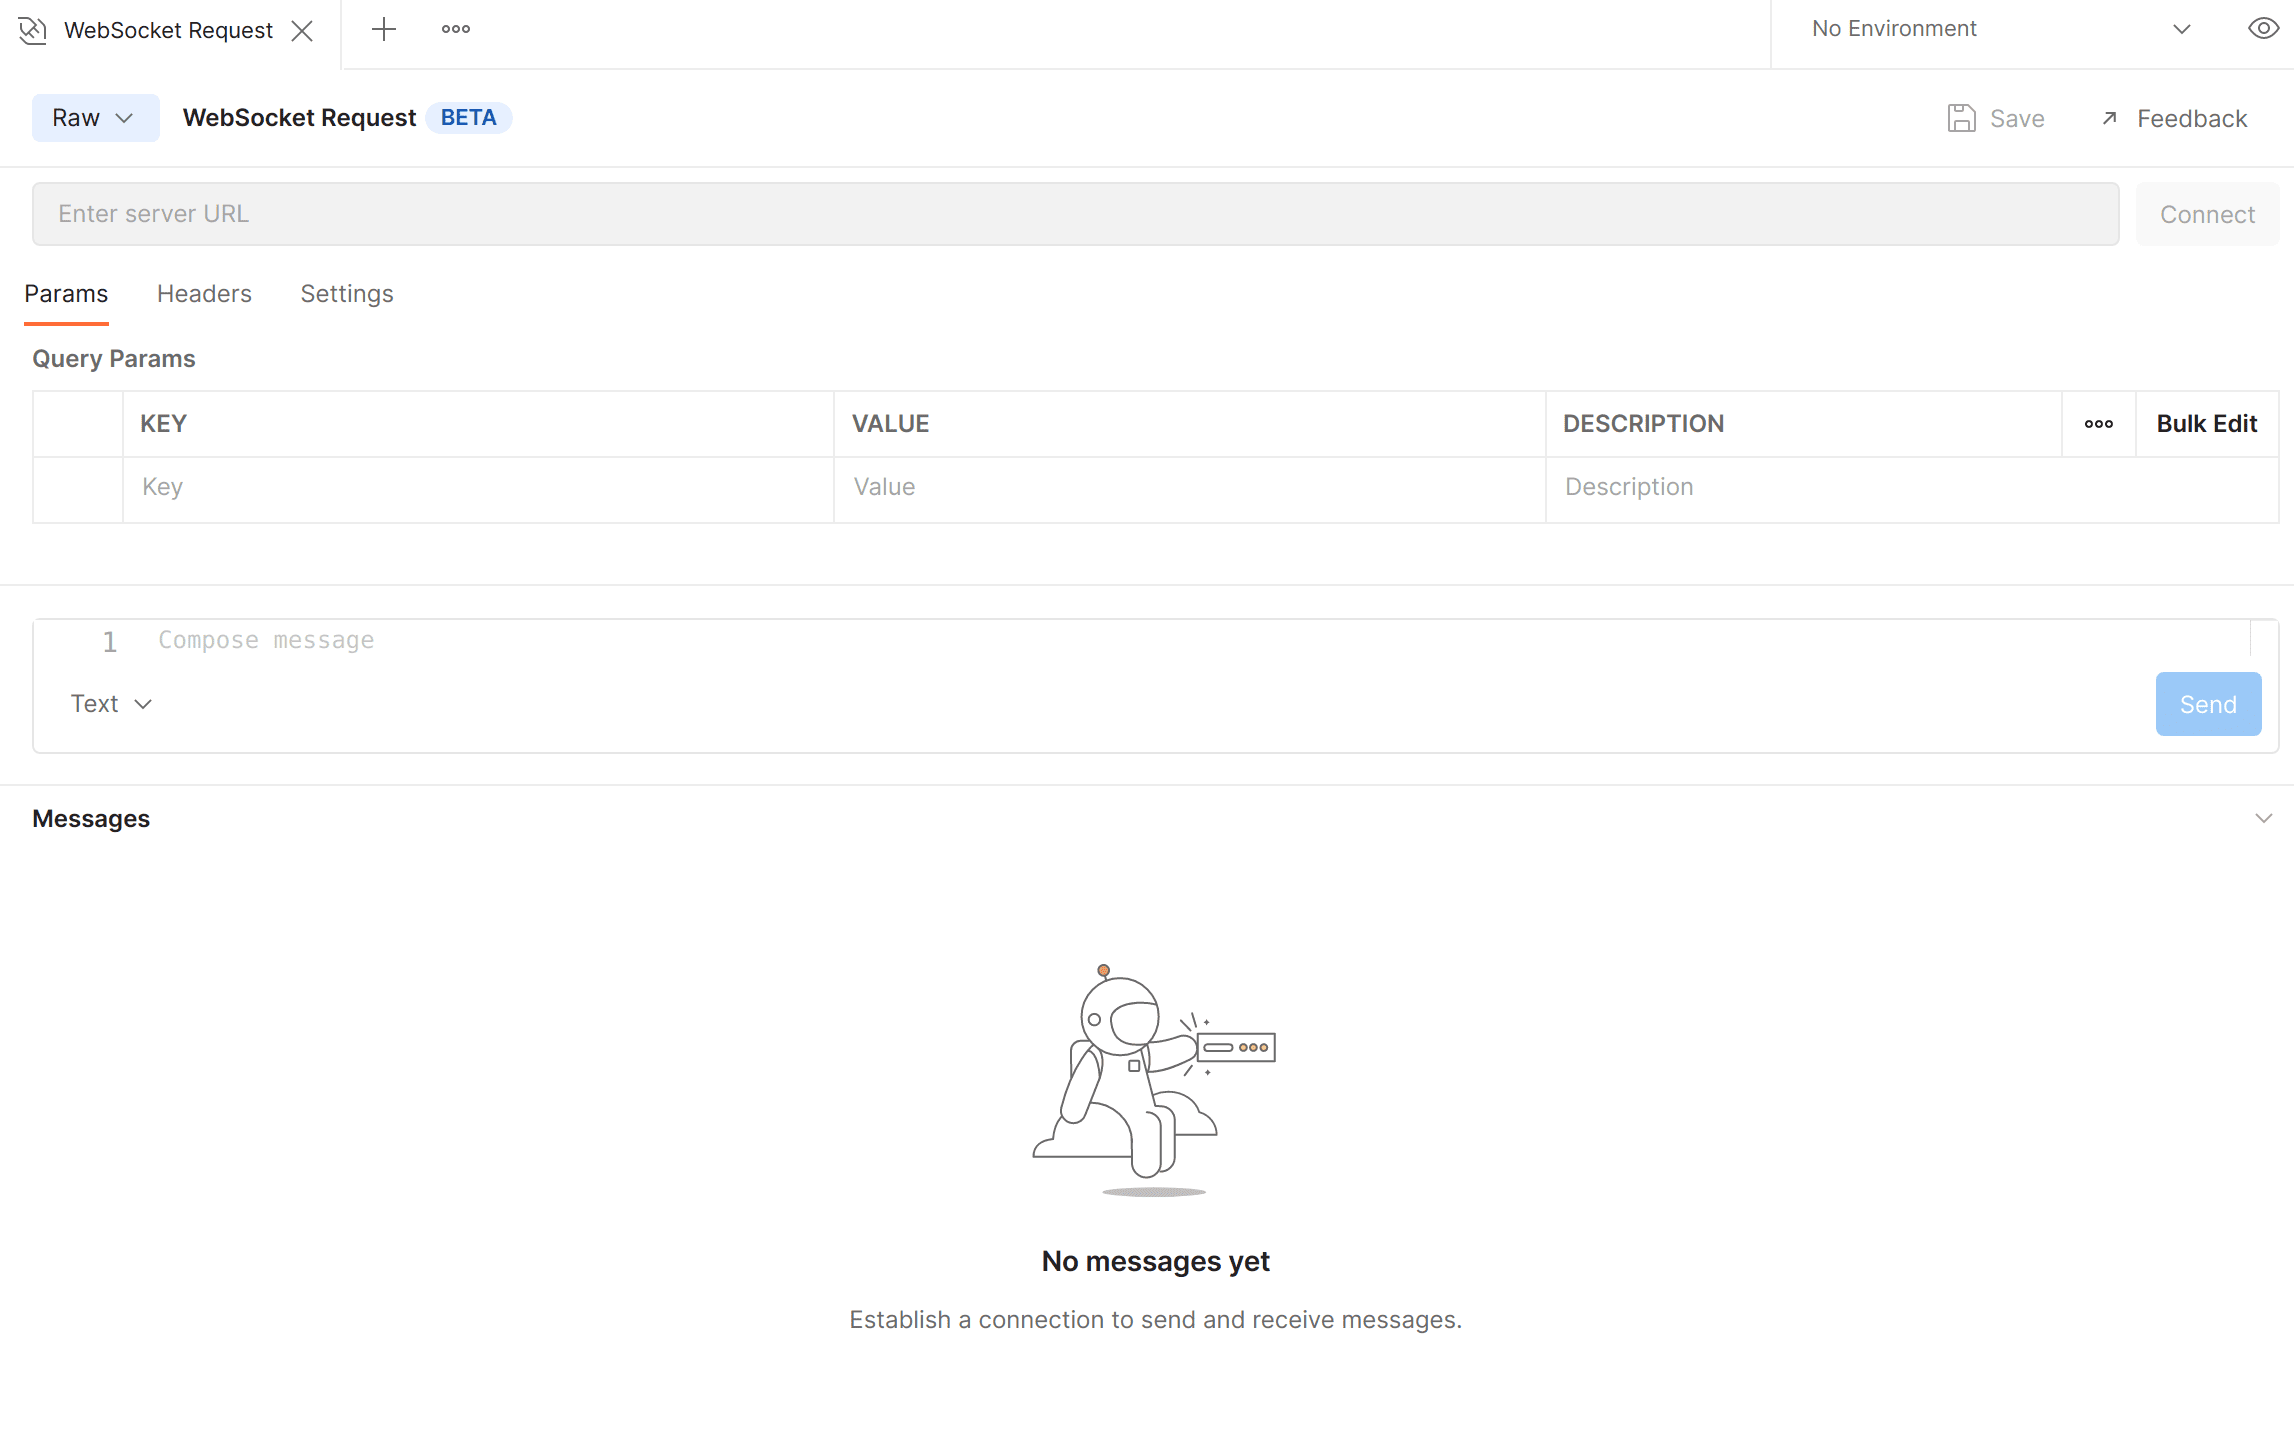
Now let’s add our URL. Press the connect button and test the connection:
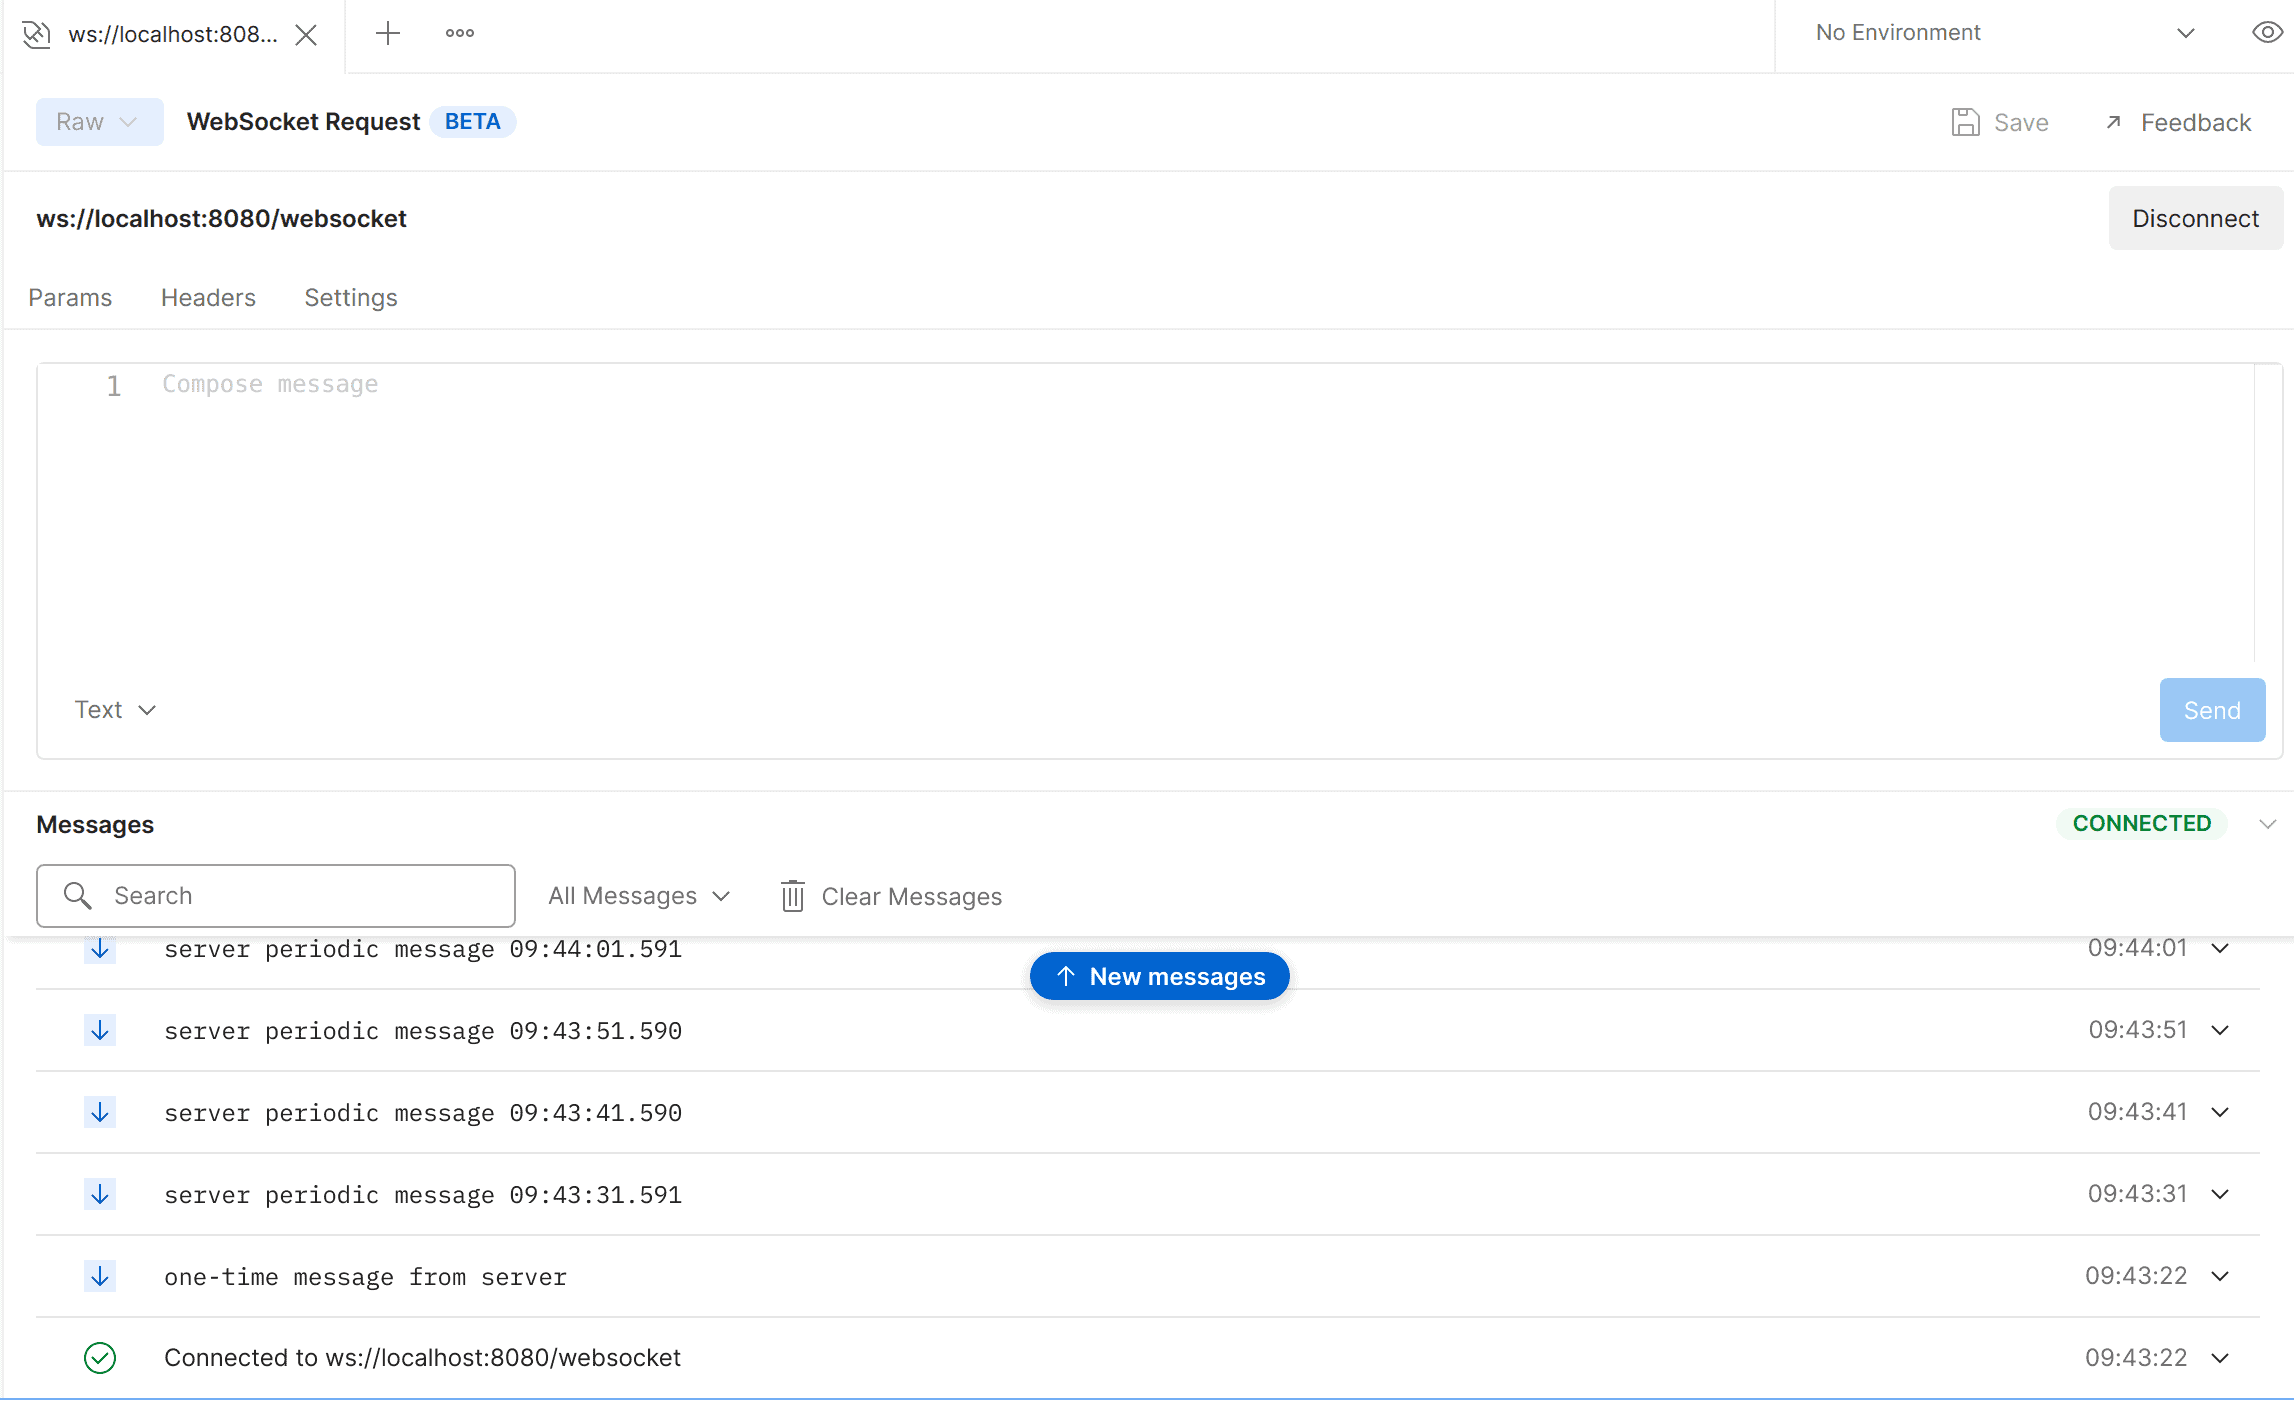
So, the connection is working fine. As we can see from the console we are getting responses from the server. Let’s try sending messages now and the server will respond back:
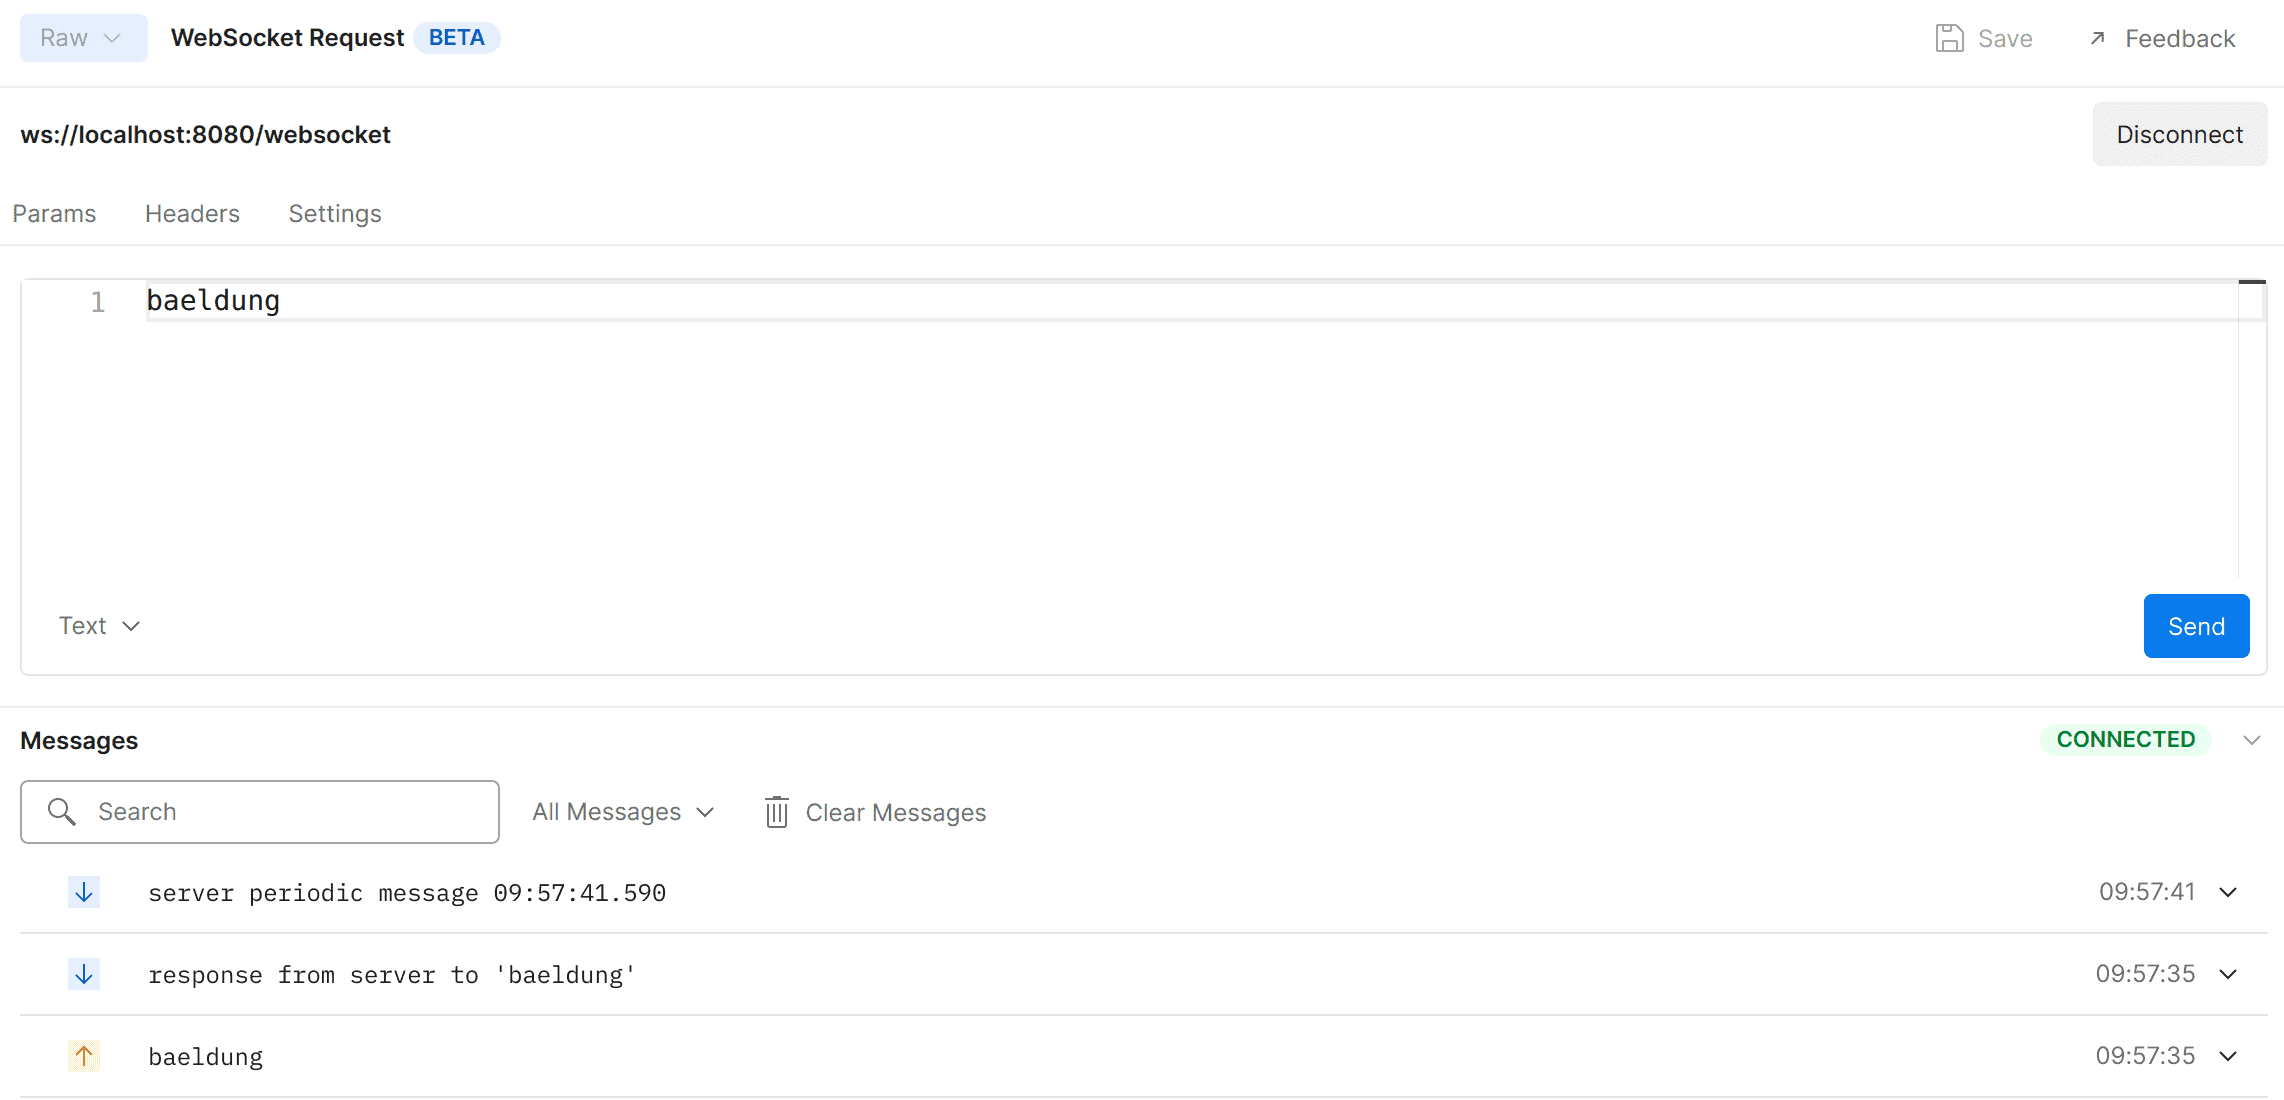
After our test is done, we can disconnect simply by clicking the Disconnect button.
7. Conclusion
In this article, we’ve created a simple application to test a connection with WebSocket and tested it using Postman.


