

Yes, we're now running our only Summer Sale. All Courses are 30% off until 20th July, 2026:
Learn through the super-clean Baeldung Pro experience:
>> Membership and Baeldung Pro.
No ads, dark-mode and 6 months free of IntelliJ Idea Ultimate to start with.
1. Overview
VirtualBox Snapshots is a tool for taking incremental snapshots of the virtual machine (VM) state. Snapshots allow us to revert our VM to a specific condition, similar to Btrfs Snapshots, LVM Snapshots, Timeshift, macOS’s Time Machine, Microsoft’s System Restore, and many others.
Let’s explore VirtualBox Snapshots to create and use snapshots.
All methods or commands in this article have been tested on Debian 12 (Bookworm) running VirtualBox 7.0.10 with an Ubuntu Server 22.04 LTS virtual machine.
2. Create a Virtual Machine Sample
Firstly, let’s create a virtual machine of Ubuntu Server 22.04 LTS for us to play around with.
Then, we open VirtualBox Snapshots (click on the hamburger menu next to the VM name, and select Snapshots):
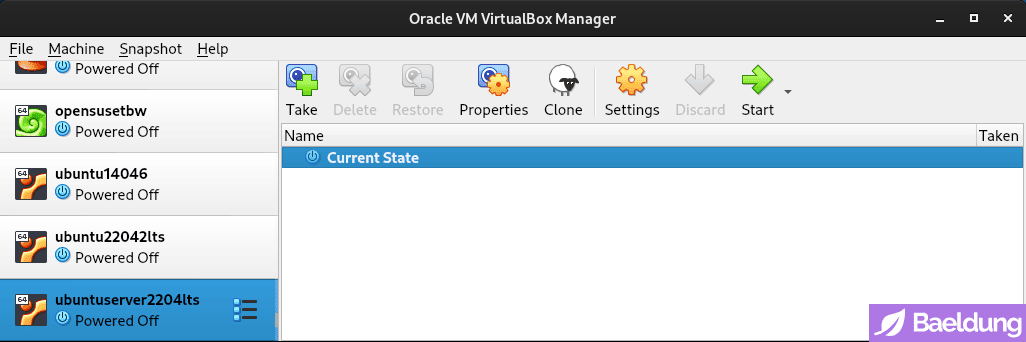
In the image above, we can see the only entry is Current State. This is because it’s a fresh installation and we’ve never taken any snapshots before.
Now that we have a working virtual machine, we can start creating or taking snapshots.
3. Create Snapshots
VirtualBox enables us to take as many snapshots as we want, with the only practical limitation being our host disk space.
3.1. Create the First Snapshot
Let’s create or take our first snapshot by clicking on the Take button, entering the name as Fresh installation, and then clicking OK:
Our new snapshot appears in the snapshots list, and below it is an item called Current State. This means that the current state of our VM is based on the snapshot we just took earlier.
3.2. Create the Second Snapshot
Since we’ve got a snapshot that stores the state of a fresh installation, let’s make some changes to the VM, and then take a second snapshot.
First, we boot the VM, then install a small hello package. Lastly, we create a subdirectory and a file in our HOME directory:
$ pwd
/home/ubuntu
$ sudo apt install hello
$ hello
Hello, world!
$ mkdir helloworld && cd helloworld && echo "Just installed hello package." > helloworld.txt
This step is for later analysis to verify that the snapshot stores and can restore user files. In addition, the pwd command is for printing the name of the current or working directory.
After creating the file and directory, let’s shut down the VM to take a second snapshot and name it Installed hello package:
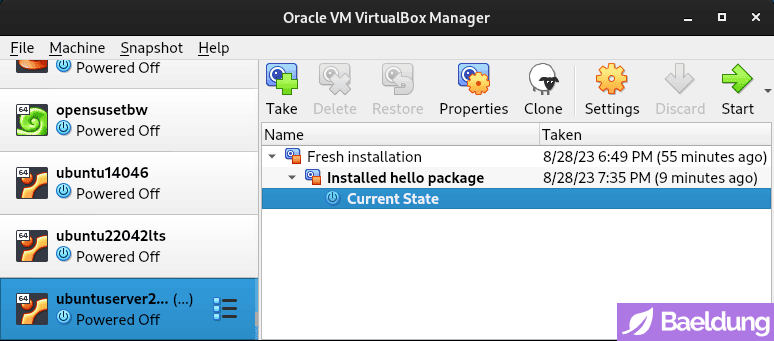
We can take a snapshot while the VM is running, however, VirtualBox pauses the VM during the snapshot creation. Moreover, VirtualBox also saves the memory state of the VM in the snapshot, which increases the size of the snapshot.
3.3. Snapshot Files
VirtualBox creates a new VirtualBox Disk Image (VDI) file for each snapshot to store the differences with the parent snapshot:
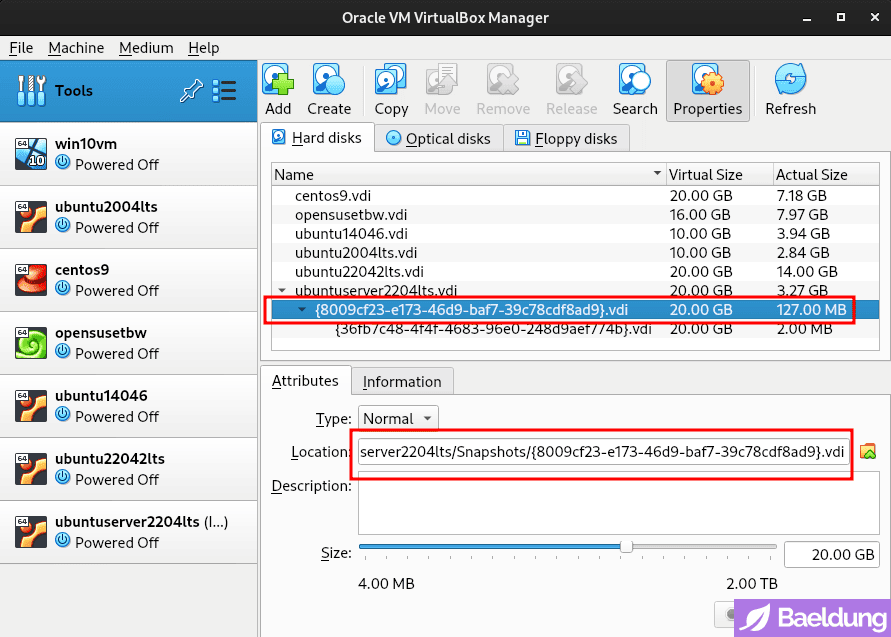
The location of the snapshot VDI files is usually in the same directory as the VM’s VDI file.
Notably when we take a snapshot of our VM, VirtualBox freezes the VM’s image file at that moment and no longer writes to it. Any changes made to the VM after taking the snapshot are stored in a separate file called a differencing image file. As we continue using the VM and making changes, the differencing image file size will grow because it stores all the subsequent changes. In the image above, the differencing image file is the one that ends with 774b}.vdi and has an actual size of 2MB.
4. Restore Snapshots
At this point, we have two snapshots of our VM: Fresh installation and Installed hello package. Our VM’s current state is the latter.
4.1. Restore the First Snapshot
Let’s restore the Fresh installation snapshot, and verify if the hello package and the files and directory still exist:

As we can see in the image above, the hello package and the user file and directory don’t exist in this snapshot. This is because, by default, VirtualBox image is in normal image write mode, where VirtualBox freezes the image file every time we take a snapshot of it.
4.2. VirtualBox Image Write Modes
The VirtualBox image has several write modes: normal images, write-through hard disks, shareable hard disks, immutable images, multiattach mode images, and read-only images.
These write modes apply to VDI, VMDK, VHD, or HDD image formats, regardless of whether the virtual hard disk type is fixed-size or dynamically allocated.
In other words, these write modes determine how VirtualBox writes to the virtual hard disk. For example, in normal mode, during snapshot operations, it freezes the image file, including the user files, and creates differencing images that aren’t in write-through mode.
On the other hand, in write-through hard disk mode, VirtualBox writes to an additional virtual hard disk (VHD). The state of this additional VHD won’t be included in the snapshot. Additionally, we need to create this additional VHD and attach it to the virtual machine separately if we want to use it.
4.3. Restore the Second Snapshot
The current state of our VM is the child of the Fresh installation snapshot. At this point, it doesn’t have the hello package and the user files.
Let’s restore the second snapshot – Installed hello package – and see the difference:
Our current virtual machine now has the hello package installed and the user files present, unlike the Fresh installation snapshot.
5. Conclusion
In this article, we explored VirtualBox Snapshots, a tool for taking incremental snapshots of virtual machine states. We learned how to create snapshots, make changes, and restore to previous states. Additionally, we also learned about snapshot write modes and their implications, giving us insights into managing the virtual machine states.