

Yes, we're now running our only Summer Sale. All Courses are 30% off until 20th July, 2026:
Learn through the super-clean Baeldung Pro experience:
>> Membership and Baeldung Pro.
No ads, dark-mode and 6 months free of IntelliJ Idea Ultimate to start with.
1. Introduction
It might not be obvious at first glance, but Vim is a powerful editor. In fact, it is the editor of choice for many software engineers.
In this article, we will discuss Vim windows and see how flexible they are. We assume the basics are already familiar. Namely, how to use normal (or command) mode and how to save or exit.
2. Buffers and Windows
Before we get to windows, we need to define buffers. A buffer is a temporary copy of a file’s contents. When we open a file, Vim loads its contents into memory. The original file remains intact until we save our changes.
Along with the buffer, Vim creates a window through which we do the editing. A window, in essence, is a view of a buffer. Multiple windows can display the same file or buffer.
We can use the :edit or short :e command to open a file. It can be an existing file or a new one we want to create:
:edit {file path}
In case we have a work in progress on another buffer, this will replace the current buffer with the newly opened one. The replaced buffer will still be loaded but not visible. Note that this command fails if we have unsaved changes.
The :edit command without any arguments reloads the file’s contents into the current buffer.
:edit
We can also create an empty buffer with the :new, or short :N, command. With an optional file path argument, the newly opened buffer is named:
:new [{file path}]
Instead of replacing existing windows, the new buffer opens alongside others in a split window. By default, this new window is placed above the current window.
Obviously, when we start Vim empty without any files, the :edit and :new commands do not alter the view.
3. Split Windows
The main view can be split into multiple windows, both horizontal and vertical. Each split window has the filename, or its absence, indicated at the bottom of its view.
Let’s say we want to compare two different sections of the same file. With the :split, or short :sp, command we can open a new horizontal split window on the current buffer:
:sp
With a file path argument, a new split window opens for the specified file. It can be an existing or a new file:
:sp {file path}
We can also split the current window vertically with the :vsplit, or short :vsp, command:
:vsp
:vsp {file path}-

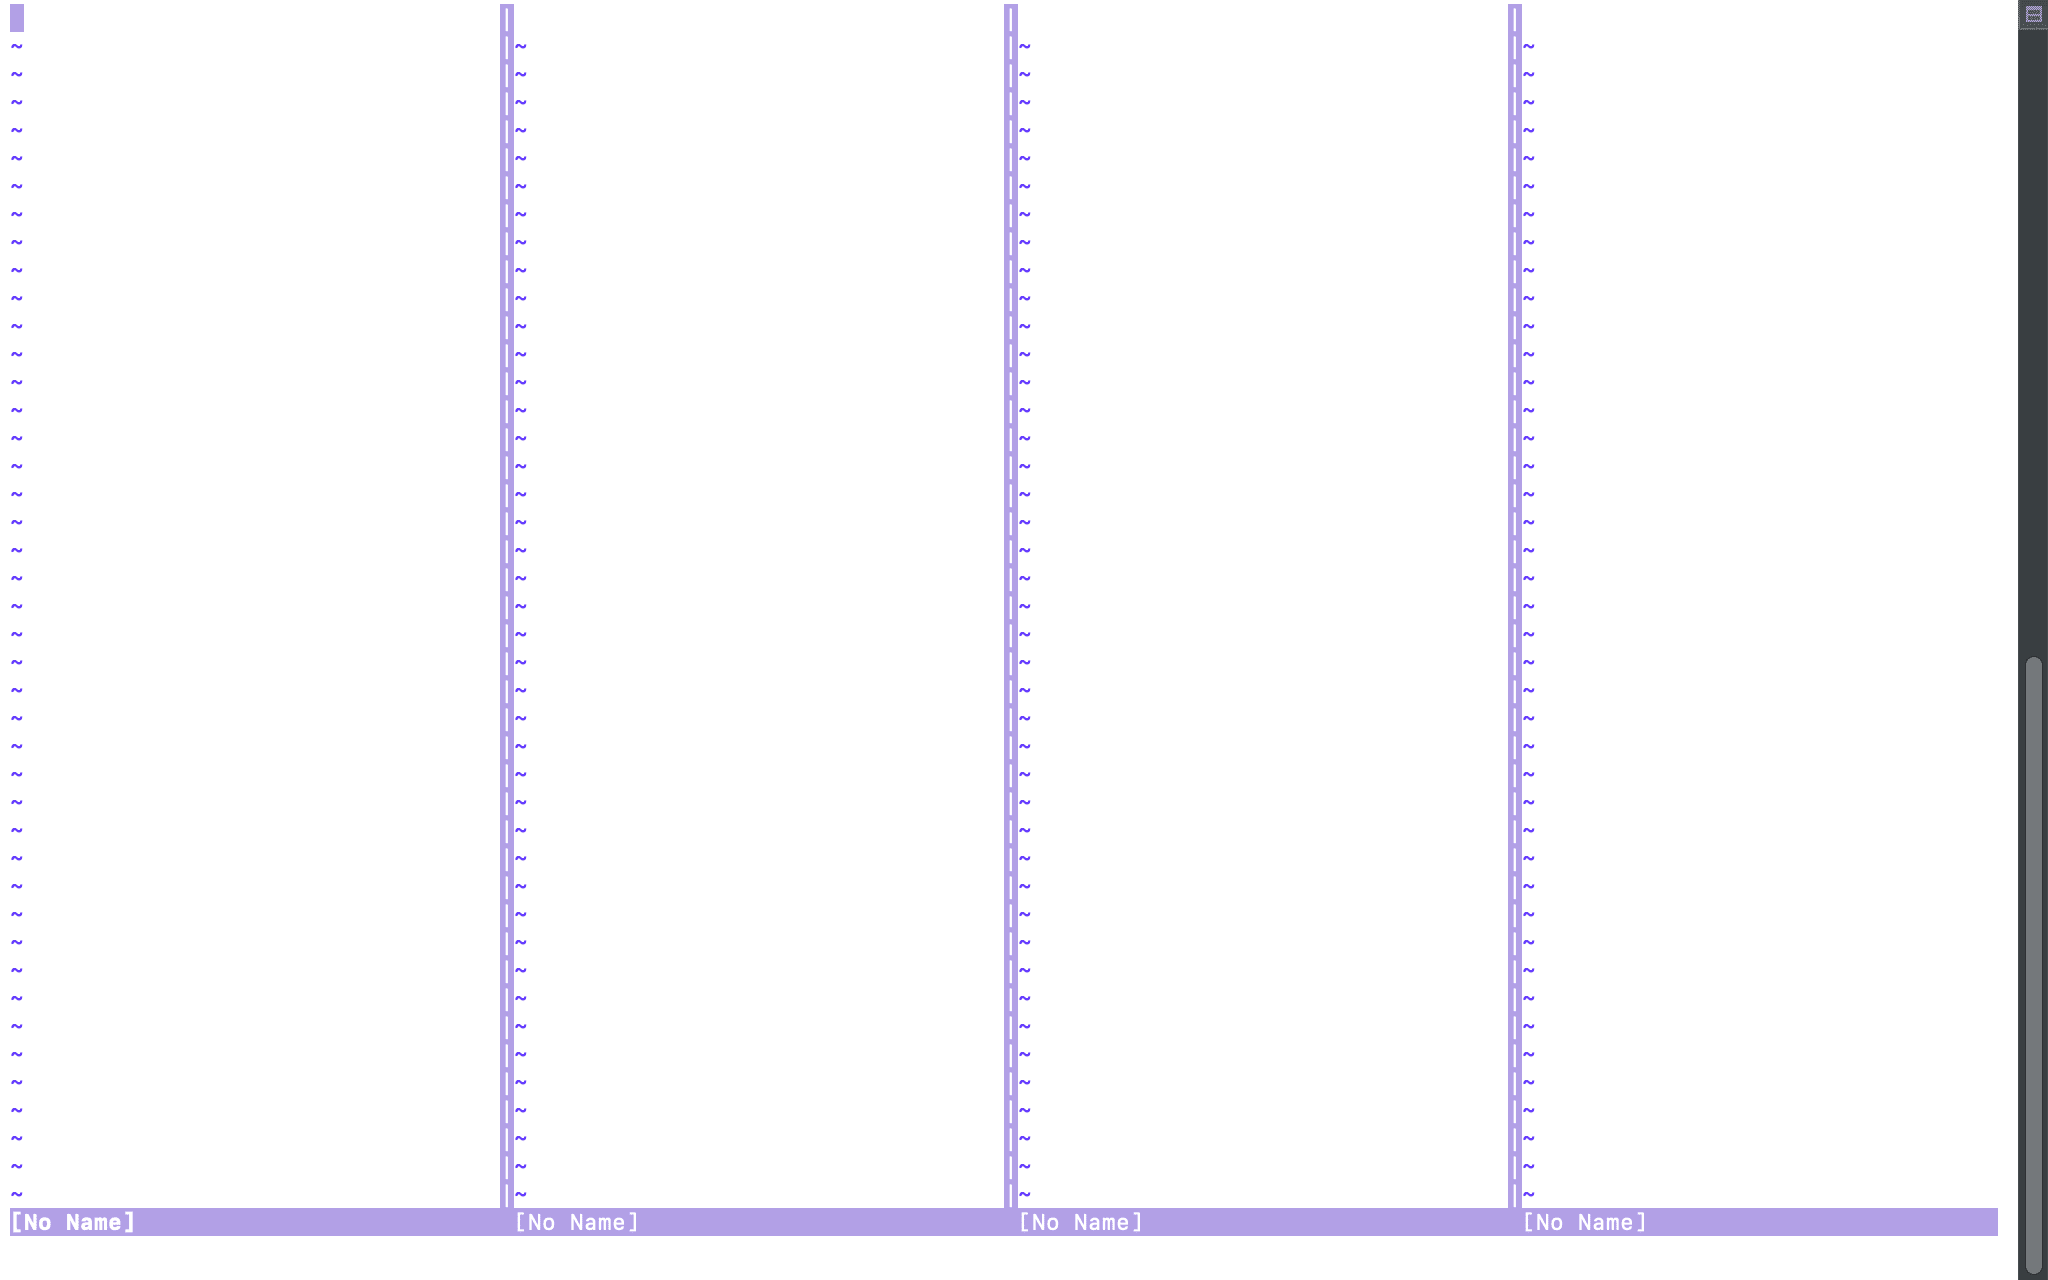
- Horizontal Split

-
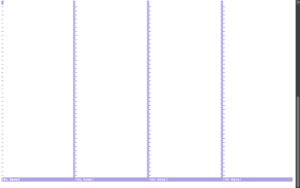
- Vertical Split
The :new command too has its vertical equivalent. Instead of a horizontal split window, it opens a vertical one on the left side of the active window:
:vnew [{file path}]
It is also possible to start Vim with files displayed in split windows. Running the vim command with the -o option followed by a space-delimited list of file paths opens them in horizontally split windows. The -O option does the same vertically:
vim -o {file path 1} {file path 2} ...
vim -O {file path 1} {file path 2} ...
Editing is done only in the active window. When we have other windows on the same buffer, changes are applied to all of them in real-time.
Similarly, when executing commands in normal mode, unless it is a batch command, we are executing them on the active window. If we save and quit, Vim saves the buffer contents and closes the active window. The buffer is closed only when it happens to be the last window on that buffer.
Window layout combinations are many. Whether we start splitting windows vertically or horizontally determines the high-level layout. When we do vertical split first and then try horizontal split, as illustrated above, we are splitting vertical windows horizontally and won’t have horizontally split windows at the highest level.
4. Window Commands
The Ctrl+w key combination enters us into the window command mode. Unlike application modes, we need to use Ctrl+w before every command we use.
4.1. Navigation
First, let’s discuss the navigation options. The Ctrl+w +w combination navigates to the next split window and makes it the active one. It wraps around reaching the end. The Ctrl+w +number +w combination jumps to the n-th window. Ctrl+w +W works similarly but in the opposite direction.
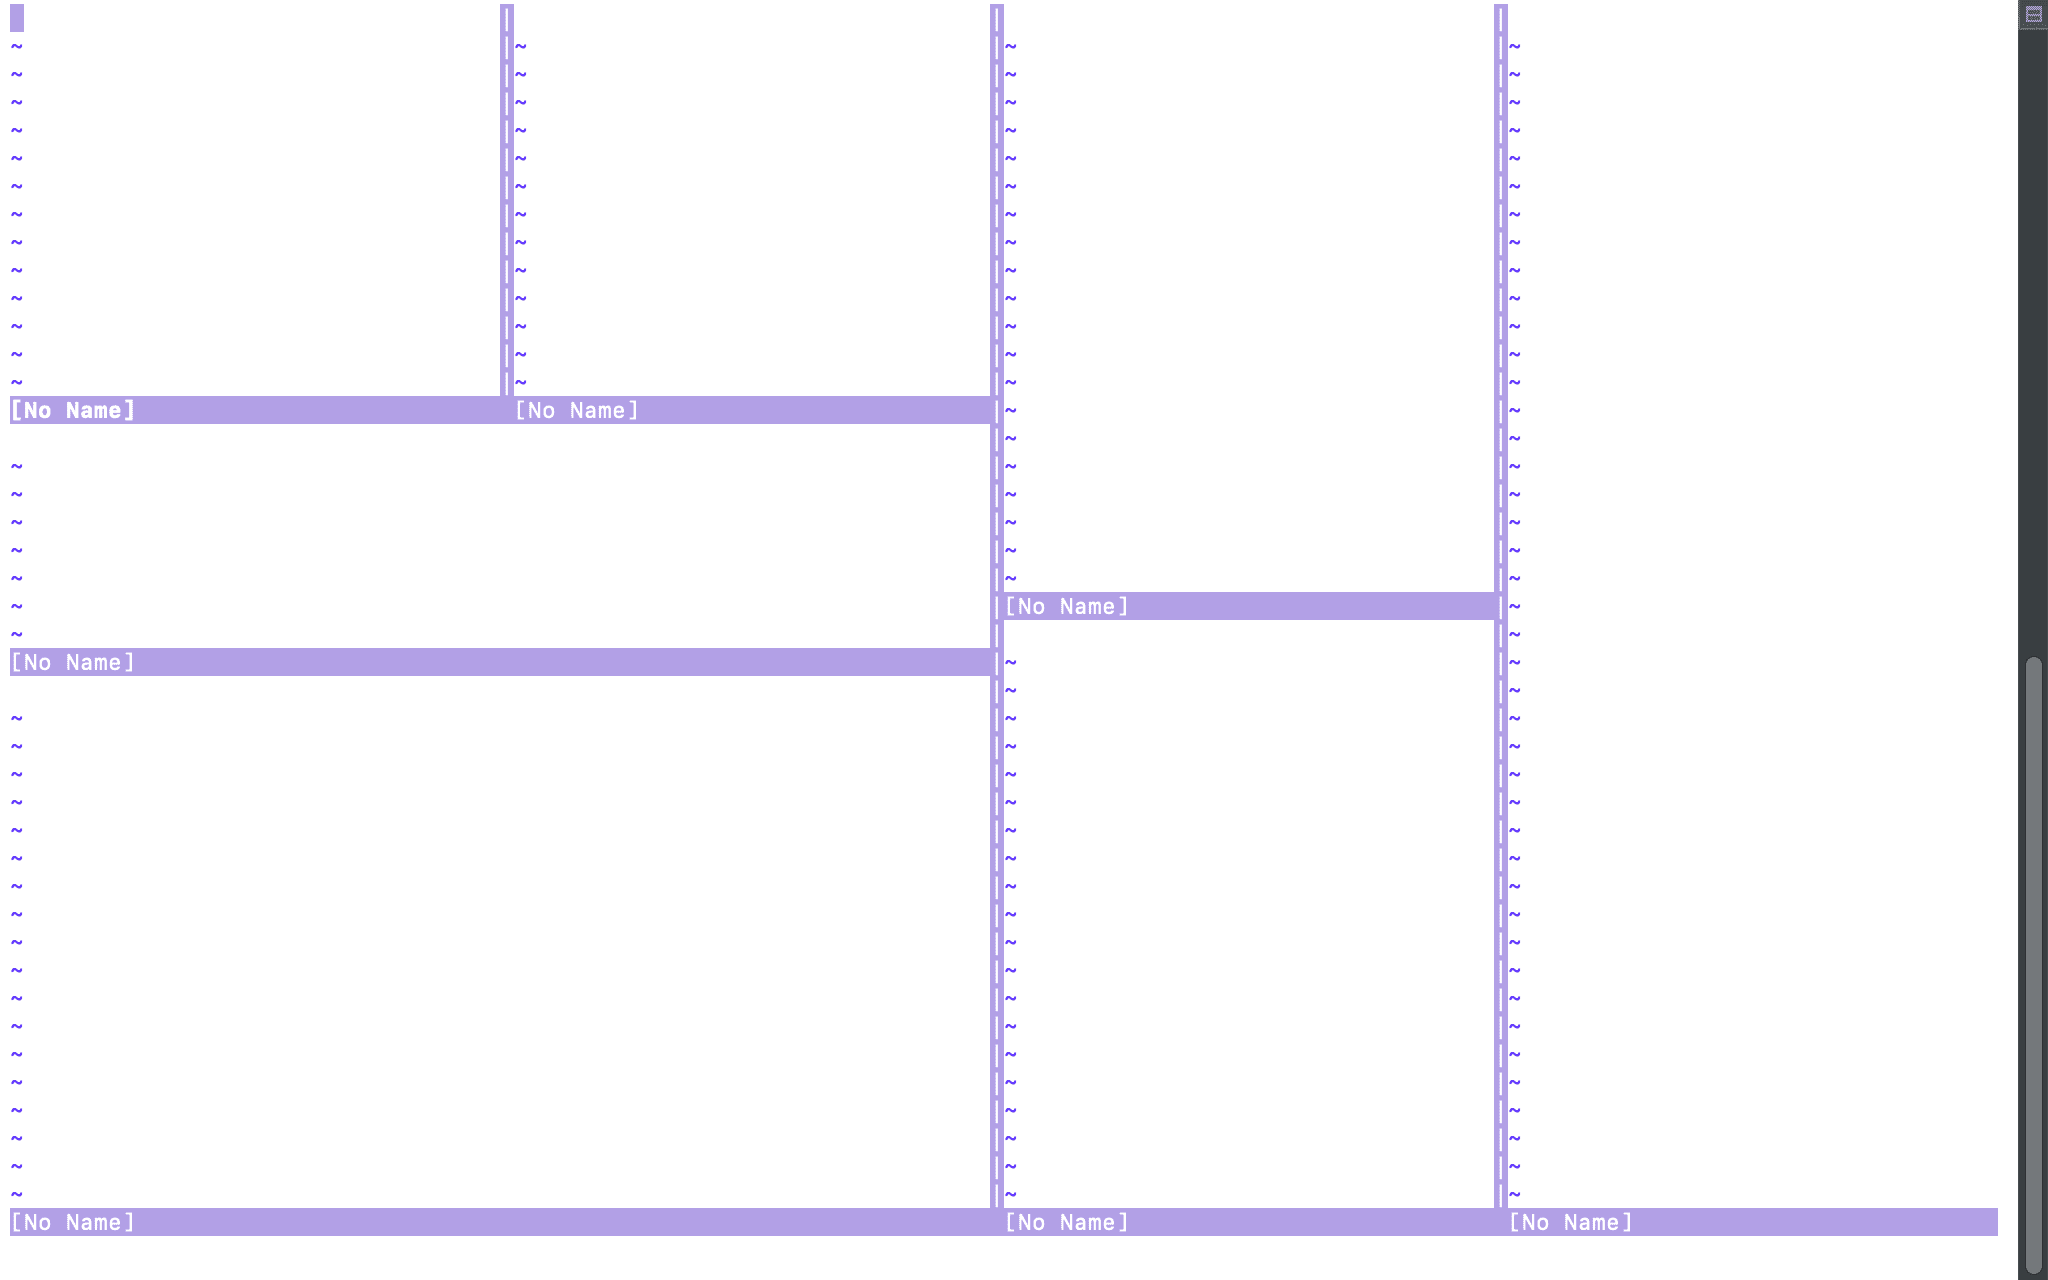
Note that navigation and enumeration are done from the top to bottom and left to right order, from the lowest to the highest layout level.
Ctrl+w +p goes to the previous, last accessed window. Ctrl+w +t goes to the top left and Ctrl+w +b to the bottom right window.
4.2. Layout
We can adjust the layout by splitting, repositioning, or resizing the windows.
The Ctrl+w +s and Ctrl+w +v combinations open a new horizontal or vertical split window respectably for the current buffer. To open a split window with an empty buffer we can use Ctrl+w +n. These are faster to use, but unlike the :split, :vsplit, or :new commands, we do not have the option to open a different buffer or name the new buffer.
Reordering split windows is only possible for windows that are at the same level and not split themselves. The Ctlr+w +r combination shifts the windows forward in a circular way, from left to right in horizontally split and top to bottom in vertically split windows. Ctlr+w +R shifts backwards.
To exchange the current window with its neighboring window, we have the Ctlr+w +x combination. It is done in either left to right or top to bottom swap. Ctrl+w +number +x exchanges the active window with the n-th window.
We can equally distribute the available space among windows using Ctrl+w +=. The command will take into account windows’ nesting level. Ctrl+w +_ and Ctrl+w +| give the maximum available vertical or horizontal space respectably to the active window.
For more nuanced resizing on the active window we can use the :resize or :vertical resize commands:
:resize {+/-number}
:vertical resize {+/-number}
Same can be done with the Ctrl+w +number ++ or Ctrl+w +number +- combinations for vertical resizing, and Ctrl+w +number +> or Ctrl+w +number +< for horizontal resizing. Here as well the number can be negative.
4.3. Closing
For closing windows, we have several options. We can close with the Ctrl+w +q combination or the :quit command. Doing this closes the active window and, if it happens to be the last window, quits Vim:
:quit
The next option is using the Ctrl+w +c combination or the :close command. This too closes the active window. However, it gives a warning if we try to close the last window:
:close
There is another option, in case we want to focus on editing a single buffer. The Ctrl+w +o combination or the :only command leaves only the active window and closes all other windows:
:only
Buffers are not unloaded. Yet, doing this requires saving all unsaved changes.
5. Buffer List
Now that we know how to close windows without unloading the buffers, let’s see how we view the full list of buffers. For that, we have the :buffers, :ls or :files commands. All three are aliases for the same action and give the same output:
:buffers

1  #   "MIT.txt"              line 1
2      "GPL-2.0.txt"          line 0
3  a   "BSD-2-Clause.txt"     line 0
4 %a + "[No Name]"            line 20
Here, a indicates active buffers, those that are loaded and visible in a window. Buffers with no a indicator are the ones that have no windows. + indicates there are unsaved changes on the buffer.
% marks the buffer of the currently active window. # marks the alternate buffer, we can think of it as the previous buffer. There can be only one buffer with each of these indicators.
The column with line numbers indicates where the pointer is in the buffer.
6. Conclusion
Hopefully, after our introduction to windows, buffers, and ways to manipulate the layout, Vim has become a more appealing editor. To learn more we can refer to the windows documentation using :help windows or :help buffers command. The :help ctrl-w command will give the full list of window control options.