

Learn through the super-clean Baeldung Pro experience:
>> Membership and Baeldung Pro.
No ads, dark-mode and 6 months free of IntelliJ Idea Ultimate to start with.
Learn through the super-clean Baeldung Pro experience:
>> Membership and Baeldung Pro.
No ads, dark-mode and 6 months free of IntelliJ Idea Ultimate to start with.
ASCII diagrams are text-based diagrams written with ASCII characters. These are an easy way to visualize our thoughts and ideas when we don’t have the skill, desire, or proper environment to work with more complex graphics. Another plus is memory efficiency since these diagrams only comprise text.
Of course, with enough practice, we can create beautiful diagrams manually, character by character. However, there are great tools that can save us time.
In this tutorial, we’ll discuss a tool called DrawIt. DrawIt is a Vim plugin, so we can add simple ASCII diagrams to our documents while editing the document.
Vim is cross-platform and so is its DrawIt plugin. The latest version DrawIt 13 was released in 2013. The team behind it hasn’t updated the repository since then. Nonetheless, it’s perfectly usable as of the writing of this article.
To install DrawIt, we first download the package via wget:
$ wget -O DrawIt.vba.gz https://www.vim.org/scripts/download_script.php?src_id=21108
The link is a permanent link to the latest version from the script’s official Vim page.
Then, we need to open the file and source it, which we’ll do in a single command:
$ vim -c'so %' -c'quit' DrawIt.vba.gz
A prompt asks us to Press ENTER for the sourcing to complete.
After installing the plugin, we can control it in Command mode:
For example, \di means the \ key followed by d and i, pressed sequentially and not at the same time. This also applies to other similar commands.
Critically, although it’s a fairly basic plugin, the :help drawit manual describes more options that DrawIt offers.
In essence, DrawIt enables us to leave a trail of lines as we navigate the text. Once created, there’s no easy way to relocate diagram components in a text-based environment. Because of this, it’s best to start drawing with a draft prepared in advance.
In particular, after activating DrawIt, we navigate the text as we normally would in Vim. By doing so, we draw a line along the cursor path. The text area will automatically expand on the top, right, and bottom directions, creating more space for drawing.
The points where a line changes direction or crosses another line are automatically marked with a special symbol, making it easy to draw clearly marked boxes. By using the >, <, ^, v keys at the end of a line we can draw an arrow:
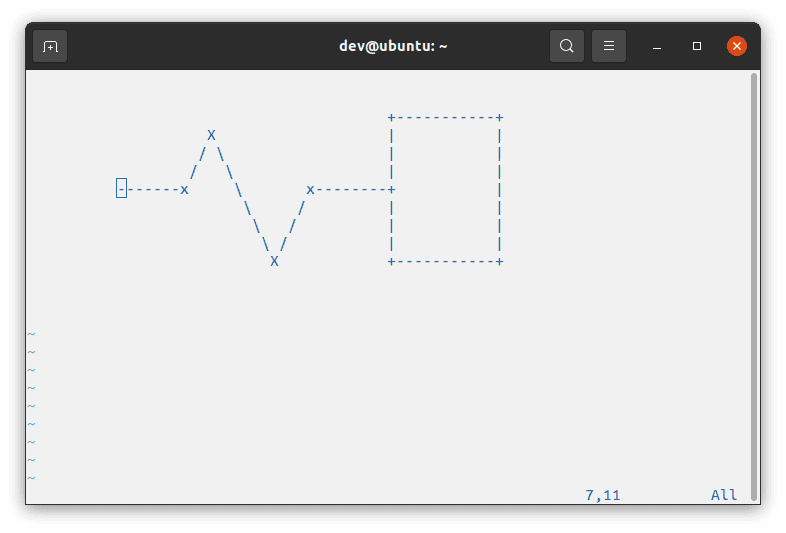
To draw diagonal lines, we can use several keys:
Diagonal lines too are marked when crossing. However, there’s no automatic marking for points where a diagonal line changes direction or crosses a vertical or horizontal line. So, we might want to add a symbol manually for a neater look:
In general, apart from the basic drawing, changing the character set used for drawing is one of the main functions of DrawIt.
Since that plays a big role in the final style, the diagram characters we see when drawing are configurable. To change them, we use the SetDrawIt() function call in Command mode:
:call SetDrawIt('|','-','+','\','/','X','*')
In the given order, the arguments define different diagram components:
The characters in the code snippet are the default values.
DrawIt works in replace-insert mode. This means we replace characters as we pass over them. For this reason, to keep the text intact while drawing, we should navigate carefully.
The reverse is also true: editing the text can ruin the diagrams, so it’s best to use replace-insert mode instead of insert mode. We can activate the former in Command mode using the R key.
To correct any mistakes or remove unwanted text while drawing, we can use the erase mode. We use the Space key to toggle erase mode. When it’s active, any character the cursor passes over will be removed. Besides, while drawing, we can use erase mode to navigate the text without leaving a trail.
DrawIt supports Vim visual mode with a few options. First, we need to make sure DrawIt is active and erase mode is off before entering Visual mode with Ctrl+v key combination. In it, after selecting an area, we can insert a box, an ellipse, a line, or an arrow:
Box and ellipse are straightforward. \b adds a box and \e adds an ellipse covering the selected area.
The lines, however, are drawn diagonally:
The \l command draws a line, while \a adds a similar line with an arrow cap at the end. If the selected area isn’t a square, we’ll have a weird squiggly line.
In this article, we became familiar with the DrawIt Vim plugin. We’ve learned how to set up the tool, draw simple diagrams, customize the characters, and make corrections. In addition, we’ve looked at how to avoid common mistakes when editing.
Overall, it might be a bit tricky to draw with DrawIt at first, but after some practice, it should become more intuitive.