

Yes, we're now running our only Summer Sale. All Courses are 30% off until 20th July, 2026:
Learn through the super-clean Baeldung Pro experience:
>> Membership and Baeldung Pro.
No ads, dark-mode and 6 months free of IntelliJ Idea Ultimate to start with.
1. Overview
Many of us think that vim is just a basic text editor, but that’s not entirely true. It supports many advanced features like – regular expressions, advanced navigations, plug-in support, scripting, and so on. One of these less well-known advanced features is its diff mode.
In this tutorial, we’ll discuss how to use vim as a diff tool.
2. Setting up an Example
Let’s create a few sample files to use as an example:
$ cat file1.txt
Red Hat Linux
CentOS
Ubuntu Server Edition
Debian

$ cat file2.txt
Red Hat
CentOS
Ubuntu
In the next sections, we’ll use these files to try out vim’s diff tool.
3. Using vim as a Graphical Diff Tool
diff is a very commonly used command, and we can find it on almost every Linux distribution. It compares files line by line. One of the limitations of this command is that the output isn’t very easy to use:
$ diff file1.txt file2.txt
1c1
< Red Hat Linux
---
> Red Hat
3,4c3
< Ubuntu Server Edition
< Debian
---
> Ubuntu
Now, let’s compare the same files using vim:
$ vim -d file1.txt file2.txt
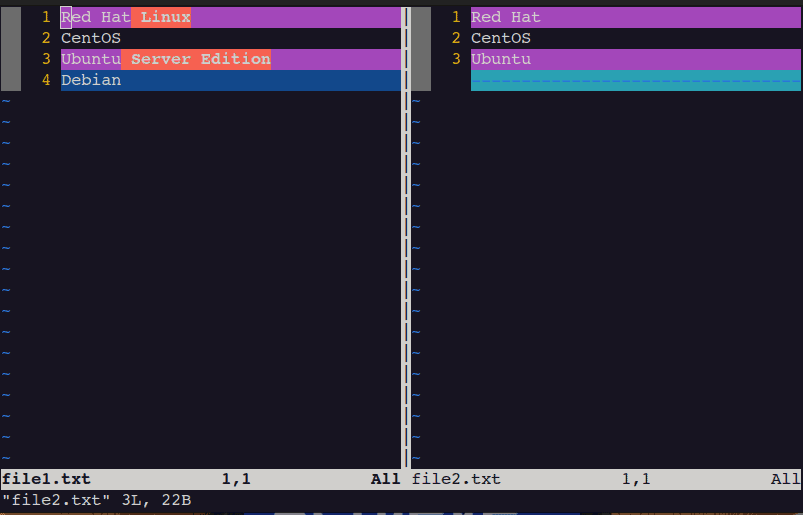
Here we have a side-by-side display that is easier to use.
In this example, the text CentOS isn’t highlighted because it’s an exact match in both files. On the other hand, the remaining text is highlighted in different colors.
The lines with red and magenta backgrounds represent a partial match. The magenta color indicates the common text, whereas the red color indicates the differences. The last line with a blue background indicates additional text.
We should also note that we can use the vimdiff command to compare files. This command starts the vim editor in diff mode.
4. Some Useful Diff Commands
vim editor’s command support makes it a powerful text editor. In this section, we’ll discuss some of the useful commands of the diff mode. This will help us to use the editor more efficiently.
4.1. Switching Between Diff Windows
We often need to switch between the diff windows to make desired changes. In such cases, we can use the Ctrl-w + Ctrl-w command to switch from one window to another.
This key combination will move the cursor from the left window to the right window and vice-versa. In addition to this, we can also use the other vim commands once the cursor is placed in the appropriate window.
4.2. Changing Split Window Orientation
By default, vim splits windows vertically. However, splitting windows horizontally is more convenient in some cases. For example, it’s convenient to use a horizontal diff pane when the lines are longer in length. We can use the ctrl-w + K key combination to change window orientation from vertical to horizontal.
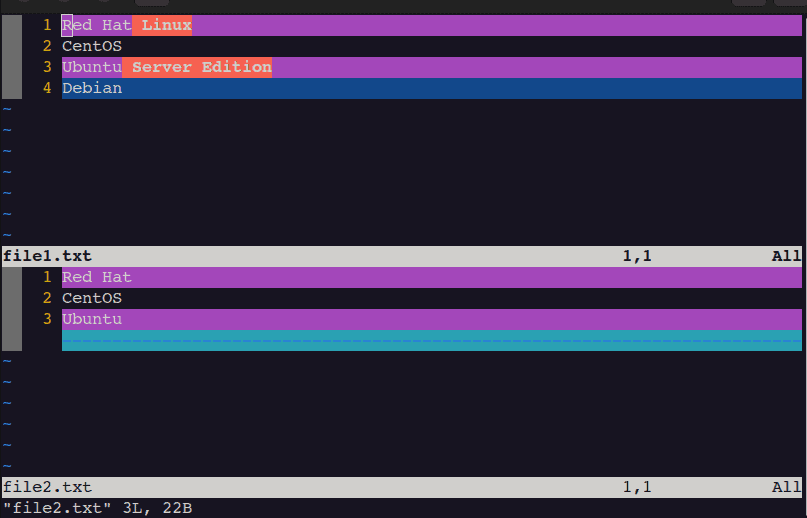
Similarly, we can use the ctrl-w + H shortcut to switch back window orientation to a vertical split.
4.3. Jumping Between Changes
We can navigate through the output using arrow keys. But this isn’t necessarily very efficient. Often times we are interested in navigating through the changes only.
In such cases, we can use special navigation commands of the diff mode, which allow us to jump directly at the start of the change.
We can use the ]c key combination to go to the next change. Let’s suppose the cursor is placed at line #1, then using this command moves the cursor to line #3.
In a similar way, we can use the [c shortcut to jump to the previous change. For example, using this command moves the cursor back to line# 1.
4.4. Applying Changes From the Diff Window
vim allows us to perform complex text editing tasks using a few commands. One of such tasks is applying changes from the adjacent windows.
We can use the diff mode’s get command to apply changes from the adjacent window to the current window:
:diffget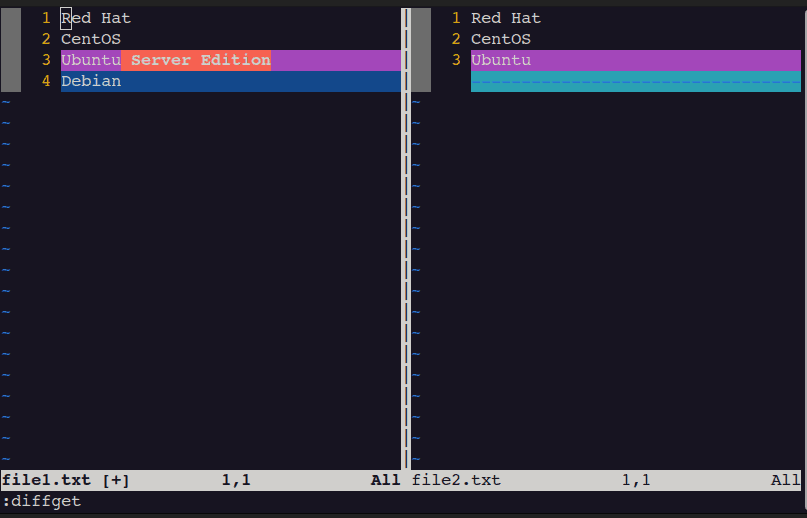
In this example, we placed the cursor at line #1 in the left window and executed :diffget command. This action made line #1 identical in both files.
Likewise, we can also use the put command in diff mode to apply changes from the current window to the adjacent window:
:diffput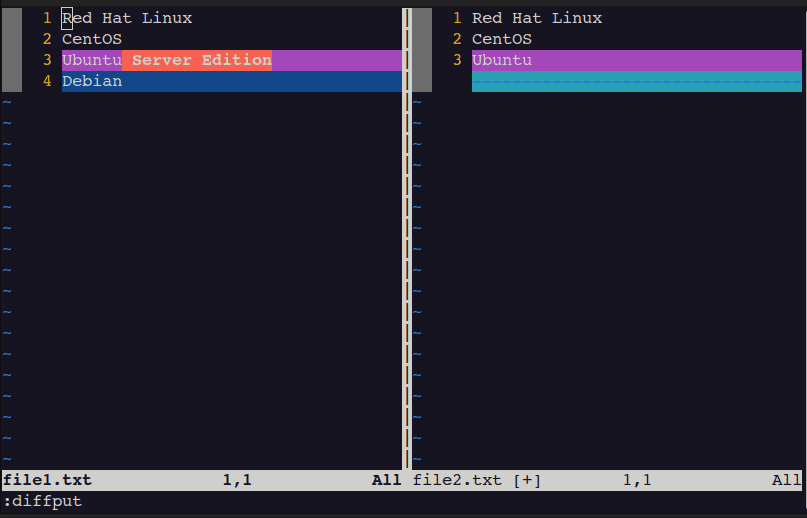
In this example, we placed the cursor at line #1 in the left window and executed :diffput command. This action made line #1 identical in both files.
We should note that, like other vim commands, :diffget and :diffput commands also support an optional line range.
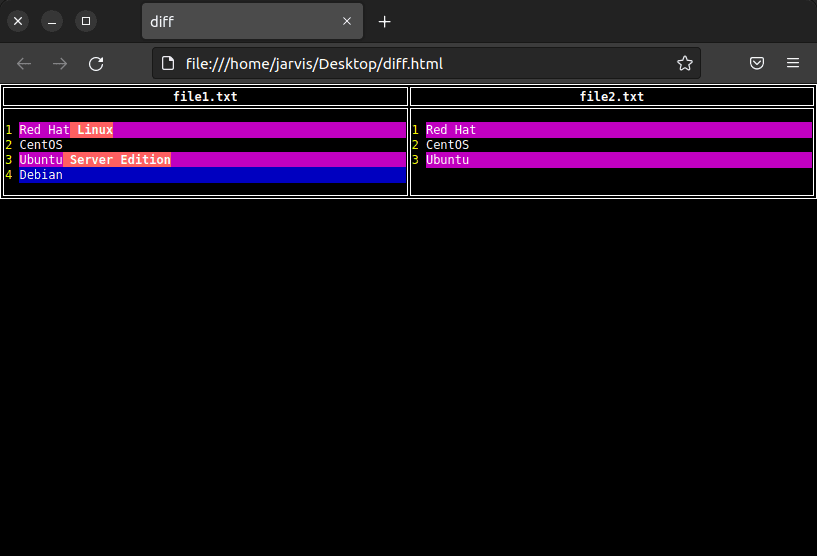
4.5. Export Diff to the HTML Web Page
So far, we have discussed how to work with a diff on a local machine. However, while working on a large project, we collaborate with multiple people on a daily basis, and we may need to share our changes.
For this use case, displaying the entire diff in a single vim window isn’t practical. In such scenarios, we can export the diff to an HTML web page and share it with others for review. We can achieve this using the combinations of the following commands:
:TOhtml | w ~/Desktop/diff.html
In this example, we’ve used pipe(|) to execute multiple vim commands. The first command generates the HTML representation of the diff, and the next command writes it to the file.
We can then look at the diff in our browser:
5. Configuring vim as an External Diff Tool With Git
In previous sections, we discussed how vim could be used as a graphical diff tool.
Now, let’s extend this further and configure it as a diff tool with git:
$ git config diff.tool vimdiff
$ git config difftool.prompt false
In this example, the first command configures vim as a diff tool. The second command makes diff tool launching process non-interactive.
Let’s see this in action:
$ git difftool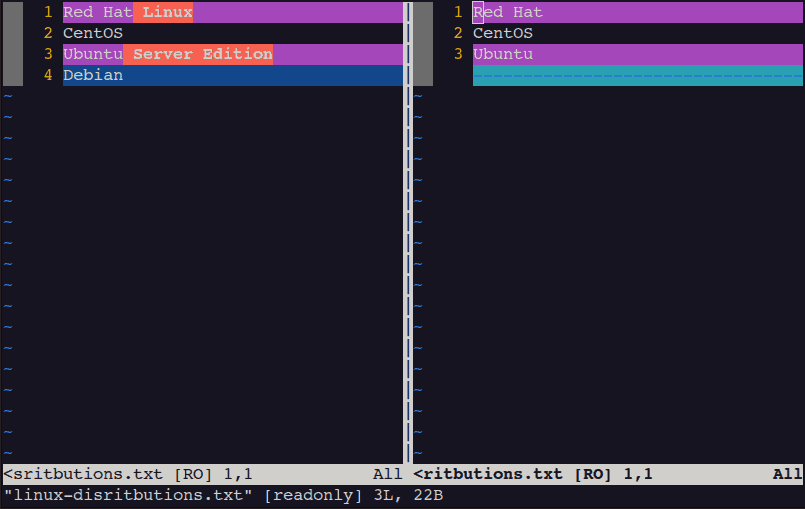
6. Conclusion
In this article, we saw how to use vim as a graphical diff tool. We also discussed some practical use cases of it.
First, we saw how it’s better than a traditional diff utility. Next, we discussed some of the useful commands which can be used on a day-to-day basis.
Finally, we configured vim as an external diff tool with Git.