

Yes, we're now running our only Summer Sale. All Courses are 30% off until 20th July, 2026:
How to Downsample Video to a Lower Resolution
Last updated: March 4, 2024
Learn through the super-clean Baeldung Pro experience:
>> Membership and Baeldung Pro.
No ads, dark-mode and 6 months free of IntelliJ Idea Ultimate to start with.
1. Overview
It’s common for us to view and store videos as part of our everyday lives. Sometimes, we might need to lower their resolution to make them more shareable. Additionally, we can downsample or decrease video size when space is limited on our disks, cloud services, or personal storage drives. For example, we can downsample a 1080p full HD video to 720p, 480p, or any other lower resolution.
However, downsampling a video always involves a loss of quality, detail, or color due to resolution decreases and the removal of redundant data. Therefore, to deal with that, we can experiment with various settings to find a balance between file size and acceptable quality for our needs.
In this tutorial, we’ll downsample a video to a lower resolution in Ubuntu using various software tools such as FFmpeg, VLC, HandBrake, MEncoder, and OpenShot.
2. Using FFmpeg
FFmpeg is a cross-platform free and open-source command-line utility. We can use this tool for handling audio, video, and other multimedia files, and streams on Linux. We can also use this tool to downsample video to a lower resolution with ease.
Let’s first install FFmpeg using the apt install command:
$ sudo apt install ffmpegAfter installing FFmpeg, we can now downsample our video. To do that, we utilize the scale filter option of FFmpeg. This filter enables us to define the desired width and height for our video. Let’s downsample a 1920×1080 pixels video to 640×480 pixels using the following ffmpeg command:
$ ffmpeg -i example.mp4 -vf scale=640:480 output.mp4Here, the -vf option stands for video filter, and the scale=640:480 parameter tells FFmpeg to resize the video to 640 pixels wide and 480 pixels high.
We can also use -1 as a placeholder for either width or height, and FFmpeg automatically calculates the other dimension to preserve the video’s aspect ratio. Let’s downsample a video to 640 pixels wide and keep the same aspect ratio:
$ ffmpeg -i example.mp4 -vf scale=640:-1 output.mp4Furthermore, we can downsample a video to half of its original size by assigning the specified expressions to the -vf scale filter option:
$ ffmpeg -i example.mp4 -vf scale=iw/2:ih/2 output.mp4Here, iw and ih stand for input width and input height, respectively.
We can also maintain the quality of the video by modifying the Constant Rate Factor (CRF) value. The CRF value can range from 0 to 51, where lower values mean better quality and high bitrate, while higher values mean smaller file size. A reasonable range for the H.265 codec is between 24 and 30.
Let’s use the H.265 codec with a constant rate factor (CRF) of 28, which is a good compromise between quality and file size:
$ ffmpeg -i example.mp4 -vf scale=640:480 -c:v libx265 -crf 28 output.mp4The -c:v option stands for video codec, and the -crf option stands for constant rate factor.
3. Using HandBrake
HandBrake is a free and open-source GUI-based video transcoder that’s compatible with Windows, macOS, and Linux. We can use this tool to downsample our video to lower resolution using built-in presets without compromising quality. These presets provide an easy selection of resolution or device-specific profiles.
Let’s first install HandBrake using the apt install command:
$ sudo apt install handbrakeAfter installing HandBrake, we can open it from the Applications menu.
First, we need to import our video by tapping on the Open Source option and selecting the video. Alternatively, we can also drag and drop our video into the program:

When we open our video file in HandBrake, a window with various options and settings appears. From there, we need to click on Presets in the top right menu bar and select the desired preset profile:
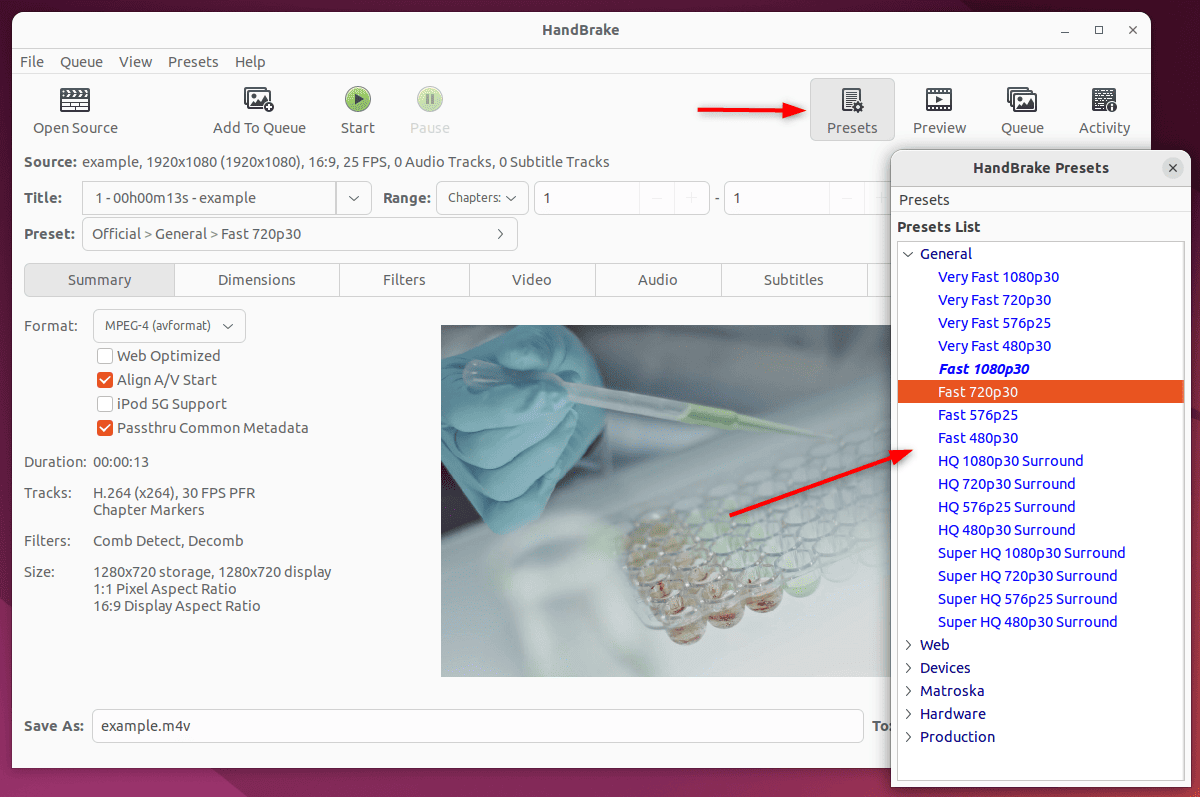
Furthermore, we make sure to choose a preset with a lower resolution than our source and try different preset options to find the best balance between size and quality.
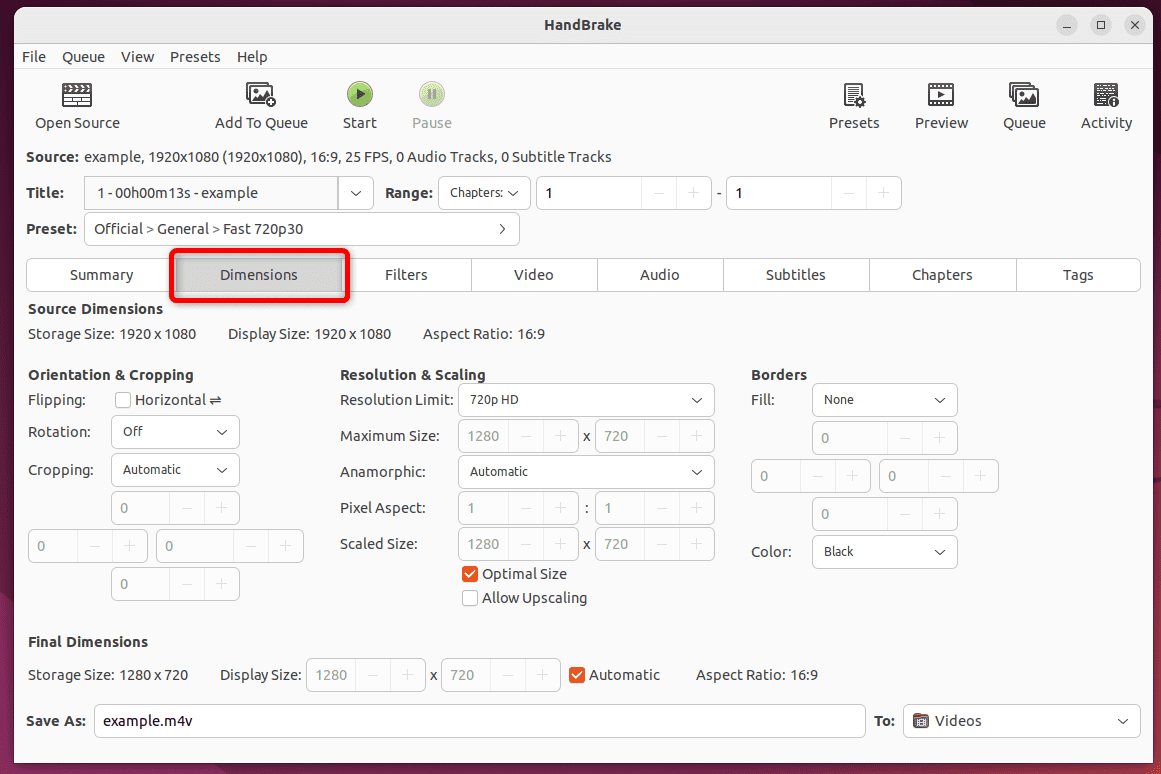
Alternatively, we can also specify the custom dimensions through the Dimensions tab by inputting the width and height manually:
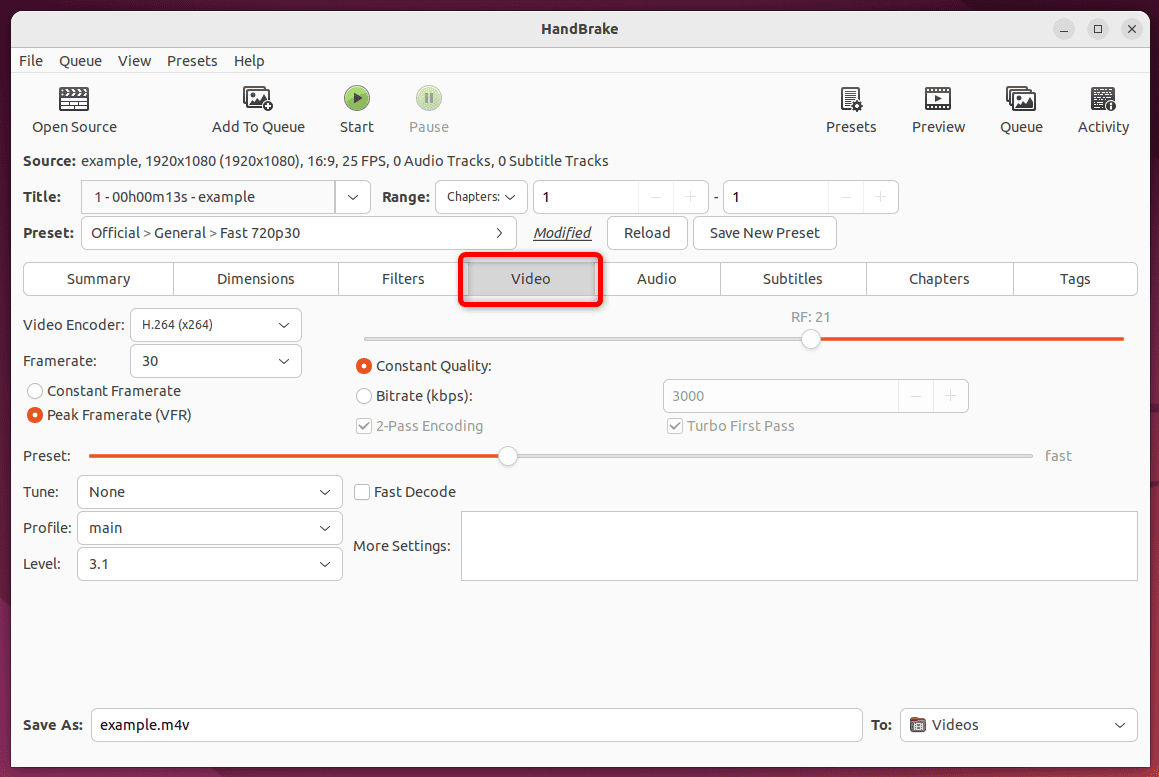
Additionally, we can switch to the Video tab and change various other options such as a video codec, frame rate, constant quality, preset optimization, tune, and profile of the encoder:
Lastly, we specify the output name and destination folder where we want to save our video and then tap on Start to downsample the video:
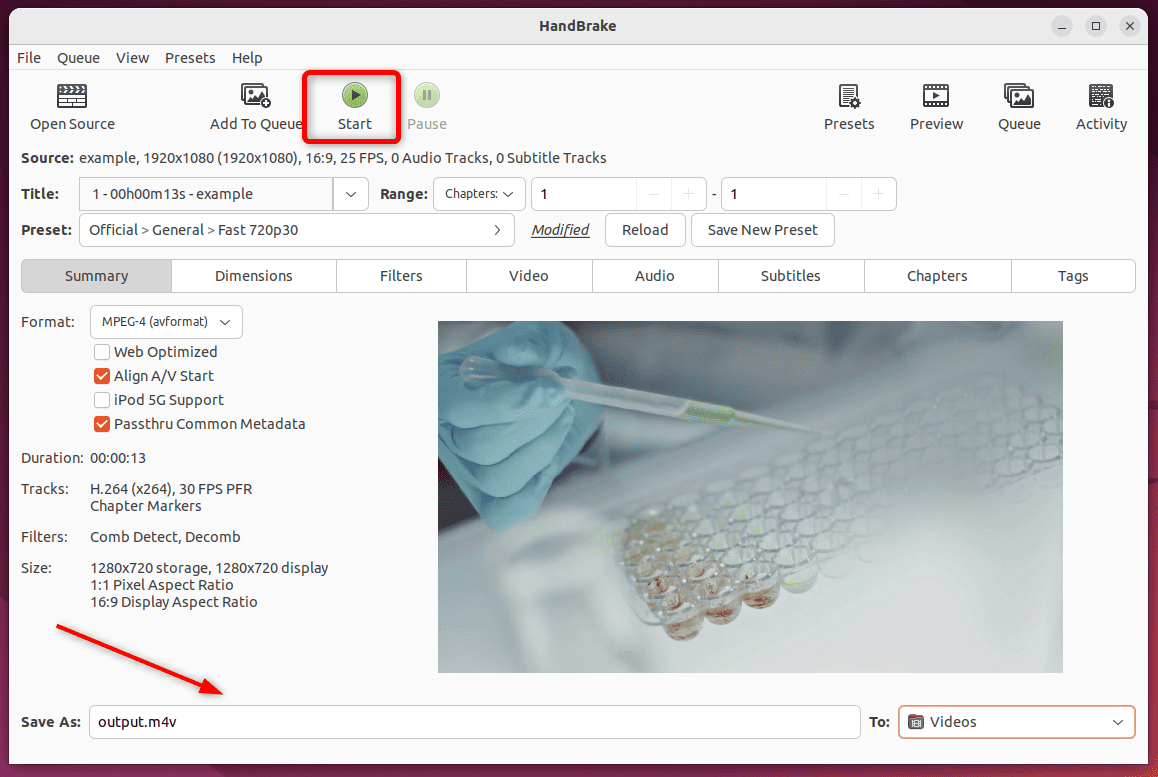
Once our video has been downsampled, we can access the video from its location.
4. Using VLC
VLC is another popular GUI-based tool that’s used for video playback and conversion. We can use this tool with various formats and can adjust video resolution, orientation, and recording. We can also use VLC to downsample videos to lower resolution and make them smaller.
If we don’t already have this tool on our Linux system, we can install it using the official apt package manager:
$ sudo apt install vlcAfter installing, we can open VLC from the Applications menu.
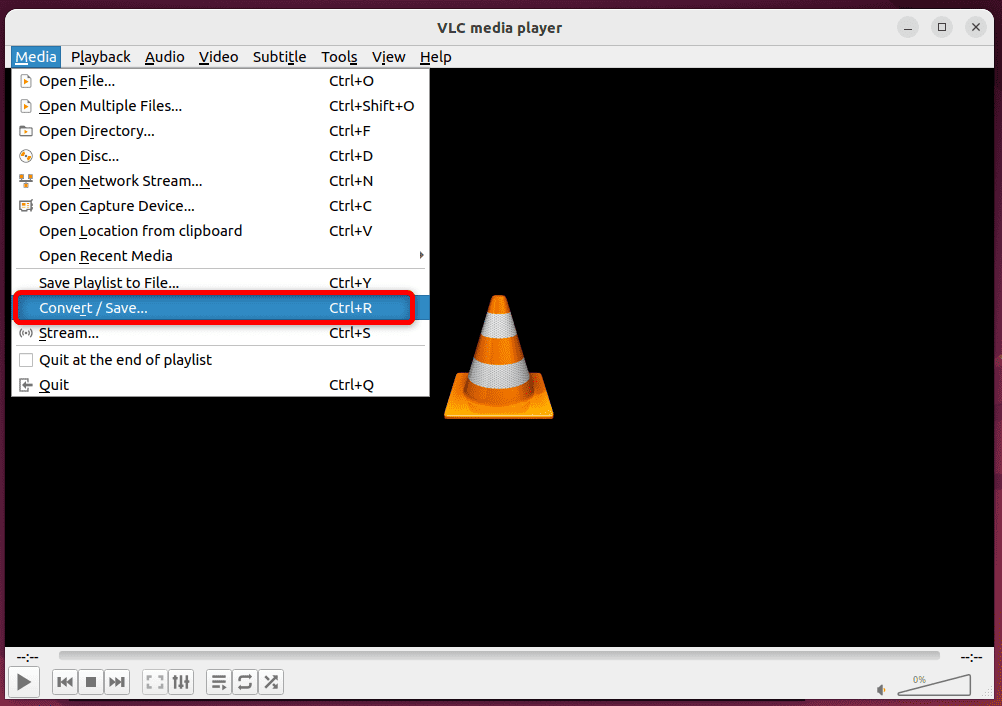
Once it opens, we navigate to the Media option of the VLC and choose the Convert/Save option from the drop-down menu:
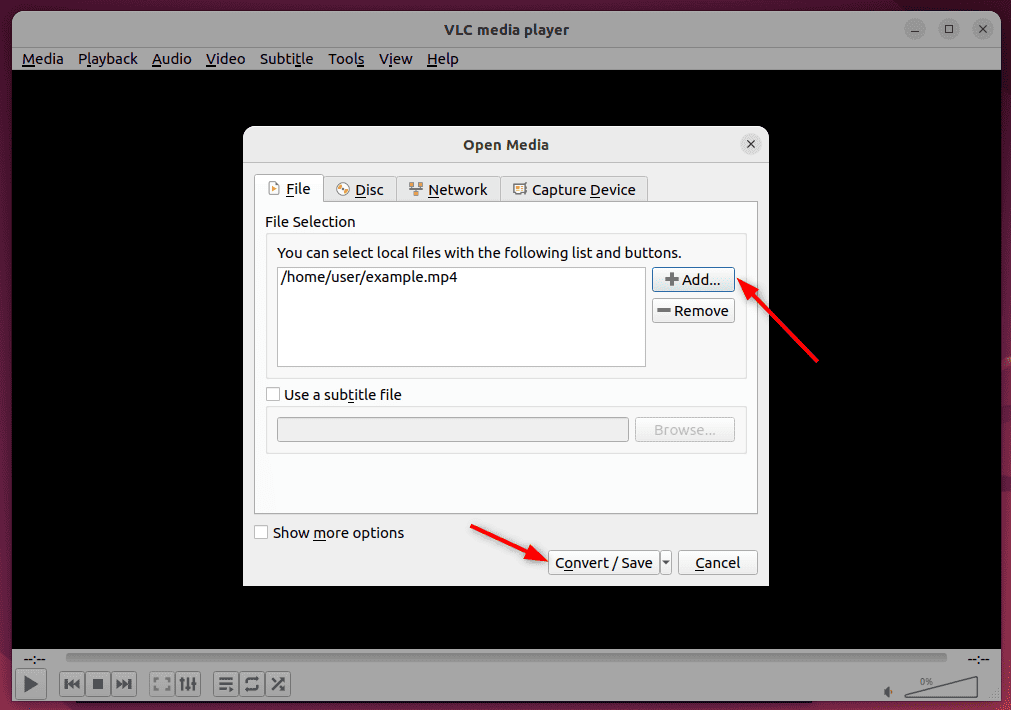
Next, in the File tab, we click the +Add button and add our sample video by browsing through our files. Then, we click on the Convert/Save option to proceed to the next step:
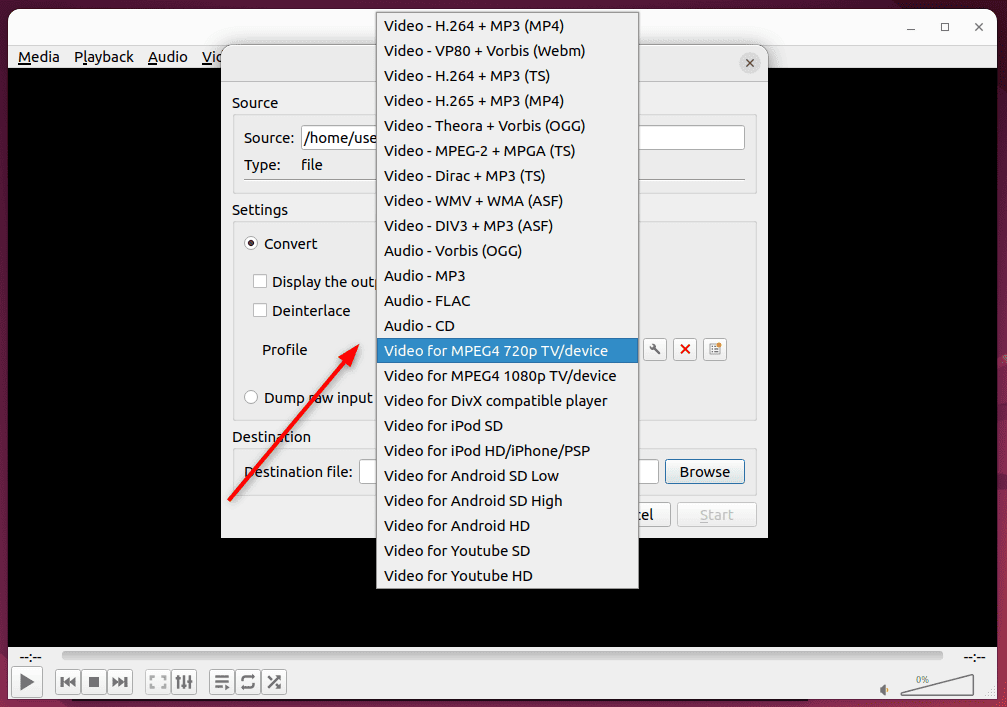
Next, we can expand the Profile list by clicking on the field next to the Profile and choosing one of the predefined video profiles:
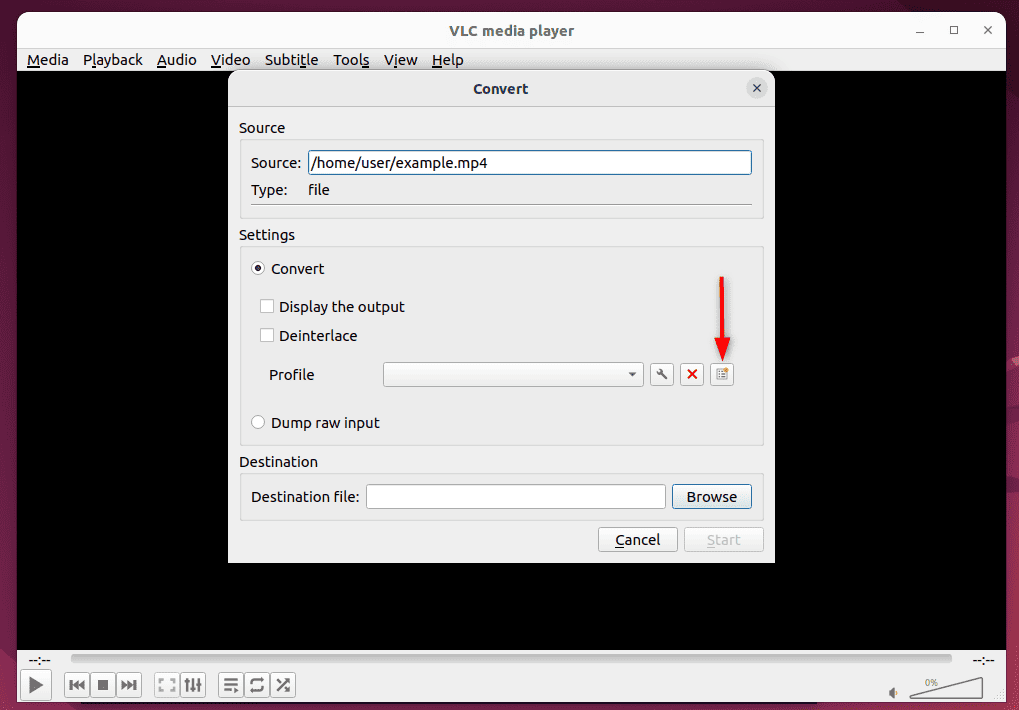
To adjust the predefined profile’s settings, we can click on the small wrench button next to the profile field.
Moreover, we can also create a new profile by clicking the new profile icon and selecting an output format and other settings from the Profile window:
In the Profile edition window, we can choose the codec, bitrate, frame rate, and other settings from the Video codec section. Furthermore, we can manually assign the width and height to our video from the Resolution tab. After entering the profile name, we can click the Create button to create a profile, then specify the destination path and click on Start to begin downsampling:

When it’s done, we can find our exported video in a destination path where we saved it.
5. Using OpenShot
OpenShot is a free video editor that allows us to edit our video files. We can use this tool to apply various features to our videos such as trim, merge, add text, add colors, transitions, and others. We can also use the OpenShot tool to downsample the video to a lower resolution on Linux.
To install OpenShot, we first need to add its repository to the APT:
$ sudo apt-add-repository ppa:openshot.developers/libopenshot-dailyAfter adding the repository, we can update the system using the apt update command:
$ sudo apt updateFinally, we can install the OpenShot using the apt install command:
$ sudo apt install openshot-qtFurthermore, we can open the OpenShot by running the openshot-qt in the terminal.
After opening OpenShot, we can import our sample video by clicking the Import Files option from the File menu and then drag the video to the timeline:

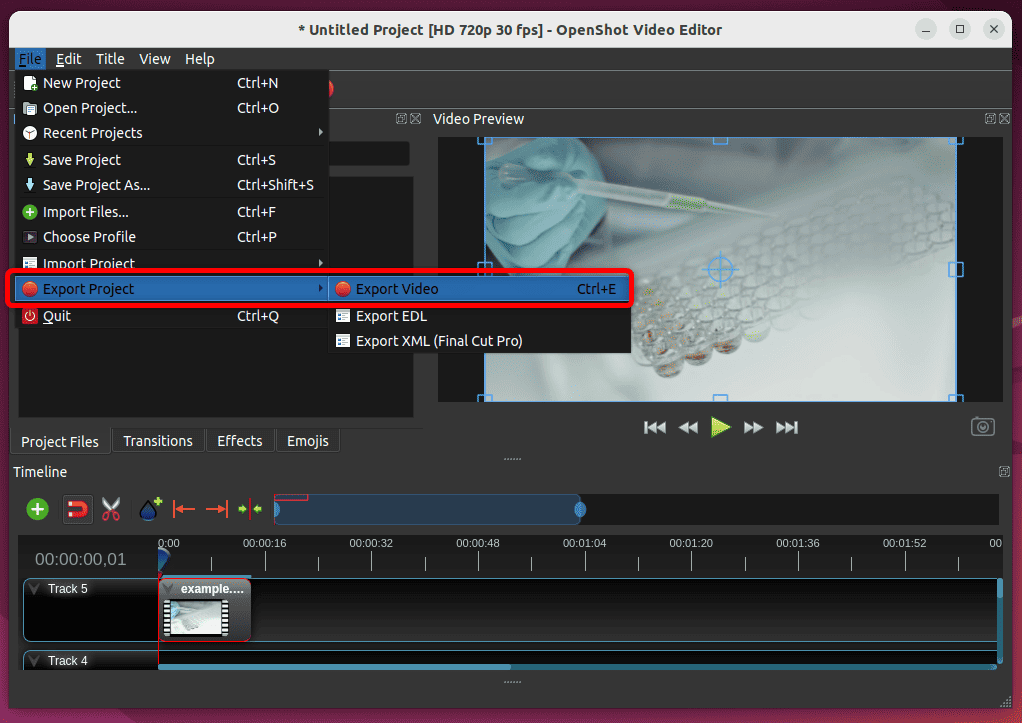
After adding the video to the timeline, we again head over to the File menu and click on the Export Video sub-option of Export Project:
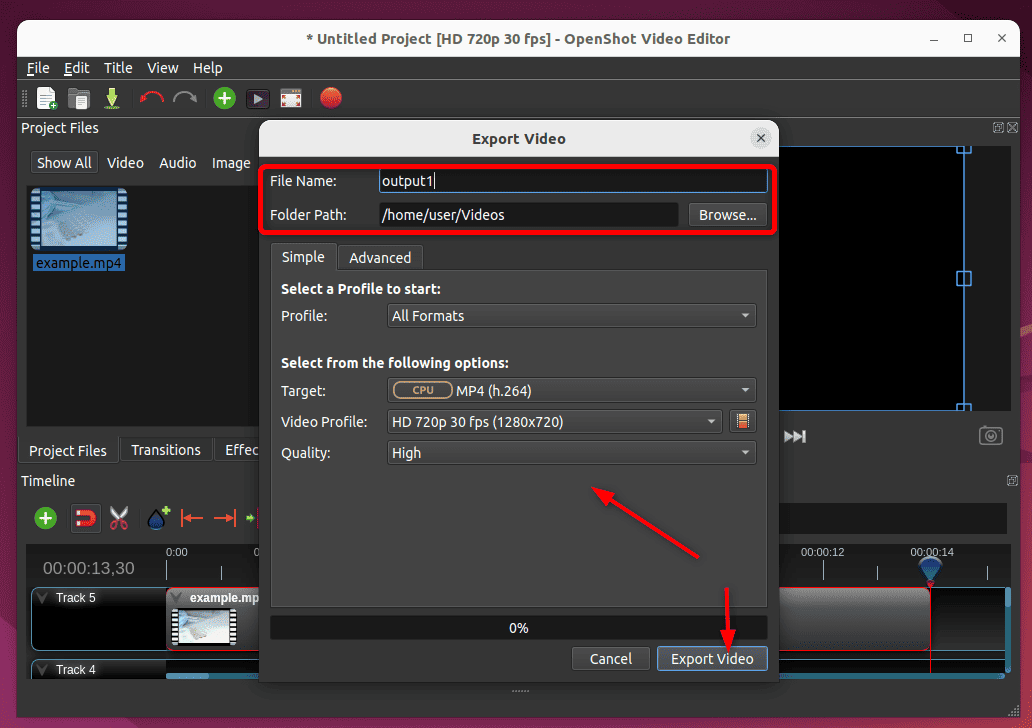
Next, we can specify the name and destination of our export video and change the Target value to MP4 (h.264) and the Video Profile value to HD 720p 25 FPS (1280×720) or any desired resolution:
Additionally, we can switch to the Advanced tab and change the Bit Rate value to reduce the file size:
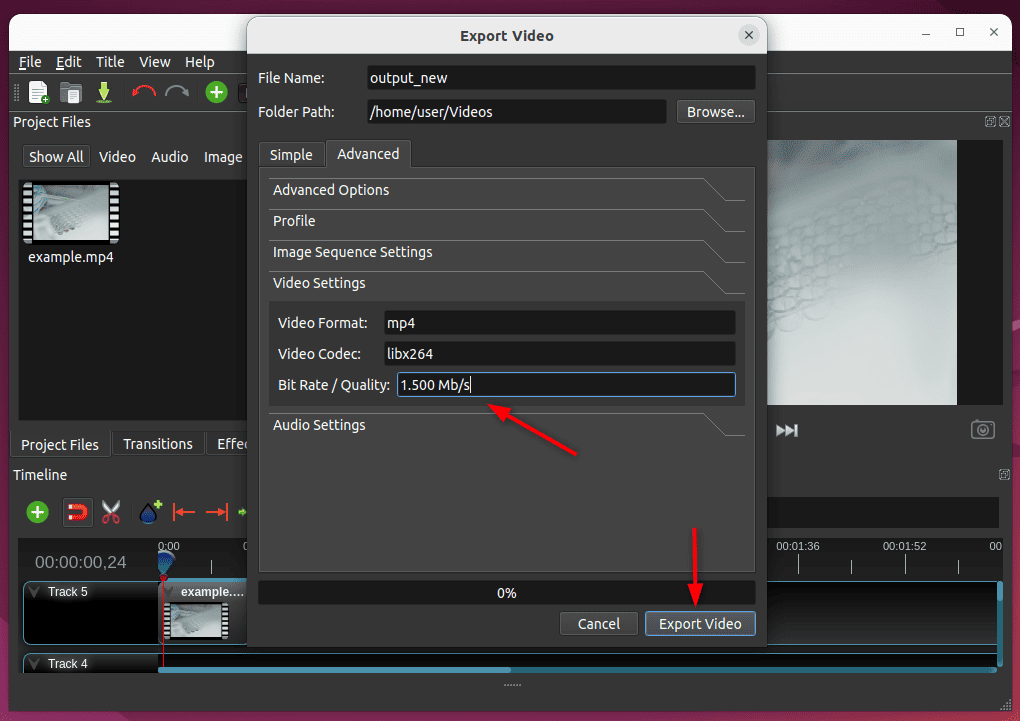
We can also experiment with additional settings in the Export Video Window to find the best setting for our video.
6. Using MEncoder
Just like FFmpeg, MEncoder is a free command-line video encoding, decoding, and filtering tool. We can use the MEncoder tool to downsample video to a lower resolution.
Let’s install MEncoder by using the apt install command:
$ sudo apt install mencoderAfter installing, we can downsample 1080 pixels video to custom 640×480 pixels resolution video using the -vf scale option:
$ mencoder example.mp4 -ovc lavc -lavcopts vcodec=mpeg4 -vf scale=640:480 -oac copy -o output.mp4Here, we are specifying the mpeg4 video codec using -lavcopts vcodec and the libavcodec library using -ovc lavc for downsampling the video. Furthermore, we copy the audio stream from the input file without any encoding or decoding using the -oac copy option.
Moreover, if we don’t specify the video codecs for the output video, the MEncoder uses the default one:
$ mencoder example.mp4 -ovc lavc -vf scale=640:480 -oac copy -o output.mp4Furthermore, we can get the list of supported video codecs by MEncoder using the -ovc help option:
$ mencoder -ovc helpWe can also set the custom output frame rate of our output video using the -ofps flag. Let’s set the output video frame rate to 20 FPS:
$ mencoder example.mp4 -ofps 20 -ovc lavc -vf scale=640:480 -oac copy -o output1.mp4We can experiment with various MEncoder options and compare the outcomes to determine the best balance of quality and file size.
7. Conclusion
In this article, we explored various Linux tools to downsample a video to a lower resolution in Linux. These tools included using HandBrake, OpenShot, and VLC in addition to the FFmpeg and MEncoder command-line tools.
Firstly, we explored how to downsample video to a lower resolution using the FFmpeg command-line tool. We discussed how to maintain the quality while downsampling video using the CRF factor. Secondly, we used GUI-based tools such as HandBrake, OpenShot, and VLC to downsample video with various options.
Moreover, we discussed various parameters of the downsampling video such as bitrate, framerate, predefined filters, and others.