


Learn through the super-clean Baeldung Pro experience:
>> Membership and Baeldung Pro.
No ads, dark-mode and 6 months free of IntelliJ Idea Ultimate to start with.
Learn through the super-clean Baeldung Pro experience:
>> Membership and Baeldung Pro.
No ads, dark-mode and 6 months free of IntelliJ Idea Ultimate to start with.
User management tools provide a convenient interface for managing various users and enhancing system performance. For new Linux users with limited technical knowledge, user management tools based on a graphical user interface (GUI) are an ideal way to minimize errors and increase accessibility.
In this tutorial, we’ll explore two GUI-based user management tools in Linux.
The Users tool is part of the GNOME desktop environment and provides an easy-to-use GUI for managing users in the system. We can perform different user management tasks, such as adding a new user, deleting an existing user, and managing user accounts. Additionally, we can handle tasks such as managing users’ passwords and locking accounts.
Users is a pre-installed tool, making it a good choice for new users. However, it only provides essential user management functions. Additionally, it’s important to note that the GNOME Users tool is usable for users who use the GNOME desktop environment.
We can open the tool by searching it from the start menu. Let’s take a look at the main page of the Users tool:
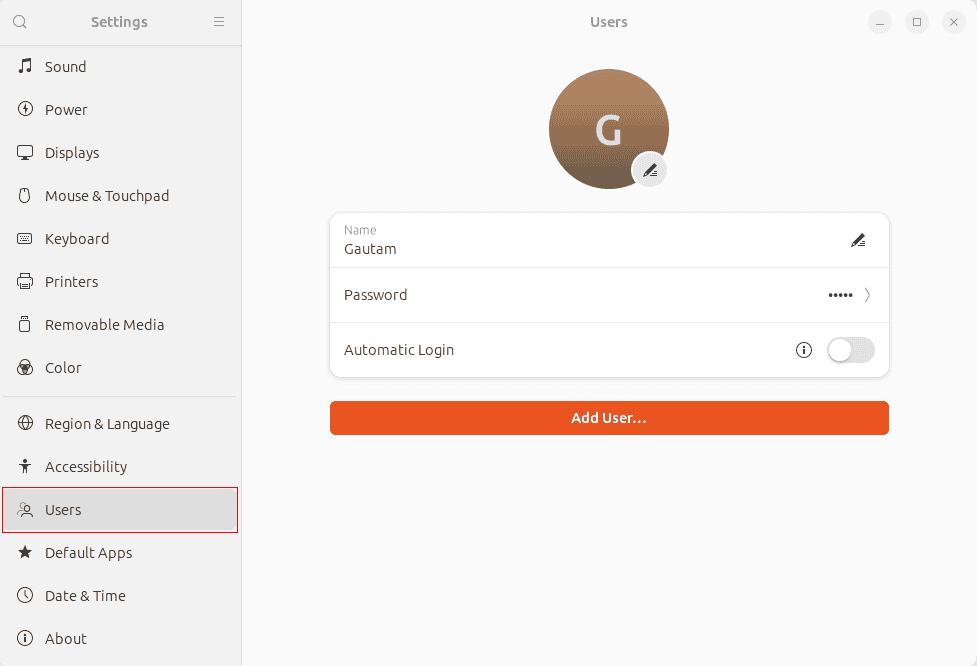
This page displays the existing users in the system. Moreover, the Users tool provides the ability to edit the name and password of the existing users.
Furthermore, we can add the new users:
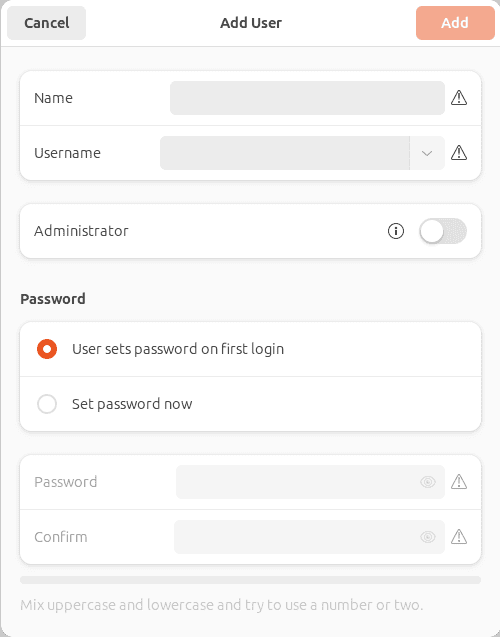
Of course, we can also delete and set administrative privileges for user accounts.
An alternative to the GNOME Users tool for user management is Cockpit. It’s a modern Web-based system administration tool in Linux. It provides a user-friendly graphical interface for user management and server monitoring. Additionally, it facilitates storage management, network configuration, docker integration support, and real-time system monitoring.
To install the Cockpit tool in Debian-based systems, we utilize the apt command:
$ sudo apt install cockpitAlternatively, we can install the Cockpit tool on Arch and Arch-derivatives using the pacman command:
$ sudo pacman -S cockpit
After the successful installation, let’s check some details about the package:
$ apt show cockpit
Package: cockpit
Version: 300.1-1
Priority: optional
Section: universe/admin
Origin: Ubuntu
Thus, the deployment is complete.
The next step is to enable the Cockpit service via the systemctl command:
$ sudo systemctl enable cockpit.socketNow, we start the tool:
$ sudo systemctl start cockpit.socketFurthermore, it’s important to note that the Cockpit tool uses port 9090 by default. Therefore, if the system uses a firewall, we need to ensure that port 9090 is open and the firewall doesn’t block the port:
$ sudo iptables -A INPUT -p tcp --dport 9090 -j ACCEPT
Now, we should be all set to launch the tool and manage the users in the system.
To access the Web interface of the Cockpit tool, we use an IP address containing the localhost and port 9090:
http://localhost:9090Now, let’s a look at the login page of the Cockpit tool:

Moreover, after entering the credentials of the system, we go to the main page of the Cockpit Web interface:

From the main page, we navigate to the Accounts page by clicking the Accounts option:
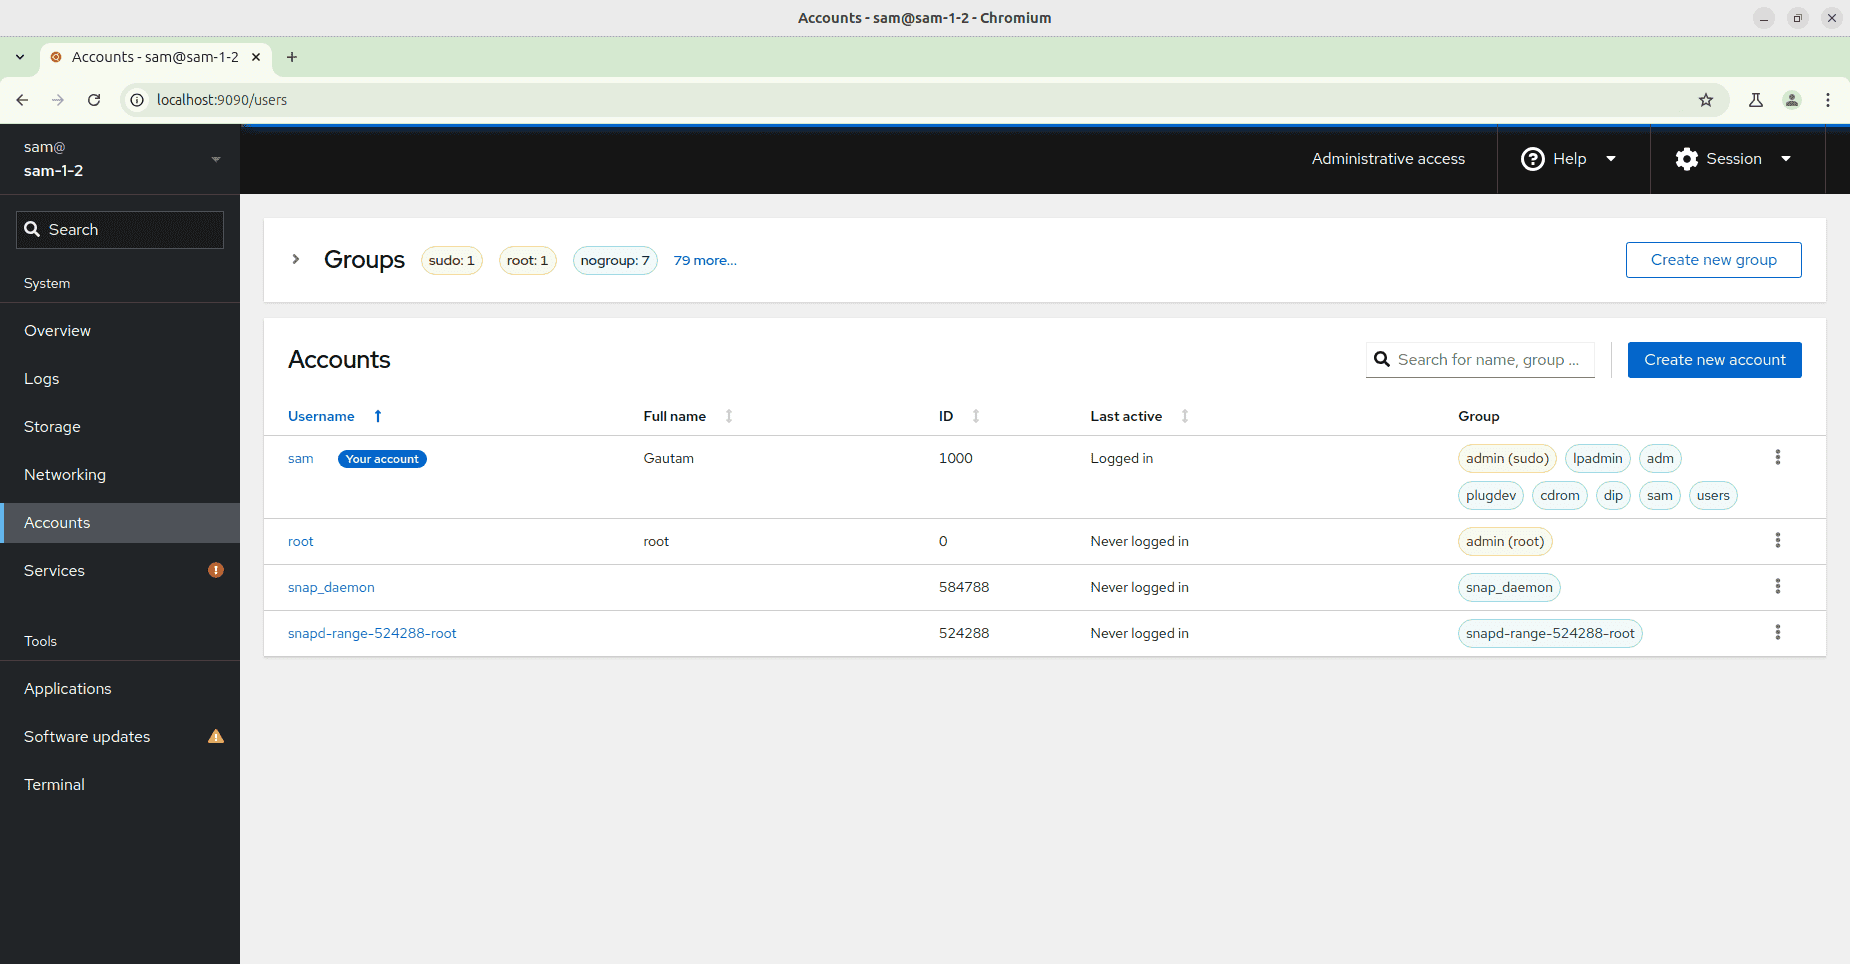
On this page, we can find a list:
This page represents an overview of all accounts on the system.
In addition to displaying the user details, we can perform various user management tasks.
For example, we can create a new user by clicking on the Create new account button and adding the necessary information such as full name, user name, directory, and password:
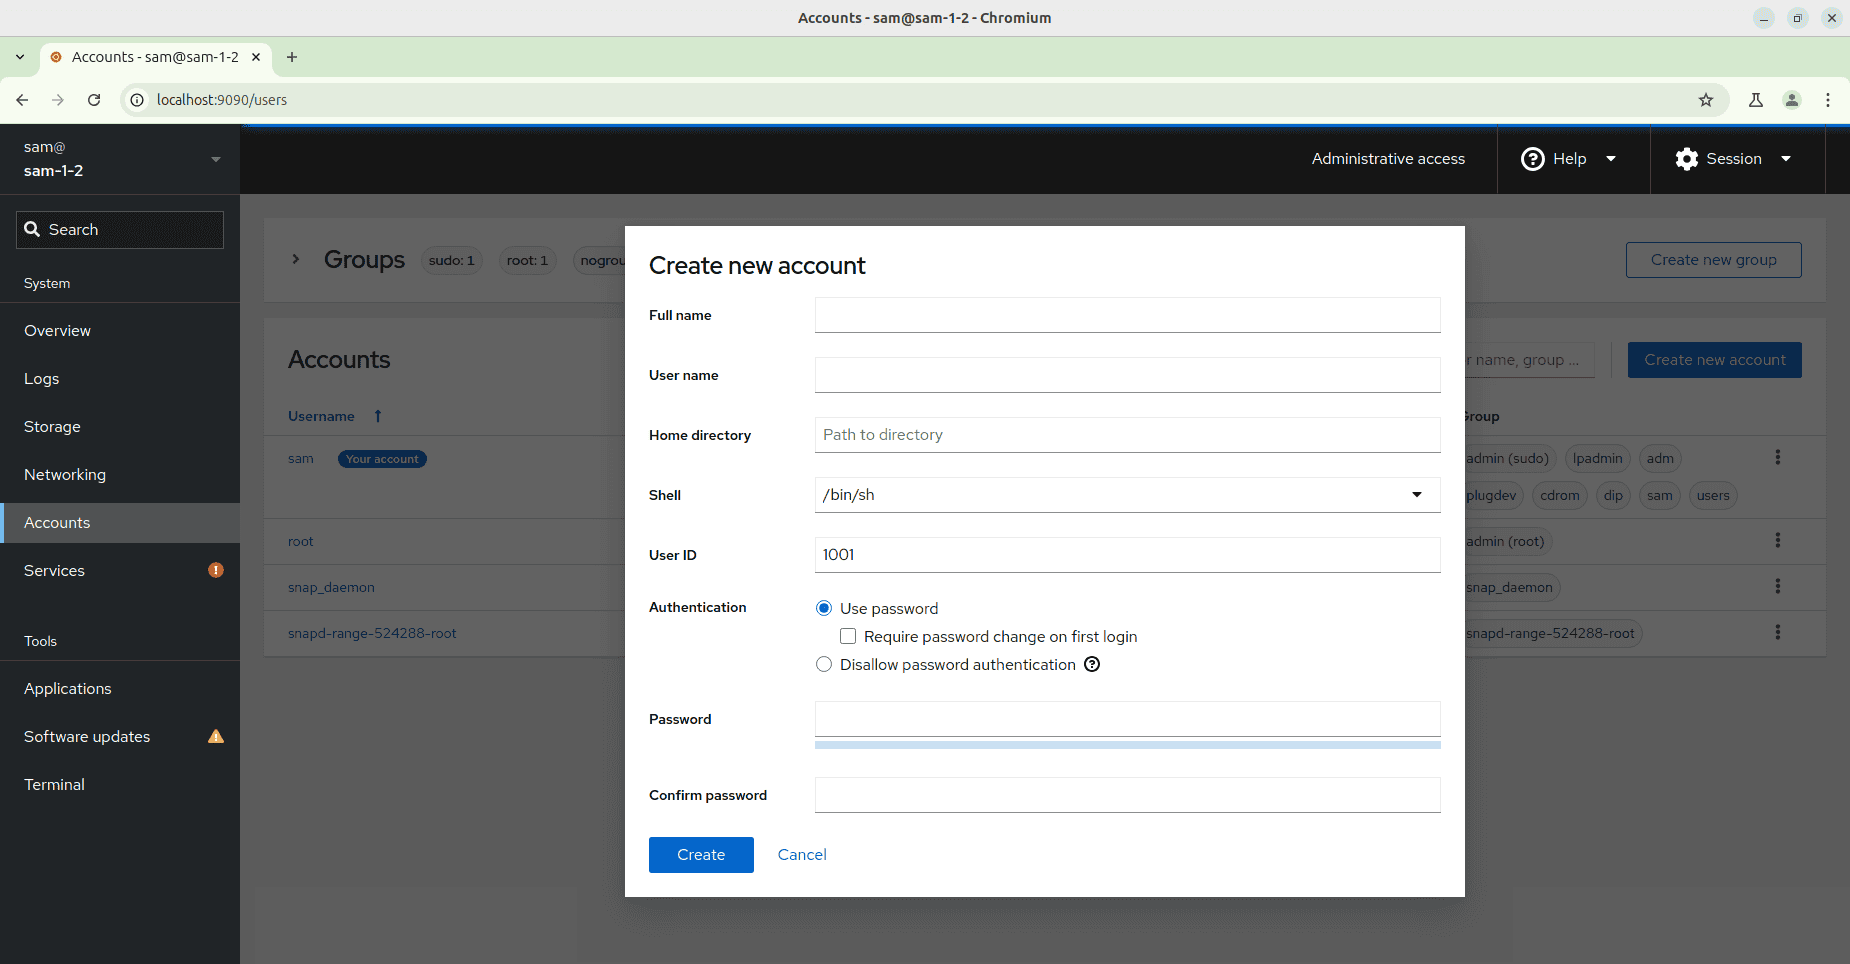
Similarly, we can create new groups.
Furthermore, the Cockpit tool provides the option to edit the existing users:
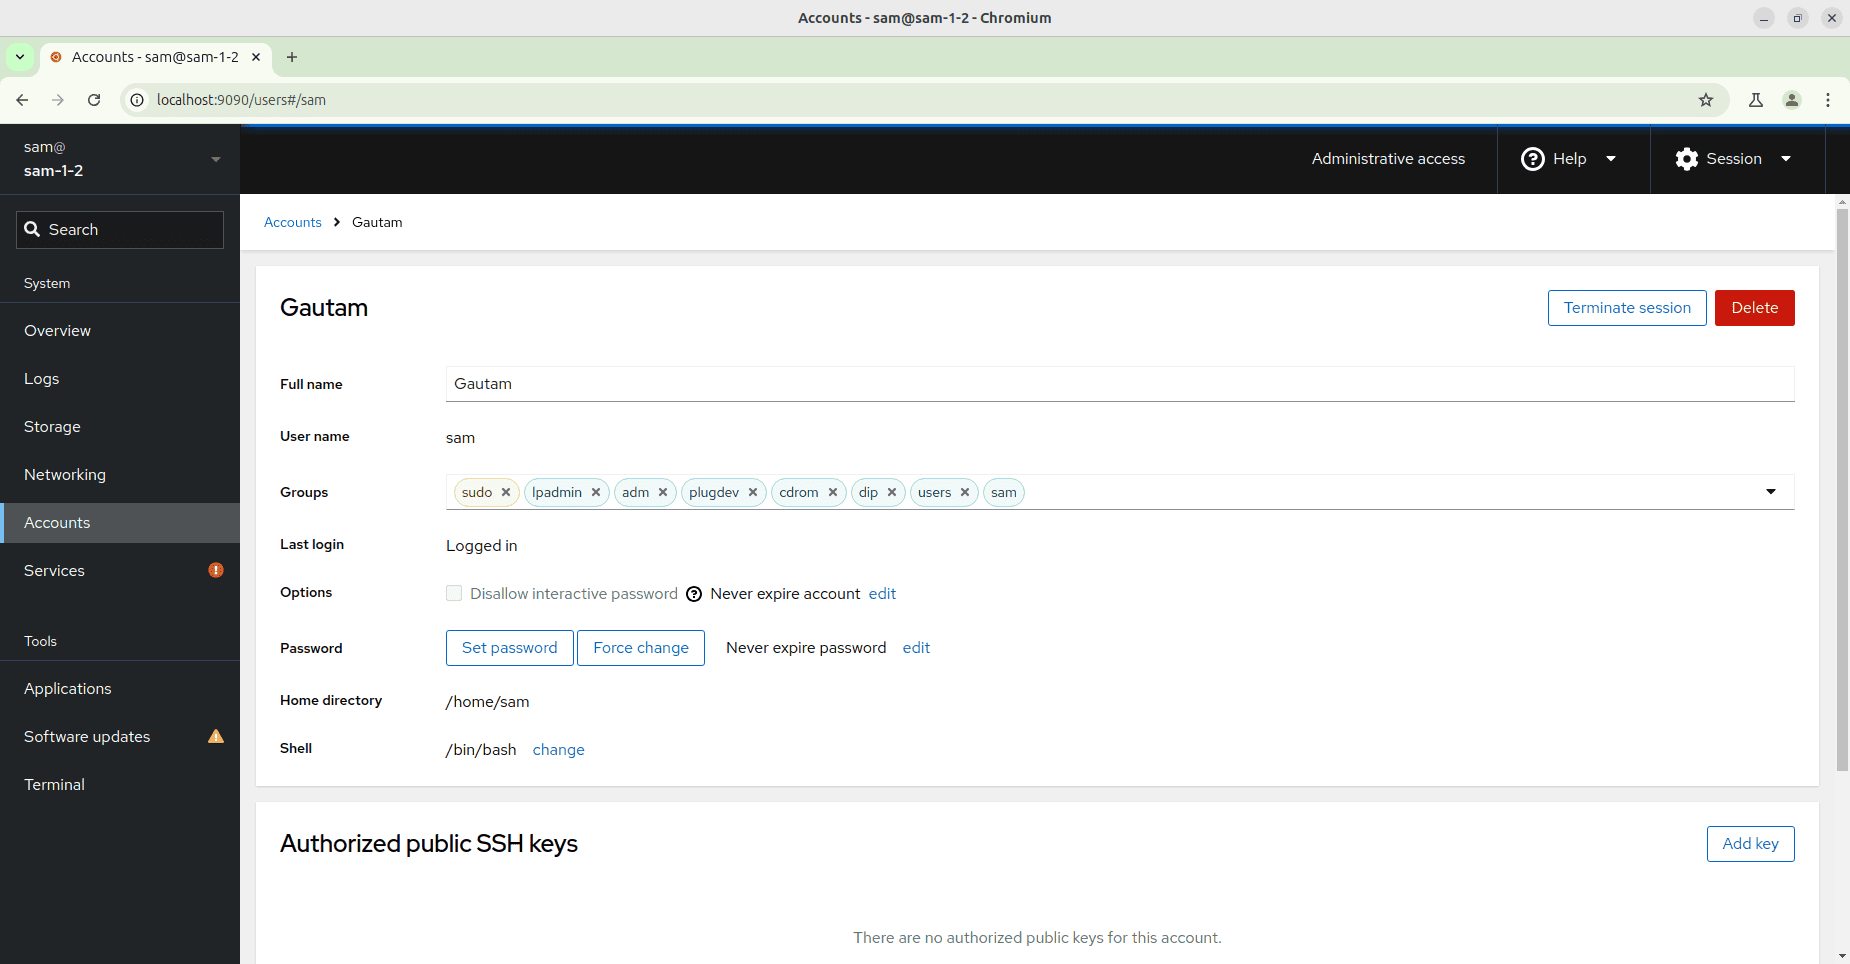
Here, we can edit the details of an existing user, set or change the password, and add SSH keys to the user account. Furthermore, the tool enables us to log the user out, lock the user account, delete the account, and terminate the session.
In this article, we discussed two GUI-based user management tools in Linux.
GNOME Users is a pre-installed tool ideal for new Linux users who have the GNOME desktop environment, as it provides an easy-to-use interface. However, it only facilitates the basic user management functionalities. Furthermore, it’s only suitable for the GNOME users.
On the other hand, the Cockpit tool is a modern, comprehensive user management tool that supports fundamental to advanced tasks. However, it’s a Web-based tool that requires more technical knowledge to install and use efficiently.