

Yes, we're now running our only Summer Sale. All Courses are 30% off until 20th July, 2026:
Learn through the super-clean Baeldung Pro experience:
>> Membership and Baeldung Pro.
No ads, dark-mode and 6 months free of IntelliJ Idea Ultimate to start with.
1. Introduction
Converting data files into the Microsoft Excel format can be essential for analysis purposes and archiving.
In this tutorial, we’ll explore various cases of TSV, CSV and XLS(X) generation to address common data-related challenges.
First, we’ll discuss how to process database query dump files and output an Excel file. After that, we’ll cover the use case of processing user files. Lastly, we’ll showcase a custom Bash shell script that generates an Excel file containing machine details such as user credentials, IP addresses, and operating system using csv2xls.
2. Processing Database Query Dump Files
To begin with, we’ll discuss how to process database query dump files and convert them into a .xlsx format.
We’ll create a database query dump using mysql client. The mysql command works with MySQL databases. Other versions of SQL provide different tools. For instance, we use pg_dump for PostgreSQL.
2.1. Installing mysql
First, we need to have a MySQL server. After that, the mysql command-line client can process MySQL queries. Since it’s usually not part of Linux distributions by default, we’ll install the client.
To do so, we use the appropriate package manager, such as apt, yum, or dnf, depending on the Linux distribution.
Since we’re on Ubuntu, we’ll use sudo apt install:
$ sudo apt install mysqlOnce the process is complete, we can check the mysql client version to verify the installation:
$ mysql –version
mysql Ver 8.0.34-0ubuntu0.22.04.1 for Linux on x86_64 ((Ubuntu))
Lastly, we’ll check if the mysql service is running on the MySQL server using the systemctl command:
$ systemctl status mysqlThus, we ensure that there is a proper test environment.
2.2. Create a Database Query Dump
Now, let’s use cat to see a shell script that creates a database connection and runs a query:
$ cat sqlDump2Excel.sh
#!/bin/bash
# MySQL database credentials
DB_USER="your_db_user"
DB_PASSWORD="your_db_password"
DB_NAME="your_db_name"
# SQL query to execute
SQL_QUERY="SELECT * FROM your_table"
# Output file for query results
OUTPUT_FILE="query_results.tsv"
# Execute the SQL query and save results to the output file
mysql -u"$DB_USER" -p"$DB_PASSWORD" -D "$DB_NAME" -e "$SQL_QUERY" > "$OUTPUT_FILE"
# Check if the query execution was successful
if [ $? -eq 0 ]; then
    echo "SQL query executed successfully. Results saved to
    $OUTPUT_FILE"
else
    echo "Error: SQL query execution failed."
fi
In this example, we begin the script with the usual shebang line. After that, we initialize the required variables:
- DB_USER: database username
- DB_PASSWORD: database password
- DB_NAME: database name
- SQL_QUERY: consisting of the query for which we want to generate the Excel file
- OUTPUT_FILE: output file for the query result
Next, we write the command to query the table using mysql with the -u, -p, and -D options for username, password, and database name respectively. Crucially, -e executes the supplied command.
Then, we redirect the result to the OUTPUT_FILE. Lastly, we check the status of the query execution.
We’ll make the file executable using the chmod command and run it:
$ chmod +x sqlDump2Excel.sh
$ ./sqlDump2Excel.sh
SQL query executed successfully. Results saved to query_results.tsv
Thus, we’ve generated a .tsv extension file as this is the default result of the mysql command. Notably, we can use Excel to open a .tsv file directly.
2.3. Using ssconvert to Convert to .xsls
The previous method converted a file into a .tsv format which we can open in Excel, but it isn’t a .xls(x) file. To convert data to a native Microsoft Excel file format (.xlsx), we’ll use a tool designed to create Excel files from TSV or CSV: ssconvert.
The ssconvert tool is a part of the Gnumeric spreadsheet software suite. Let’s make sure that it’s installed by verifying its version:
$ ssconvert --version
ssconvert version '1.12.51'
datadir := '/usr/share/gnumeric/1.12.51'
libdir := '/usr/lib/gnumeric/1.12.51'
We’ll see the latest version if it’s installed correctly. Otherwise, we can install it appropriately:
$ sudo apt install gnumericNow, to convert our files to .xslx, we’ll modify the previously discussed example by adding the ssconvert command at the end of the sqlDump.sh file:
ssconvert $OUTPUT_FILE query_results.xlsxAfter that, we’ll execute the file to complete the file conversion:
$ ./sqlDump2Excel.shSubsequently, to check if the conversion was successful, we’ll use the ls command:
$ ls
query_results.tsv query_results.xlsx
At this point, we have a proper native XLSX file.
2.4. Adding Custom Headers
To add custom headers to the TSV file, we’ll add the awk command to include them:
mysql -u"$DB_USER" -p"$DB_PASSWORD" -D "$DB_NAME" -e "$SQL_QUERY" | \
awk -F"\t" 'BEGIN {OFS=","; print "Header 1 \tHeader 2 \tHeader 3 \tHeader 4"}} {print $1, $2, $3, $4}' > "$OUTPUT_FILE"
ssconvert $OUTPUT_FILE OUTPUT_FILE.xlsx
In the above code, we’ve added the awk command to include print followed by the header names. Basically, we added four headers for the four columns in our table.
2.5. Processing Multiple Queries
So far, we’ve processed a single database query and saved its output in the .xlsx format. To process multiple SQL queries and save their dump, we’ll create an array to store queries, and then process it using a loop.
Let’s look at the modified script:
$ cat multipleQueries2Excel.sh
#!/bin/bash
# MySQL database credentials
DB_USER="your_db_user"
DB_PASSWORD="your_db_password"
DB_NAME="your_db_name"
# Array of SQL queries
SQL_QUERIES=(
    "SELECT * FROM table1"
    "SELECT * FROM table2"
     "SELECT * FROM table3"
)
for ((i = 0; i < ${#SQL_QUERIES[@]}; i++)); do
    SQL_QUERY="${SQL_QUERIES[$i]}"
    OUTPUT_TSV="query_results_$i.tsv"
    OUTPUT_XLSX="query_results_$i.xlsx"
    # Execute the SQL query and save results to a TSV file
    mysql -u"$DB_USER" -p"$DB_PASSWORD" -D "$DB_NAME" -e "$SQL_QUERY" > "$OUTPUT_TSV"
    # Check if the query execution was successful
    if [ $? -eq 0 ]; then
         echo "SQL query $i executed successfully. Results saved to $OUTPUT_TSV"
         # Convert the TSV file to XLSX using ssconvert
         ssconvert "$OUTPUT_TSV" "$OUTPUT_XLSX"
         # Check if the conversion was successful
         if [ $? -eq 0 ]; then
             echo "Conversion to XLSX completed successfully. Results saved to $OUTPUT_XLSX"
         else
             echo "Error: Conversion to XLSX failed."
         fi
    else
         echo "Error: SQL query $i execution failed."
    fi
done
In this version, we’ve generated separate TSVs to store the query results using a for loop. Notably, we’ve also converted those files to the .xslx format using ssconvert.
Now, let’s execute the script to store the database result:
$ ./multipleQueries2Excel.sh
Enter password:
SQL query 0 executed successfully. Results saved to query_results_0.tsv
Conversion to XLSX completed successfully. Results saved to query_results_0.xlsx
Enter password:
SQL query 1 executed successfully. Results saved to query_results_1.tsv
Conversion to XLSX completed successfully. Results saved to query_results_1.xlsx
At this point, we should have the appropriate .xlsx files with the results.
3. Processing User Files to Output in Excel Format
Now, we’ll discuss the use case of processing user files to output them in an Excel format using a different tool.
First, we’ll create a shell script that processes /etc/passwd to generate a .csv file. Notably, we’ll use sed instead of awk this time. Lastly, we’ll convert the .csv file into the .xslx format using libreoffice.
3.1. Processing /etc/passwd File
Let’s look at our example script userFiles2Excel.sh:
$ cat userFiles2Excel.sh
#!/bin/bash
# Input and output files
INPUT_FILE="/etc/passwd"
OUTPUT_CSV="passwd.csv"
# Use awk to convert the file to CSV
sed 's/:/,/g' "$INPUT_FILE" > "$OUTPUT_CSV"
# Check if the conversion was successful
if [ $? -eq 0 ]; then
    echo "Conversion to CSV completed successfully. Output saved to $OUTPUT_CSV"
else
    echo "Error: Conversion to CSV failed."
fi
In this code, we’ve set the path to our input and output files. Next, we’ve used the sed command to output the data in a CSV format. Similar to awk, we can use sed to format the output in .csv files:
- s/ invokes the substitute action in sed
- :/, indicates we’re replacing the standard colon (:) separator of /etc/passwd with a comma (,)
- /g means global substitution
Lastly, we check whether the action was successful or not using an if-else block.
Now, we’ll make the script executable and run it:
$ chmod + userFiles2Excel.sh
$ ./userFiles2Excel.sh
Conversion to CSV completed successfully. Output saved to passwd.csv
Lastly, we can check the resulting file via cat:
$ cat passwd.csv
root,x,0,0,root,/root,/bin/bash
daemon,x,1,1,daemon,/usr/sbin,/usr/sbin/nologin
bin,x,2,2,bin,/bin,/usr/sbin/nologin
sys,x,3,3,sys,/dev,/usr/sbin/nologin
sync,x,4,65534,sync,/bin,/bin/sync
From the output, we can see the .csv was generated successfully.
3.2. Installing libreoffice
Now, to convert the output file into a native Microsoft Excel format, we’ll use the libreoffice open-source tool.
Since it’s not installed by default, we can install libreoffice via apt:
$ sudo apt install libreofficeWe’ll wait for the installation to complete and verify it using the –version option:
$ libreoffice -- verison
LibreOffice 7.3.7.2 30(Build:2)
We can see the version number, so the installation is ready.
3.3. Converting Files to Excel Format
Lastly, we’ll modify the userFiles2Excel.sh file by adding the conversion code at the bottom:
# Using libreoffice to convert CSV to XLSX
libreoffice --headless --convert-to xlsx "$CSV_OUTPUT" passwd.csv"
# Checking if the XLSX conversion was successful
if [ $? -eq 0 ]; then
    echo "XLSX conversion completed successfully. Output saved to $XLSX_OUTPUT"
else
    echo "Error: XLSX conversion failed."
fi
In this code, we’ve used libreoffice with the –convert-to xlsx option to specify the desired output format. The command is followed by the destination name. Of course, we’ve also added the source file passwd.csv.
In the end, we’ve checked if the conversion is successful. Notably, depending on the size of the original file, libreoffice might take a longer time to convert the files.
4. Generating Excel Files Using csv2xls
Another tool we can use with a shell script to output an Excel file is csv2xls, a tool that only supports the XLS format. Further, csv2xls is a Python tool and requires Python as well as a PIP package installation. In our case, both packages are already installed since the installation is outside the scope of this article.
For this scenario, we’ll create a shell script that outputs machine details such as user, password, IP address, and others. After that, we’ll use csv2xls to generate an Excel file.
First, let’s check the script:
$ cat csv2xls.sh
#!/bin/bash
CSV_FILE="machine_details.csv"
XLSX_FILE="machine_details.xlsx"
echo "User,Password,IP,OS" > "$CSV_FILE"
echo "user1,password1,192.168.1.1,Windows" >> "$CSV_FILE"
if ! command -v csv2xls &> /dev/null; then
    echo "Error: csv2xls is not installed. Please install it."
    exit 1
fi
csv2xls -i "$CSV_FILE" -o "$XLSX_FILE"
if [ $? -eq 0 ]; then
   echo "XLSX file ($XLSX_FILE) generated successfully."
else
    echo "Error: XLSX conversion failed."
fi
In this script, we stored the names of a .csv and a .xls file in two variables. After that, we redirected machine data to the CSV file. Next, we checked if the csv2xls tool is available or not via command.
In addition, we used csv2xls to convert the file:
- -i indicates the input file followed by the source file name
- -o represents the output file followed by the destination file name
Lastly, we checked if the conversion was successful and provided accurate feedback. Once we execute the file, we’ll get a .xls version of the output:
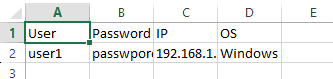
From the above output, we can see that the .xls file has been generated successfully.
5. Conclusion
In this article, we discussed several scenarios of CSV and XLS(X) generation in the shell.
We commenced by exploring the conversion of database query dump files into Excel format. Subsequently, we covered converting data from the /etc/passwd file into CSV and then XLS(X) files.
Lastly, we created a custom Bash shell script that generated an Excel file consisting of detailed machine information using csv2xls.