

Yes, we're now running our only Summer Sale. All Courses are 30% off until 20th July, 2026:
Learn through the super-clean Baeldung Pro experience:
>> Membership and Baeldung Pro.
No ads, dark-mode and 6 months free of IntelliJ Idea Ultimate to start with.
1. Overview
In this tutorial, we’ll learn how to save a file as sudo without having to leave Vim. First, we’ll explore the problem and understand why it’s not as straightforward to save files as sudo as a regular user. Then, we’ll focus on using tee inside Vim to write the changes as a super user.
Finally, we’ll discuss the sudo.vim script as an alternative.
2. The Problem
When we’re editing a file in Vim, our ability to save changes may be restricted due to file permissions. For instance, we might forgetfully edit a system file for a while and then write the changes back to the file only to find out that there is a permission error.
In Vim, there is no magic built-in that we can use to override these permissions. It’s because every process in Linux runs with a certain UID (user identifier). In addition, EUID (effective user identifier) determines the access rights the process has.
Therefore, when we run Vim, the Vim process inherits the UID of the user who launched it. Now, the problem is that we cannot directly change the EUID of the process. Therefore, we can’t make the process act as if it were run by a super user.
So, it’s a bit inconvenient and frustrating to save the file with a different filename and copy the changes back to the original file as a super user. However, there are quick workarounds for such cases, which we’ll discuss in the following sections.
3. sudo tee
In this section, we’ll use tee inside Vim’s command mode. For example, we’ll edit the /etc/hosts file without sudo. Then, we’ll save the file using tee as a super user.
But first, what is tee?
3.1. tee
The tee command reads content from the standard input and writes to the standard output and files at the same time. It makes it easier to do so without relying on echo and redirection operators.
As an example, let’s append text to a log file:
$ tee -a baeldung.log
sudo - super doer
sudo - super doer
su - super user
su -super user
Here, we can see that the text is being written to standard output as well as the baeldung.log file. Once we append text, we press Ctrl+C to save the contents to the file.
Next, let’s cat the file:
$ cat baeldung.log
sudo - super doer
su - super user
Now, the question is how would we use tee to save a file inside Vim as sudo. Well, let’s say we edit the hosts file. We can save it in Vim as sudo:
:w !sudo tee %Let’s break this down:
- :w instructs Vim to save the file
- !sudo lets us execute the following external command with elevated privileges
- tee invokes tee to write the contents of the current buffer to the file specified by %
- % is a special Vim variable that points to the filename of the current buffer
In this context, tee doesn’t read from standard input but from the file itself. So, in essence, it writes the contents of the buffer back to the opened file as sudo.
As we enter the command, we must enter the sudo password. Next, Vim prompts us to reload the file because the file has been changed. So, we press L to reload the file:
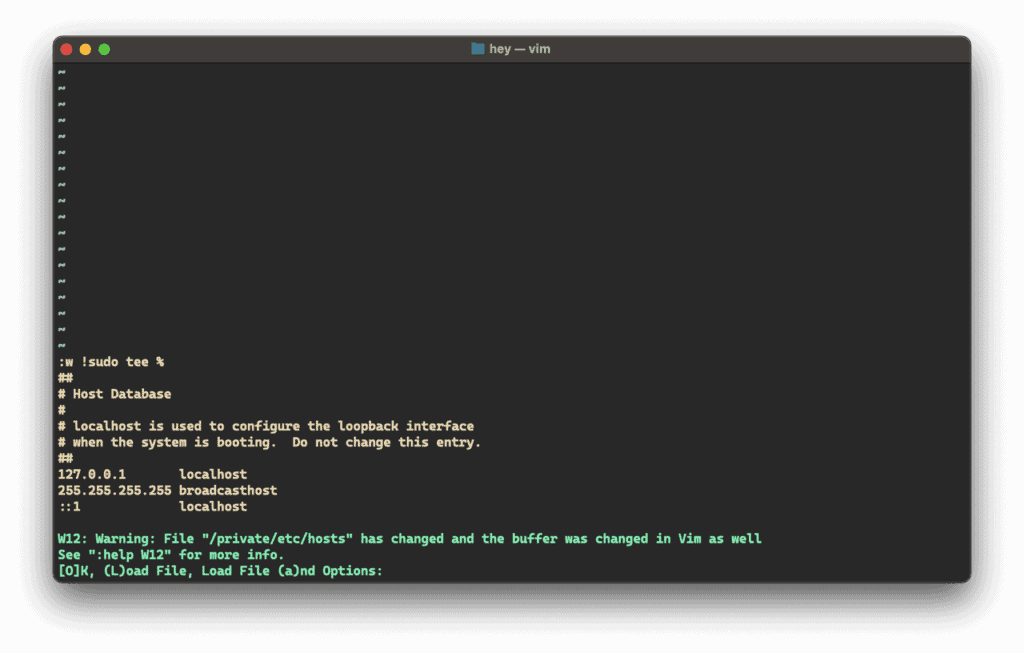
As soon as we press L, the file is reloaded. In addition, we can press O to skip reloading.
3.2. Caveats
It works very well for small files with no spaces in their filenames. However, if we have large files, the contents will be written to the file as well as the standard output, thereby creating overhead.
Not only that, if we have spaces or special characters in the filename in the filename, it won’t be handled correctly. Fortunately, we can handle it with some tweaks:
:silent execute 'write !sudo tee ' . shellescape(@%, 1) . ' >/dev/null'Alternatively, we can shorten this:
:sil exec 'w !sudo tee ' . shellescape(@%, 1) . ' >/dev/null'Let’s break this down:
- sil effectively suppresses the output of the command
- exec allows us to run a series of commands
- w !sudo tee writes the contents of the file as sudo
- . concatenates the strings
- shellescape is a Vim function that performs shell escaping on the current filename to ensure proper formatting
- >/dev/null redirects the output of the entire command to the null device /dev/null
Moreover, the shellescape function takes two arguments: the filename and an integer to escape special characters. For the filename, we used @% to read the contents of the % register, which contains the path to the current buffer. The second argument is a non-zero integer (1) to turn on backslash-escaping for special characters.
While this command does exactly what we need it to, it can be tedious to type. Therefore, we can write a custom command to run it.
3.3. Mapping for Quick Saving as sudo
In our .vimrc file, let’s add the command (W) that automates this task for us:
command W silent execute 'write !sudo tee ' . shellescape(@%, 1) . ' >/dev/null'In addition, we’ll also add a mapping for quick saving:
map <C-s> :W <CR>4. sudo.vim Plugin
sudo.vim is a lightweight plugin for Vim that we can use to save a file as sudo.
We can download and install it to our plugins directory. Once installed, we can save a file as sudo:
:e sudo:%5. Conclusion
In this article, we learned why it’s not possible to directly save a file as sudo while editing as a regular user. Next, we used the tee command to provide a workaround for the problem.
Finally, we used a simple Vim plugin as an alternative to the tee command.