

Learn through the super-clean Baeldung Pro experience:
>> Membership and Baeldung Pro.
No ads, dark-mode and 6 months free of IntelliJ Idea Ultimate to start with.
Learn through the super-clean Baeldung Pro experience:
>> Membership and Baeldung Pro.
No ads, dark-mode and 6 months free of IntelliJ Idea Ultimate to start with.
MongoDB is a powerful NoSQL database management system known for its flexibility and scalability. Furthermore, mastering admin tools is key to efficient database management in MongoDB administration on Linux.
In this tutorial, we’ll delve into Linux tools designed to streamline MongoDB administration.
The MongoDB Shell (mongosh) serves as the official command-line shell for MongoDB on Linux, providing an interactive JavaScript-based environment for efficient database administration.
Additionally, with features like syntax highlighting and autocompletion, mongosh simplifies query execution and administrative tasks, offering a convenient command-line experience for MongoDB users.
First, let’s download mongosh via wget:
$ wget https://downloads.mongodb.com/compass/mongodb-mongosh_2.1.1_amd64.debThen, we install the downloaded package via dpkg:
$ sudo dpkg -i mongodb-mongosh_2.1.1_amd64.debHere, we used -i to install the specified package.
Once installed, we should have access to the MongoDB shell.
Now, we connect to the MongoDB instance:
$ mongosh
Current Mongosh Log ID: 65a28f8d943cb29aeff1f788
Connecting to:          mongodb://127.0.0.1:27017/?directConnection=true&serverSelectionTimeoutMS=2000&appName=mongosh+2.1.1
Using MongoDB:          7.0.5
Using Mongosh:          2.1.1

For mongosh info see: https://docs.mongodb.com/mongodb-shell/

To help improve our products, anonymous usage data is collected and sent to MongoDB periodically (https://www.mongodb.com/legal/privacy-policy).
You can opt-out by running the disableTelemetry() command.
...
test>
By default, mongosh connects to a MongoDB instance running on localhost at the default port 27017.
Of course, if the MongoDB server is running on a different host or port, we can specify it in the connection string:
$ mongosh --host <hostname_or_ip> --port <port_number>In this case, we used –host to specify the MongoDB host and –port to specify the server’s listening port. Moreover, we can use -u and -p to provide the username and password for authentication.
Once connected, we can switch to a specific database using the use command:
test> use mydb
switched to db mydb
mydb>
Here, we switched to the mydb database.
Then, we can show all collections:
mydb> show collections
customers
orders
products
system.indexes
As we can see, we displayed all collections in the currently selected database.
mongodb-compass is a graphical user interface (GUI) tool designed for MongoDB database administration. It provides an intuitive and visual environment for database exploration and management. Additionally, the tool facilitates tasks such as query building, index management, and real-time performance monitoring.
Furthermore, imongodb-compass has features such as a query builder, aggregation pipeline builder, and tools for visualizing data. Moreover, users can navigate collections, analyze data, and optimize database performance.
First, let’s download the mongodb-compass package:
$ wget http://downloads.mongodb.com/compass/mongodb-compass_1.40.4_amd64.debThen, we install mongodb-compass:
$ sudo dpkg -i mongodb-compass_1.40.4_amd64.debAgain, we used -i to install the .deb package.
To connect to a database, first, we open mongodb-compass:
$ mongodb-compass
Then, we see an interactive prompt, where we can enter our database hostname or IP address and port number. In this case, we enter localhost or 127.0.0.1 and the default port number 27017 for a local MongoDB instance. Finally, we hit the Connect Button.
Once connected, we have access to the MongoDB server:
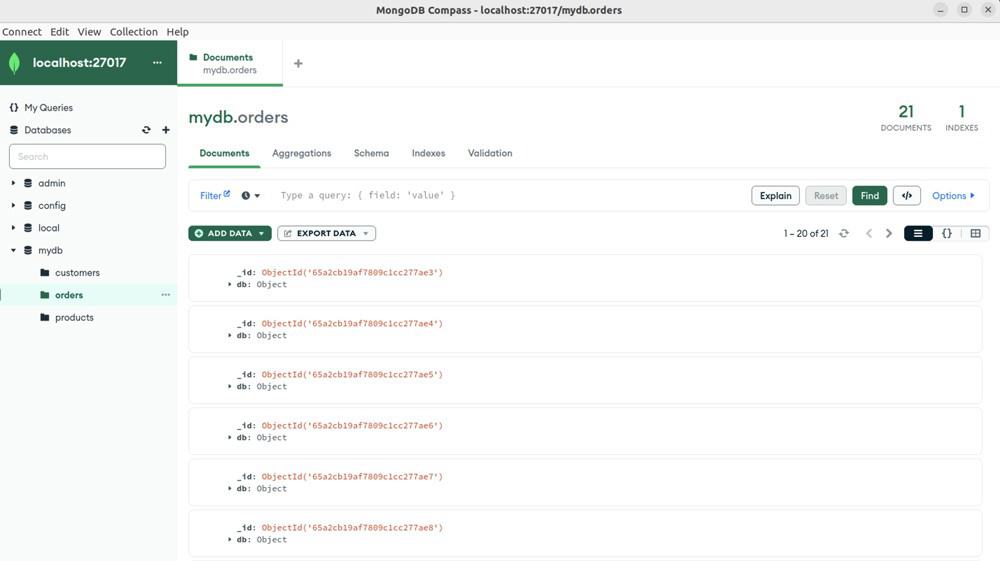
At this point, we connected to a MongoDB instance running on localhost port 27017. The left-hand panel of the interface shows a list of all the databases the user has access to.
Robo 3T is a graphical user interface (GUI) for managing MongoDB databases. It provides a set of tools and features to interact with MongoDB databases in a user-friendly way.
Hence, we can manage collections, execute queries, and perform diverse database operations. With its connection management capabilities, users can effortlessly switch between multiple MongoDB instances, facilitating efficient navigation.
First, let’s download Robo 3T via wget:
$ wget https://download.studio3t.com/studio-3t/linux/2023.9.2/studio-3t-linux-x64.tar.gzThen, we extract the downloaded archive:
$ tar -xzfv studio-3t-linux-x64.tar.gz
studio-3t-linux-x64.sh
So, let’s break down the code:
Now, we run the installation script:
$ ./studio-3t-linux-x64.sh
Unpacking JRE ...
Starting Installer ...
At this point, the script studio-3t-linux-x64.sh launches the installer guide for the rest of the installation process such as the installation location and accepting the license agreement.
Let’s explore the steps for connecting to a MongoDB database:
Now, we can access the MongoDB database:
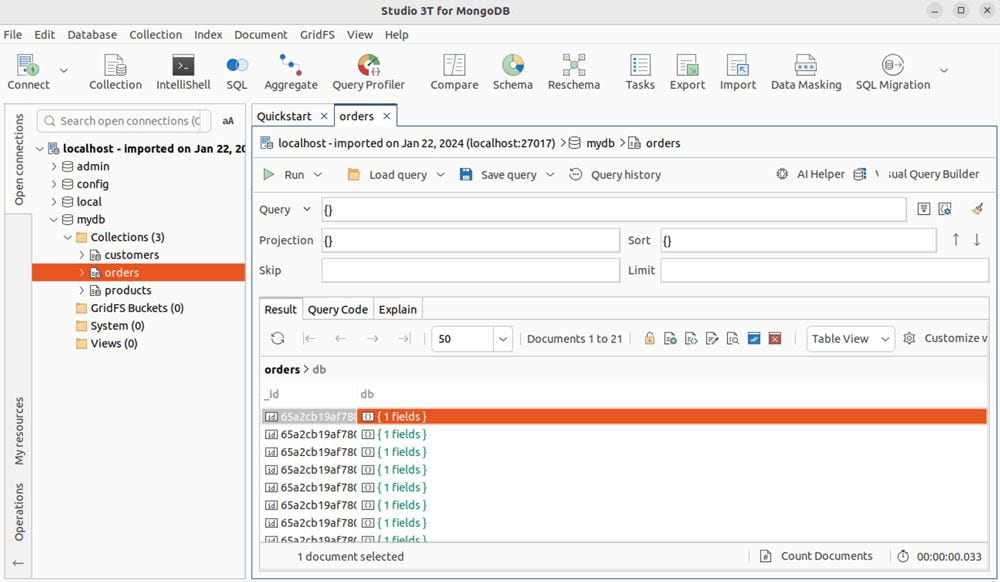
Therefore, we can perform various operations such as managing collections, executing queries, and exploring the database structure.
nosqlbooster is a user-friendly GUI tool for MongoDB management in Linux. In particular, with features like a visual query builder, it simplifies tasks for users. Moreover, data exploration through visualizations, replication, and index management contribute to its efficiency.
First, let’s download the AppImage format:
$ wget https://s3.nosqlbooster.com/download/releasesv8/nosqlbooster4mongo-8.1.6.AppImageThen, we make the AppImage executable via chmod:
$ chmod a+x nosqlbooster4mongo-8.1.6.AppImageIn this case, a refers to all users, and +x means to add execute permission. In other words, we’re granting the execute permission to all users.
Now, we execute nosqlbooster:
./nosqlbooster4mongo-8.1.6.AppImageAt this point, nosqlbooster should launch.
Let’s see how we can connect nosqlbooster to a MongoDB database:
Moreover, we can add options like authentication mode in the Connection Editor before hitting the save & connect button.
To clarify, let’s take a look at the main window of nosqlbooster:
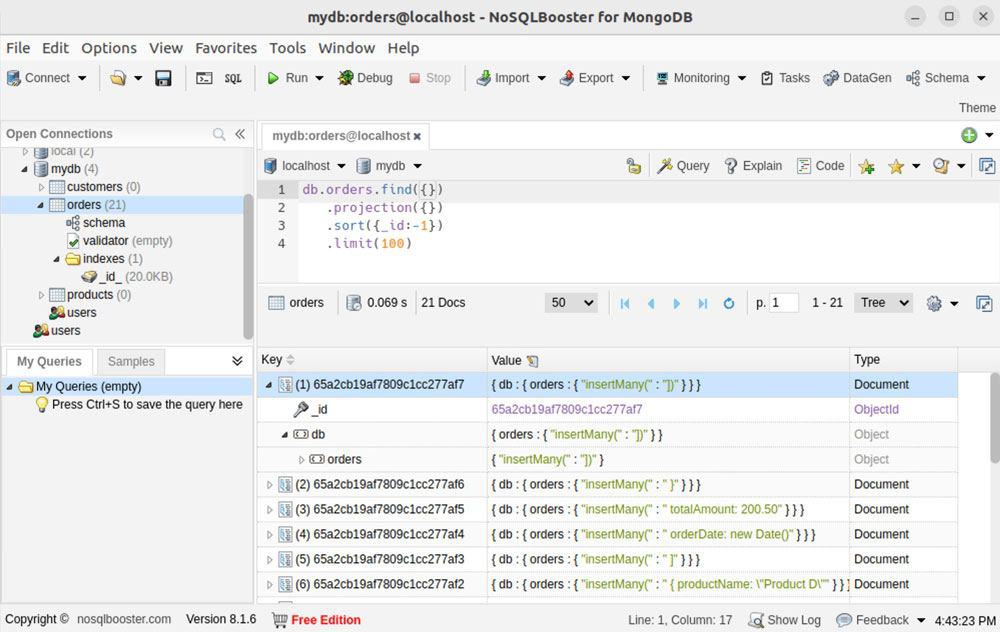
At this point, we have access to the MongoDB database via nosqlbooster. Thus, we can interact with databases through a user-friendly graphical interface to query, manage, and analyze data efficiently.
In this article, we explored various tools for MongoDB administration on Linux, delving into the key aspects of mongosh, mongodb-compass, Robo 3T, and nosqlbooster.
These MongoDB administration tools are well-equipped to choose and utilize them effectively based on their preferences and requirements.