

Yes, we're now running our only Summer Sale. All Courses are 30% off until 20th July, 2026:
Learn through the super-clean Baeldung Pro experience:
>> Membership and Baeldung Pro.
No ads, dark-mode and 6 months free of IntelliJ Idea Ultimate to start with.
1. Overview
One of the tasks of the operating system is distributing the workload among processors. The scheduler ensures the optimal assignment of CPUs to tasks. However, sometimes we want to leave certain processors out of the scheduler’s reach. This way, we can create a set of isolated CPUs and transfer selected tasks to them.
In this tutorial, we’ll learn how to isolate CPUs and manage tasks assigned to them.
2. The isolcpus Kernel Parameter
With the isolcpus parameter, we can isolate specific CPUs from the kernel scheduler during the boot time. So, we should provide the value of isolcpus via GRUB. Notice that the advantage of this way is its simplicity.
2.1. One-Time Setting
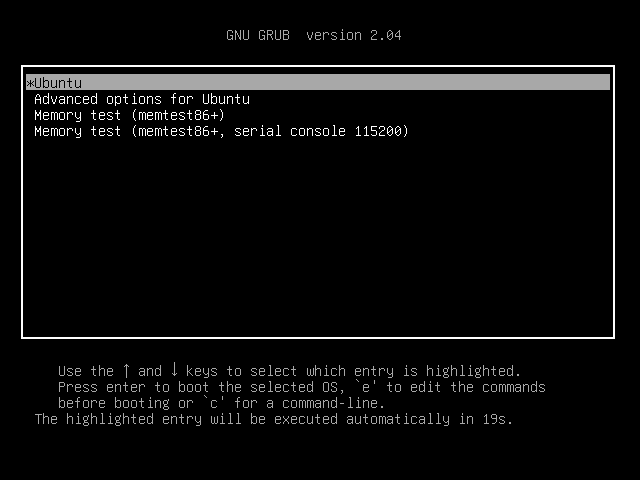
To temporarily set this parameter, we need to edit the GRUB entry. So, let’s restart the computer and jump to the GRUB menu:
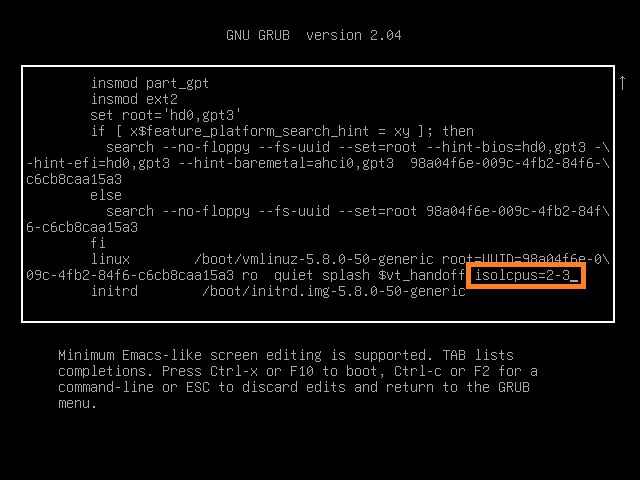
Next, we’re going to press e to edit the Ubuntu entry. Then, let’s add isolcpus=2-3 at the end of the linux line. In this way, we’re going to remove the third and fourth CPUs from the normal scheduling:
After the system’s been restarted, let’s check that our changes applied:
$ cat /sys/devices/system/cpu/isolated
2-3
We should be aware that the GRUB menu may be hidden. Then we need to change the GRUB configuration to make it accessible.
2.2. Permanent Change
Now let’s set isolcpus permanently by editing the grub configuration file:
$ sudo nano /etc/default/grubThen, let’s provide isolcpus in the GRUB_CMDLINE_LINUX entry:
GRUB_CMDLINE_LINUX="isolcpus=2-3"This time we’re going to reserve the third and fourth CPUs. Finally, let’s update the grub:
$ sudo update-grubSo, the change will come into effect after the next boot.
3. Demonstrating the Isolation
Now let’s assume that we’ve isolated the third and fourth CPUs. So, we’re going to start CPU-consuming tasks and check if these CPUs really stay idle. Hence, let’s use the sar command to collect the CPU statistics:
$ sar -P 0-3 1 70So, we’ll collect data for CPUs 0 through 3 by 70 seconds with a one-second interval. Moreover, we run sar inside the graphical kSar interface to get charts right away. Now, let’s assume that sar is running and dispatch the CPU hogs of stress-ng:
$ stress-ng --cpu 8 --timeout 60s --metrics-brief
Finally, let’s examine the results:
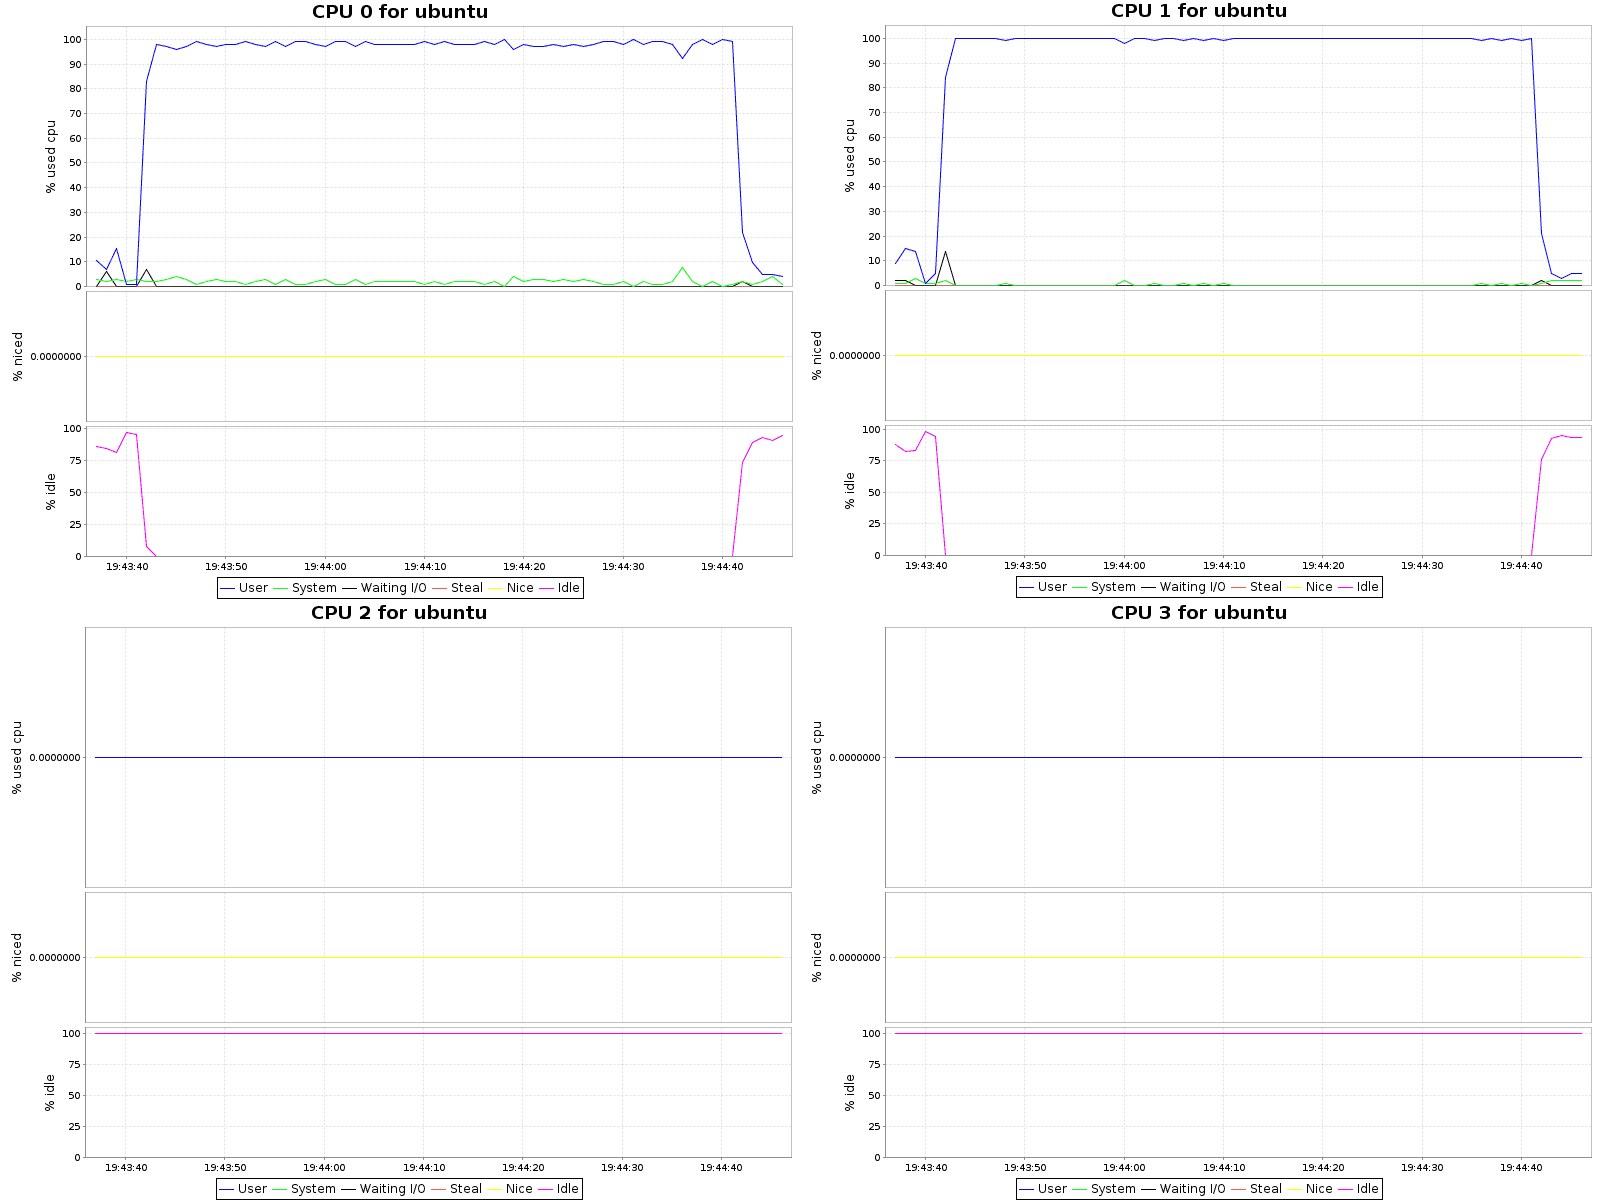
So, the effect is striking. In spite of a huge workload, only CPUs 0 and 1 are loaded. Next, we can find out that the isolated processor really remained idle.
4. How to Use the Isolated Processors
Using the isolcpus parameter, we only ask the kernel not to use the indicated processors. However, we need to set the processor affinity of the process ourselves.
As an example, let’s first dispatch four CPU stressors:
$ stress-ng --cpu 4 --timeout 600s --metrics-briefNext, let’s examine the tasks’ CPU affinity with the ps command:
$ ps -eo psr,command,pid | tr -s " " | grep "stress-ng-cpu"
 1 stress-ng-cpu [run] 4739
 0 stress-ng-cpu [run] 4740
 1 stress-ng-cpu [run] 4741
 0 stress-ng-cpu [run] 4742
So we can learn from the psr column that all tasks run on a non-isolated CPU as expected. Now, let’s move them to the isolated CPUs with help of the taskset command. Of course, we could do that by hand, but for many tasks, we’ll rather parse the ps output and use xargs:
$ ps -eo command,pid | tr -s " " | grep "^stress-ng-cpu" | cut -d " " -f 3 | xargs -n1 taskset -cp 2-3
pid 4739's current affinity list: 0,1
pid 4739's new affinity list: 2,3
# ...
Finally, let’s check the effect:
$ ps -eo psr,command,pid | tr -s " " | grep "stress-ng-cpu"
 3 stress-ng-cpu [run] 4739
 2 stress-ng-cpu [run] 4740
 3 stress-ng-cpu [run] 4741
 2 stress-ng-cpu [run] 4742
As we can see from the ps output, all stressors tasks are running now on previously unused CPUs 3 and 4.
5. Creating Processor Shielding With cset
cset is a Python application to create, separate, and manage sets of CPUs. Let’s keep in mind that cset uses the cpuset pseudo-filesystem under the hood. Moreover, the command provides a ready-to-use system of CPU sets. We can activate them by the shield super command.
Afterwards, we play with three subsets – root, user, and system. The root one contains all CPUs and makes them available for kernel threads. Then, in the user CPU set, we should run all processes we want to isolate. Finally, the system set runs all regular system tasks.
When we issue the shield command, almost all tasks from the initial root set are transferred to the system set. Then, thanks to the inheritance of processor affinity, all spawned processes stay within this set. On the other hand, we can explicitly start tasks in the user CPU set or move them from the system set. Eventually, the root set hosts only kernel tasks. So, we’ve achieved the isolation or shielding between user’s and system‘s tasks.
As opposed to the isolcpus method, cset allows the task scheduler to balance workload independently within sets.
To use cset, we should install the cpuset package. On Ubuntu or Debian distribution, we can use apt-get:
$ sudo apt-get update -y
$ sudo apt-get install -y cpuset
Moreover, as the command provides a bunch of subcommands and options, let’s learn how to obtain the help information:
$ cset help                     # for information about all subcommands
$ cset help <subcommand>        # for subcommand's details
$ cset help <subcommand> --help # for subcommand's options
5.1. Creating the Shield
Now let’s use the shield command to create a set of two processors, the third and fourth ones:
$ sudo cset shield --cpu 2,3
cset: --> activating shielding:
cset: moving 878 tasks from root into system cpuset...
[==================================================]%
cset: "system" cpuset of CPUSPEC(0-1) with 878 tasks running
cset: "user" cpuset of CPUSPEC(2-3) with 0 tasks running
Afterwards, let’s list all sets with the set command to cset:
$ cset set -l
cset:
         Name       CPUs-X    MEMs-X Tasks Subs Path
 ------------ ---------- - ------- - ----- ---- ----------
         root        0-3 y       0 y   102    2 /
         user        2-3 y       0 n     0    0 /user
       system        0-1 y       0 n   873    0 /system
So we can recognize all the abovementioned CPU sets. From the CPUs and MEMs columns we can learn about CPUs and memory nodes used by the set. The X flag informs if the respective resource is exclusive to a given set and describes between-sets relations.
Now, let’s take a look at the number of processes using each set. So, the user set is not populated altogether, as we haven’t added any process to it yet. Next, the root set keeps 120 special tasks – kernel threads. Finally, all normal 873 processes have been moved to the system set.
6. Querying the Set’s Content
Now let’s learn commands to provide information about the processes in the shield. First, let’s use the combination of s and v options to list all shielded processes:
$ cset shield -s -v
cset: "user" cpuset of CPUSPEC(2-3) with 0 tasks running
cset: done
So, at this moment no one process uses the shield. Next, let’s list all processes outside the shield, by means of u and v options:
$ cset shield -u -v
cset: "system" cpuset of CPUSPEC(0-1) with 596 tasks running
   USER       PID  PPID SPPr TASK NAME
   -------- ----- ----- ---- ---------
   root         1     0 Soth [systemd]
   root       286     1 Soth [systemd-journal]
   root       346     1 Soth [systemd-udevd]
   systemd-   730     1 Soth [systemd-oomd]
# ...
   joe       5770  5769 Soth bash
   joe       5816  5770 Roth /usr/bin/python3 /usr/bin/cset shield -u -v
cset: done
In this way, we’ve displayed the content of the system CPU set. Now, let’s explain the meaning of the SPPr column. It stands for the task’s State, Policy, and Priority. Consequently, cset is running while bash is sleeping. Moreover, oth means the default, OTHER scheduling policy for the corresponding tasks, which in turn makes their priorities irrelevant.
Finally, if we skip the verbose v option, we’re going to obtain a brief summary:
$ cset shield -s
cset: "user" cpuset of CPUSPEC(2-3) with 0 tasks running
cset: done
$ cset shield -u
cset: "system" cpuset of CPUSPEC(0-1) with 595 tasks running
cset: done
7. Managing Processes in the Shield
With the shield command, we can both start tasks straight in the user CPU set or move already running processes into or out of this set. Thus, let’s execute a task with the shield and exec options:
$ cset shield --shield --exec <command> -- <options to command>Next, we can move already running processes with help of the pid option:
$ cset shield --shield --pid <process PID>With this option, we can pass more PIDs in a form of a comma-separated list:
$ cset shield --shield --pid <PID1,PID2,...>Moreover, pid accepts a range of PIDs limited by initial PIDi and final PIDf, inclusively:
$ cset shield --shield --exec --pid <PIDi-PIDf>Working with range, we don’t need to bother if some PIDs within it don’t exist, as it’s not regarded as an error. Additionally, we can combine lists and ranges in one call to cset.
Finally, let’s use the unshield option to shield if we want to remove tasks from the user set. For that, we need to arrange processes’ PIDs in a list or range in the same way as for shield:
$ cset shield --unshield --pid <single PID, list or range>7.1. Starting Processes in the Shield
Now let’s start and shield the stressor processes:
$ cset shield --shield --exec stress-ng -- --cpu 2 --timeout 60s --metrics-briefWe’ve used the double dash after the stress-ng command to separate this command’s options from those passed to cset. Next, let’s check the shield:
$ cset shield -s -v
cset: "user" cpuset of CPUSPEC(2-3) with 4 tasks running
   USER       PID  PPID SPPr TASK NAME
   -------- ----- ----- ---- ---------
   joe       4953  4952 Soth [bash]
   joe       6118  4953 Soth [stress-ng]
   joe       6119  6118 Roth [stress-ng]
   joe       6120  6118 Roth [stress-ng]
7.2. Moving the Running Process to the Shield
We can assign a running task to the shield, so let’s do that with the current shell. Consequently, the user set will accept all processes which start in the corresponding terminal:
$ sudo cset shield --shield --pid $$
cset: --> shielding following pidspec: 11418
cset: done
So, we’ve used the shield option to the shield command to assign the task of PID passed with the pid option. Then, let’s check the shield’s content:
$ cset shield -s -v
cset: "user" cpuset of CPUSPEC(2-3) with 2 tasks running
   USER       PID  PPID SPPr TASK NAME
   -------- ----- ----- ---- ---------
   joe       4953  4952 Soth bash
   joe       4977  4953 Roth /usr/bin/python3 /usr/bin/cset shield -s -v
cset: done
Now we have only one running process – the cset command itself. Thus, let’s start two stressors in the background:
$ stress-ng --cpu 2 --timeout 60s --metrics-brief &And check the shield again:
$ cset shield -s -v
cset: "user" cpuset of CPUSPEC(2-3) with 5 tasks running
   USER       PID  PPID SPPr TASK NAME
   -------- ----- ----- ---- ---------
   joe       4953  4952 Soth bash
   joe       5275  4953 Soth stress-ng --cpu 2 --timeout 60s --metrics-brief
   joe       5276  5275 Roth stress-ng-cpu [run]
   joe       5277  5275 Roth stress-ng-cpu [run]
   joe       5278  4953 Roth /usr/bin/python3 /usr/bin/cset shield -s -v
cset: done
8. Conclusion
In this tutorial, we learned how to manage CPU access for a process. First, we used the isolcpus kernel parameter to remove CPUs from the outreach of the kernel scheduler. Then, we went through the example of how this setup worked. Then, we bound processes to isolated CPUs with the taskset command.
Next, we focused on cset, a mighty command to create CPUs sets and to host tasks inside. We used its predefined schema, shield, to create a set of CPUs shielded from normal system tasks. Finally, we found out how to run processes in the isolated user set and how to move already running tasks from or to it.