

Learn through the super-clean Baeldung Pro experience:
>> Membership and Baeldung Pro.
No ads, dark-mode and 6 months free of IntelliJ Idea Ultimate to start with.
Last updated: July 31, 2024
Learn through the super-clean Baeldung Pro experience:
>> Membership and Baeldung Pro.
No ads, dark-mode and 6 months free of IntelliJ Idea Ultimate to start with.
In this article, let’s talk about how to access a BitLocker-encrypted device in Linux. Often, we make use of storage devices to keep our data: from essential documents, music, and personal photos. These storage devices can either be a USB, a hard drive(HDD/SSD), or even memory cards. These devices help us keep our information: we use them for backup. What happens when we lose these storage devices and land in the wrong hands? In many cases, it’ll result in an impairing data breach. This is so damaging that, it’s resulted in many lawsuits. It is avoidable if we encrypt these storage devices. There are many ways to encrypt a storage device. For example, we have the Bitlocker tool in Windows OS, FileVault 2 in Mac OS, and Cryptsetup in Linux.
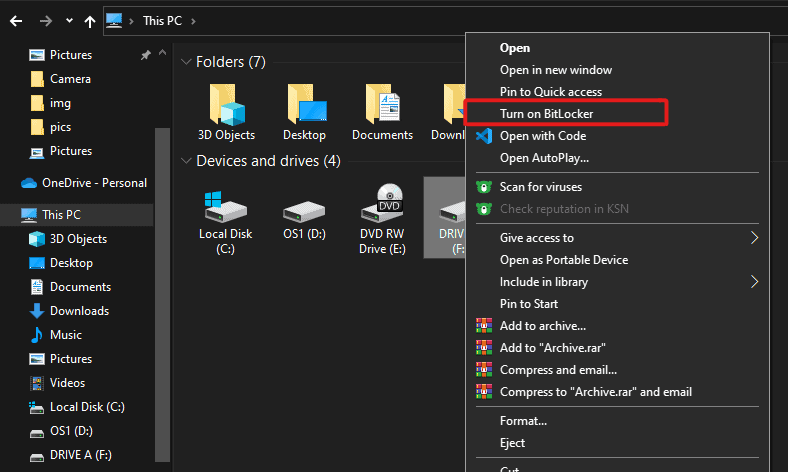
Bitlocker drive encryption is a data protection feature integrated within the Windows OS. It encrypts and protects the content of the data it is holding. This makes it difficult for unauthorized access to this data by the wrong hands. It is our responsibility to make it a priority to secure our drives by encrypting them. To secure our drives using BitLocker, we follow the process below. Let’s assume we have a USB labeled ‘drive A’. Let’s insert the storage device(drive A) into one of the USB ports. Subsequently, we open windows explorer, click on my Pc, locate where ‘drive A’ is, and then right-click it. On clicking, it opens a menu where we select ‘Turn on BitLocker’: 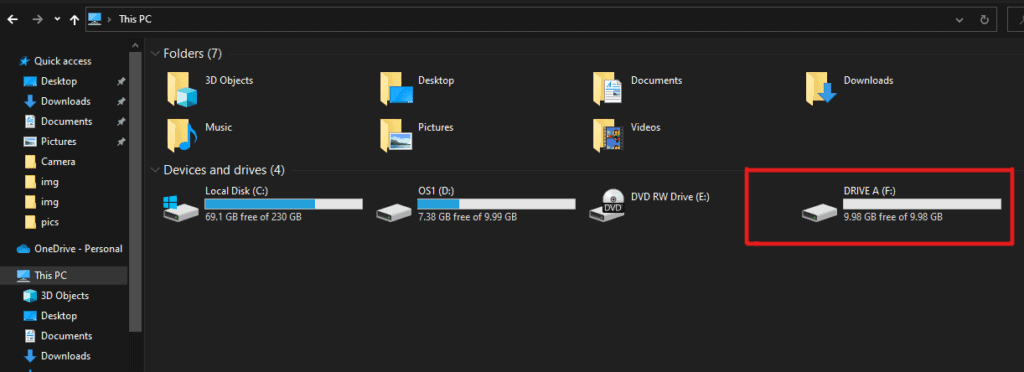
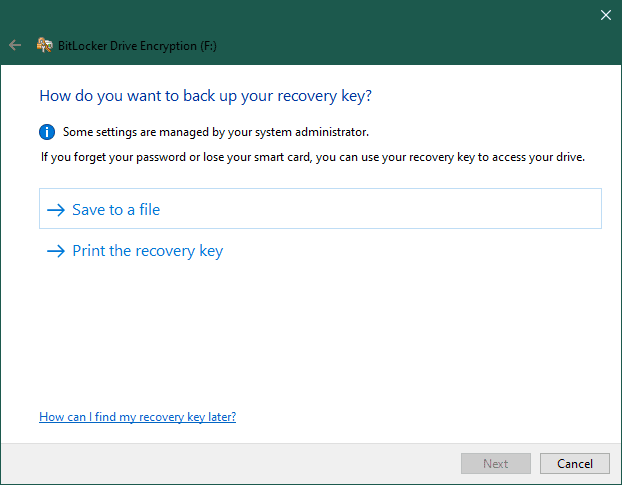
 Next, let’s enter a secure password that we can remember. After this, let’s either print or save the recover key where we can access it:
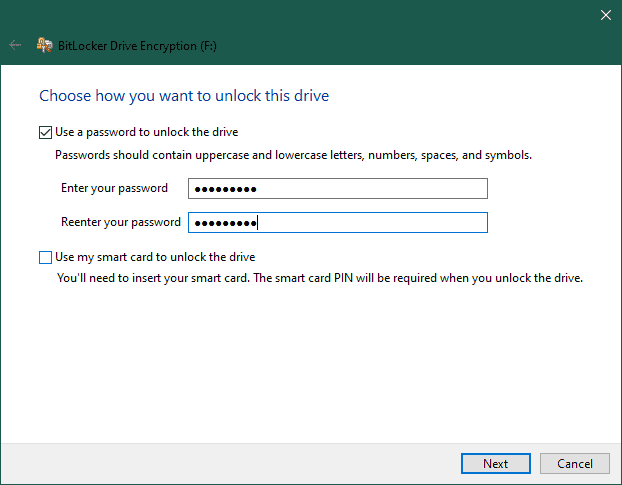
 Finally, let’s select ‘Encrypt Entire Drive’. It’s the most recommended option as it’s more secure and encrypts all the files, including those marked for deletion:
 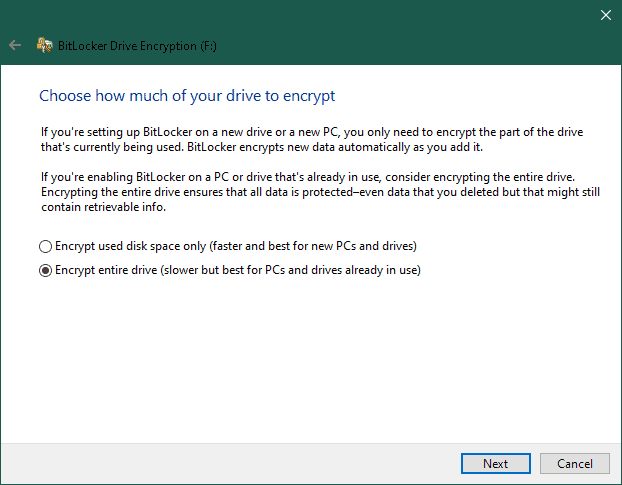 We finish by clicking on ‘Start Encrypting’ – this begins the encryption process:
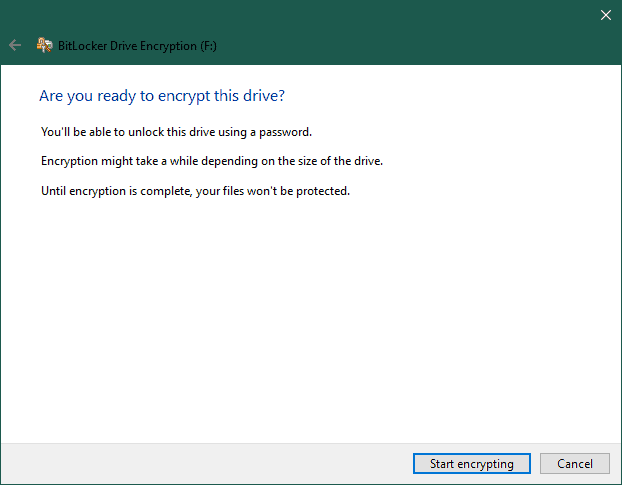
Most of the time, when we’ve inserted a BitLocker encrypted device on a Linux system, it prompts us to enter the password to unlock the drive. Frequently, the correct password fails to decrypt the drive or partition. When this fails, we’re not out of options. We can alternatively use a tool called Dislocker to access the BitLocker-encrypted drive
When we were encrypting our drive (drive A), we created a password and a recovery key. Here we’ll use the password we had set to decrypt the BitLocker-encrypted drive. Dislocker works in two ways: it decrypts the BitLocker-encryption and generates a file named dislocker-file, which is a virtual NTFS partition. It then mounts the virtual NTFS to our system, where we can now access its content. To achieve this, we need either the BitLocker password or the recovery key to decrypt the encrypted drive. First, let’s install the tool by:
$ sudo apt install dislockerIn some instances, we might need to add the universe repository before installing:
$ sudo apt-add-repository universe
$ sudo apt-get update
$ sudo apt-get dislocker
Secondly, let’s list the drives attached to our system and identify the drive letter assigned to our BitLocker-encrypted drive or partition. We can either use GParted or run the following commands to identify our external drive:
$ sudo fdisk -l
$ lsblk -f
Next, let’s create two mount points, the first one is where the dislocker generates the dislocker -file, and the other is where the virtual NTFS is mounted as a loop device. We can give these mount points any name we want:
$ sudo mkdir /media/bitlocker
$ sudo mkdir /media/mount
# we can use any name for those two folders
We then decrypt the BitLocker-encrypted drive and mount it to our system by:
$ sudo dislocker -v -V /dev/sdb1 -u#53!12345 -- /media/bitlocker
$ sudo ls /media/bitlocker
$ sudo mount -o loop,rw /media/bitlocker/dislocker-file /media/mount
$ sudo ls /media/mount
This opens the decrypted drive/partition and mounts it to where we can access it and view its content. Note that /dev/sdb1 is the BitLocker-encrypted drive. The -u flag is combined with the password #53!12345. Lastly, /media/bitlocker is where to mount the dislocker-file. When we’re done, we unmount the decrypted drive by:
$ sudo umount /media/mount
$ sudo umount /media/bitlockerHere let’s use the recovery key to decrypt instead of the password:
$ sudo dislocker -v -V /dev/sdb1 --recovery-password=100353-130856-687511-648978-419881-621753-302863-601689 -- /media/bitlocker
$ sudo mount -o loop,rw /media/bitlocker/dislocker-file /media/mount
$ sudo ls /media/mount   #this lists the contents of the decrypted drive or partition
# we then unmount after obtaining/viewing the content of the decrypted device
$ sudo umount /media/mount
$ sudo umount /media/bitlockerSometimes when we’ve run sudo mount -o loop,rw /media/bitlocker/dislocker-file /media/mount, we might encounter the following error:
mount: /media/bitlocker: wrong fs type, bad option, bad superblock on /dev/loop10, missing codepage or helper program, or other error.To correct this, let’s run the mounting command if it is NTFS:
$ sudo mount -t ntfs-3g -o loop /media/bitlocker/dislocker-file /media/mountOtherwise, if it is exFAT, we use:
$ sudo mount -t exFAT-fuse -o loop /media/bitlocker/dislocker-file /media/mountIn this article, we’ve mentioned why it is crucial to encrypt our storage devices. We also looked at how to access a BitLocker-encrypted device on a Linux system using dislocker when we’ve got the password or the recovery key.