

Learn through the super-clean Baeldung Pro experience:
>> Membership and Baeldung Pro.
No ads, dark-mode and 6 months free of IntelliJ Idea Ultimate to start with.
Last updated: May 5, 2024
Learn through the super-clean Baeldung Pro experience:
>> Membership and Baeldung Pro.
No ads, dark-mode and 6 months free of IntelliJ Idea Ultimate to start with.
Flashing the BIOS (Basic Input/Output System) refers to updating the computer’s firmware. We can achieve this by creating a bootable USB drive.
The workflow we’ll follow here is meant for client systems such as desktops and laptops. Servers may have a different way, and we must consult our hardware vendor.
In this tutorial, we’ll see how to create a bootable USB drive using a Dell computer as our example. We can use these steps to upgrade or downgrade the BIOS system.
First, we need to get the make of the device. From a Gnome desktop using Ubuntu 22.04, we can get this information by going to Settings> About:
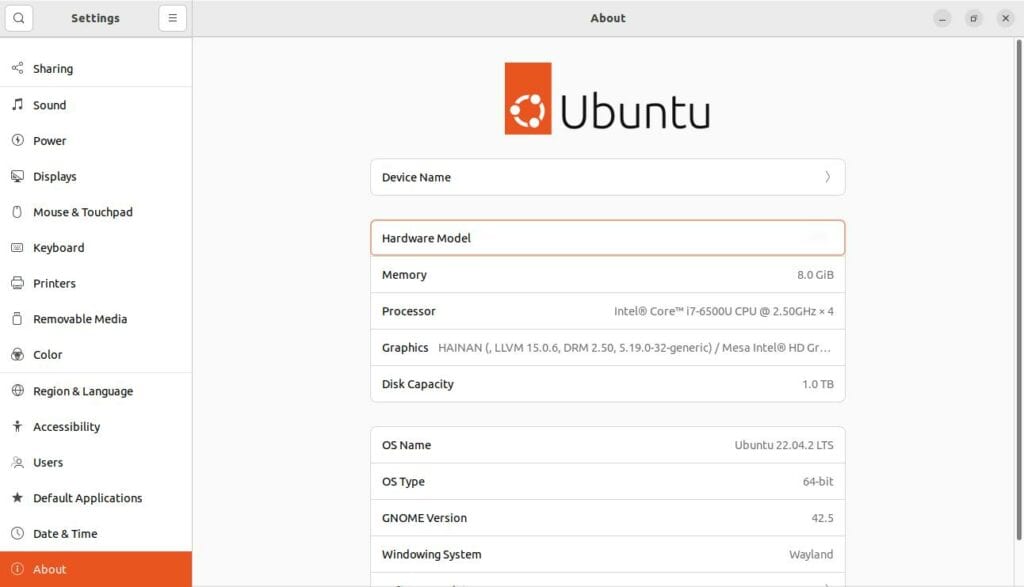
Our interest is the Hardware Model. We’ll later require this to download a BIOS version designed for our specific hardware.
Flashing the BIOS is a significant undertaking that, if not executed accurately, risks rendering the system inoperable. Here’s a checklist of things we need to consider before proceeding.
First, we need to ensure a constant power supply throughout the process. Ideally, this requires the PC to be plugged into an AC supply or to have a UPS during operation. If the power goes off during the update, our system may be permanently damaged.
We also need to check vendor-specific instructions on how to update the system. For example, Dell advises that we sequentially update the BIOS without skipping any intermediate version. Otherwise, we may face compatibility issues.
Let’s now get a USB flash drive. One with a storage capacity of at least 1 GB should suffice. Unlike operating systems, which can be several gigabytes, BIOS downloads can be as little as 6 MB.
Initially, we must format our USB stick to the appropriate file system, namely FAT32 (File Allocation Table, 32-bit). This choice is because FAT32 enjoys universal support from almost all systems, including Windows, Linux, and even macOS.
Additionally, FAT32 supports both BIOS and UEFI firmware.
Note that we need to use FAT32 strictly. Other FAT-based file systems like exFAT may not work.
Let’s now plugin our USB drive. We can backup any data on the flash since the following actions will erase all data.
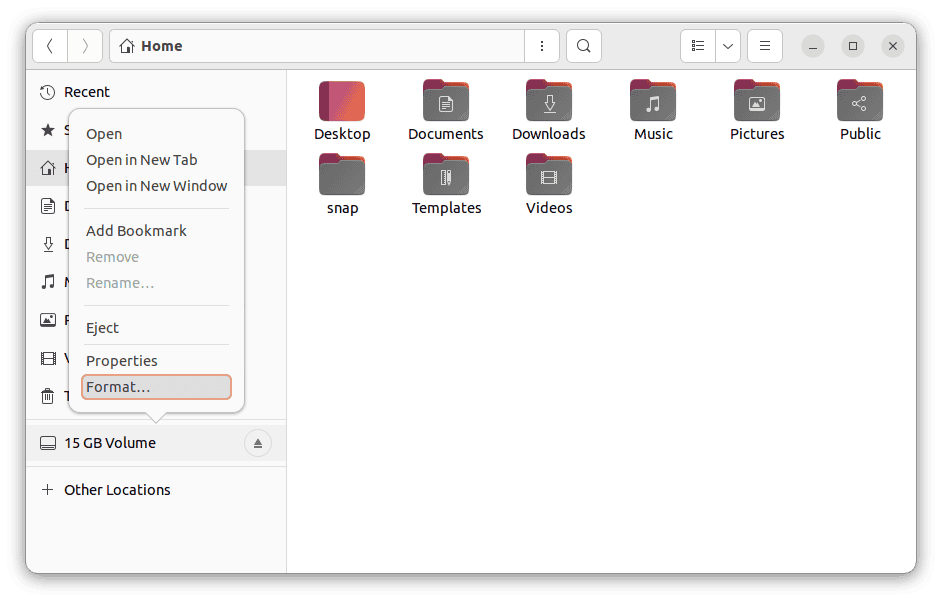
To format the flash, we can right-click on its tab from the Files app. We can then choose the Format option:
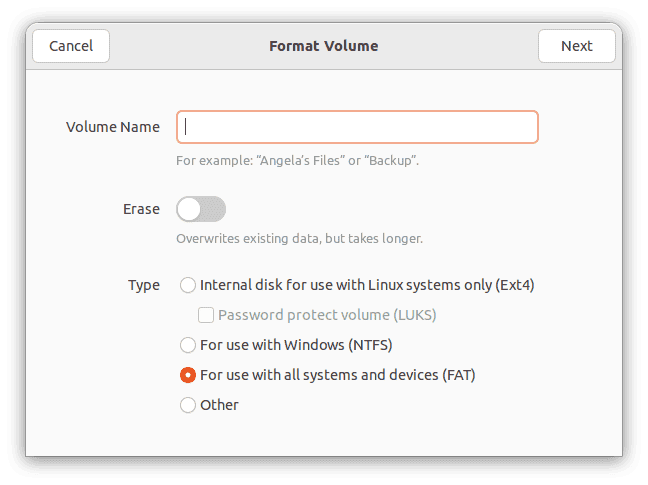
In the pop-up window, we’ll need to change the file system to FAT32 and then press Next:
We’ll then receive a prompt to confirm the action by clicking Format:
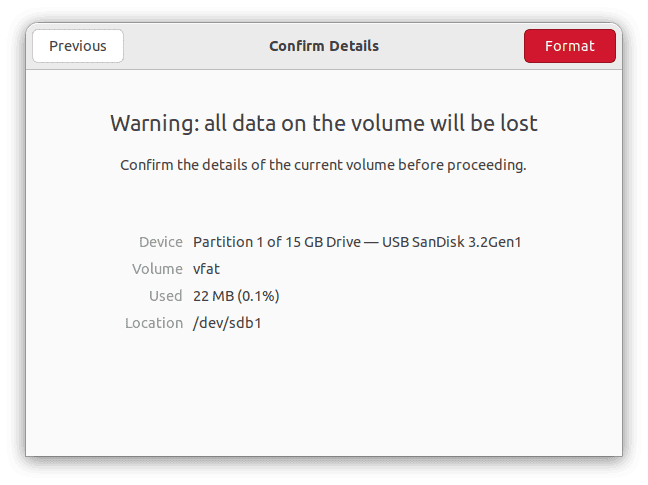
Our flash drive will be ready for use when the action is done.
An alternative approach to format the flash drive is to use the command line:
$ mkfs.fat /dev/sdbWe’ll need to replace /dev/sdb with the actual device to which our USB drive corresponds. We can check for all recognized storage devices on the system using:
$ lsblkLet’s now head over to our manufacturer’s page.
We can then insert our PC model (obtained earlier) and search the available downloads for BIOS updates.
Now would also be a good time to check the BIOS version of our system:
$ sudo dmidecode -s bios-versionIf our version is outdated, we can download the next version in line. Note that Dell advises that we shouldn’t skip intermediate BIOS versions when upgrading.
After downloading the chosen version, we can simply copy it to the USB stick. A close notice at the downloaded file reveals that it’s a Windows executable (.exe). This shouldn’t worry us. The file can’t run directly on Linux, but the BIOS can run it appropriately.
Finally, it’s time to update the BIOS. With the precautions mentioned earlier in the account, we can reboot our PC.
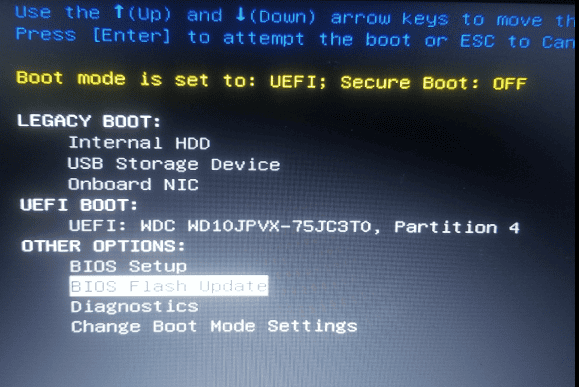
When the PC starts, we can press F12, F2, or ESC to enter the boot menu. At this stage, we can choose BIOS Flash Update option:
The system will take over from there. When the upgrade is complete, the system automatically restarts and hands control to the operating system.
In this article, we’ve seen how to upgrade or downgrade our computer’s BIOS version. Remember that flashing the BIOS carries potential risks to our system’s usability. Therefore, we should always take the necessary precautions.