

Yes, we're now running our only Summer Sale. All Courses are 30% off until 20th July, 2026:
How to Automount Partitions at Linux Startup
Last updated: March 18, 2024
Learn through the super-clean Baeldung Pro experience:
>> Membership and Baeldung Pro.
No ads, dark-mode and 6 months free of IntelliJ Idea Ultimate to start with.
1. Overview
On a Linux system, we can manually mount a partition to a particular mount point. However, we can also set up the system to automount a partition on reboot.
In this tutorial, we’ll take a look at some methods that we can use to automount a partition at Linux startup.
2. Using the GNOME and XFCE GUI
The GUI (Graphical User Interface) method for GNOME and XFCE applies to most Linux distributions.
Let’s start the operation.
2.1. Installing GNOME Disks
GNOME Disks is a graphical application that we can use for disk configuration on Linux. Since it enables us to perform automounting on partitions, we’ll install this tool on our Linux machine.
To install GNOME Disks on GNOME, we first navigate to Add/Remove Software:
Then, we type gnome-disk-utility in the search bar and install the GNOME Disks application that pops up on the screen:

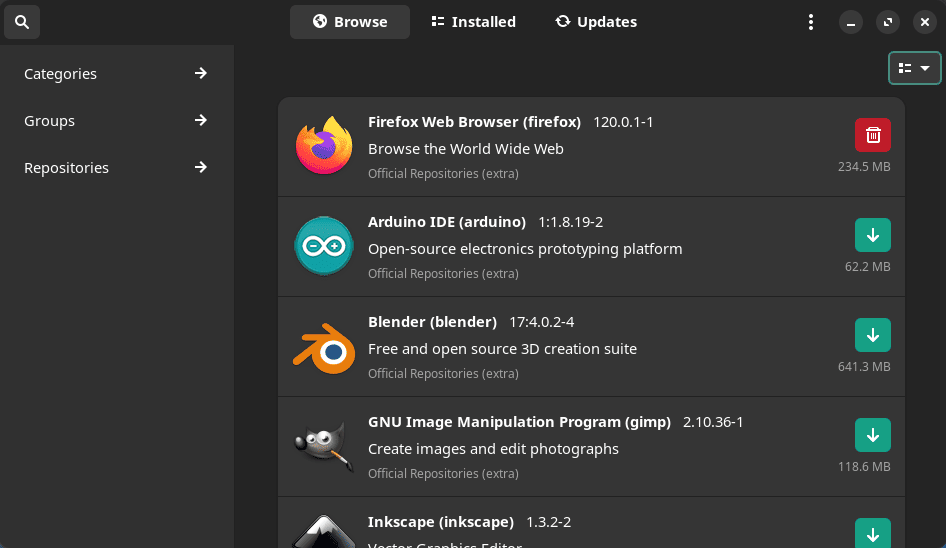
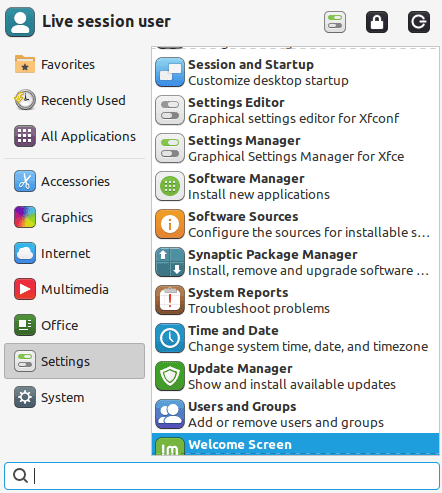
In the case of XFCE, we’ll go to Settings -> Software Manager:
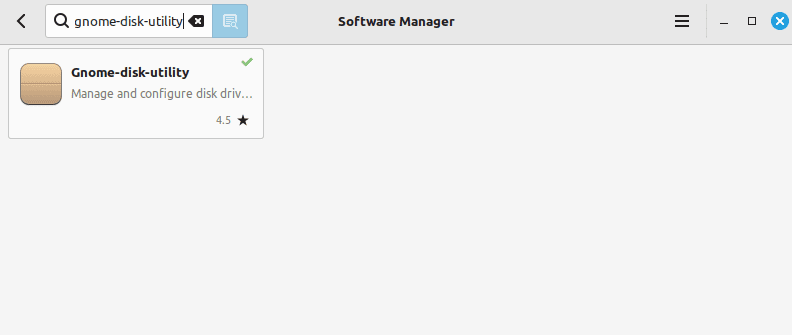
Just like in GNOME, we type gnome-disk-utility in the search bar and install GNOME Disks:
Alternatively, we can also install this utility via the command line:
$ sudo apt install gnome-disk-utilityNow that we’ve installed the tool, let’s see how to utilize it for automounting a particular partition.
2.2. Partition Automount
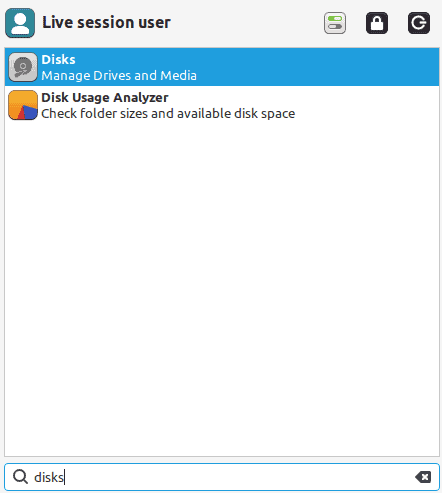
The first step is to open GNOME Disks by typing disk in the search bar and clicking on the application named Disks in the menu:
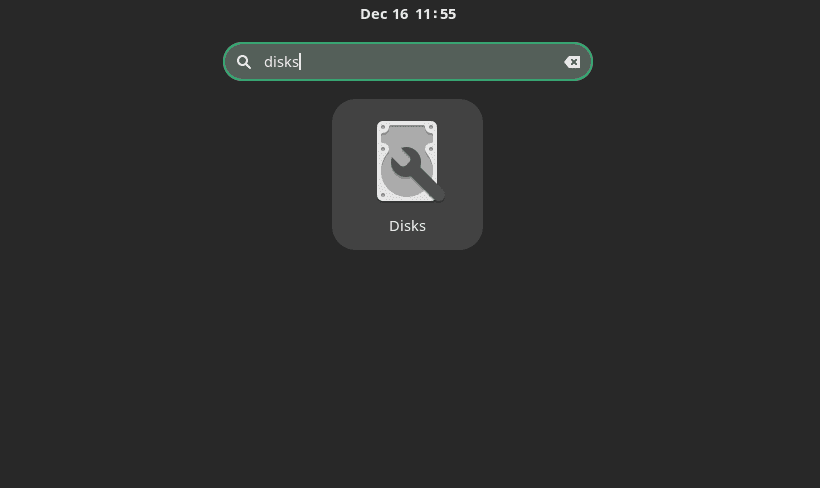
The same process applies to XFCE:
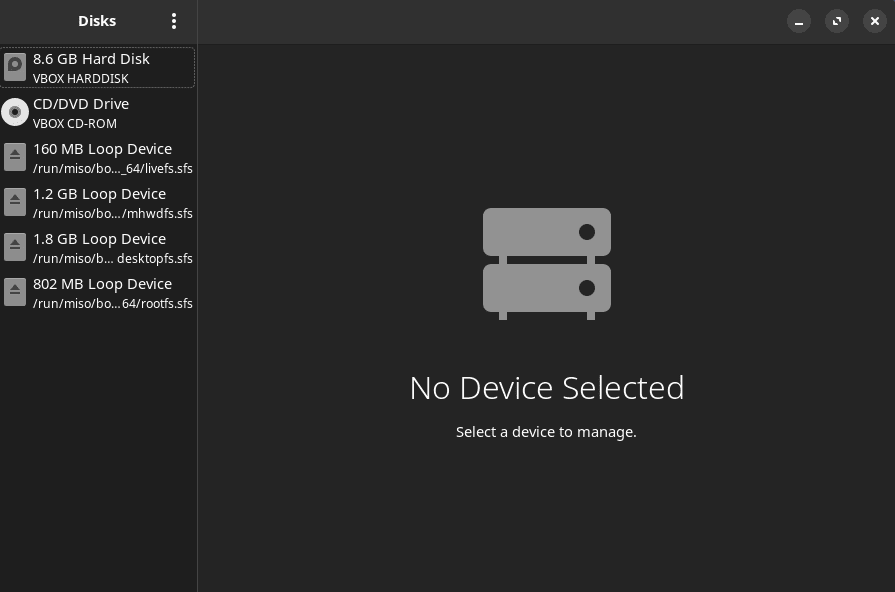
Once the application opens, we see a list of existing drives on the system on the left pane of the window. Here, we’ll click on the drive that contains the partition that we want to automount. In our case, we click on 8.6 GB Hard Disk to proceed:
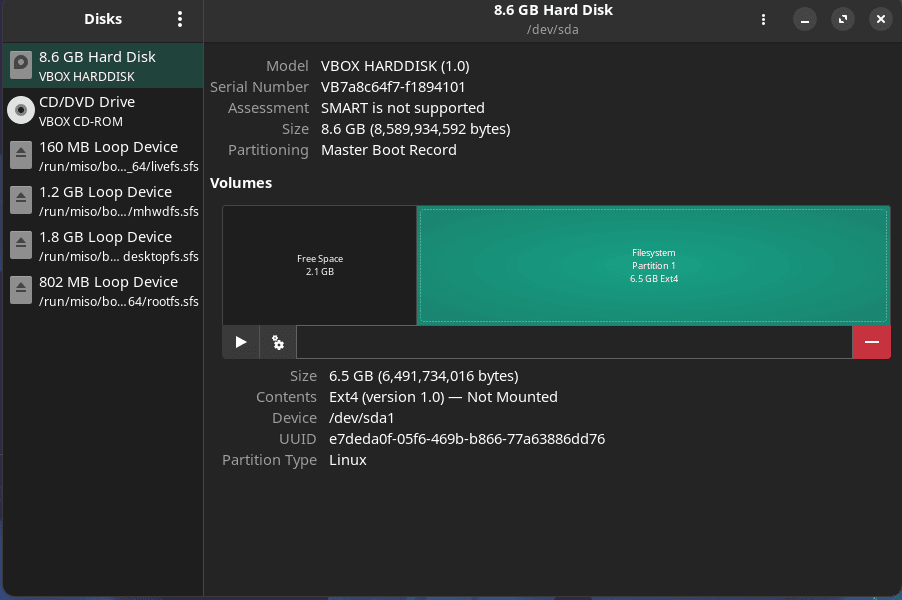
Upon clicking the drive, a list of partitions that exist on the drive show up on screen.
Next, we select the partition that we’re going to automount, i.e., Partition 1:
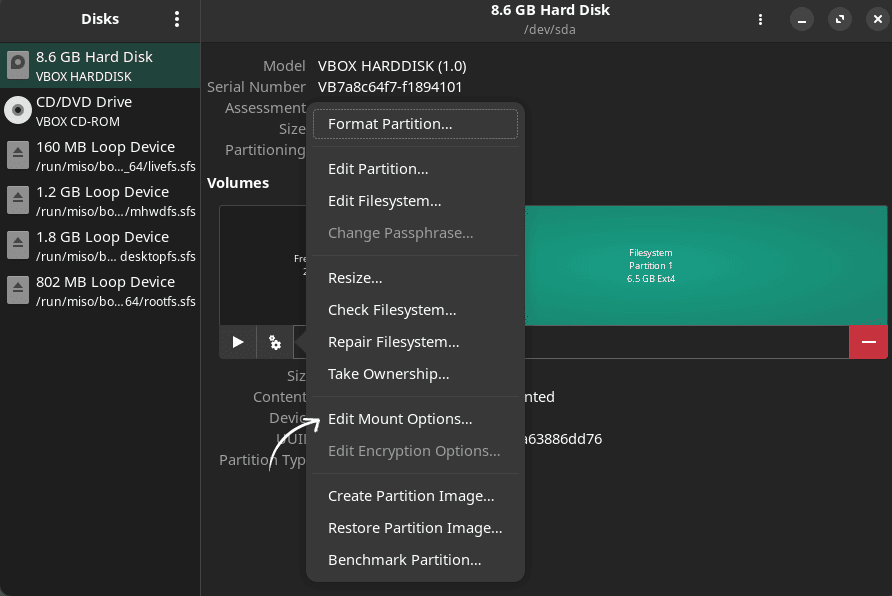
After that, we click on the Additional partition options icon, located just under the list of partitions:

A context menu appears. Here, let’s click on Edit Mount Options to proceed:
In the window that appears, we uncheck the User Session Defaults box:
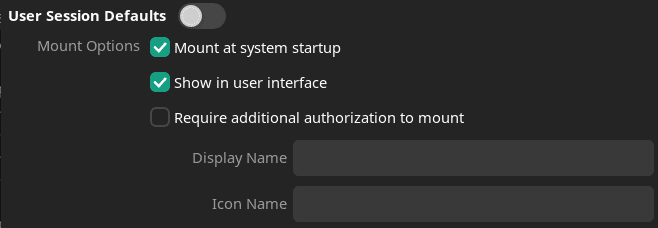
Then, we check the box that says Mount at system startup:

Finally, let’s specify the mount point in the box that says Mount Point and hit OK to save the settings:
Now, we just restart the machine to automount the target partition to the specified mount point at startup.
3. Using the KDE GUI
There’s a slightly different process to follow on KDE, which we’ll go through in this section. Just like with GNOME and XFCE, the only requirement is the proper desktop environment (KDE).
Let’s start the process.
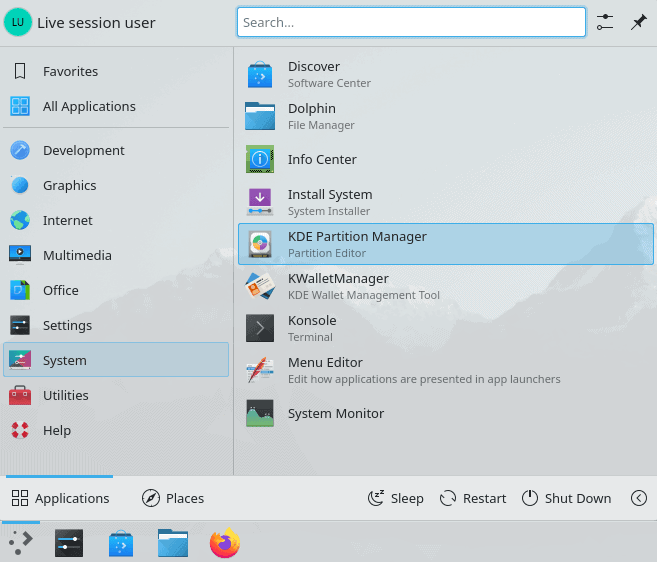
Firstly, we navigate to System -> KDE Partition Manager. This utility is a built-in application for managing partitions on KDE:
Once the application opens, we see a list of existing drives on the left side of the screen. Just like in the previous section, we click on the drive that contains the partition to be automounted.
In this case, we select the only drive that we see:
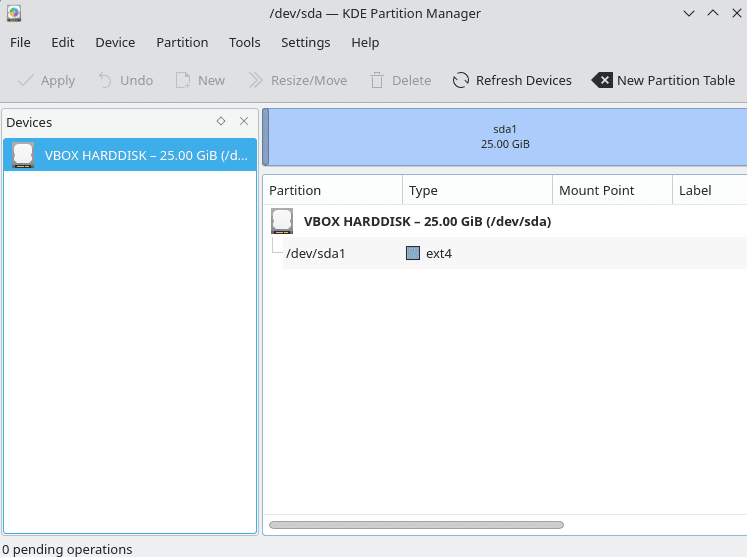
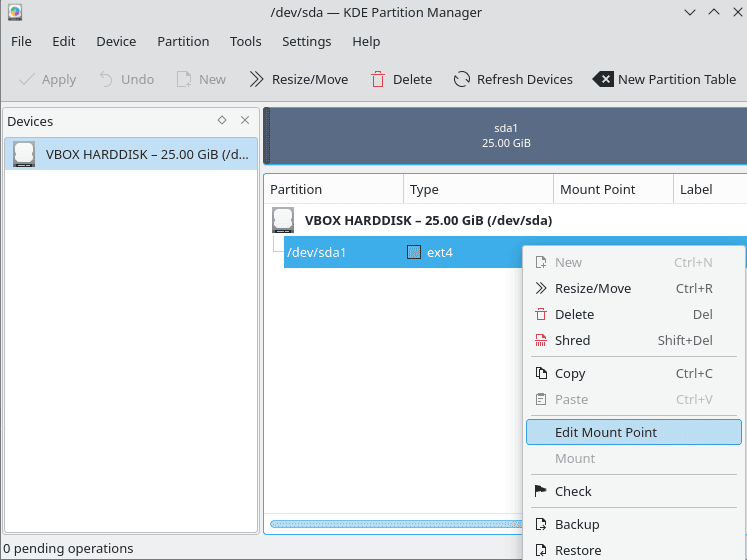
After that, the partitions on the drive show up. Here, we right-click on the target partition and select Edit Mount Point:
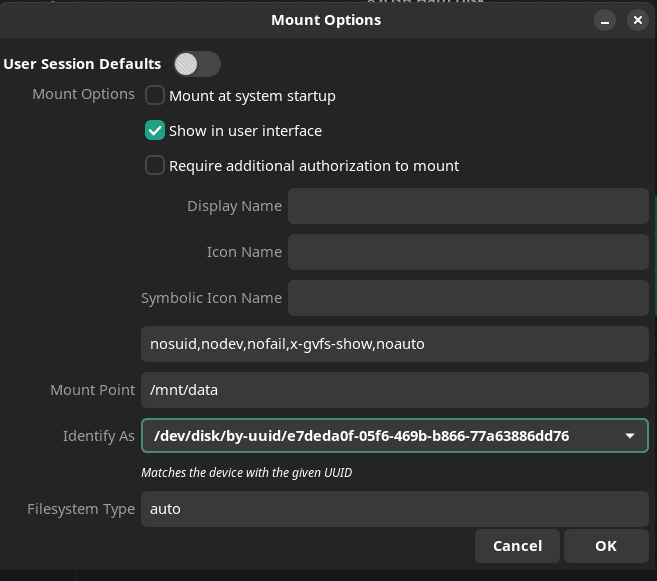
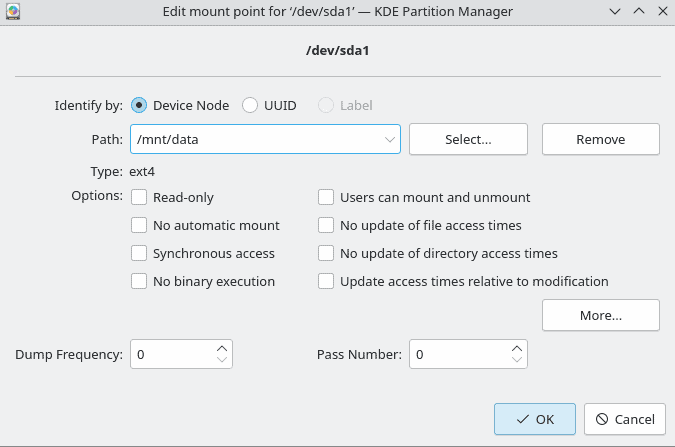
Next, a new window pops up. In this window, we first specify the mount point in the box labeled Path. Then, we should uncheck the box that says No automatic mount.
Finally, we hit OK to save the settings:
Upon saving, we restart the machine to automount the target partition to the specified mount point at startup.
4. Terminal Method
Of course, we can also use the terminal to make the system automount a specific partition at startup.
Let’s go through the process step-by-step.
4.1. Getting Partition Information
The first step is to get the UUID and the filesystem type of the target partition.
So, let’s perform the operation using the blkid command, which displays information about the existing devices on the system:
$ sudo blkid
/dev/sda: UUID="3255683f-53a2-4fdf-91cf-b4c1041e2a62" TYPE="ext4"
/dev/sda1: UUID="187171ab-c9b8-43ec-b0bb-77c736ca22e0" TYPE="ext4"
/dev/sdb: UUID="3255683f-53a2-4fdf-91cf-b4c1041e2a62" TYPE="ext4"
...
Here, the target partition is /dev/sda1. So, we note its corresponding values for UUID and filesystem type (TYPE) for future use.
4.2. Creating a Mount Point
Before we set up the target partition for automount, we have to create a mount point where the system mounts the partition.
Let’s create one named data in the /mnt directory:
$ cd /mnt
$ mkdir data
Now, we have a mount point to automount the target partition.
4.3. Set Target Partition Automount
To configure automount, we edit the /etc/fstab file, which streamlines the process of mounting partitions on Linux.
Before moving forward, it’s best to back up the file to ensure that it’s safe in case anything goes wrong.
Then, we open the file and add a line to it in a standard format:
UUID=<uuid> <mount-point> <filesystem-type> <mount-option> <dump> <pass>In our case, we can fill in the values we acquired:
UUID=187171ab-c9b8-43ec-b0bb-77c736ca22e0 /mnt/data ext4 defaults 0 2After adding, we’ll save the file and restart the machine to make the system automount the target partition to the specified mount point at startup.
5. Conclusion
In this article, we discussed some methods that enable us to automount a partition at startup on Linux.
First, we went through the GUI methods for GNOME, XFCE, and KDE. Then, we also explored the terminal method for automounting partitions on Linux.