Mocking is an essential part of unit testing, and the Mockito library makes it easy to write clean and intuitive unit tests for your Java code.
Get started with mocking and improve your application tests using our Mockito guide:
Handling concurrency in an application can be a tricky process with many potential pitfalls. A solid grasp of the fundamentals will go a long way to help minimize these issues.
Get started with understanding multi-threaded applications with our Java Concurrency guide:
Spring 5 added support for reactive programming with the Spring WebFlux module, which has been improved upon ever since. Get started with the Reactor project basics and reactive programming in Spring Boot:
Since its introduction in Java 8, the Stream API has become a staple of Java development. The basic operations like iterating, filtering, mapping sequences of elements are deceptively simple to use.
But these can also be overused and fall into some common pitfalls.
To get a better understanding on how Streams work and how to combine them with other language features, check out our guide to Java Streams:
Explore Spring Boot 3 and Spring 6 in-depth through building a full REST API with the framework:
Yes, Spring Security can be complex, from the more advanced functionality within the Core to the deep OAuth support in the framework.
I built the security material as two full courses - Core and OAuth, to get practical with these more complex scenarios. We explore when and how to use each feature and code through it on the backing project.
You can explore the course here:
All Access is finally out, with all of my Spring courses. Learn JUnit is out as well, and Learn Maven is coming fast. And, of course, quite a bit more affordable. Finally.
>> GET THE COURSE
Spring Data JPA is a great way to handle the complexity of JPA with the powerful simplicity of Spring Boot.
Get started with Spring Data JPA through the guided reference course:
Refactor Java code safely — and automatically — with OpenRewrite.
Refactoring big codebases by hand is slow, risky, and easy to put off. That’s where OpenRewrite comes in. The open-source framework for large-scale, automated code transformations helps teams modernize safely and consistently.
Each month, the creators and maintainers of OpenRewrite at Moderne run live, hands-on training sessions — one for newcomers and one for experienced users. You’ll see how recipes work, how to apply them across projects, and how to modernize code with confidence.
Join the next session, bring your questions, and learn how to automate the kind of work that usually eats your sprint time.
1. Overview
Java has long been a popular choice for game development, with notable successes like the original version of Minecraft.
Developing a game without a game library or engine could be a tedious task. libGDX is a Java game library that makes the development of cross-platform 2D and 3D games easier.
In this tutorial, we’ll explore the basics of libGDX. We’ll learn how to set up a libGDX project, import it into an IDE, and deploy the game project.
2. libGDX Library
The libGDX game library allows us to build a cross-platform game in Java. With a single code base, we can compile our game to support Desktop, Android, iOS, Linux, and web platforms. This flexibility makes libGDX suitable for indie game developers.
libGDX takes care of low-level details like graphics, audio, and networking based on the selected platforms. Furthermore, it uses OpenGL under the hood to communicate with the Graphics Processing Unit (GPU) for rendering.
Moreover, the library doesn’t impose a specific coding paradigm, allowing us to structure the game as we prefer.
3. Creating a libGDX Project
To begin, let’s download the gdx-liftoff tool, a standalone JAR application that generates the necessary project files. This JAR file runs on any system with a Java Runtime Environment (JRE) installed.
Next, let’s click on the JAR file to run it. Alternatively, we can run it via a terminal:
$ java -jar gdx-liftoff-1.12.1.17.jarThe command above launches a graphical interface for setting up a new project:
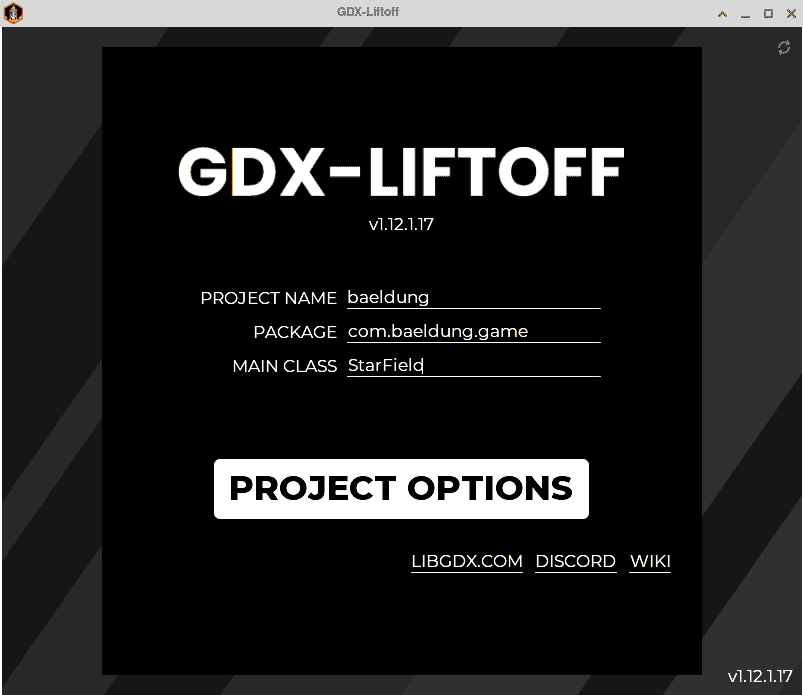
On the first page, we have an input field for the project name, the package, and the name of the main class. Let’s name our main class StarField.
3.1. Setting Target Platform
Furthermore, let’s select the Project Options button to proceed to the next page. This page contains the platforms box where we can select the target platform. CORE is selected by default as it contains shared game logic.
Additionally, the web platform (HTML) is selected by default. Let’s select the Android, iOS, and Desktop platforms:

Also, we can select another programming language aside from Java in the LANGUAGE section. Other supported programming languages include Kotlin, Scala, and Groovy.
Moreover, we can add extensions like the game physics engine, and controllers by clicking on the plus sign in the Extensions box. These extensions are provided by libGDX maintainers.
3.2. Third Party Extension
After setting the target platform, let’s click on the next button to access third-party extensions:
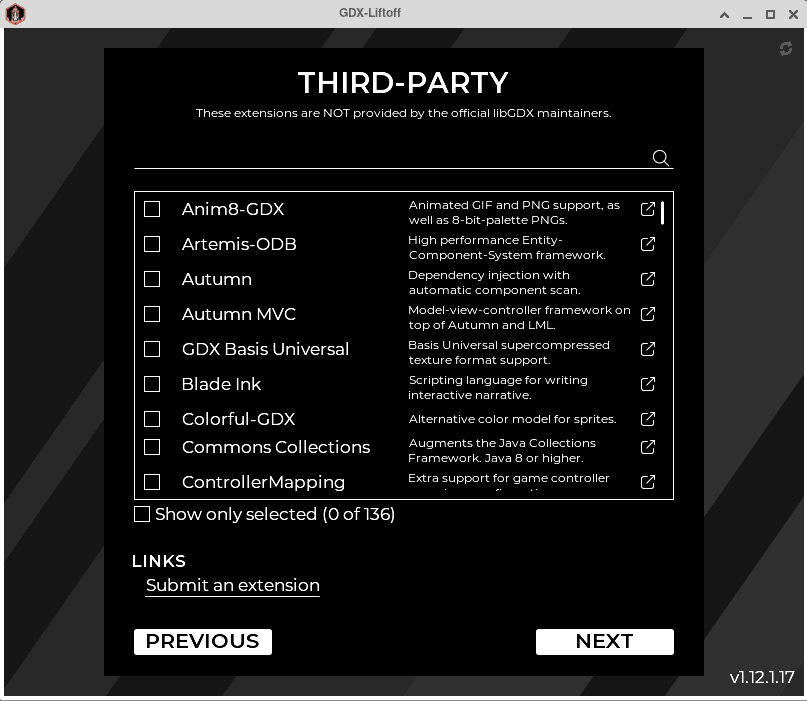
Here, we can select some third-party extensions to enhance our game’s functionality. Third-party extensions are provided by developers outside the libGDX core team.
3.3. Setting Java Version
Let’s finalize our project creation by clicking on the next button on the third-party extension page. The last step contains an input field to set the path to generate the project files and the path to the Android SDK for the Android platform. Also, it contains input fields to select the libGDX version and the Java version:
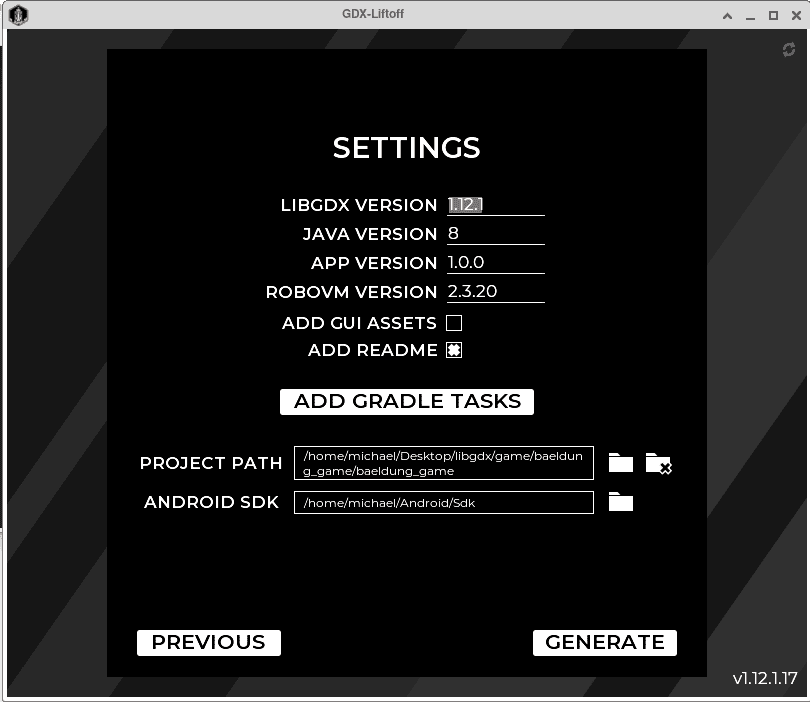
Importantly, the choice of Java version is critical for libGDX’s cross-platform support. Java 8 supports all platforms, and if we’re targeting the old Android or iOS versions, we can go as low as Java 7. Java 11 only supports desktop and web platforms while Java 22 only supports the desktop platform.
Finally, let’s click the generate button to generate the project files in the specified directory.
4. Importing to an IDE
libGDX uses Gradle as a build and dependency management tool. We can import a Gradle project inside Java’s IDE such as Eclipse, IntelliJ, and VSCode by opening the project directory containing the build.gradle file. After importing the project into our favorite IDE, let’s check out the file directory structure:

The image above shows our project directory in IntelliJ IDE. The core directory contains the shared game logic, while the platform-specific folders like html, android, ios, and lwjgl3 provide a backend for each platform.
The desktop backend is based on Lightweight Java Game Library (LWJGL). It provides binding to native libraries, particularly OpenGL for graphics.
While creating our project, we named the main class StarField. The class is automatically generated in the src directory of the core directory. It extends the ApplicationAdapter interface:
public class StarField extends ApplicationAdapter {
    // ...
}
The interface contains several methods that can be overridden:
- create() – This method is invoked immediately after we launch our game and acts like a constructor. All forms of resource allocation and initialization are done here.
- resize() – This method is called after create() and when the screen size changes.
- render() – This method allows us to define game logic called by the game loop anytime rendering is required. This is where action happens. By default, the render() method gets called 60 times per second. Due to this behavior, resource allocation and initialization aren’t done within this method.
- dispose() – this method helps us to destroy all initialized objects in the create() method. Though Java is a Garbage Collector language, it’s essential to destroy unused objects in a game to improve performance because the garbage collector may take some time to destroy the objects.
This shows the life cycle of a typical libGDX game.
5. libGDX in Action
Let’s see libGDX in action by creating a constellation of stars. To begin, let’s clear the default code in the StarField class.
5.1. Drawing Lines
First, let’s draw lines. We can draw different shapes using the ShapeRenderer class. Let’s create a ShapeRenderer object in our StarField class and initialize it in the create() method:
private ShapeRenderer shapeRenderer;

@Override
public void create() {
    shapeRenderer = new ShapeRenderer();
}
Initializing the object within the create() method makes the object available when the application is started.
Next, let’s render two lines on a dark screen by overriding the render() method:
@Override
public void render() {
    Gdx.gl.glClearColor(0, 0, 0, 1);
    Gdx.gl.glClear(GL20.GL_COLOR_BUFFER_BIT);
    shapeRenderer.begin(ShapeRenderer.ShapeType.Line);
    shapeRenderer.setColor(Color.WHITE);
    shapeRenderer.line(0, 100, 110, 100);
    shapeRenderer.setColor(Color.RED);
    shapeRenderer.line(20, 0, 110, 100);
    shapeRenderer.end();
}
In the code above, we set the background color to opaque black using the glClearColor() method. Next, we instruct OpenGL to clear the screen.
Then, we invoke the begin() method on the shapeRenderer object to get set for drawing points on a defined location on the screen. The begin() method accepts the shape type as an argument. In this case, we use Line as the shape type.
Next, we draw two lines on the screen by invoking the line() method on the shapeRender. The method accepts the starting and ending coordinates as arguments. We can draw additional lines by invoking the line() method on the shapeRenderer object as needed.
Also, we invoke the end() method on the shapeRenderer to stop drawing.
Finally, let’s dispose the shapeRenderer object to free resources:
@Override
public void dispose() {
    shapeRenderer.dispose();
}
To run the game on a desktop platform, let’s open the Lwjgl3Launcher.java file in the lwjgl3/src/main/java/com/baeldung/game/lwjgl3/Lwjgl3Launcher.java directory and execute it by clicking the run button. The class contains the main method and serves as the application entry point for the desktop platform.
Here are the rendered lines:
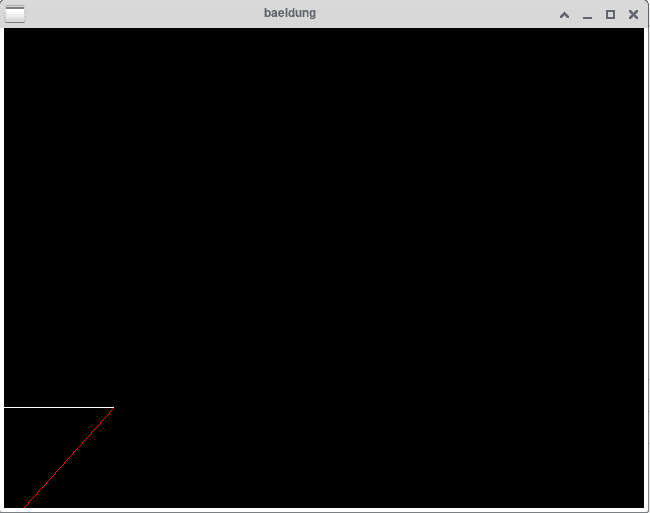
Here, we draw two lines on the screen at coordinates (0, 100, 110, 100) and (20, 0, 110, 100).
5.2. Drawing Star Fields
We can define multiple points to create multiple stars by scattering points across the screen. First, let’s define a couple of fields:
private static final float STAR_DENSITY = 0.05f;
Array<Vector2> stars;
Here, we define a constant named STAR_DENSITY to represent the proportion of the screen covered by stars. Then, we define an Array of Vector2 objects to store the 2D coordinates of the stars.
Next, let’s create a method to initialize different star points across the screen:
void initStars(float density){
    int screenWidth = Gdx.graphics.getWidth();
    int screenHeight = Gdx.graphics.getHeight();
    int starCount = (int)(screenHeight * screenWidth * density);
    stars = new Array<Vector2>(starCount);
    Random random = new Random();
    for (int i = 0; i < starCount; i++){
        int x = random.nextInt(screenWidth);
        int y = random.nextInt(screenHeight);
        stars.add(new Vector2(x, y));
    }
}
In the code above, we create a method named initStars() that accepts density as a parameter to specify the proportion of the screen in which to populate the stars.
Next, we calculate the screen’s width and height and use their product multiplied by the density to estimate the number of stars.
Then, we initialize the stars collection as an Array of type Vector2. Using the Random class, we generate random x and y coordinates within the screen’s dimension and add them to the stars array.
Let’s invoke the initStars() method in the create() method to initialize the star points and set the star density:
@Override
public void create() {
    shapeRenderer = new ShapeRenderer();
    initStars(STAR_DENSITY);
}
Then, let’s draw a point on every pair of xy coordinates stored in the stars array:
@Override
public void render() {
    // ...
    shapeRenderer.begin(ShapeRenderer.ShapeType.Point);
    for (Vector2 star : stars){
        shapeRenderer.point(star.x, star.y, 0);
        shapeRenderer.setColor(0,1,0,1);
    }
    shapeRenderer.end();
}
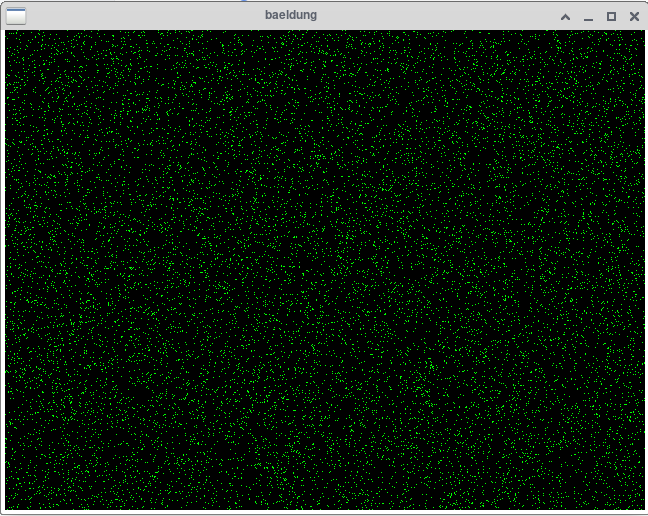
Unlike the previous example, we set the shape type to Point. Then, we loop through the stars and draw points on each xy coordinate pair. The setColor() method sets the color of the stars to green.
Let’s see the rendered stars:
6. Deploying the Application
We can deploy our application on any supported platform as long as the required backend module is present in the project directory. In our case, backends for all supported platforms are included.
6.1. Deploying to the Web Platform
To deploy the application on a web platform, we can use the following command:
$ ./gradlew html:distThe command above generates an HTML file in the target/dist directory that can be launched in any web server to test the game in a browser.
6.2. Deploying to the Desktop Platform
We can deploy our game for desktop platforms using the ./gradlew lwjgl3:dist command:
$ ./gradlew lwjgl3:distThe command above creates a runnable JAR file in the lwjgl3/dist directory that can be run on Linux/Mac/Windows.
6.3. Deploying to the Android Platform
Furthermore, we can deploy the game on the Android platform using the following command:
$ ./gradlew android:assembleReleaseWe must have Android SDK installed on our machine. An APK file is created in the android/build/outputs/apk directory. The APK must be signed before publishing or installing it on an Android device.
6.4. Deploying to the iOS Platform
Finally, we can deploy our project on iOS platform by building an IPA file:
$ ./gradlew ios:createIPAThe command above creates an IPA file in the ios/build/robovm directory. To publish the game on the App Store, we must define a provisioning identity and profile in the build.gradle file under the ios module.
Notably, iOS builds can only be compiled on macOS.
7. Conclusion
In this article, we learned the basics of the libGDX game library. We saw how to create a new project using the libGDX liftoff and import it into an IDE. Also, we saw how to create a single point and a collection of points to form star constellations.
Finally, we examined how to deploy our game application on different platforms.