

Mocking is an essential part of unit testing, and the Mockito library makes it easy to write clean and intuitive unit tests for your Java code.
Get started with mocking and improve your application tests using our Mockito guide:
Handling concurrency in an application can be a tricky process with many potential pitfalls. A solid grasp of the fundamentals will go a long way to help minimize these issues.
Get started with understanding multi-threaded applications with our Java Concurrency guide:
Spring 5 added support for reactive programming with the Spring WebFlux module, which has been improved upon ever since. Get started with the Reactor project basics and reactive programming in Spring Boot:
Since its introduction in Java 8, the Stream API has become a staple of Java development. The basic operations like iterating, filtering, mapping sequences of elements are deceptively simple to use.
But these can also be overused and fall into some common pitfalls.
To get a better understanding on how Streams work and how to combine them with other language features, check out our guide to Java Streams:
Explore Spring Boot 3 and Spring 6 in-depth through building a full REST API with the framework:
Yes, Spring Security can be complex, from the more advanced functionality within the Core to the deep OAuth support in the framework.
I built the security material as two full courses - Core and OAuth, to get practical with these more complex scenarios. We explore when and how to use each feature and code through it on the backing project.
You can explore the course here:
Spring Data JPA is a great way to handle the complexity of JPA with the powerful simplicity of Spring Boot.
Get started with Spring Data JPA through the guided reference course:
Refactor Java code safely — and automatically — with OpenRewrite.
Refactoring big codebases by hand is slow, risky, and easy to put off. That’s where OpenRewrite comes in. The open-source framework for large-scale, automated code transformations helps teams modernize safely and consistently.
Each month, the creators and maintainers of OpenRewrite at Moderne run live, hands-on training sessions — one for newcomers and one for experienced users. You’ll see how recipes work, how to apply them across projects, and how to modernize code with confidence.
Join the next session, bring your questions, and learn how to automate the kind of work that usually eats your sprint time.
1. Introduction
In this tutorial, we’ll discuss decompiling Java classes. When source code is not available, decompiling Java classes helps to debug and understand source code behavior.
Let’s take a look at the different options available.
2. Decompiling in IDE
Since most development is done in an integrated development environment (IDE), it makes sense that decompilation should also take place in an IDE.
For more info on the IDEs we will work with, check out our articles on how to debug in Eclipse and configuration for IntelliJ IDEA.
2.1. Eclipse
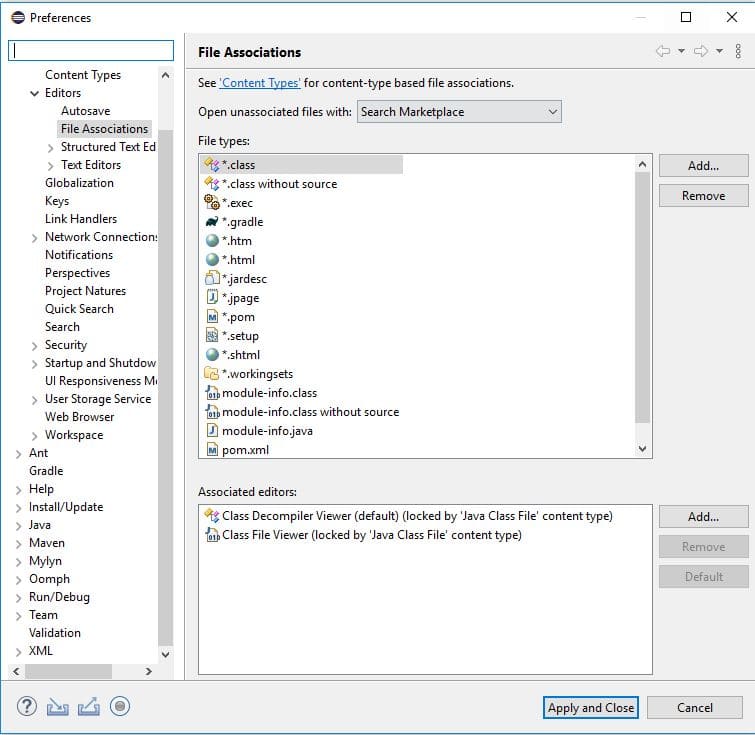
Firstly, in Eclipse we need a plugin such as the Enhanced Class Decompiler (ECD). This plugin uses five different decompilers. We can install it from the Eclipse Marketplace and then we need to restart Eclipse.
Next, ECD requires a small amount of setup to associate class files with the Class Decompiler Viewer:
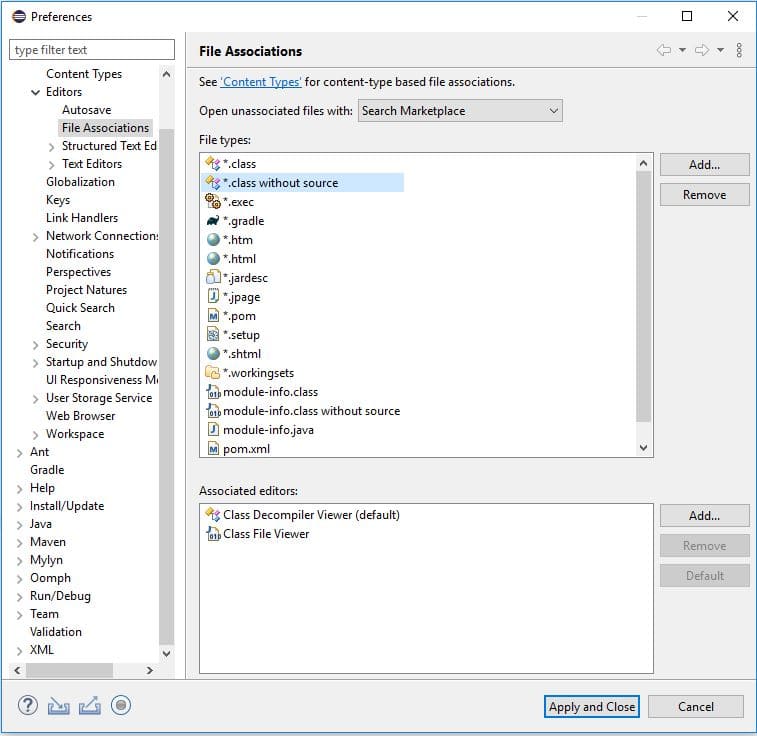
Also, we need to associate “.class without source” files:
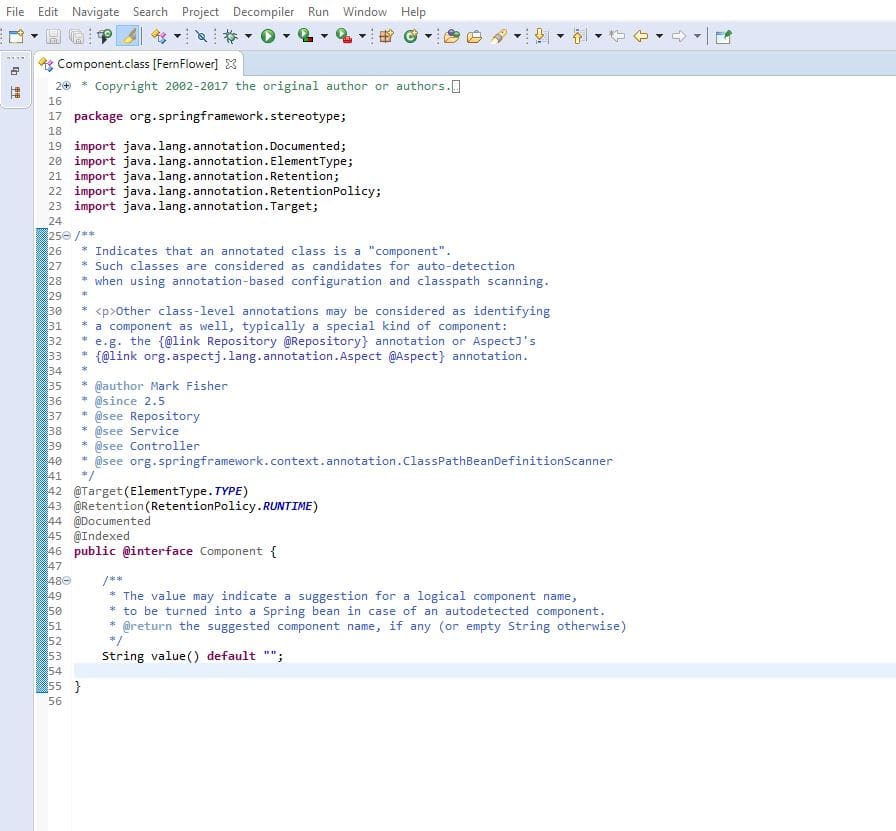
Finally, we can use the decompiler by pressing Ctrl+Left-Click on a class name. We see the decompiler used on the file tab in brackets.
In this example, we’re using FernFlower:
2.2. IntelliJ IDEA
In contrast to Eclipse, IntelliJ IDEA provides the FernFlower decompiler as a default.
To use it, we simply Ctrl+Left-Click on a class name and view the code:
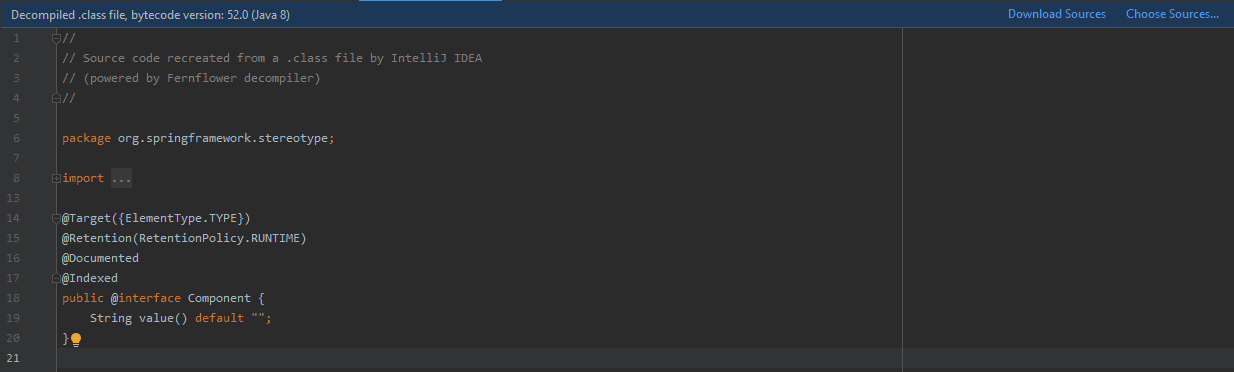
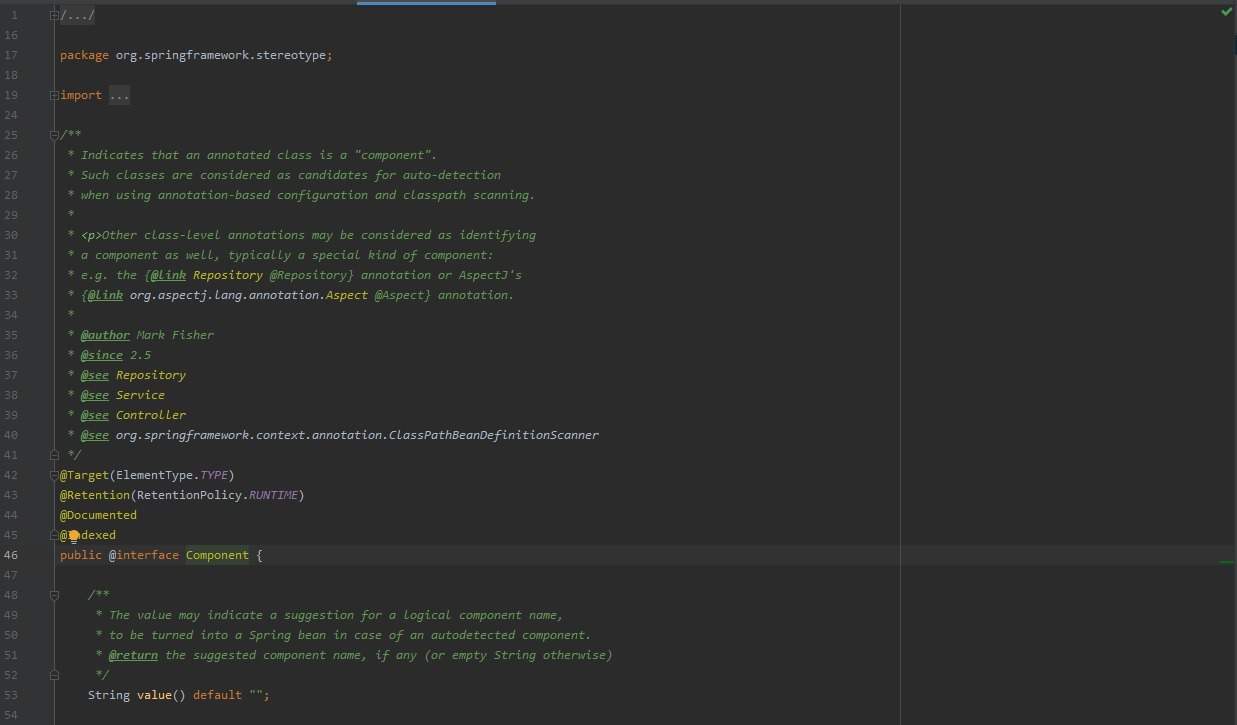
Also, we can download the source. Downloading the source will provide the actual code and comments.
For instance, the Component annotation class from the above screenshot includes Javadoc on the use of Component. We can notice the difference:
While decompilation is very helpful, it doesn’t always give a complete picture. The full source code gives us a complete picture.
3. Command Line Decompiling
Before IDE plugins, the command-line was used for decompiling classes. Command-line decompilers can also be useful for debugging Java bytecode on a remote server that is not accessible with an IDE or GUI.
For example, we can decompile with JDCommandLine using a simple jar command:
java -jar JDCommandLine.jar ${TARGET_JAR_NAME}.jar ./classesDon’t leave off the ./classes parameter. It defines the output directory.
After successful decompilation, we can access the source files contained in the output directory. They’re now ready to view through a text editor like Vim.
4. Conclusion
We looked at decompilation in Eclipse and IntelliJ IDEA IDEs as well as a command-line option when they aren’t available.
We also looked at the difference between linking source code and decompilation.


