

Mocking is an essential part of unit testing, and the Mockito library makes it easy to write clean and intuitive unit tests for your Java code.
Get started with mocking and improve your application tests using our Mockito guide:
Handling concurrency in an application can be a tricky process with many potential pitfalls. A solid grasp of the fundamentals will go a long way to help minimize these issues.
Get started with understanding multi-threaded applications with our Java Concurrency guide:
Spring 5 added support for reactive programming with the Spring WebFlux module, which has been improved upon ever since. Get started with the Reactor project basics and reactive programming in Spring Boot:
Since its introduction in Java 8, the Stream API has become a staple of Java development. The basic operations like iterating, filtering, mapping sequences of elements are deceptively simple to use.
But these can also be overused and fall into some common pitfalls.
To get a better understanding on how Streams work and how to combine them with other language features, check out our guide to Java Streams:
Explore Spring Boot 3 and Spring 6 in-depth through building a full REST API with the framework:
Yes, Spring Security can be complex, from the more advanced functionality within the Core to the deep OAuth support in the framework.
I built the security material as two full courses - Core and OAuth, to get practical with these more complex scenarios. We explore when and how to use each feature and code through it on the backing project.
You can explore the course here:
Spring Data JPA is a great way to handle the complexity of JPA with the powerful simplicity of Spring Boot.
Get started with Spring Data JPA through the guided reference course:
Refactor Java code safely — and automatically — with OpenRewrite.
Refactoring big codebases by hand is slow, risky, and easy to put off. That’s where OpenRewrite comes in. The open-source framework for large-scale, automated code transformations helps teams modernize safely and consistently.
Each month, the creators and maintainers of OpenRewrite at Moderne run live, hands-on training sessions — one for newcomers and one for experienced users. You’ll see how recipes work, how to apply them across projects, and how to modernize code with confidence.
Join the next session, bring your questions, and learn how to automate the kind of work that usually eats your sprint time.
1. Introduction
Over the past few years, IntelliJ from JetBrains has quickly become the top IDE for Java developers. In our most recent State of Java report, IntelliJ was the IDE of choice for 61% of respondents, up from 55% the year before.
One feature that makes IntelliJ so appealing to Java developers is the ability to extend and create new functionality using plugins.
In this tutorial, we’ll look at writing an IntelliJ plugin using the new recommended way with Gradle to demonstrate a few ways we can extend the IDE. This article is a re-mix of a previous one that describes the creation of the same plugin using the Plugin Devkit.
2. Main Types of Plugins
The most common types of plugins include functionality for:
- Custom language support: the ability to write, interpret, and compile code written in different languages
- Framework integration: support for third-party frameworks such as Spring
- Tool integration: integration with external tools such as Gradle
- User interface add-ons: new menu items, tool windows, progress bars, and more
Plugins will often fall into multiple categories. For example, the Git plugin that ships with IntelliJ interacts with the git executable installed on the system. The plugin provides its tool window and popup menu items, while also integrating into the project creation workflow, preferences window, and more.
3. Create a Plugin
There are two supported ways of creating plugins. We’ll use the recommended way for new projects with Gradle instead of using their Plugin Devkit.
Creating a Gradle-based plugin is done by using the New > Project menu.
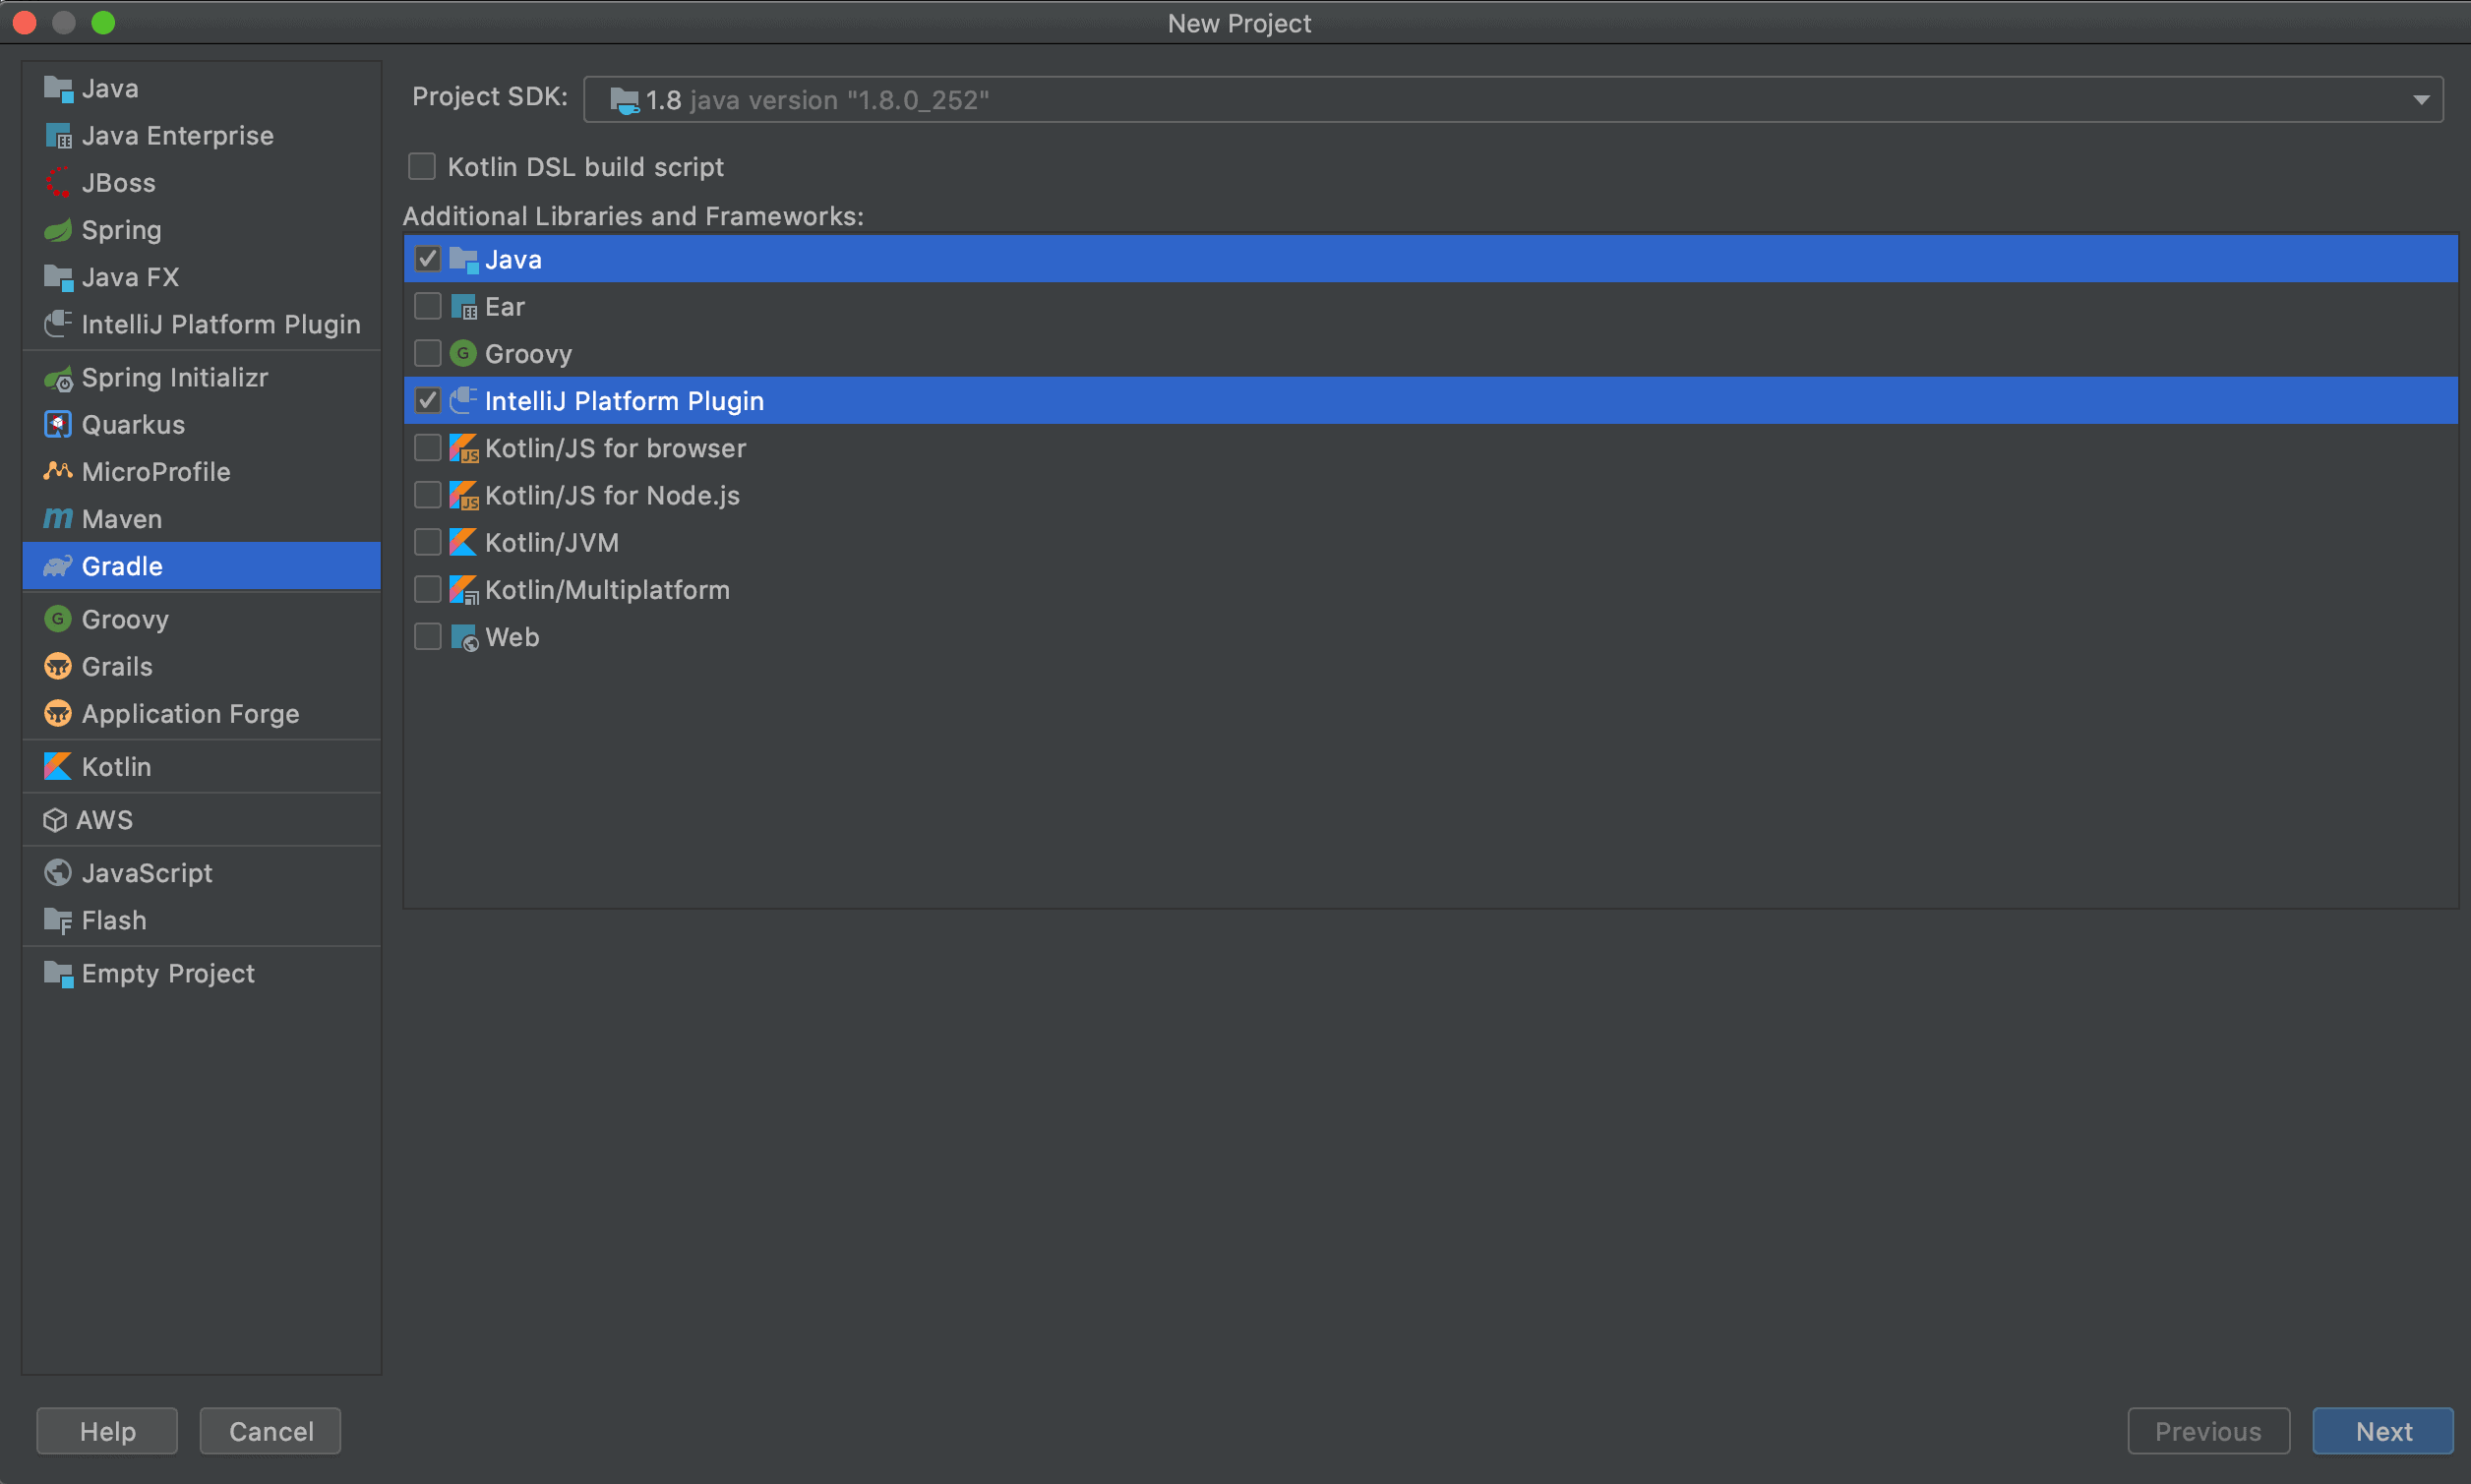
Note that we must include Java and the IntelliJ Platform Plugin to ensure the required plugin classes are available on the classpath.
As of this writing, we can only use JDK 8 for writing IntelliJ plugins.
4. Example Plugin
We’ll create a plugin that provides quick access to the popular Stack Overflow website from multiple areas in the IDE. It’ll include:
- a Tools menu item to visit the Ask a Question page
- a popup menu item in both text editor and console output to search Stack Overflow for highlighted text
4.1. Creating Actions
Actions are the most common way to access a plugin. Actions get triggered by events in the IDE, such as clicking a menu item or a toolbar button.
The first step in creating an action is to create a Java class that extends AnAction. For our Stack Overflow plugin, we’ll create two actions.
The first action opens the Ask a Question page in a new browser window:
public class AskQuestionAction extends AnAction {
    @Override
    public void actionPerformed(AnActionEvent e) {
        BrowserUtil.browse("https://stackoverflow.com/questions/ask");
    }
}
We use the built-in BrowserUtil class to handle all the nuances of opening a web page on different operating systems and browsers.
We need two parameters to perform a search on StackOverflow: the language tag and the text to search for.
To get the language tag, we’ll use the Program Structure Interface (PSI). This API parses all the files in a project and provides a programmatic way to inspect them.
In this case, we use the PSI to determine the programming language of a file:
Optional<PsiFile> psiFile = Optional.ofNullable(e.getData(LangDataKeys.PSI_FILE));
String languageTag = psiFile.map(PsiFile::getLanguage)
  .map(Language::getDisplayName)
  .map(String::toLowerCase)
  .map(lang -> "[" + lang + "]")
  .orElse("");
To get the text to search for, we’ll use the Editor API to retrieve highlighted text on the screen:
Editor editor = e.getRequiredData(CommonDataKeys.EDITOR);
CaretModel caretModel = editor.getCaretModel();
String selectedText = caretModel.getCurrentCaret().getSelectedText();
Even though this action is the same for both editor and console windows, accessing the selected text works the same way.
Now, we can put this all together in an actionPerformed declaration:
@Override
public void actionPerformed(@NotNull AnActionEvent e) {
    Optional<PsiFile> psiFile = Optional.ofNullable(e.getData(LangDataKeys.PSI_FILE));
    String languageTag = psiFile.map(PsiFile::getLanguage)
      .map(Language::getDisplayName)
      .map(String::toLowerCase)
      .map(lang -> "[" + lang + "]")
      .orElse("");

    Editor editor = e.getRequiredData(CommonDataKeys.EDITOR);
    CaretModel caretModel = editor.getCaretModel();
    String selectedText = caretModel.getCurrentCaret().getSelectedText();

    BrowserUtil.browse("https://stackoverflow.com/search?q=" + languageTag + selectedText);
}
This action also overrides a second method named update, which allows us to enable or disable the action under different conditions. In this case, we disable the search action if there is no selected text:
Editor editor = e.getRequiredData(CommonDataKeys.EDITOR);
CaretModel caretModel = editor.getCaretModel();
e.getPresentation().setEnabledAndVisible(caretModel.getCurrentCaret().hasSelection());
4.2. Registering Actions
Once we have our actions written, we need to register them with the IDE. There are two ways to do this.
The first way is using the plugin.xml file, which is created for us when we start a new project.
By default, the file will have an empty <actions> element, which is where we’ll add our actions:
<actions>
    <action
      id="StackOverflow.AskQuestion.ToolsMenu"
      class="com.baeldung.intellij.stackoverflowplugin.AskQuestionAction"
      text="Ask Question on Stack Overflow"
      description="Ask a Question on Stack Overflow">
        <add-to-group group-id="ToolsMenu" anchor="last"/>
    </action>
    <action
      id="StackOverflow.Search.Editor"
      class="com.baeldung.intellij.stackoverflowplugin.SearchAction"
      text="Search on Stack Overflow"
      description="Search on Stack Overflow">
        <add-to-group group-id="EditorPopupMenu" anchor="last"/>
    </action>
    <action
      id="StackOverflow.Search.Console"
      class="com.baeldung.intellij.stackoverflowplugin.SearchAction"
      text="Search on Stack Overflow"
      description="Search on Stack Overflow">
        <add-to-group group-id="ConsoleEditorPopupMenu" anchor="last"/>
    </action>
</actions>
Using the XML file to register actions will ensure they register during IDE startup, which is usually preferable.
The second way to register actions is programmatically using the ActionManager class:
ActionManager.getInstance().registerAction("StackOverflow.SearchAction", new SearchAction());This has the advantage of letting us dynamically register actions. For example, if we write a plugin to integrate with a remote API, we might want to register a different set of actions based on the version of the API that we call.
The disadvantage of this approach is that actions do not register at startup. We have to create an instance of ApplicationComponent to manage actions, which requires more coding and XML configuration.
5. Testing the Plugin
As with any program, writing an IntelliJ plugin requires testing. For a small plugin like the one we’ve written, it’s sufficient to ensure the plugin compiles and that the actions we created work as expected when we click them.
We can manually test (and debug) our plugin by opening the Gradle tool window and executing the runIde task:
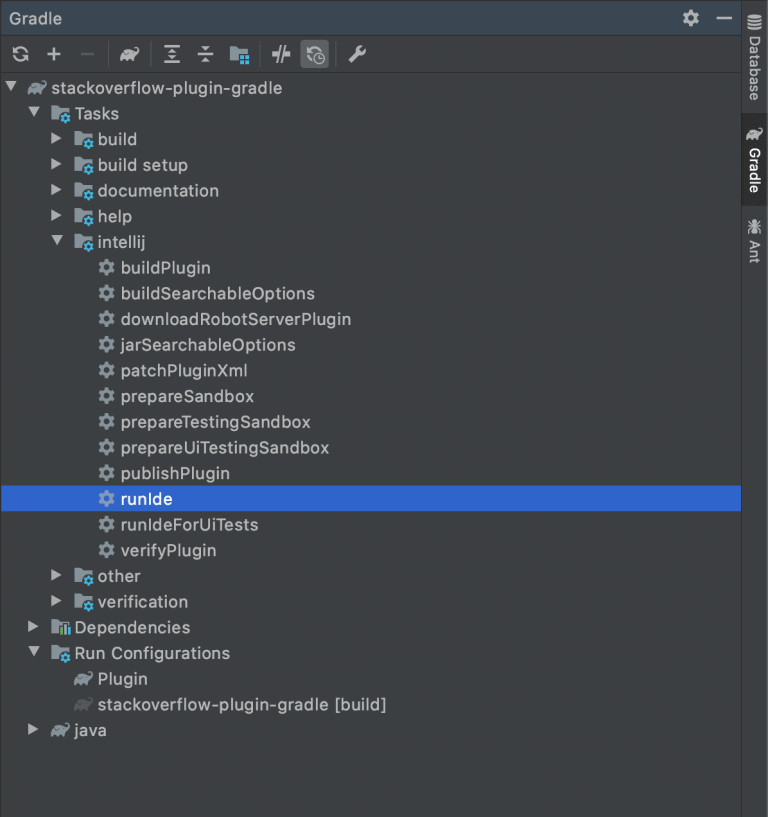
This will launch a new instance of IntelliJ with our plugin activated. Doing so allows us to click the different menu items we created and ensure the proper Stack Overflow pages open up.
If we wish to do more traditional unit testing, IntelliJ provides a headless environment to run unit tests. We can write tests using any test framework we want, and the tests run using real, unmocked components from the IDE.
6. Deploying the Plugin
The Gradle Plugin provides a simple way to package plugins so we can install and distribute them. Simply open the Gradle tool window and execute the buildPlugin task. This will generate a ZIP file inside the build/distributions directory.
The generated ZIP file contains the code and configuration files needed to load into IntelliJ. We can install it locally, or publish it to a plugin repository for use by others.
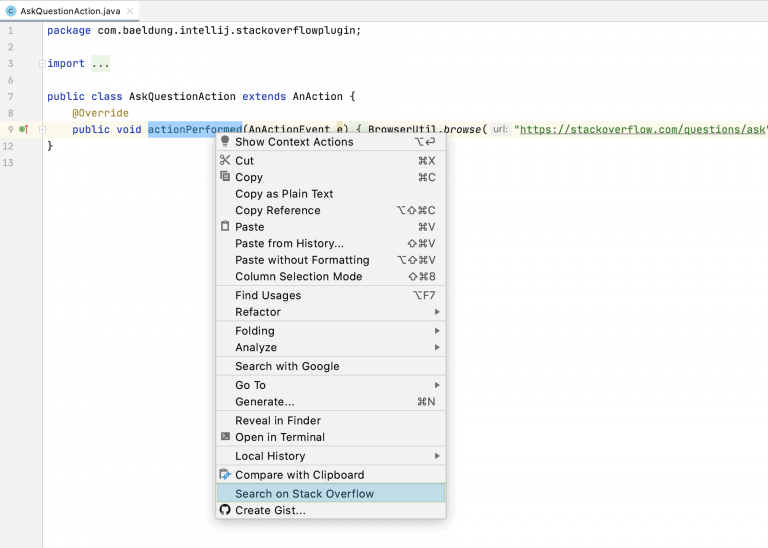
The screenshot below shows one of the new Stack Overflow menu items in action:
7. Conclusion
In this article, we developed a simple plugin that highlights how we can enhance the IntelliJ IDE.
While we primarily work with actions, the IntelliJ plugin SDK offers several ways to add new functionality to the IDE. For further reading, check out their official getting started guide.


