


Mocking is an essential part of unit testing, and the Mockito library makes it easy to write clean and intuitive unit tests for your Java code.
Get started with mocking and improve your application tests using our Mockito guide:
Handling concurrency in an application can be a tricky process with many potential pitfalls. A solid grasp of the fundamentals will go a long way to help minimize these issues.
Get started with understanding multi-threaded applications with our Java Concurrency guide:
Spring 5 added support for reactive programming with the Spring WebFlux module, which has been improved upon ever since. Get started with the Reactor project basics and reactive programming in Spring Boot:
Since its introduction in Java 8, the Stream API has become a staple of Java development. The basic operations like iterating, filtering, mapping sequences of elements are deceptively simple to use.
But these can also be overused and fall into some common pitfalls.
To get a better understanding on how Streams work and how to combine them with other language features, check out our guide to Java Streams:
Explore Spring Boot 3 and Spring 6 in-depth through building a full REST API with the framework:
Yes, Spring Security can be complex, from the more advanced functionality within the Core to the deep OAuth support in the framework.
I built the security material as two full courses - Core and OAuth, to get practical with these more complex scenarios. We explore when and how to use each feature and code through it on the backing project.
You can explore the course here:
All Access is finally out, with all of my Spring courses. Learn JUnit is out as well, and Learn Maven is coming fast. And, of course, quite a bit more affordable. Finally.
>> GET THE COURSE
Spring Data JPA is a great way to handle the complexity of JPA with the powerful simplicity of Spring Boot.
Get started with Spring Data JPA through the guided reference course:
Refactor Java code safely — and automatically — with OpenRewrite.
Refactoring big codebases by hand is slow, risky, and easy to put off. That’s where OpenRewrite comes in. The open-source framework for large-scale, automated code transformations helps teams modernize safely and consistently.
Each month, the creators and maintainers of OpenRewrite at Moderne run live, hands-on training sessions — one for newcomers and one for experienced users. You’ll see how recipes work, how to apply them across projects, and how to modernize code with confidence.
Join the next session, bring your questions, and learn how to automate the kind of work that usually eats your sprint time.
1. Introduction
In this tutorial, we explore the different server modes and configurations of the JBoss WildFly application server. WildFly is a lightweight application server with a CLI and an admin console.
Before we get started, though, we need to make sure we have a JAVA_HOME variable set to a JDK. Anything after version 8 will work for WildFly 17.
2. Server Modes
WildFly comes with standalone and domain modes by default. Let’s take a look at standalone first.
2.1. Standalone
After downloading and extracting WildFly to a local directory, we need to execute the user script.
For Linux, we’d do:
~/bin/add-user.shOr for Windows:
~\bin\add-user.batThe admin user will already exist; however, we’ll want to update the password to something different. Updating the default admin password is always best practice even when planning to use another account for server management.
The UI will prompt us to update the password in option (a):
Enter the details of the new user to add.
Using realm 'ManagementRealm' as discovered from the existing property files.
Username : admin
User 'admin' already exists and is enabled, would you like to...
 a) Update the existing user password and roles
 b) Disable the existing user
 c) Type a new username
(a):
After changing the password, we need to run the OS-appropriate startup script:
~\bin\standalone.batAfter the server output stops, we see that the server is running.
We can now access the administration console at http://127.0.0.1:9990 as prompted in the output. If we access the server URL, http://127.0.0.1:8080/, we should be prompted with a message telling us that the server is running:
Server is up and running!This quick and easy setup is great for a lone instance running on a single server, but let’s check out domain mode for multiple instances.
2.2. Domain
As mentioned above, the domain mode has multiple server instances being managed by a single host controller. The default number is two servers.
Similarly to the standalone instance, we add a user via the add-user script. However, the startup script is appropriately called domain rather than standalone.
After running through the same steps for the startup process, we now hit the individual server instances.
For example, we can visit the same single instance URL for the first server at http://127.0.0.1:8080/
Server is up and running!Likewise, we can visit server two at http://127.0.0.1:8230
Server is up and running!We’ll take a look at that odd port configuration for server two a bit later.
3. Deployment
To deploy our first application, we need a good example application.
Let’s use Spring Boot Hello World. With a slight modification, it’ll work on WildFly.
First, let’s update the pom.xml to build a WAR. We’ll change the packaging element and add the maven-war-plugin:
<packaging>war</packaging>
...
<build>
  <plugins>
	<plugin>
	  <groupId>org.apache.maven.plugins</groupId>
	  <artifactId>maven-war-plugin</artifactId>
	  <configuration>
		<archive>
		  <manifestEntries>
			<Dependencies>jdk.unsupported</Dependencies>
		  </manifestEntries>
		</archive>
	  </configuration>
	</plugin>
  </plugins>
</build>
Next, we need to alter the Application class to extend SpringBootServletInitializer:
public class Application extends SpringBootServletInitializerAnd override the configure method:
    @Override
    protected SpringApplicationBuilder configure(SpringApplicationBuilder application) {
        return application.sources(Application.class);
    }
Finally, let’s build the project:
./mvnw packageNow, we can deploy it.
3.1. Deploy an Application
Let’s look at how easy it is to deploy our new WildFly application through the console.
Firstly, we log in to the console using the admin user and password set earlier.
Click Add -> Upload Deployment -> Choose a file…
Secondly, we browse to the target directory for the Spring Boot application and upload the WAR file. Click Next to continue, and edit the name of the new application.
Lastly, we access the application by the same URL – http://127.0.0.1:8080/. We now see the application output as:
Greetings from Spring Boot!As a result of the successful application deployment, let’s review some of the common configuration properties.
4. Server Configuration
For these common properties, viewing them in the administration console is the most convenient.
4.1. Common Configuration Properties
First of all, let’s take a look at the Subsystems — each one has a statistics-enabled value that can be set to true for runtime statistics:
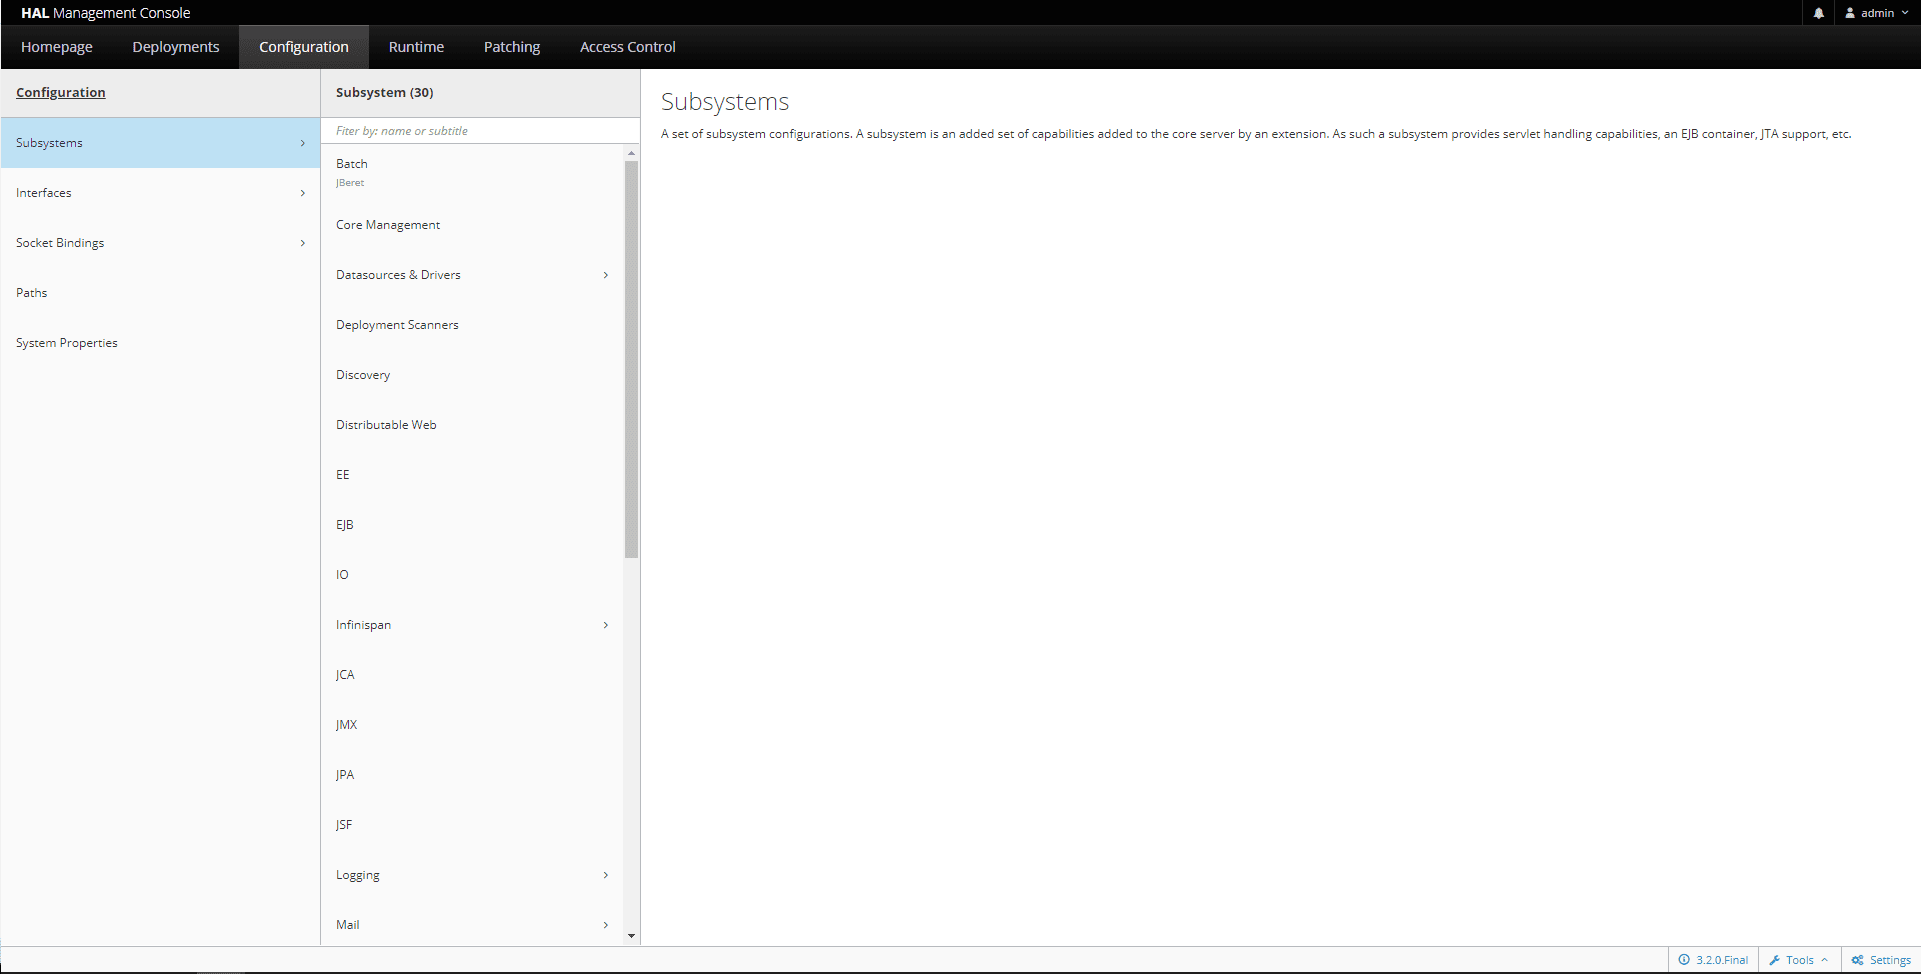
Under the Paths section, we see a couple of the important file paths being used by the server:
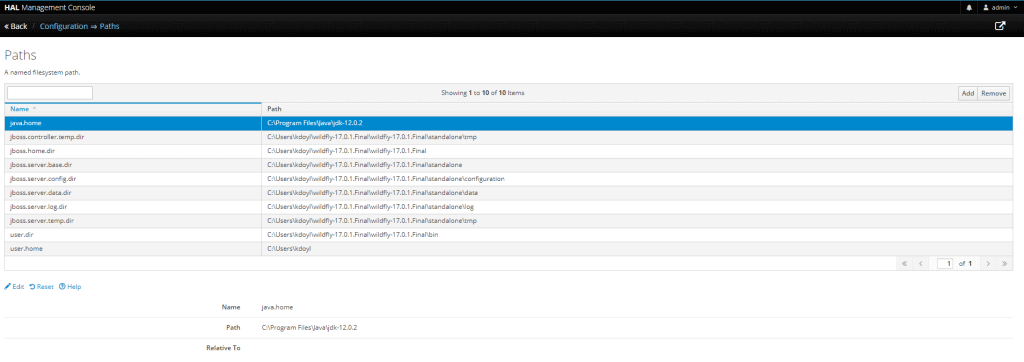
As an example, using specific values for the configuration directory and log directory is helpful:
jboss.server.config.dir
jboss.server.log.dirw
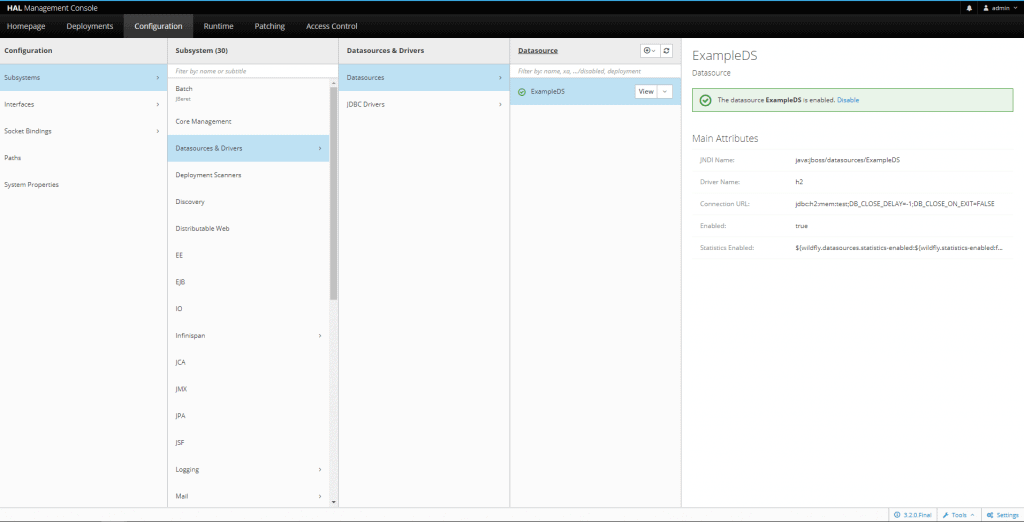
In addition, the Datasources and Drivers section provides for managing external data sources and different drivers for data persistence layers:
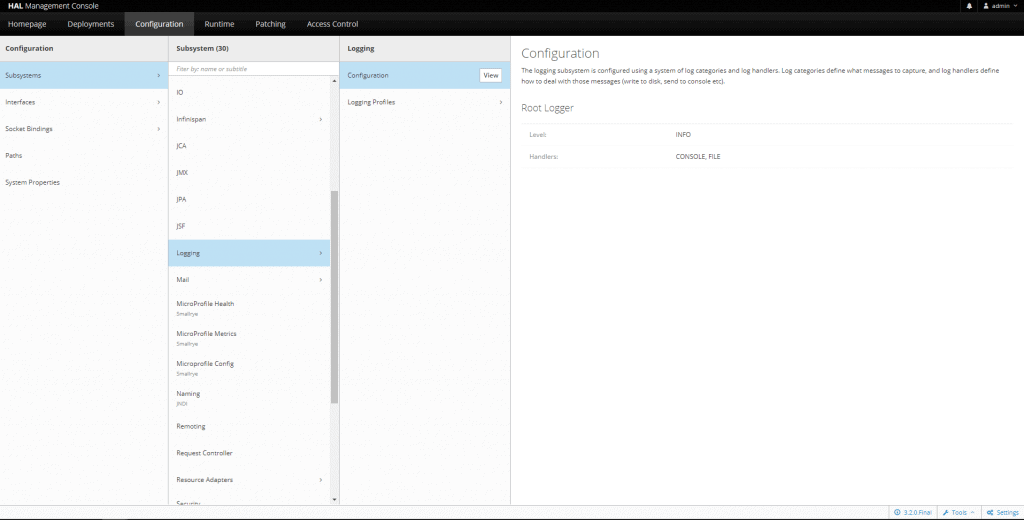
In the Logging subsystem, we update the log level from INFO to DEBUG to see more application logs:
4.2. Server Configuration Files
Remember the server two URL in domain mode, http://127.0.0.1:8230? The odd port 8230 is due to a default offset value of 150 in the host-slave.xml configuration file:
<server name="server-one" group="main-server-group"/>
<server name="server-two" group="main-server-group" auto-start="true">
  <jvm name="default"/>
  <socket-bindings port-offset="150"/>
</server>
However, we can make a simple update to the port-offset value:
<socket-bindings port-offset="10"/>Consequently, we now access server two at URL http://127.0.0.1:8090.
Another great feature of using and configuring the application in a convenient admin console is that those settings can be exported as an XML file. Using a consistent configuration through XML files simplifies managing multiple environments.
5. Monitoring
The command-line interface for WildFly allows for viewing and updating configuration values the same as the administration console.
To use the CLI, we simply execute:
~\bin\jboss-cli.batAfter that we type:
[disconnected /] connect
[domain@localhost:9990 /]
As a result, we can follow the prompts to connect to our server instance. After connecting, we can access the configuration in real-time.
For example, to view all current configuration as XML when connected to the server instance, we can run the read-config-as-xml command:
[domain@localhost:9990 /] :read-config-as-xmlThe CLI can also be used for runtime statistics on any of the server subsystems. Most importantly, CLI is great for identifying different issues through server metrics.
6. Conclusion
In this tutorial, we walked through setting up and deploying a first application in WildFly as well as some of the configuration options for the server.














