Trampoline – Managing Spring Boot Applications Locally
Last updated: January 8, 2024


Mocking is an essential part of unit testing, and the Mockito library makes it easy to write clean and intuitive unit tests for your Java code.
Get started with mocking and improve your application tests using our Mockito guide:
Handling concurrency in an application can be a tricky process with many potential pitfalls. A solid grasp of the fundamentals will go a long way to help minimize these issues.
Get started with understanding multi-threaded applications with our Java Concurrency guide:
Spring 5 added support for reactive programming with the Spring WebFlux module, which has been improved upon ever since. Get started with the Reactor project basics and reactive programming in Spring Boot:
Since its introduction in Java 8, the Stream API has become a staple of Java development. The basic operations like iterating, filtering, mapping sequences of elements are deceptively simple to use.
But these can also be overused and fall into some common pitfalls.
To get a better understanding on how Streams work and how to combine them with other language features, check out our guide to Java Streams:
Explore Spring Boot 3 and Spring 6 in-depth through building a full REST API with the framework:
Yes, Spring Security can be complex, from the more advanced functionality within the Core to the deep OAuth support in the framework.
I built the security material as two full courses - Core and OAuth, to get practical with these more complex scenarios. We explore when and how to use each feature and code through it on the backing project.
You can explore the course here:
Spring Data JPA is a great way to handle the complexity of JPA with the powerful simplicity of Spring Boot.
Get started with Spring Data JPA through the guided reference course:
Refactor Java code safely — and automatically — with OpenRewrite.
Refactoring big codebases by hand is slow, risky, and easy to put off. That’s where OpenRewrite comes in. The open-source framework for large-scale, automated code transformations helps teams modernize safely and consistently.
Each month, the creators and maintainers of OpenRewrite at Moderne run live, hands-on training sessions — one for newcomers and one for experienced users. You’ll see how recipes work, how to apply them across projects, and how to modernize code with confidence.
Join the next session, bring your questions, and learn how to automate the kind of work that usually eats your sprint time.
1. Trampoline Overview
Historically, a simple way to understand the state of our system at runtime was to run it manually in a terminal. Best case scenario, we’d automatize everything using scripts.
Of course, the DevOps movement changed all of that, and, fortunately, our industry has moved well past that approach. Trampoline is one of the solutions that solve this problem (for Unix and Windows users) in the Java ecosystem.
The tool is built on top of Spring Boot and aims to help Spring Cloud developers in their daily development routine thanks to a clean and fresh User Interface.
Here are some of its capabilities:
- Start instances using Gradle or Maven as a Build Tool
- Manage Spring Boot instances
- Configure VM arguments during launching phase
- Monitor deployed instances: Memory usage, Logs, and Traces
- Provide feedback to authors
In this quite article, we’ll review the problem Trampoline aspires to solve, as well as have a look at it in practice. We’ll go on a guided tour that covers registering a new service and starting one instance of that service.
2. Microservices: Single Deployment Dead
As we discussed, the times when applications were deployed using a single deployment unit – are gone.
This has positive consequences and, unfortunately, negative ones as well. Although Spring Boot and Spring Cloud help in this transition, there are side effects we need to take care of.
The journey from monoliths to microservices has introduced a huge improvement to the way developers structure their applications.
As we all know, it is not the same to open a project with a set of 30 classes, well-structured among packages and with its corresponding units tests, as opening a monster codebase with a huge number of classes, where things easily get complicated.
Not only that – reusability, decoupling, and separation of concerns have benefited from this evolution. Although the benefits are well-known, let’s list some of them:
- Single Responsibility Principle – important in terms of maintainability and testing
- Resiliency – failure in one service does not impact other services
- High scalability – demanding services can be deployed in multiple instances
But, we have to face some trade-off when using microservice architecture, especially regarding network overhead and deployments.
However, focusing on deployment, we lost one of the monolith’s advantages – the single deployment. To solve it in a production environment, we’ve got a whole set of CD tools which will help and will make our lives easier there.
3. Trampoline: Setting up the First Service
In this section, we’ll register a service in Trampoline and we’ll show all available features.
3.1. Download Latest Release
Going to Trampoline Repository, in the releases section, we’ll be able to download the latest published release.
Then, start Trampoline, for instance using mvn spring-boot:run or ./gradlew (or gradle.bat) bootRun.
Finally, the UI can be accessed at http://localhost:8080.
3.2. Registering Services
Once we have Trampoline up and running, let’s go to Settings section where we’ll be able to register our first service. We’ll find two examples of microservices in the Trampoline source code: microservice-example-gradle and microservice-example-maven.
To register a service, the following information is needed: name*, default port*, pom or build location*, build tool*, actuator prefix, and VM default arguments.
If we decide to use Maven as a build tool, first we’ll have to set our Maven location. If we decide, however, to use a Gradle wrapper, it must be placed in our microservices folder. Nothing else will be required.
In this example, we’ll set up both:

At any time, we’ll be able to review the service information by clicking on the info button or delete it clicking on the trash button.
Finally, to be able to enjoy all these features, the only requirement is to include actuator starter (see the snippet for an example) in our Spring Boot projects, as well as /logfile endpoint through well-known logging properties:
<dependency>
    <groupId>org.springframework.boot</groupId>
    <artifactId>spring-boot-starter-actuator</artifactId>
</dependency>
3.3. Managing Service Instances
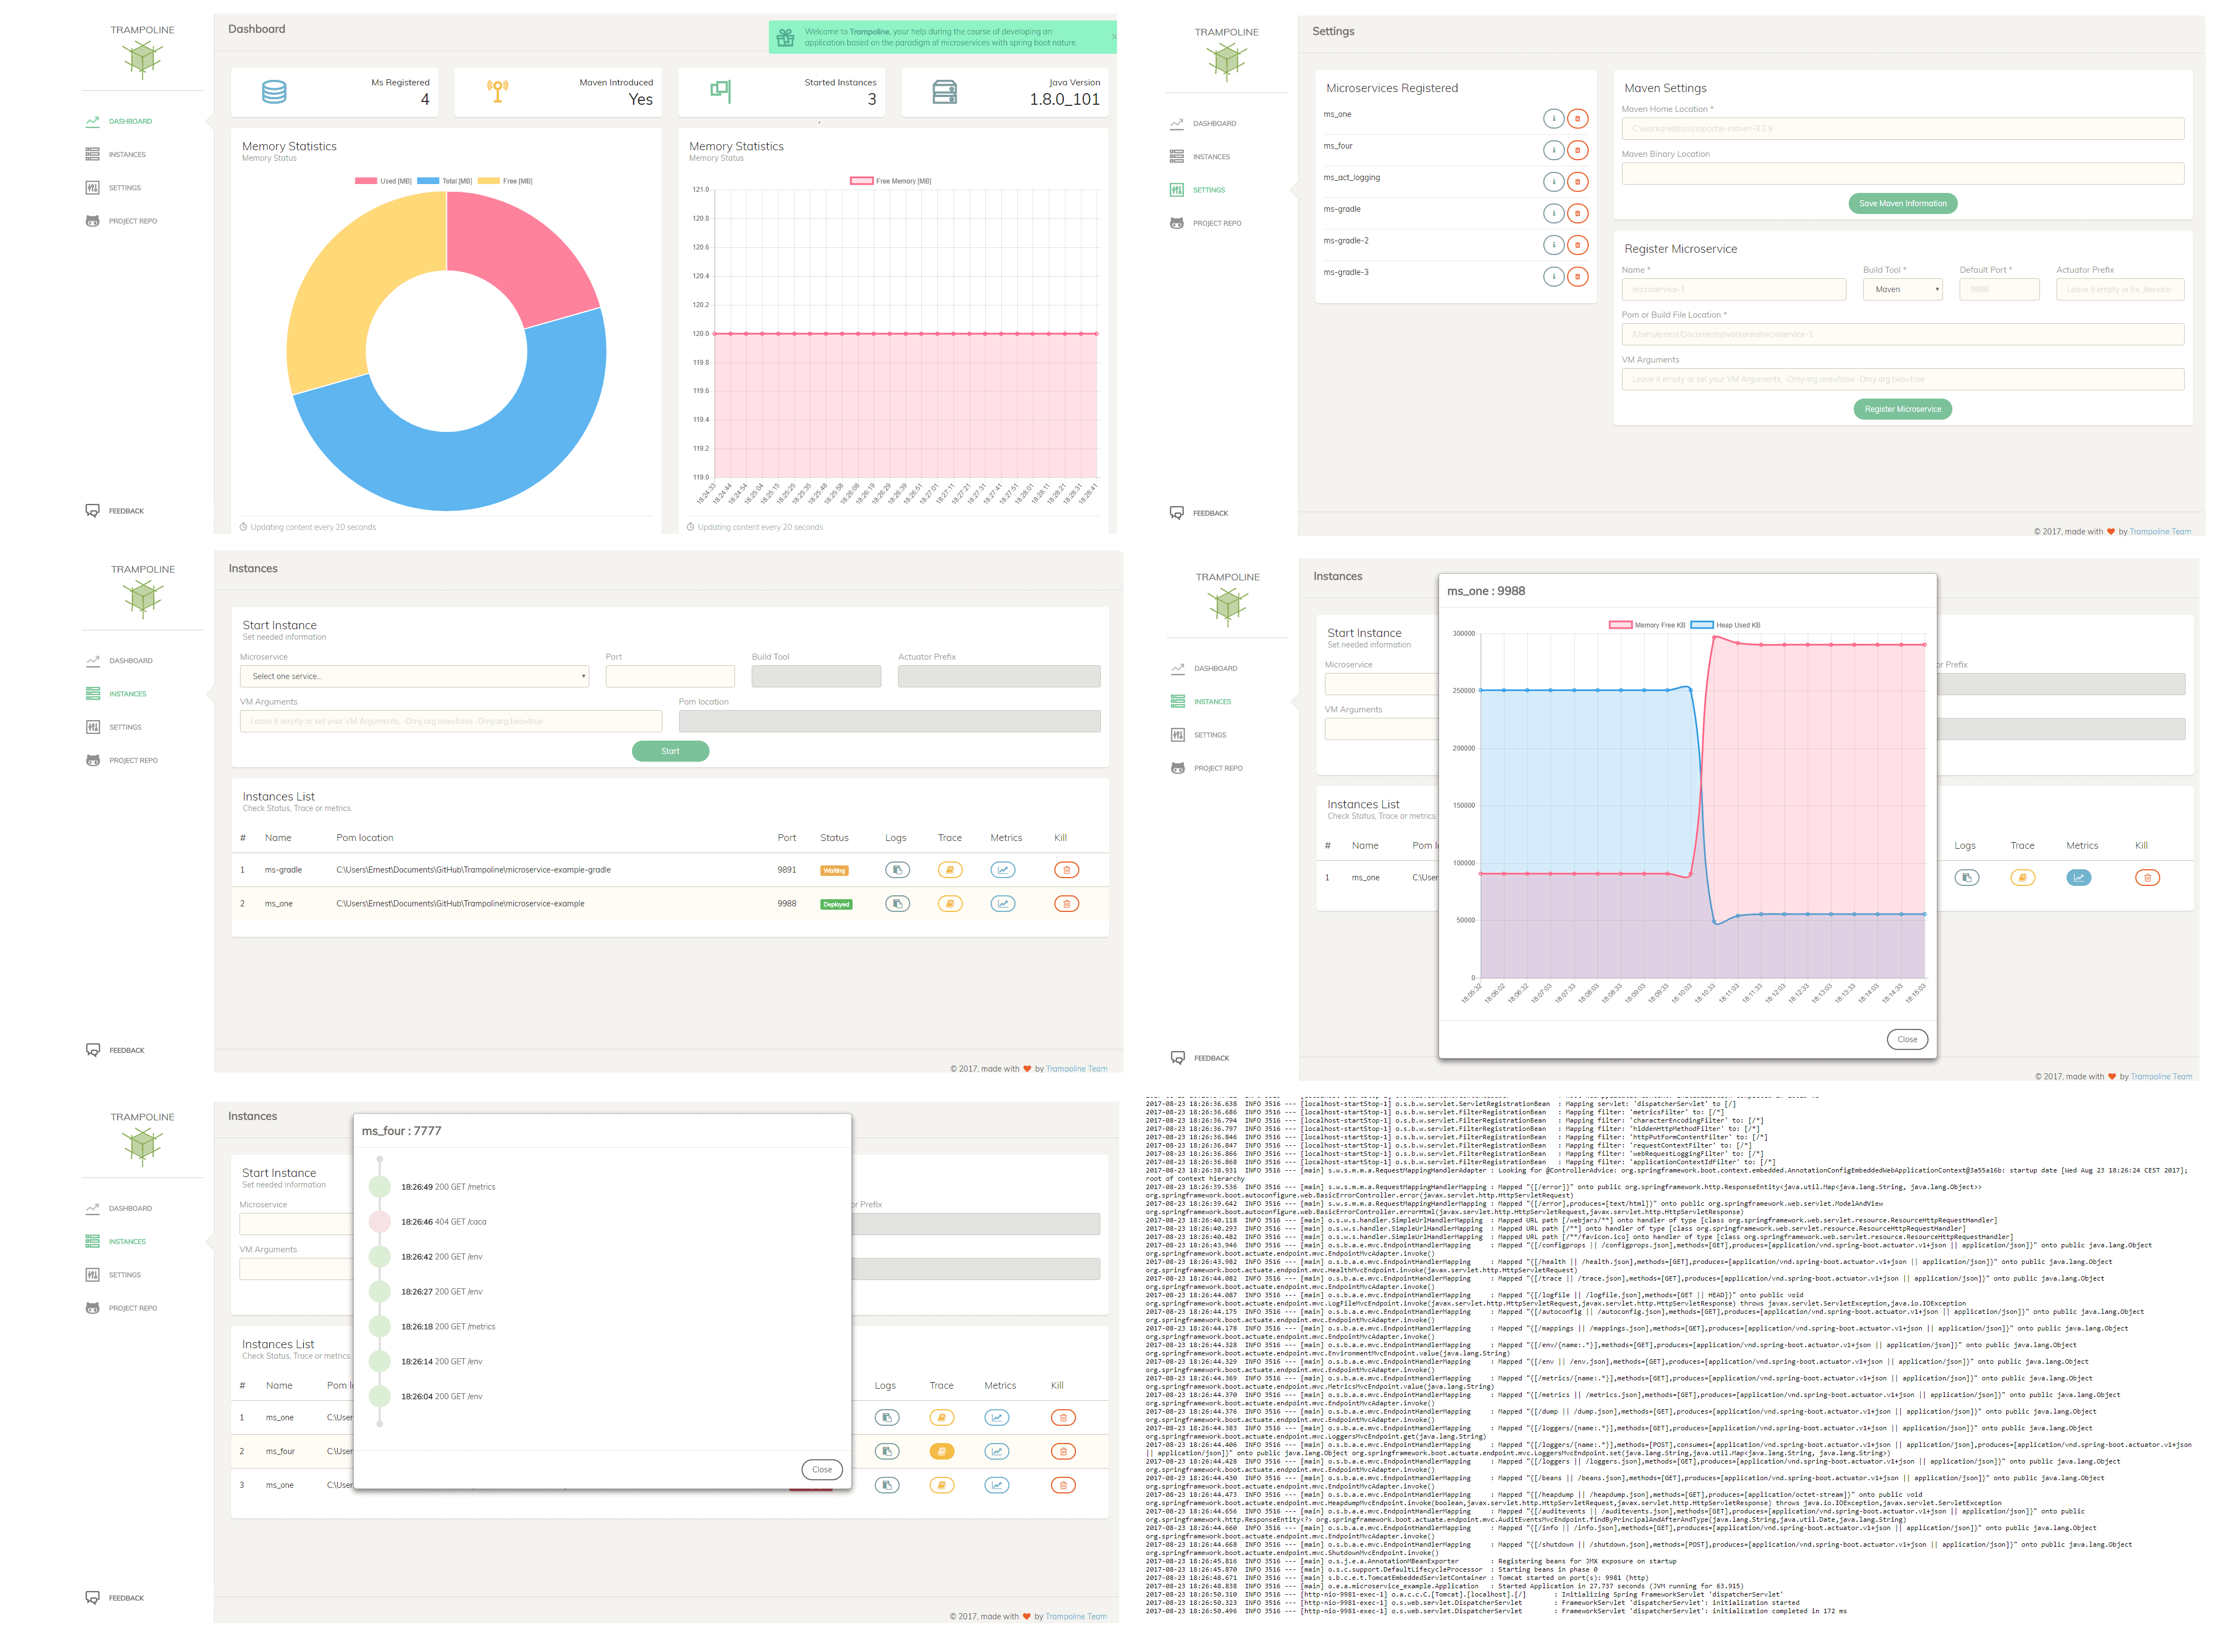
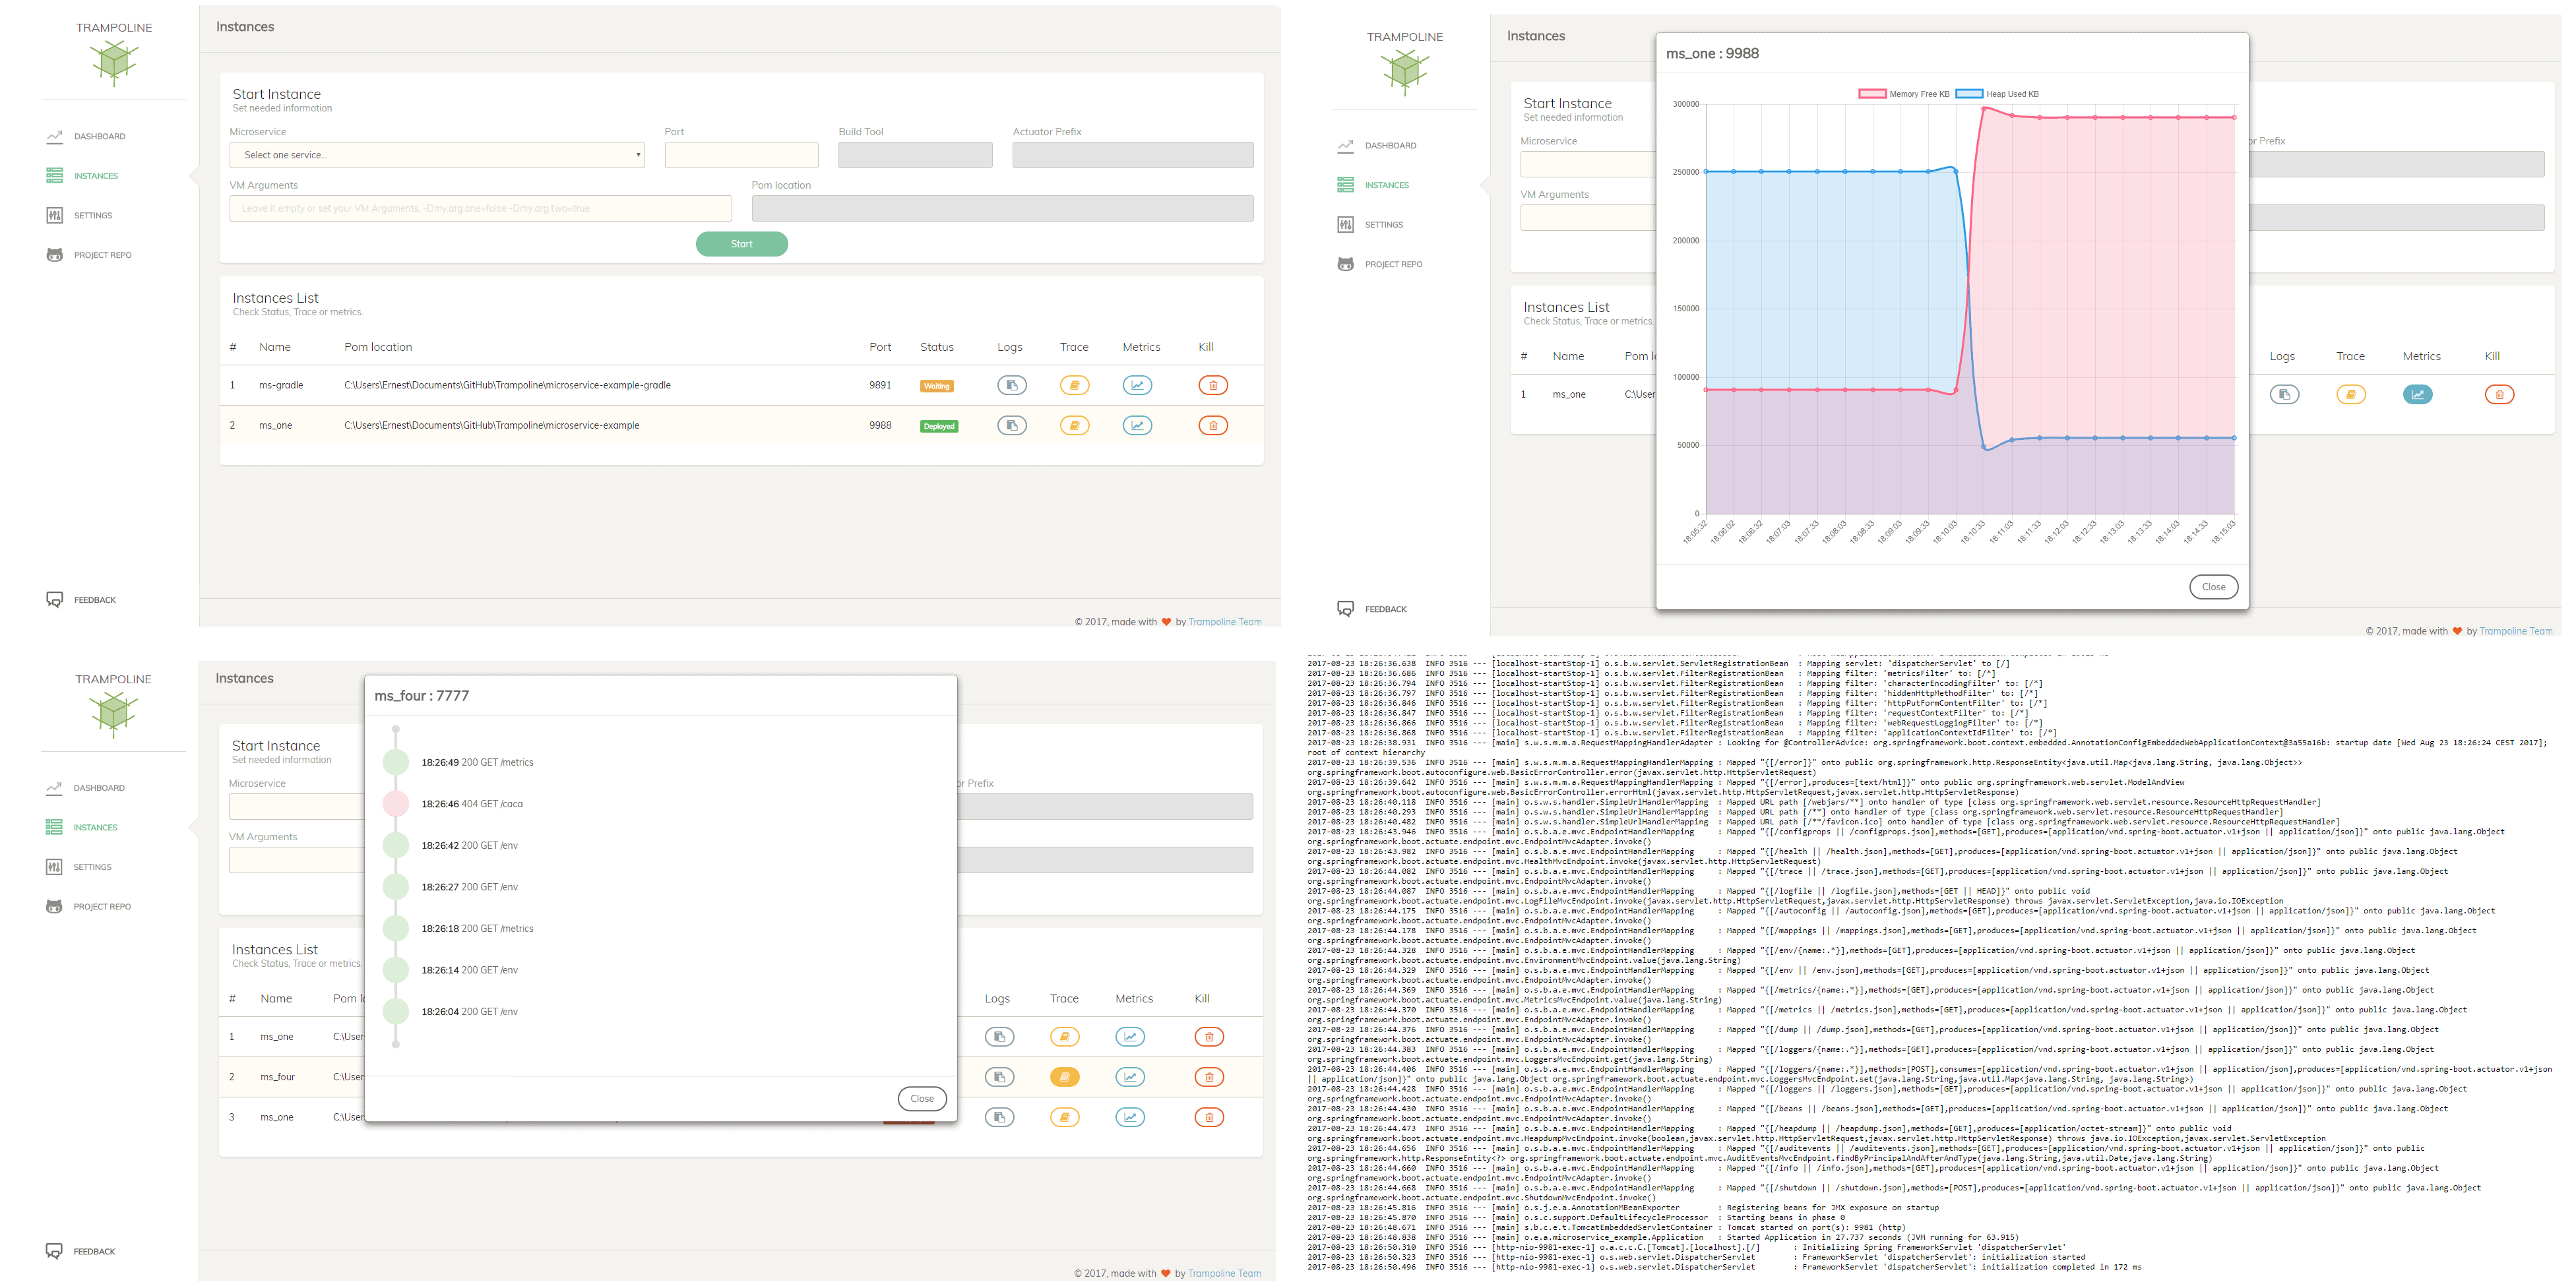
Now, we’re ready to move to Instances section. Here, we’ll be able to start and stop service instances and also monitor their statuses, traces, logs and memory consumption.
For this tutorial, we start one instance of each service registered previously:
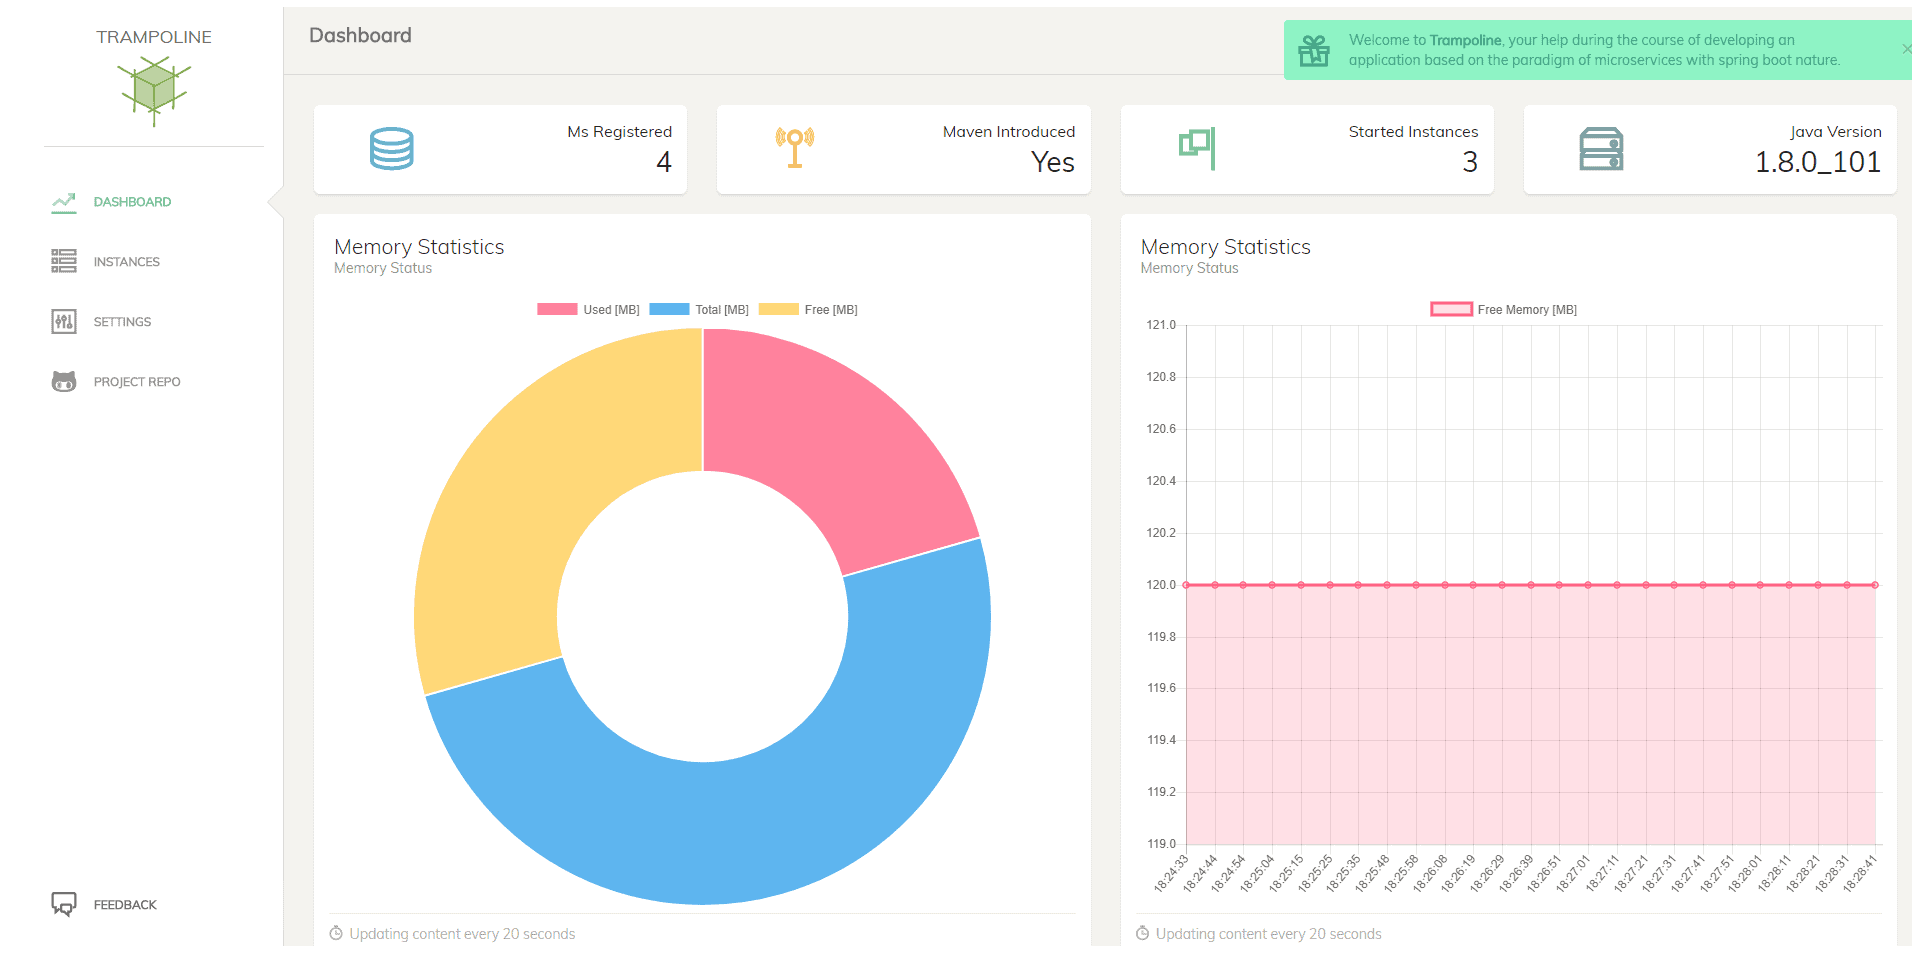
3.4. Dashboard
Finally, let’s have a quick overview of the Dashboard section. Here, we can visualize some statistics, such as memory usage from our computer or services registered or launched.
We’ll also be able to watch whether required Maven information has been introduced or not in the settings section:
3.5. Feedback
And last but not least, we can find a Feedback button which redirects to the GitHub repo where it’s possible to create issues or raise questions and enhancements.

4. Conclusion
During the course of this tutorial, we discussed the problem Trampoline aims to solve.
We’ve also shown an overview of its functionalities, as well as a short tutorial on how to register a service and how to monitor it.
Finally, note that this is an open source project and you are welcome to contribute.


