

Mocking is an essential part of unit testing, and the Mockito library makes it easy to write clean and intuitive unit tests for your Java code.
Get started with mocking and improve your application tests using our Mockito guide:
Handling concurrency in an application can be a tricky process with many potential pitfalls. A solid grasp of the fundamentals will go a long way to help minimize these issues.
Get started with understanding multi-threaded applications with our Java Concurrency guide:
Spring 5 added support for reactive programming with the Spring WebFlux module, which has been improved upon ever since. Get started with the Reactor project basics and reactive programming in Spring Boot:
Since its introduction in Java 8, the Stream API has become a staple of Java development. The basic operations like iterating, filtering, mapping sequences of elements are deceptively simple to use.
But these can also be overused and fall into some common pitfalls.
To get a better understanding on how Streams work and how to combine them with other language features, check out our guide to Java Streams:
Explore Spring Boot 3 and Spring 6 in-depth through building a full REST API with the framework:
Yes, Spring Security can be complex, from the more advanced functionality within the Core to the deep OAuth support in the framework.
I built the security material as two full courses - Core and OAuth, to get practical with these more complex scenarios. We explore when and how to use each feature and code through it on the backing project.
You can explore the course here:
Spring Data JPA is a great way to handle the complexity of JPA with the powerful simplicity of Spring Boot.
Get started with Spring Data JPA through the guided reference course:
Refactor Java code safely — and automatically — with OpenRewrite.
Refactoring big codebases by hand is slow, risky, and easy to put off. That’s where OpenRewrite comes in. The open-source framework for large-scale, automated code transformations helps teams modernize safely and consistently.
Each month, the creators and maintainers of OpenRewrite at Moderne run live, hands-on training sessions — one for newcomers and one for experienced users. You’ll see how recipes work, how to apply them across projects, and how to modernize code with confidence.
Join the next session, bring your questions, and learn how to automate the kind of work that usually eats your sprint time.
If you're working on a Spring Security (and especially an OAuth) implementation, definitely have a look at the Learn Spring Security course:
>> LEARN SPRING SECURITY1. Introduction
Spring Security 6.3 adds first-class support for the OAuth 2.0 Token Exchange Grant (RFC 8693). It lets us exchange an existing access token for a new one with a different audience while preserving the original end-user identity. This is especially useful in microservices and service-to-service communication where tokens must be scoped to different audiences.
In this article, we’ll explain what a token exchange is and how to configure it in a Spring Boot application, both on the resource server (acting as an OAuth2 client) and the authorization server.
2. What Is OAuth 2.0 Token Exchange?
OAuth 2.0 Token Exchange provides a standardized mechanism for exchanging one access token for another while preserving the identity of the original end user. This allows an application to obtain a token that is intended for a different audience or resource without requiring the user to re-authenticate.
Let’s imagine the following scenario: A resource server called user-service (API to access user information) receives an incoming request that authenticates using a bearer token. This token is valid and correctly scoped for user-service.
Let’s assume tokens must have an audience (aud claim) of user-service:
{
  "aud": "user-service"
}
During request processing, the user-service needs to call another protected internal API, message-service, on behalf of the same user. However, the original access token cannot be reused for this purpose because its aud (audience) claim only allows access to the user-service. We’d like the identity of the user from the original request to be preserved.
OAuth 2.0 Token Exchange solves this problem by allowing the user-service to present the incoming access token to the authorization server and exchange it for a new access token. The new one is scoped specifically for the message-service.
To obtain this token, the user-service temporarily acts as an OAuth 2.0 client. It exchanges the existing token for a new one that retains the identity and authorization context of the original end user. This flow is often referred to as impersonation. It enables secure service-to-service communication without requiring any additional user interaction.
3. Maven Dependencies
Let’s start by importing the spring-boot-starter-oauth2-resource-server dependency to our pom.xml:
<dependency>
    <groupId>org.springframework.boot</groupId>
    <artifactId>spring-boot-starter-oauth2-resource-server</artifactId>
    <version>3.5.11</version>
</dependency>
Also, we need the spring-boot-starter-oauth2-client dependency because token exchange treats the resource server as an OAuth 2.0 client when requesting a new token:
<dependency>
    <groupId>org.springframework.boot</groupId>
    <artifactId>spring-boot-starter-oauth2-client</artifactId>
    <version>3.5.11</version>
</dependency>
Finally, to enable token exchange on the authorization server side, we need Spring Authorization Server 1.3 or later. This version introduces built-in support for the token exchange grant. Let’s add the spring-boot-starter-oauth2-authorization-server dependency:
<dependency>
    <groupId>org.springframework.boot</groupId>
    <artifactId>spring-boot-starter-oauth2-authorization-server</artifactId>
    <version>3.5.11</version>
</dependency>
4. Configuring Resource Server
In a token exchange flow, the resource server plays two distinct roles. First, it acts as a resource server, responsible for validating incoming access tokens and securing its own APIs. Second, it acts as an OAuth 2.0 client. It uses the incoming access token to request a new one when calling downstream services on behalf of the user.
4.1. Resource Server as a Server
We’ll start by configuring user-service as a standard OAuth 2.0 resource server. In this role, user-service protects its own APIs and validates incoming access tokens issued by the authorization server.
Let’s create a UserController class and expose a protected endpoint at /user/message:
@RestController
public class UserController {

    @GetMapping(value = "/user/message")
    public String message() {
        return "baeldung";
    }
}
When using JWTs, the resource server needs to know where to retrieve the token issuer’s metadata. We can configure this using the issuer-uri property:
spring:
  security:
    oauth2:
      resourceserver:
        jwt:
          issuer-uri: http://localhost:9001
          audiences: user-service
In our example, access tokens presented to the user-service must include an aud (audience) claim with the value user-service.
At this point, the application is fully configured to act as a resource server and can accept and validate access tokens issued by the authorization server.
4.2. Resource Server as a Client
Next, we need to configure the user-service to act as an OAuth 2.0 client. In this role, the resource server exchanges the incoming access token for a new token when calling downstream services on behalf of the authenticated user.
To enable this behavior, we define a client registration that uses the OAuth 2.0 Token Exchange grant type. We can configure this in the application-userservice.yml:
spring:
  security:
    oauth2:
      client:
        registration:
          my-message-service:
            provider: my-auth-server
            client-id: "message-service"
            client-secret: "token"
            authorization-grant-type: "urn:ietf:params:oauth:grant-type:token-exchange"
            client-authentication-method:
              - "client_secret_basic"
            scope:
              - message.read
            client-name: my-message-service
        provider:
          my-auth-server:
            issuer-uri: http://localhost:9001
This configuration registers an OAuth 2.0 client that communicates with the authorization server. The authorization-grant-type property specifies that this client uses the token exchange grant. This allows it to obtain a new access token based on an existing one. The requested scope determines the level of access granted to downstream services.
4.3. Configuring Spring Security for Token Exchange
To use token exchange, we also need to enable the use of the new grant type in Spring Security. We can do this by publishing the TokenExchangeOAuth2AuthorizedClientProvider bean.
We need an OAuth2AuthorizedClientManager to programmatically handle the token exchange logic. This manager is responsible for coordinating the process of obtaining an authorized client. We’ll configure it to use our TokenExchangeOAuth2AuthorizedClientProvider.
Let’s create a TokenExchangeConfig class to define these beans:
@Configuration
public class TokenExchangeConfig {

    @Bean
    public OAuth2AuthorizedClientManager authorizedClientManager(
        ClientRegistrationRepository clientRegistrationRepository,
        OAuth2AuthorizedClientRepository authorizedClientRepository) {

        TokenExchangeOAuth2AuthorizedClientProvider tokenExchangeAuthorizedClientProvider =
          new TokenExchangeOAuth2AuthorizedClientProvider();

        OAuth2AuthorizedClientProvider authorizedClientProvider =
          OAuth2AuthorizedClientProviderBuilder.builder()
            .provider(tokenExchangeAuthorizedClientProvider)
            .build();

        DefaultOAuth2AuthorizedClientManager authorizedClientManager =
          new DefaultOAuth2AuthorizedClientManager(
            clientRegistrationRepository, authorizedClientRepository);
        authorizedClientManager.setAuthorizedClientProvider(authorizedClientProvider);

        return authorizedClientManager;
    }
}
Additionally, since Spring Security 6.3 supports RestClient, we’ll define a custom OAuth2AccessTokenResponseClient. It uses RestClientTokenExchangeTokenResponseClient to handle the actual HTTP request for token exchange:
@Bean
public OAuth2AccessTokenResponseClient<TokenExchangeGrantRequest> accessTokenResponseClient() {
    return new RestClientTokenExchangeTokenResponseClient();
}
With this configuration in place, we can obtain an access token in one resource server. Then, we use it as a Bearer token in a protected resources request to another resource server.
4.4. Completing UserController
Now we can update the UserController to perform the token exchange programmatically.
We need to inject the OAuth2AuthorizedClientManager class. Then, we’ll create an OAuth2AuthorizeRequest specifying which client registration (defined in application-userservice.yml) to use. The manager automatically detects the incoming token. It exchanges it with the Authorization Server and returns an OAuth2AuthorizedClient containing the new access token scoped for the message-service.
Let’s implement our controller:
@GetMapping("/user/message")
public String message(JwtAuthenticationToken jwtAuthentication) {

    OAuth2AuthorizeRequest authorizeRequest = OAuth2AuthorizeRequest
      .withClientRegistrationId("my-message-service")
      .principal(jwtAuthentication)
      .build();

    OAuth2AuthorizedClient authorizedClient = this.authorizedClientManager.authorize(authorizeRequest);

    assert authorizedClient != null;

    OAuth2AccessToken accessToken = authorizedClient.getAccessToken();
    if (accessToken == null) {
        return "token exchange resource server";
    }

    RestClient.ResponseSpec responseSpec = restClient.get().uri(TARGET_RESOURCE_SERVER_URL)
      .headers(headers -> headers.setBearerAuth(accessToken.getTokenValue()))
      .retrieve();
    ResponseEntity<String> responseEntity = responseSpec.toEntity(String.class);
    return responseEntity.getBody();
}
The message() method accepts the current user’s authentication via JwtAuthenticationToken. We then construct an OAuth2AuthorizeRequest targeting the my-message-service registration. The authorizedClientManager uses this request to exchange the original token for a new one suitable for the downstream service. Finally, we use RestClient to invoke the target API using the exchanged access token.
5. Configuring Authorization Server
To complete the token exchange flow, we also need to configure the authorization server. In addition to issuing access tokens, the authorization server must accept token exchange requests. It issues new tokens with updated audience or scope values.
5.1. Token Exchange Grant Support
Spring Authorization Server 1.3 adds built-in support for the OAuth 2.0 Token Exchange grant. This support lets us implement the flow without writing custom extensions.
We can verify this capability through the OpenID Provider Metadata endpoint:
http://localhost:9001/.well-known/openid-configuration
If the grant_types_supported field includes urn:ietf:params:oauth:grant-type:token-exchange, the server supports token exchange requests defined in RFC 8693.
5.2. Registering a Token Exchange Client
To enable token exchange, we need to register a client with the Authorization Server. The client is explicitly authorized to use the “urn:ietf:params:oauth:grant-type:token-exchange” grant type. In Spring Authorization Server, we configure this in our properties:
spring:
  security:
    oauth2:
      authorizationserver:
        client:
          message-service:
            registration:
              client-id: "message-service"
              client-secret: "{noop}token"
              client-authentication-methods:
                - "client_secret_basic"
              authorization-grant-types:
                - "urn:ietf:params:oauth:grant-type:token-exchange"
              scopes:
                - "openid"
                - "message:read"
This configuration allows the client to authenticate using client credentials and request access tokens using the token exchange grant type.
With the authorization server configured to support token exchange, the end-to-end flow is now complete.
6. Testing the Flow End-to-End
In this section, we’ll test the complete OAuth 2.0 flow. We’ll simulate a real-world scenario where a user logs into a client application via a browser. The client then calls the user-service, which in turn performs a token exchange to securely communicate with the message-service.
To demonstrate this, we’ve created a simple client application that acts as the front-end.
6.1. The Client Application Setup
Let’s create a ClientController class. It exposes the “/api/user/message” endpoint as a protected resource and calls the user-service using the current user’s access token:
@RestController
public class ClientController {
    private static final String TARGET_RESOURCE_SERVER_URL = "http://localhost:8081/user/message";

    @GetMapping("/api/user/message")
    public String userMessage(@RegisteredOAuth2AuthorizedClient(registrationId = "messaging-client-oidc")
      OAuth2AuthorizedClient oauth2AuthorizedClient) {
        RestClient.ResponseSpec responseSpec = restClient.get().uri(TARGET_RESOURCE_SERVER_URL)
          .headers(
            headers -> headers.setBearerAuth(oauth2AuthorizedClient.getAccessToken().getTokenValue()))
          .retrieve();

        String messageFromResourceServer = responseSpec.toEntity(String.class).getBody();
        String safeMessage = HtmlUtils.htmlEscape(
          messageFromResourceServer != null ? messageFromResourceServer : ""
        );

        return "<html><body><title>Token Exchange</title>" +
          "<p>Token Exchange Client!</p><br/>" +
          "<p>The resource server: <strong>" +
          safeMessage +
          "</strong></p></body></html>";
    }
}
The @RegisteredOAuth2AuthorizedClient annotation automatically injects the OAuth2AuthorizedClient associated with the messaging-client-oidc registration. This client holds the access token obtained after the user logs in.
6.2. Running the Test
First, we open our browser and navigate to the client application’s home page (assuming it runs on port 8080). We’ll be redirected to the login page of the authorization server: 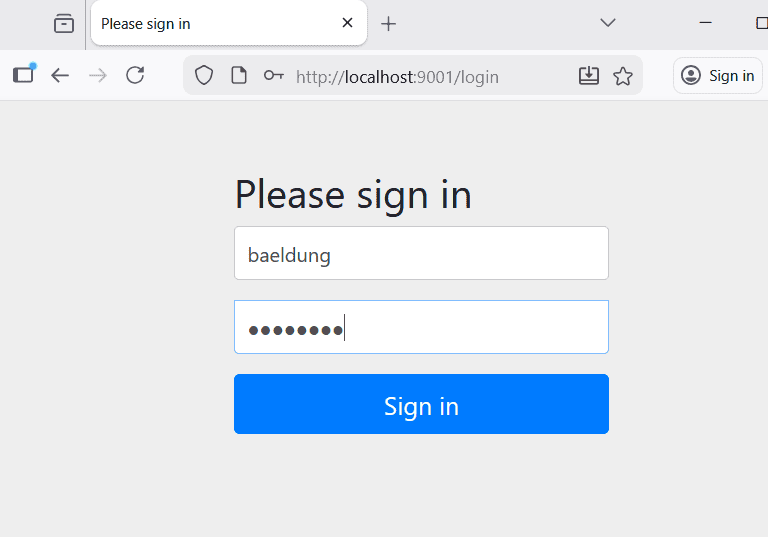
Then, we log in with the user credentials (baeldung / password).
Upon successful login, we can see the user’s subject and authorized party. This confirms that the client has successfully authenticated the user via the Authorization Code flow:
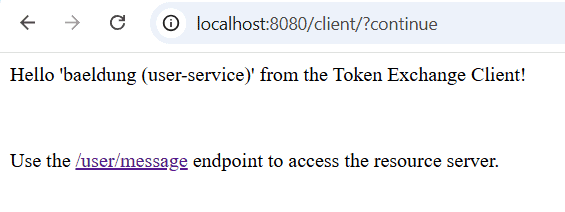
Finally, we click the link provided on the page to access “/api/user/message“. This invokes the userMessage() method, which uses the injected access token to call the user-service.
The user-service validates the incoming token. It then sends a request to the Authorization Server to exchange the token for a new one scoped for message-service. Finally, it uses the exchanged token to fetch the message.
Here is the exchanged token:
{
  "sub": "baeldung",
  "aud": "message-service",
  "scope": [
    "message.read"
  ],
  // ...
}
The browser then displays the response from the resource server, confirming that the token exchange happened successfully.
7. Conclusion
In this article, we explored OAuth 2.0 Token Exchange, defined in RFC 8693. It provides a standardized mechanism to exchange one access token for another while preserving the identity of the original end user.
We walked through the complete setup, including the Authorization Server and the Resource Server. We also saw how to programmatically trigger the exchange and invoke downstream APIs using RestClient. This approach ensures a secure and seamless flow of identity and authorization across microservice boundaries.


