

Mocking is an essential part of unit testing, and the Mockito library makes it easy to write clean and intuitive unit tests for your Java code.
Get started with mocking and improve your application tests using our Mockito guide:
Handling concurrency in an application can be a tricky process with many potential pitfalls. A solid grasp of the fundamentals will go a long way to help minimize these issues.
Get started with understanding multi-threaded applications with our Java Concurrency guide:
Spring 5 added support for reactive programming with the Spring WebFlux module, which has been improved upon ever since. Get started with the Reactor project basics and reactive programming in Spring Boot:
Since its introduction in Java 8, the Stream API has become a staple of Java development. The basic operations like iterating, filtering, mapping sequences of elements are deceptively simple to use.
But these can also be overused and fall into some common pitfalls.
To get a better understanding on how Streams work and how to combine them with other language features, check out our guide to Java Streams:
Explore Spring Boot 3 and Spring 6 in-depth through building a full REST API with the framework:
Yes, Spring Security can be complex, from the more advanced functionality within the Core to the deep OAuth support in the framework.
I built the security material as two full courses - Core and OAuth, to get practical with these more complex scenarios. We explore when and how to use each feature and code through it on the backing project.
You can explore the course here:
Spring Data JPA is a great way to handle the complexity of JPA with the powerful simplicity of Spring Boot.
Get started with Spring Data JPA through the guided reference course:
Refactor Java code safely — and automatically — with OpenRewrite.
Refactoring big codebases by hand is slow, risky, and easy to put off. That’s where OpenRewrite comes in. The open-source framework for large-scale, automated code transformations helps teams modernize safely and consistently.
Each month, the creators and maintainers of OpenRewrite at Moderne run live, hands-on training sessions — one for newcomers and one for experienced users. You’ll see how recipes work, how to apply them across projects, and how to modernize code with confidence.
Join the next session, bring your questions, and learn how to automate the kind of work that usually eats your sprint time.
Yes, we're now running our only Summer Sale. All Courses are 30% off until 20th July, 2026:
Yes, we're now running our only Summer Sale. All Courses are 30% off until 20th July, 2026:
1. Overview
Auth0 provides authentication and authorization services for various types of applications like Native, Single Page Applications, and Web. Additionally, it allows for implementing various features like Single Sign-on, Social login, and Multi-Factor Authentication.
In this tutorial, we’ll explore Spring Security with Auth0 through a step-by-step guide, along with key configurations of the Auth0 account.
2. Setting Up Auth0
2.1. Auth0 Sign-Up
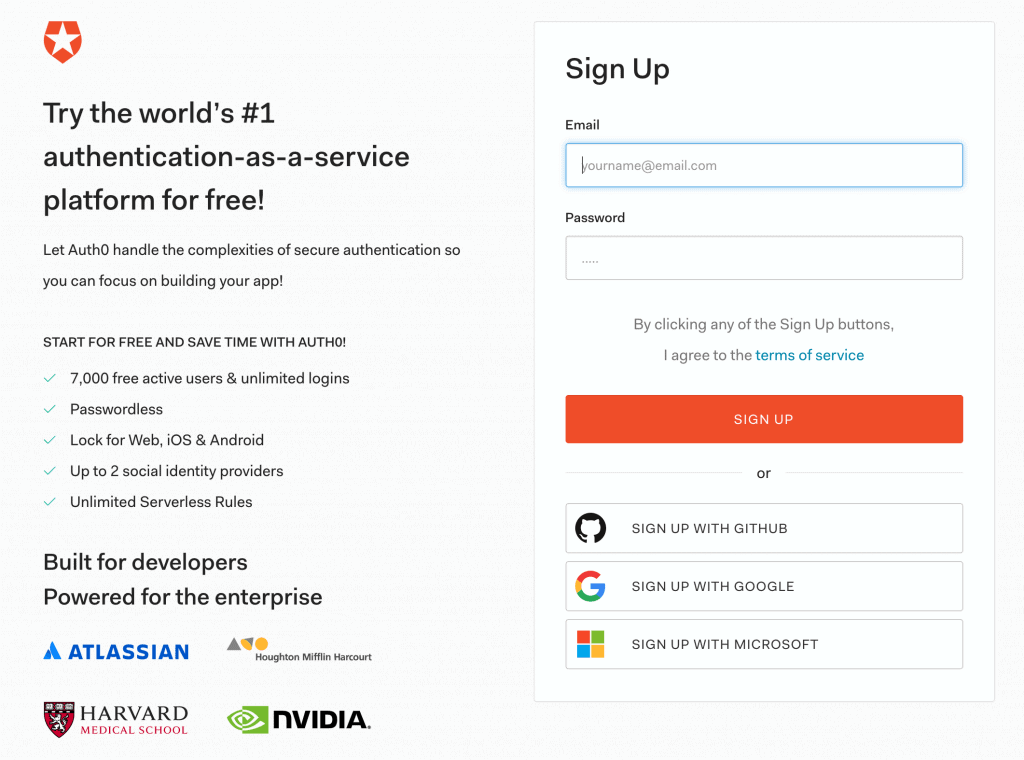
First, we’ll sign up for a free Auth0 plan that provides access for up to 7k active users with unlimited logins. However, we can skip this section if we already have one:
2.2. Dashboard
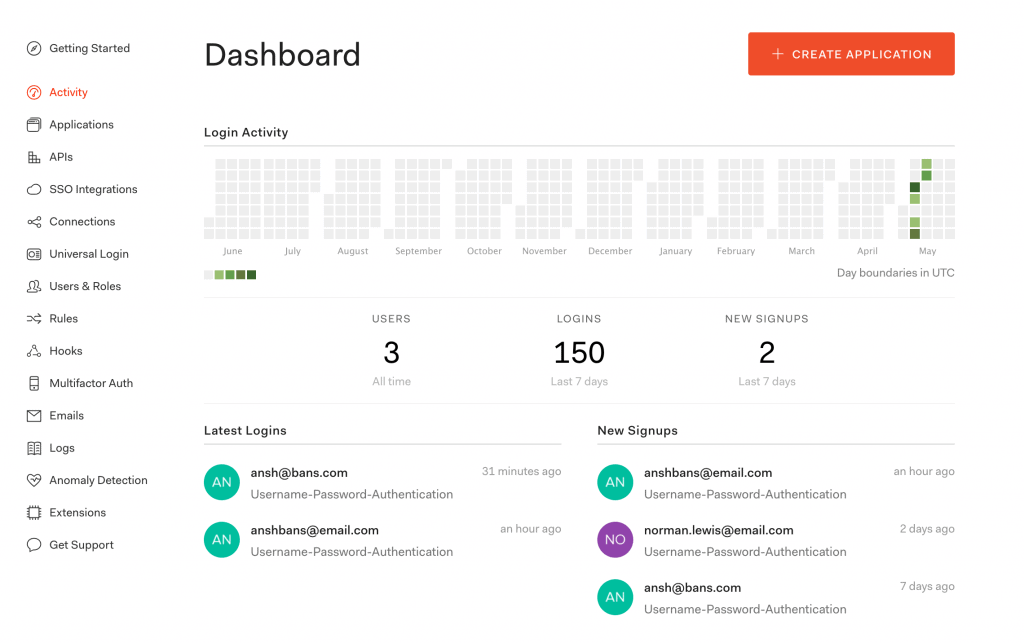
Once logged in to the Auth0 account, we’ll see a dashboard that highlights the details like login activities, latest logins, and new signups:
2.3. Create a New Application
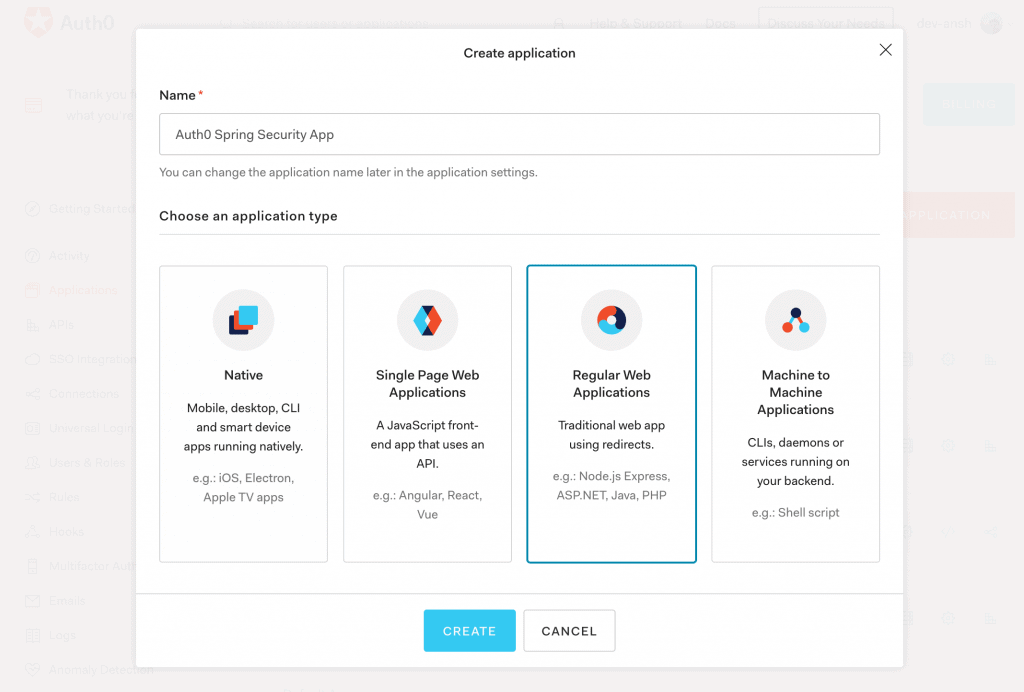
Then, from the Applications menu, we’ll create a new OpenID Connect (OIDC) application for Spring Boot.
Further, we’ll choose Regular Web Applications as application type out of available options like Native, Single-Page Apps, and Machine to Machine Apps:
2.4. Application Settings
Next, we’ll configure a few Application URIs like Callback URLs and Logout URLs pointing to our application:

2.5. Client Credentials
At last, we’ll get values of the Domain, Client ID, and Client Secret associated with our app:

Please keep these credentials handy because they are required for the Auth0 setup in our Spring Boot App.
3. Spring Boot App Setup
Now that our Auth0 account is ready with key configurations, we’re prepared to integrate Auth0 security in a Spring Boot App.
3.1. Maven
First, let’s add the latest mvc-auth-commons Maven dependency to our pom.xml:
<dependency>
    <groupId>com.auth0</groupId>
    <artifactId>mvc-auth-commons</artifactId>
    <version>1.2.0</version>
</dependency>
3.2. Gradle
Similarly, when using Gradle, we can add the mvc-auth-commons dependency in the build.gradle file:
compile 'com.auth0:mvc-auth-commons:1.2.0'3.3. application.properties
Our Spring Boot App requires information like Client Id and Client Secret to enable authentication of an Auth0 account. So, we’ll add them to the application.properties file:
com.auth0.domain: dev-example.auth0.com
com.auth0.clientId: {clientId}
com.auth0.clientSecret: {clientSecret}
3.4. AuthConfig
Next, we’ll create the AuthConfig class to read Auth0 properties from the application.properties file:
@Configuration
@EnableWebSecurity
public class AuthConfig {
    @Value(value = "${com.auth0.domain}")
    private String domain;

    @Value(value = "${com.auth0.clientId}")
    private String clientId;

    @Value(value = "${com.auth0.clientSecret}")
    private String clientSecret;

    @Bean
    public SecurityFilterChain filterChain(HttpSecurity http) throws Exception {
        http.csrf()
          .disable()
          .authorizeRequests()
          .antMatchers("/callback", "/login", "/").permitAll()
          .anyRequest().authenticated()
          .and()
          .formLogin()
          .loginPage("/login")
          .and()
          .logout().logoutSuccessHandler(logoutSuccessHandler()).permitAll();
        return http.build();
    }
}
Additionally, the AuthConfig class is configured to enable web security by creating a SecurityFilterChain bean .
3.5. AuthenticationController
Last, we’ll add a bean reference for the AuthenticationController class to the already discussed AuthConfig class:
@Bean
public AuthenticationController authenticationController() throws UnsupportedEncodingException {
    JwkProvider jwkProvider = new JwkProviderBuilder(domain).build();
    return AuthenticationController.newBuilder(domain, clientId, clientSecret)
      .withJwkProvider(jwkProvider)
      .build();
}
Here, we’ve used the JwkProviderBuilder class while building an instance of the AuthenticationController class. We’ll use this to fetch the public key to verify the token’s signature (by default, the token is signed using the RS256 asymmetric signing algorithm).
Further, the authenticationController bean provides an authorization URL for login and handles the callback request.
4. AuthController
Next, we’ll create the AuthController class for login and callback features:
@Controller
public class AuthController {
    @Autowired
    private AuthConfig config;

    @Autowired
    private AuthenticationController authenticationController;
}
Here, we’ve injected the dependencies of the AuthConfig and AuthenticationController classes discussed in the previous section.
4.1. Login
Let’s create the login method that allows our Spring Boot App to authenticate a user:
@GetMapping(value = "/login")
protected void login(HttpServletRequest request, HttpServletResponse response) {
    String redirectUri = "http://localhost:8080/callback";
    String authorizeUrl = authenticationController.buildAuthorizeUrl(request, response, redirectUri)
      .withScope("openid email")
      .build();
    response.sendRedirect(authorizeUrl);
}
The buildAuthorizeUrl method generates the Auth0 authorize URL and redirects to a default Auth0 sign-in screen.
4.2. Callback
Once the user signs in with Auth0 credentials, the callback request will be sent to our Spring Boot App. For that, let’s create the callback method:
@GetMapping(value="/callback")
public void callback(HttpServletRequest request, HttpServletResponse response) {
    Tokens tokens = authenticationController.handle(request, response);

    DecodedJWT jwt = JWT.decode(tokens.getIdToken());
    TestingAuthenticationToken authToken2 = new TestingAuthenticationToken(jwt.getSubject(),
      jwt.getToken());
    authToken2.setAuthenticated(true);

    SecurityContextHolder.getContext().setAuthentication(authToken2);
    response.sendRedirect(config.getContextPath(request) + "/");
}
We handled the callback request to obtain the accessToken and idToken that represent successful authentication. Then, we created the TestingAuthenticationToken object to set the authentication in SecurityContextHolder.
However, we can create our implementation of the AbstractAuthenticationToken class for better usability.
5. HomeController
Last, we’ll create the HomeController with a default mapping for our landing page of the application:
@Controller
public class HomeController {
    @GetMapping(value = "/")
    @ResponseBody
    public String home(final Authentication authentication) {
        TestingAuthenticationToken token = (TestingAuthenticationToken) authentication;
        DecodedJWT jwt = JWT.decode(token.getCredentials().toString());
        String email = jwt.getClaims().get("email").asString();
        return "Welcome, " + email + "!";
    }
}
Here, we extracted the DecodedJWT object from the idToken. Further, user information like email is fetched from the claims.
That’s it! Our Spring Boot App is ready with Auth0 security support. Let’s run our app using the Maven command:
mvn spring-boot:runWhen accessing the application at localhost:8080/login, we’ll see a default sign-in page provided by Auth0:
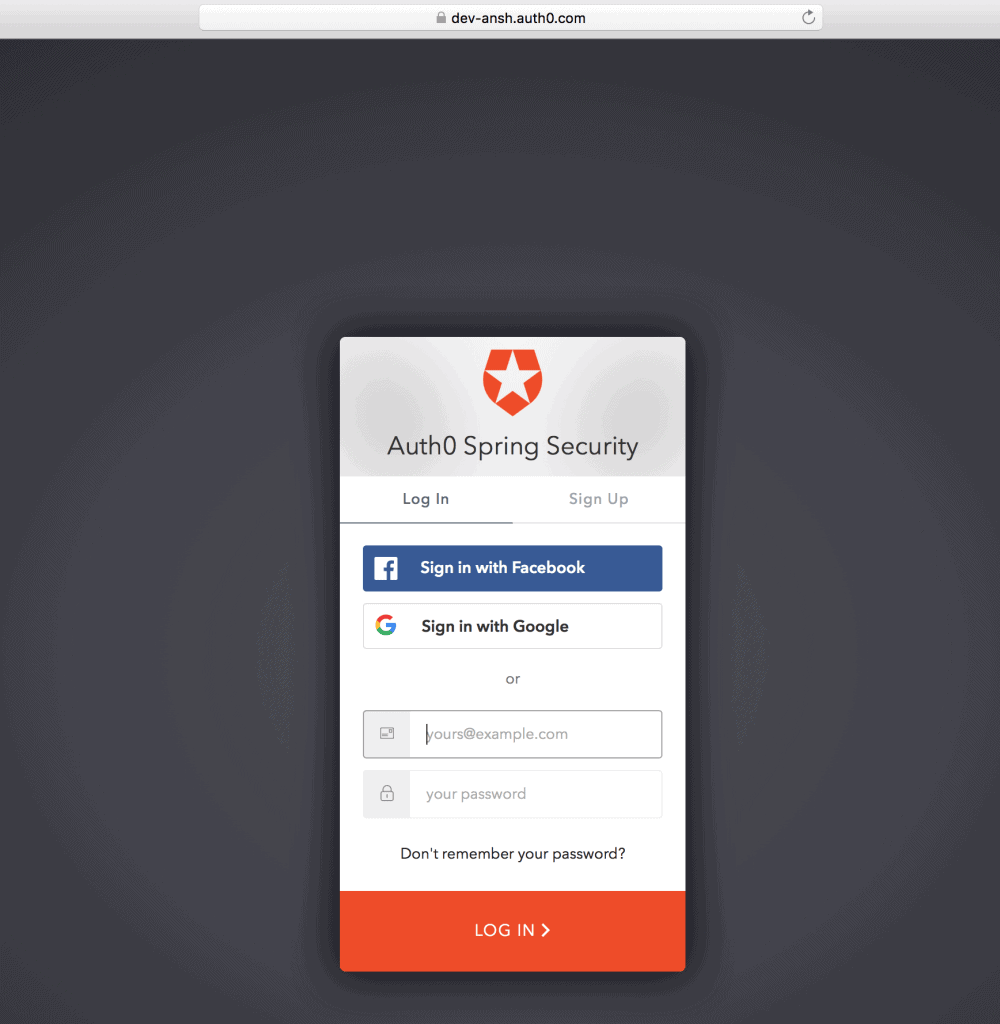
Once logged in using the registered user’s credentials, a welcome message with the user’s email will be shown:

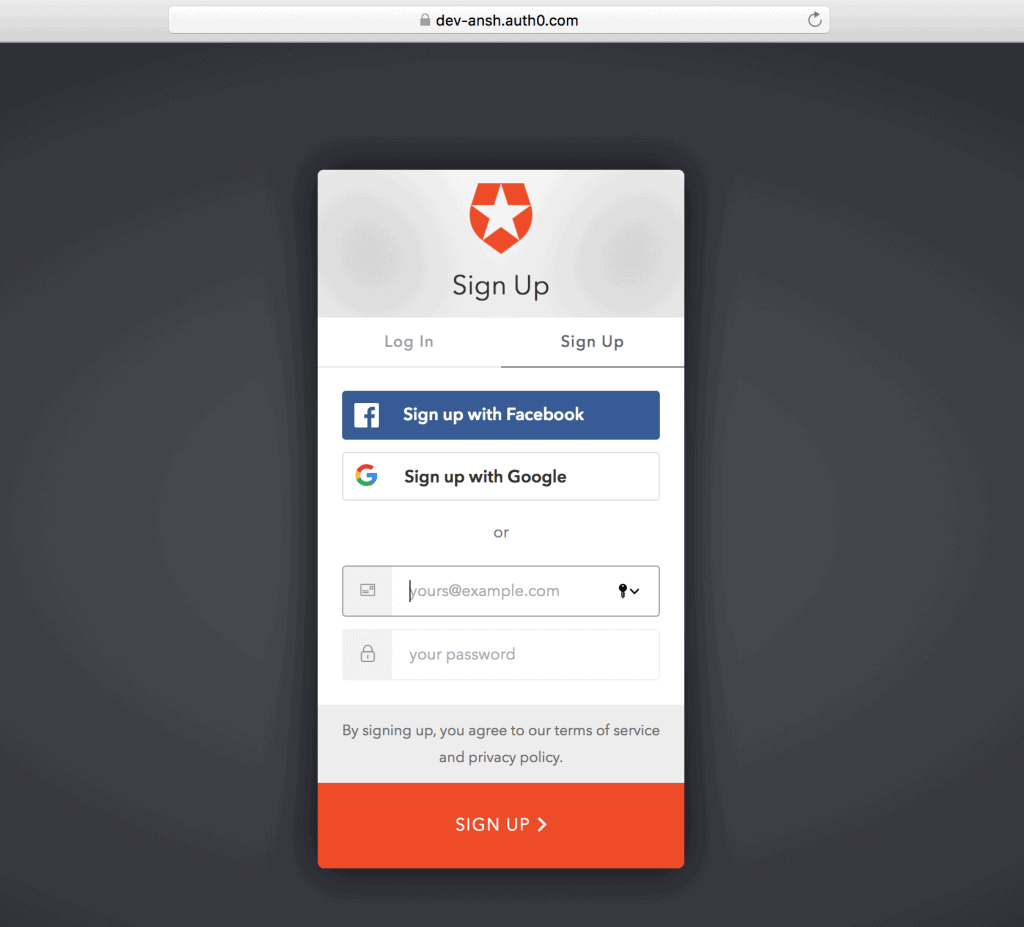
Also, we’ll find a “Sign Up” button (next to the “Log In”) on the default sign-in screen for self-registration.
6. Sign-Up
6.1. Self-Registration
For the first time, we can create an Auth0 account by using the “Sign Up” button, and then providing information like email and password:
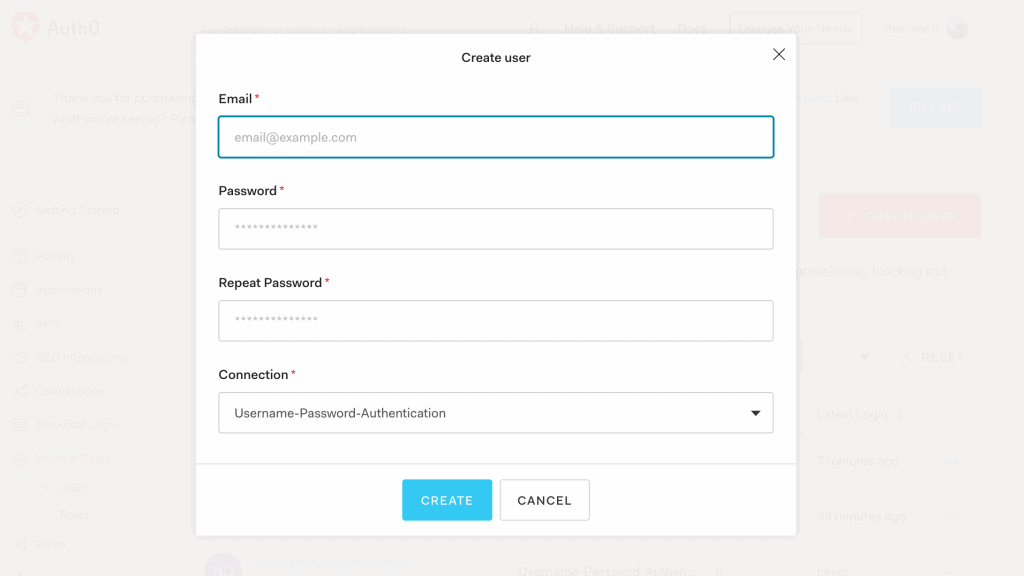
6.2. Create a User
Or, we can create a new user from the Users menu in the Auth0 account:
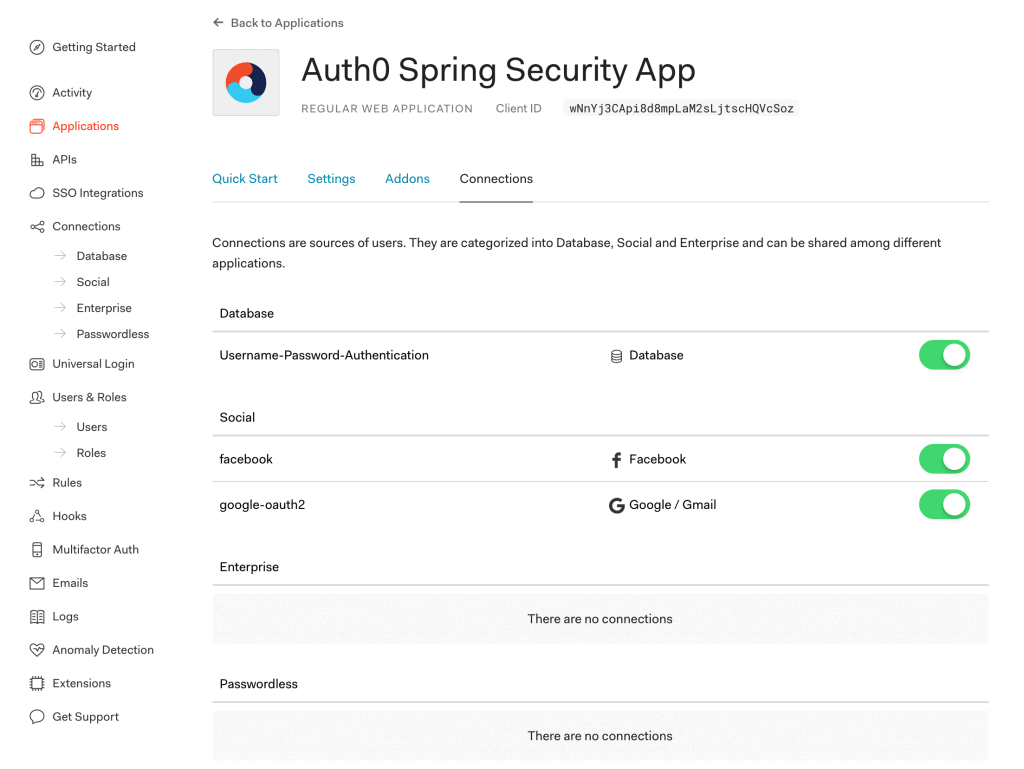
6.3. Connections Settings
Additionally, we can choose various types of connections like Database and Social Login for Sign-Up/Sign-In to our Spring Boot App:
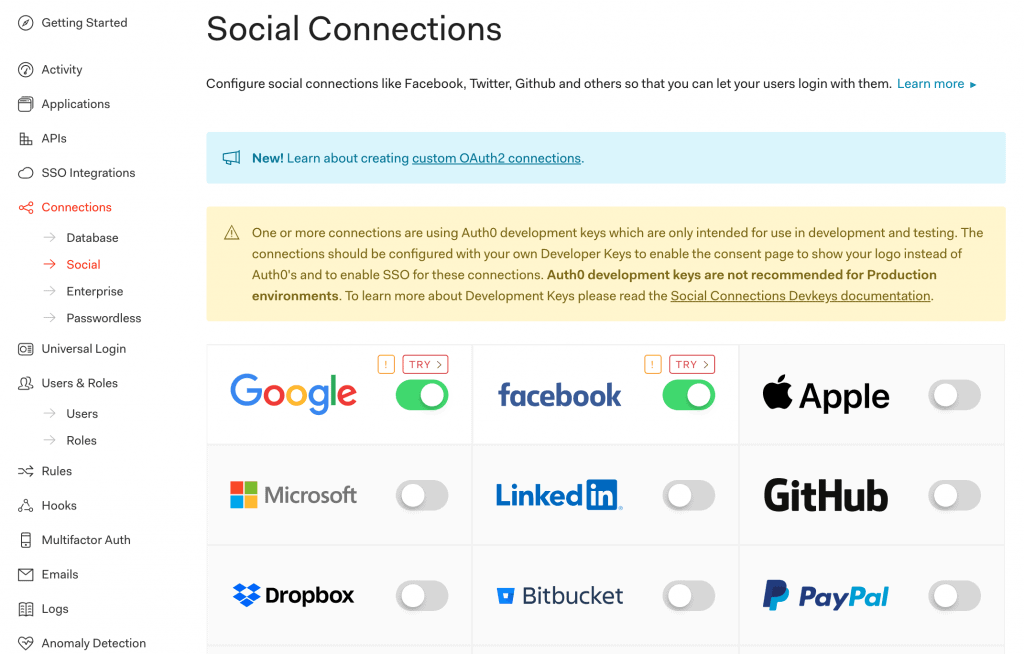
Further, a range of Social Connections are available to choose from:
7. LogoutController
Now that we’ve seen login and callback features, we can add a logout feature to our Spring Boot App.
Let’s create the LogoutController class implementing the LogoutSuccessHandler class:
@Controller
public class LogoutController implements LogoutSuccessHandler {
    @Autowired
    private AuthConfig config;

    @Override
    public void onLogoutSuccess(HttpServletRequest req, HttpServletResponse res,
      Authentication authentication) {
        if (req.getSession() != null) {
            req.getSession().invalidate();
        }
        String returnTo = "http://localhost:8080/";
        String logoutUrl = "https://dev-example.auth0.com/v2/logout?client_id=" +
          config.getClientId() + "&returnTo=" +returnTo;
        res.sendRedirect(logoutUrl);
    }
}
Here, the onLogoutSuccess method is overridden to call the /v2/logout Auth0 Logout URL.
8. Auth0 Management API
So far, we’ve seen Auth0 security integration in the Spring Boot App. Now, let’s interact with the Auth0 Management API (system API) in the same app.
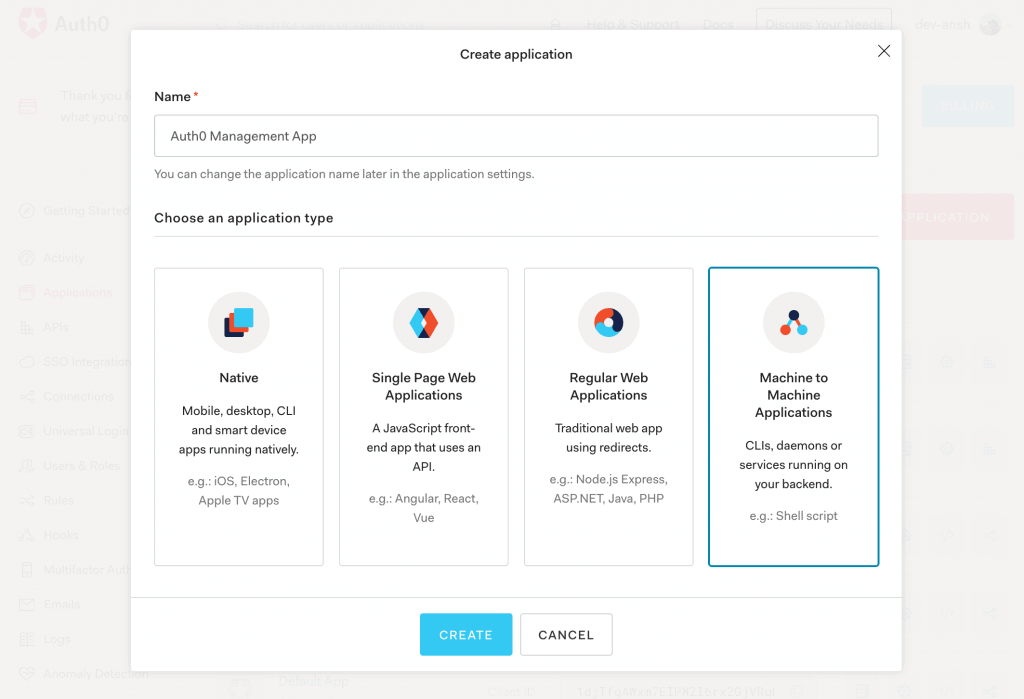
8.1. Create a New Application
First, to access the Auth0 Management API, we’ll create a Machine to Machine Application in the Auth0 account:
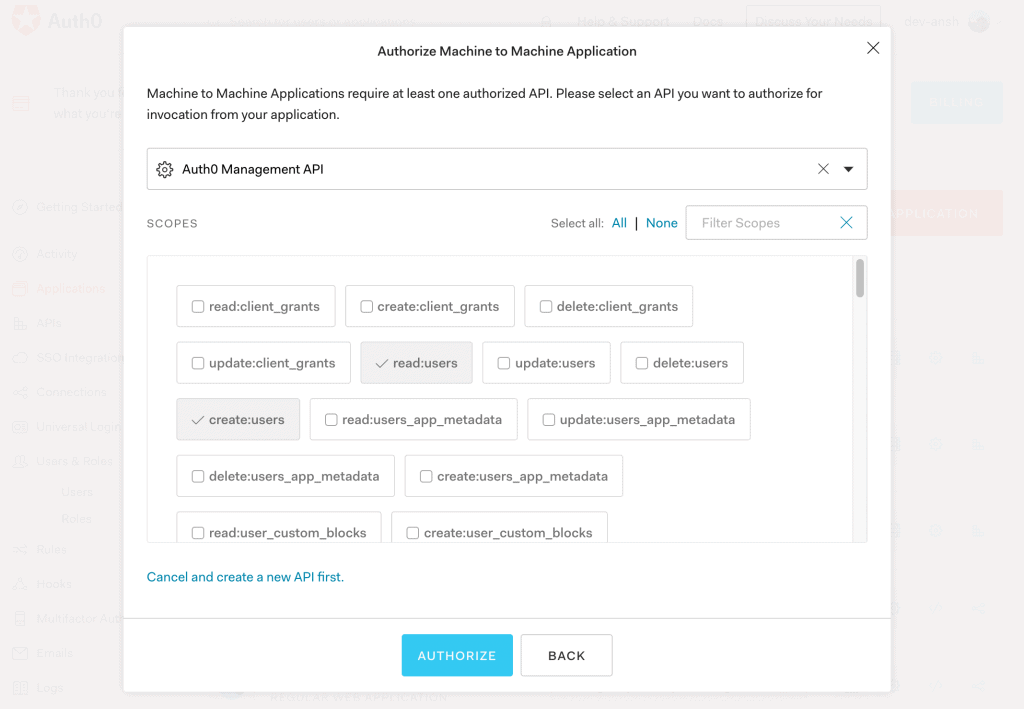
8.2. Authorization
Then, we’ll add authorization to the Auth0 Management API with permissions to read/create users:
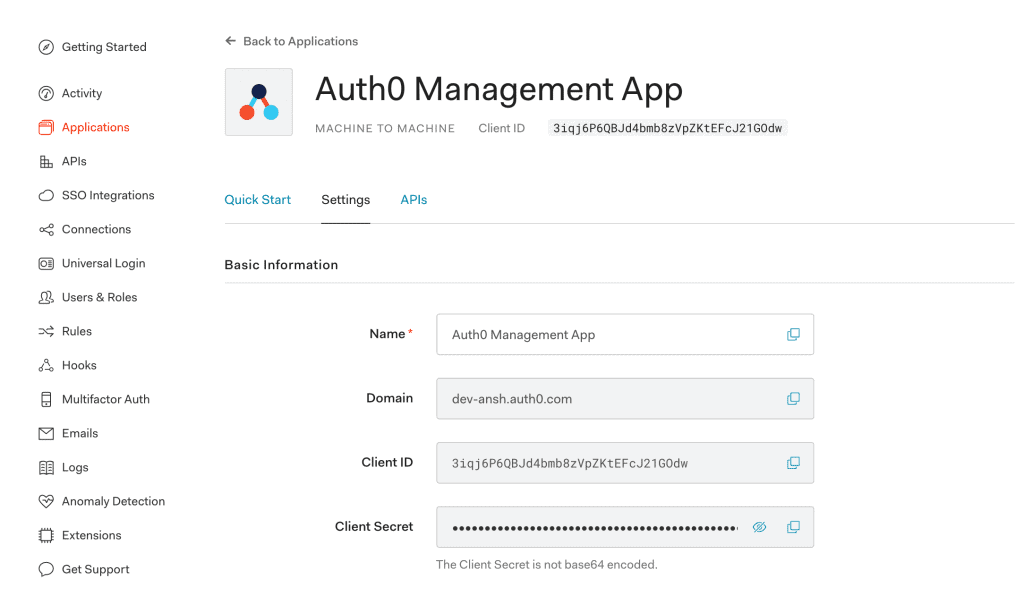
8.3. Client Credentials
At last, we’ll receive Client Id and Client Secret to access the Auth0 Management App from our Spring Boot App:
8.4. Access Token
Let’s generate an access token for the Auth0 Management App using client credentials received in the previous section:
public String getManagementApiToken() {
    HttpHeaders headers = new HttpHeaders();
    headers.setContentType(MediaType.APPLICATION_JSON);

    JSONObject requestBody = new JSONObject();
    requestBody.put("client_id", "auth0ManagementAppClientId");
    requestBody.put("client_secret", "auth0ManagementAppClientSecret");
    requestBody.put("audience", "https://dev-example.auth0.com/api/v2/");
    requestBody.put("grant_type", "client_credentials");

    HttpEntity<String> request = new HttpEntity<String>(requestBody.toString(), headers);

    RestTemplate restTemplate = new RestTemplate();
    HashMap<String, String> result = restTemplate
      .postForObject("https://dev-example.auth0.com/oauth/token", request, HashMap.class);

    return result.get("access_token");
}
Here, we’ve made a REST request to the /oauth/token Auth0 Token URL to get the access and refresh tokens.
Also, we can store these client credentials in the application.properties file and read it using the AuthConfig class.
8.5. UserController
After that, let’s create the UserController class with the users method:
@Controller
public class UserController {
    @GetMapping(value="/users")
    @ResponseBody
    public ResponseEntity<String> users(HttpServletRequest request, HttpServletResponse response) {
        HttpHeaders headers = new HttpHeaders();
        headers.setContentType(MediaType.APPLICATION_JSON);
        headers.set("Authorization", "Bearer " + getManagementApiToken());

        HttpEntity<String> entity = new HttpEntity<String>(headers);

        RestTemplate restTemplate = new RestTemplate();
        ResponseEntity<String> result = restTemplate
          .exchange("https://dev-example.auth0.com/api/v2/users", HttpMethod.GET, entity, String.class);
        return result;
    }
}
The users method fetches a list of all users by making a GET request to the /api/v2/users Auth0 API with the access token generated in the previous section.
So, let’s access localhost:8080/users to receive a JSON response containing all users:
[{
    "created_at": "2020-05-05T14:38:18.955Z",
    "email": "[email protected]",
    "email_verified": true,
    "identities": [
        {
            "user_id": "5eb17a5a1cc1ac0c1487c37f78758",
            "provider": "auth0",
            "connection": "Username-Password-Authentication",
            "isSocial": false
        }
    ],
    "name": "[email protected]",
    "nickname": "ansh",
    "logins_count": 64
    // ...
}]
8.6. Create User
Similarly, we can create a user by making a POST request to the /api/v2/users Auth0 API:
@GetMapping(value = "/createUser")
@ResponseBody
public ResponseEntity<String> createUser(HttpServletResponse response) {
    JSONObject request = new JSONObject();
    request.put("email", "[email protected]");
    request.put("given_name", "Norman");
    request.put("family_name", "Lewis");
    request.put("connection", "Username-Password-Authentication");
    request.put("password", "Pa33w0rd");

    // ...
    ResponseEntity<String> result = restTemplate
      .postForEntity("https://dev-example.auth0.com/api/v2/users", request.toString(), String.class);
    return result;
}
Then, let’s access localhost:8080/createUser and verify the new user’s details:
{
    "created_at": "2020-05-10T12:30:15.343Z",
    "email": "[email protected]",
    "email_verified": false,
    "family_name": "Lewis",
    "given_name": "Norman",
    "identities": [
        {
            "connection": "Username-Password-Authentication",
            "user_id": "5eb7f3d76b69bc0c120a8901576",
            "provider": "auth0",
            "isSocial": false
        }
    ],
    "name": "[email protected]",
    "nickname": "norman.lewis",
    // ...
}
Similarly, we can perform various operations like listing all connections, creating a connection, listing all clients, and creating a client using Auth0 APIs, depending on our permissions.
9. Conclusion
In this tutorial, we explored Spring Security with Auth0.
First, we set up the Auth0 account with essential configurations. Then, we created a Spring Boot App and configured the application.properties for Spring Security integration with Auth0.
Next, we looked into creating an API token for the Auth0 Management API. Last, we looked into features like fetching all users and creating a user.


