Spring Boot – Keycloak Integration Testing with Testcontainers
Last updated: January 8, 2024


Mocking is an essential part of unit testing, and the Mockito library makes it easy to write clean and intuitive unit tests for your Java code.
Get started with mocking and improve your application tests using our Mockito guide:
Handling concurrency in an application can be a tricky process with many potential pitfalls. A solid grasp of the fundamentals will go a long way to help minimize these issues.
Get started with understanding multi-threaded applications with our Java Concurrency guide:
Spring 5 added support for reactive programming with the Spring WebFlux module, which has been improved upon ever since. Get started with the Reactor project basics and reactive programming in Spring Boot:
Since its introduction in Java 8, the Stream API has become a staple of Java development. The basic operations like iterating, filtering, mapping sequences of elements are deceptively simple to use.
But these can also be overused and fall into some common pitfalls.
To get a better understanding on how Streams work and how to combine them with other language features, check out our guide to Java Streams:
Explore Spring Boot 3 and Spring 6 in-depth through building a full REST API with the framework:
Yes, Spring Security can be complex, from the more advanced functionality within the Core to the deep OAuth support in the framework.
I built the security material as two full courses - Core and OAuth, to get practical with these more complex scenarios. We explore when and how to use each feature and code through it on the backing project.
You can explore the course here:
All Access is finally out, with all of my Spring courses. Learn JUnit is out as well, and Learn Maven is coming fast. And, of course, quite a bit more affordable. Finally.
>> GET THE COURSE
Spring Data JPA is a great way to handle the complexity of JPA with the powerful simplicity of Spring Boot.
Get started with Spring Data JPA through the guided reference course:
Refactor Java code safely — and automatically — with OpenRewrite.
Refactoring big codebases by hand is slow, risky, and easy to put off. That’s where OpenRewrite comes in. The open-source framework for large-scale, automated code transformations helps teams modernize safely and consistently.
Each month, the creators and maintainers of OpenRewrite at Moderne run live, hands-on training sessions — one for newcomers and one for experienced users. You’ll see how recipes work, how to apply them across projects, and how to modernize code with confidence.
Join the next session, bring your questions, and learn how to automate the kind of work that usually eats your sprint time.
If you're working on a Spring Security (and especially an OAuth) implementation, definitely have a look at the Learn Spring Security course:
>> LEARN SPRING SECURITY1. Introduction
Integration testing is crucial when validating that an application is working properly. Also, we should correctly test authentication as it’s a sensitive part. Testcontainers allow us to launch Docker containers during the testing phase to run our tests against actual technical stacks.
In this article, we’ll see how to set up integration tests against an actual Keycloak instance using Testcontainers.
2. Setting up Spring Security with Keycloak
We’ll need to set up Spring Security, Keycloak configuration, and, finally, Testcontainers.
2.1. Setting up Spring Boot and Spring Security
Let’s start by setting up security, thanks to Spring Security. We’ll need the spring-boot-starter-security dependency. So, let’s add it to our pom:
<dependency>
    <groupId>org.springframework.boot</groupId>
    <artifactId>spring-boot-starter-security</artifactId>
</dependency>
We’ll use the spring-boot parent pom. Hence we don’t need to specify the version of the libraries specified in its dependencies management.
Next, let’s create a simple controller to return a User:
@RestController
@RequestMapping("/users")
public class UserController {

    @GetMapping("me")
    public UserDto getMe() {
        return new UserDto(1L, "janedoe", "Doe", "Jane", "[email protected]");
    }
}
At this point, we have a secure controller that responds to requests on “/users/me”. When launching the application, Spring Security generates a password for the user ‘user’, visible in the application logs.
2.2. Configuring Keycloak
The easiest way to launch a local Keycloak is to use Docker. Hence, let’s run a Keycloak container with an admin account already configured:
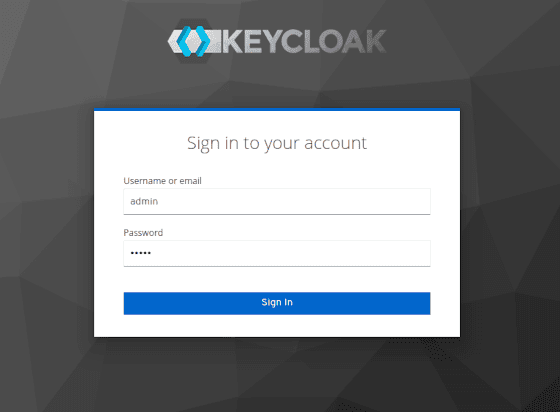
docker run -p 8081:8080 -e KEYCLOAK_ADMIN=admin -e KEYCLOAK_ADMIN_PASSWORD=admin quay.io/keycloak/keycloak:17.0.1 start-devLet’s open a browser to the URL http://localhost:8081 to access the Keycloak console:
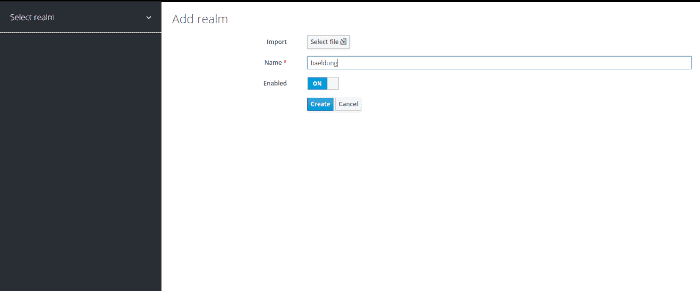
Next, let’s create our realm. We’ll call it baeldung:
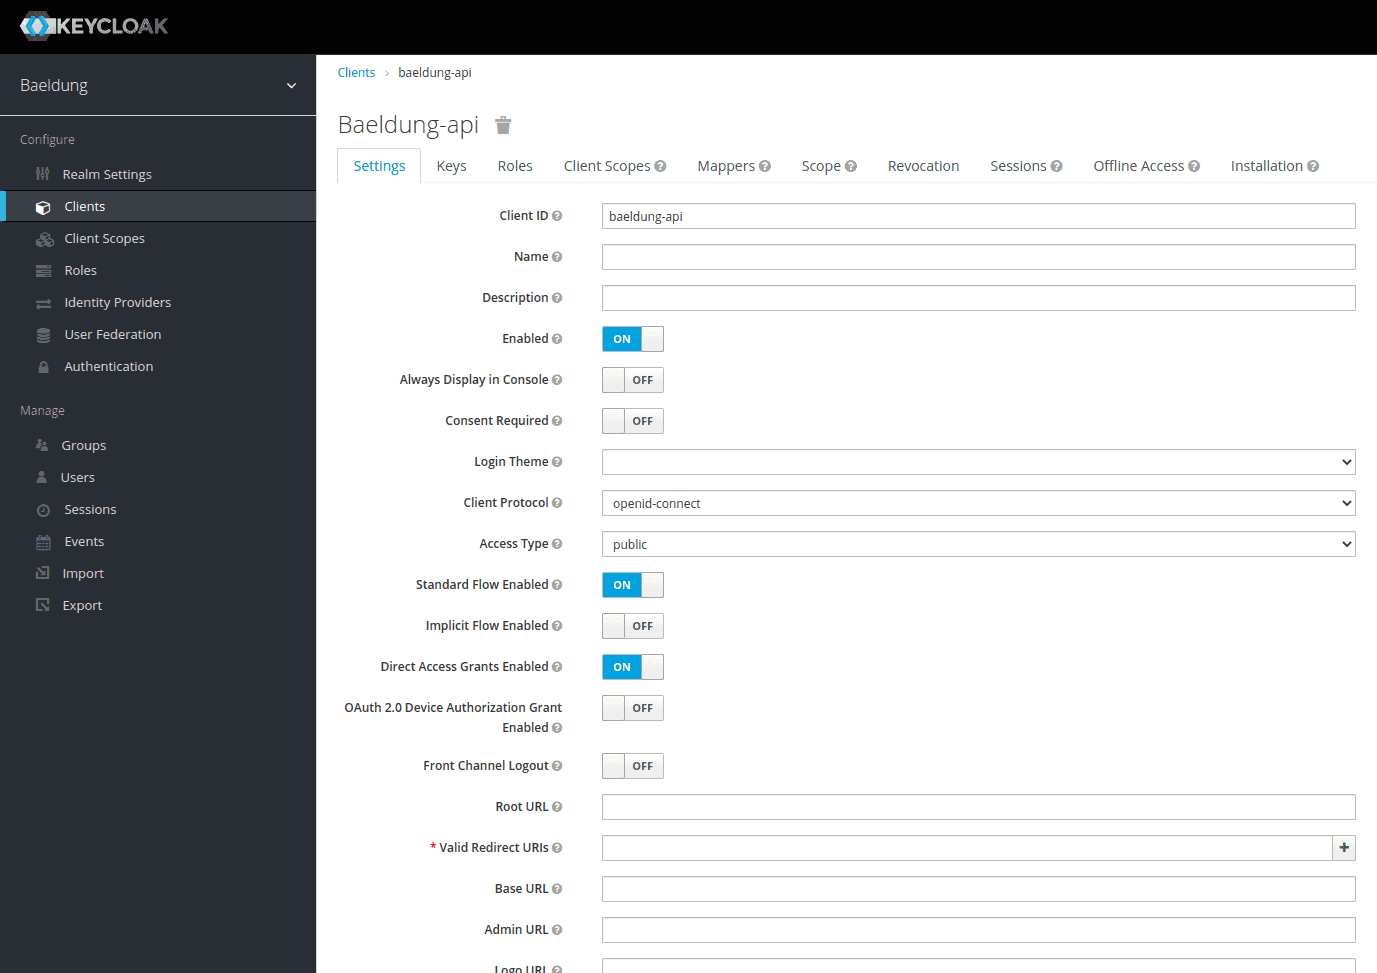
We need to add a client, which we’ll name baeldung-api:
Finally, let’s add a Jane Doe user using the Users menu:
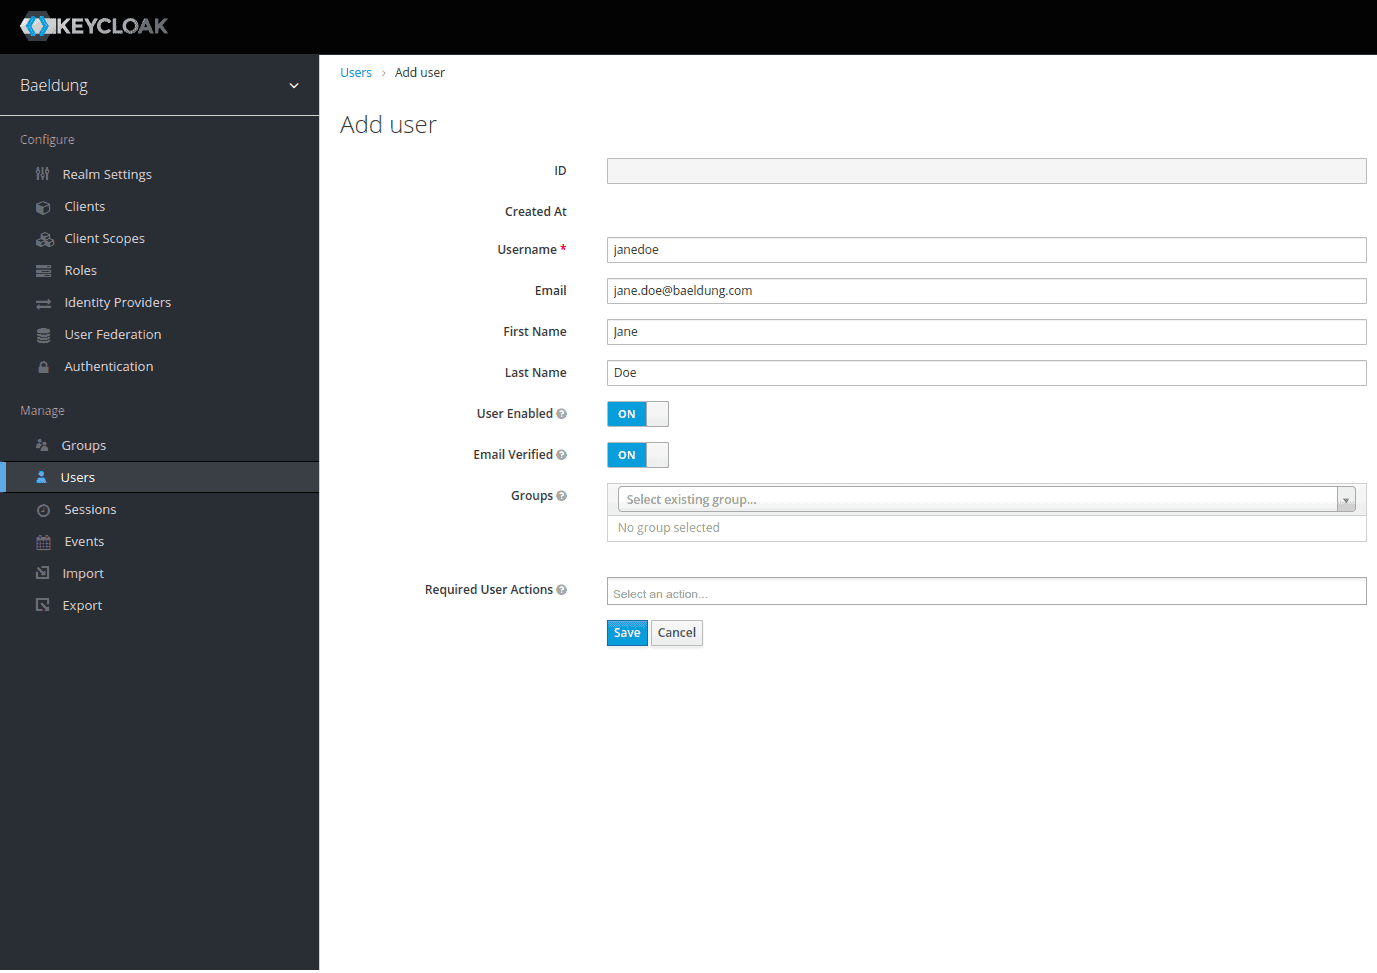
Now that we’ve created our user, we must assign it a password. Let’s choose s3cr3t and uncheck the temporary button:

We’ve now set up our Keycloak realm with a baeldung-api client and a Jane Doe user.
We’ll next configure Spring to use Keycloak as the identity provider.
2.3. Putting Both Together
First, we’ll delegate the identification control to a Keycloak server. For this, we’ll use the spring-boot-starter-oauth2-resource-server library. It will allow us to validate a JWT token with the Keycloak server. Hence, let’s add it to our pom:
<dependency>
    <groupId>org.springframework.boot</groupId>
    <artifactId>spring-boot-starter-oauth2-resource-server</artifactId>
</dependency>
Let’s continue by configuring Spring Security to add the OAuth 2 resource server support:
@Configuration
@ConditionalOnProperty(name = "keycloak.enabled", havingValue = "true", matchIfMissing = true)
public class WebSecurityConfiguration {

    @Bean
    protected SessionAuthenticationStrategy sessionAuthenticationStrategy() {
        return new NullAuthenticatedSessionStrategy();
    }

    @Bean
    public SecurityFilterChain filterChain(HttpSecurity http) throws Exception {

        return http.csrf()
            .disable()
            .cors()
            .and()
            .authorizeHttpRequests(auth -> auth.anyRequest()
                .authenticated())
            .oauth2ResourceServer(OAuth2ResourceServerConfigurer::jwt)
            .build();
    }
}
We’re setting up a new filter chain that will apply to all incoming requests. It will validate the bound JWT token against our Keycloak server.
As we’re building a stateless application with bearer-only authentication, we’ll use the NullAuthenticatedSessionStrategy as a session strategy. Moreover, @ConditionalOnProperty allows us to disable the Keycloak configuration by setting the keycloak.enabled property to false.
Finally, let’s add the configuration needed to connect to our Keycloak in our application.properties file:
keycloak.enabled=true
spring.security.oauth2.resourceserver.jwt.issuer-uri=http://localhost:8180/auth/realms/baeldung-api
Our application is now secure and queries Keycloak on each request to validate the authentication.
3. Setting up Testcontainers for Keycloak
3.1. Exporting the Realm Configuration
The Keycloak container starts without any configuration in place. Thus, we must import it when the container starts as a JSON file. Let’s export this file from our currently running instance:

Unfortunately, Keycloak does not export users through the administration interface. We could log into the container and use the kc.sh export command. For our example, it’s easier to manually edit the resulting realm-export.json file and add our Jane Doe to it. Let’s add this configuration just before the final curly brace:
"users": [
  {
    "username": "janedoe",
    "email": "[email protected]",
    "firstName": "Jane",
    "lastName": "Doe",
    "enabled": true,
    "credentials": [
      {
        "type": "password",
        "value": "s3cr3t"
      }
    ],
    "clientRoles": {
      "account": [
        "view-profile",
        "manage-account"
      ]
    }
  }
]
Let’s include our realm-export.json file to our project in an src/test/resources/keycloak folder. We’ll use it during the launch of our Keycloak container.
3.2. Setting up Testcontainers
Let’s add the testcontainers dependency as well as testcontainers-keycloak, which allows us to launch a Keycloak container:
<dependency>
    <groupId>com.github.dasniko</groupId>
    <artifactId>testcontainers-keycloak</artifactId>
    <version>2.1.2</version>
    <scope>test</scope>
</dependency>
<dependency>
    <groupId>org.testcontainers</groupId>
    <artifactId>testcontainers</artifactId>
    <version>1.16.3</version>
</dependency>
Next, let’s create a class from which all our tests will derive. We use it to configure the Keycloak container, launched by Testcontainers:
@SpringBootTest(webEnvironment = WebEnvironment.RANDOM_PORT)
public abstract class KeycloakTestContainers {

    static {
        keycloak = new KeycloakContainer().withRealmImportFile("keycloak/realm-export.json");
        keycloak.start();
    }
}
Declaring and starting our container statically will ensure it will be instantiated and started once for all of our tests. We’re specifying the realm’s configuration to import at startup using the withRealmImportFile method from the KeycloakContainer object.
3.3. Spring Boot Testing Configuration
The Keycloak container uses a random port. So we need to override the spring.security.oauth2.resourceserver.jwt.issuer-uri configuration defined in our application.properties once started. For this, we’ll use the convenient @DynamicPropertySource annotation:
@DynamicPropertySource
static void registerResourceServerIssuerProperty(DynamicPropertyRegistry registry) {
    registry.add("spring.security.oauth2.resourceserver.jwt.issuer-uri", () -> keycloak.getAuthServerUrl() + "/realms/baeldung");
}
4. Creating Integration Tests
Now that we have our main test class responsible for launching our Keycloak container and configuring Spring properties, let’s create an integration test calling our User controller.
4.1. Getting an Access Token
First, let’s add to our abstract class IntegrationTest a method for requesting a token with Jane Doe’s credentials:
URI authorizationURI = new URIBuilder(keycloak.getAuthServerUrl() + "/realms/baeldung/protocol/openid-connect/token").build();
WebClient webclient = WebClient.builder().build();
MultiValueMap<String, String> formData = new LinkedMultiValueMap<>();
formData.put("grant_type", Collections.singletonList("password"));
formData.put("client_id", Collections.singletonList("baeldung-api"));
formData.put("username", Collections.singletonList("[email protected]"));
formData.put("password", Collections.singletonList("s3cr3t"));

String result = webclient.post()
  .uri(authorizationURI)
  .contentType(MediaType.APPLICATION_FORM_URLENCODED)
  .body(BodyInserters.fromFormData(formData))
  .retrieve()
  .bodyToMono(String.class)
  .block();
Here, we’re using Webflux’s WebClient to post a form containing the different parameters required to get an access token.
Finally, we’ll parse the Keycloak server response to extract the token from it. Specifically, we generate a classic authentication string containing the Bearer keyword, followed by the content of the token, ready to be used in a header:
JacksonJsonParser jsonParser = new JacksonJsonParser();
return "Bearer " + jsonParser.parseMap(result)
  .get("access_token")
  .toString();
4.2. Creating an Integration Test
Let’s quickly set up integration tests against our configured Keycloak container. We’ll be using RestAssured and Hamcrest for our test. Let’s add the rest-assured dependency:
<dependency>
    <groupId>io.rest-assured</groupId>
    <artifactId>rest-assured</artifactId>
    <scope>test</scope>
</dependency>
We can now create our test using our abstract IntegrationTest class:
@Test
void givenAuthenticatedUser_whenGetMe_shouldReturnMyInfo() {

    given().header("Authorization", getJaneDoeBearer())
      .when()
      .get("/users/me")
      .then()
      .body("username", equalTo("janedoe"))
      .body("lastname", equalTo("Doe"))
      .body("firstname", equalTo("Jane"))
      .body("email", equalTo("[email protected]"));
}
As a result, our access token, fetched from Keycloak, is added to the request’s Authorization header.
5. Conclusion
In this article, we set up integration tests against an actual Keycloak managed by Testcontainers. We imported a realm configuration to have a preconfigured environment each time we launch the test phase.














