1. Introduction
In this tutorial, we’ll demonstrate how to setup the back end of a web application that uses Spring’s social login feature. We’ll use Spring Boot and the OAuth2.0 dependency. We’ll also use Google as the social login provider.
2. Register With Social Login Provider
2.1. Consent Screen Configuration
Before we start the project setup, we need to obtain the ID and secret from the social login provider. Considering we’re using Google as the provider, let’s go to their api console to start the process.
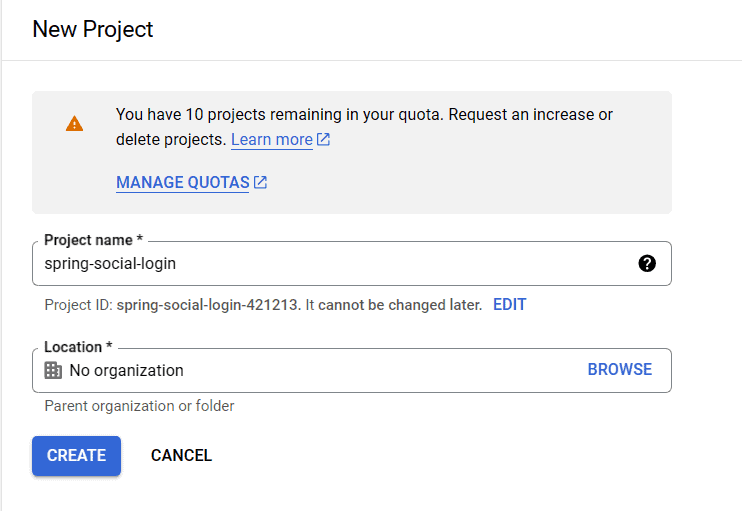
Once we’ve reached the Google API console, we need to create a new project. Once we have selected an appropriate project name, we’ll start the process to obtain the credentials:

Moving forward, we’ll need to set up the OAuth consent screen. For this, we’ll need to select the following option:

This action brings forward a new page with more options:
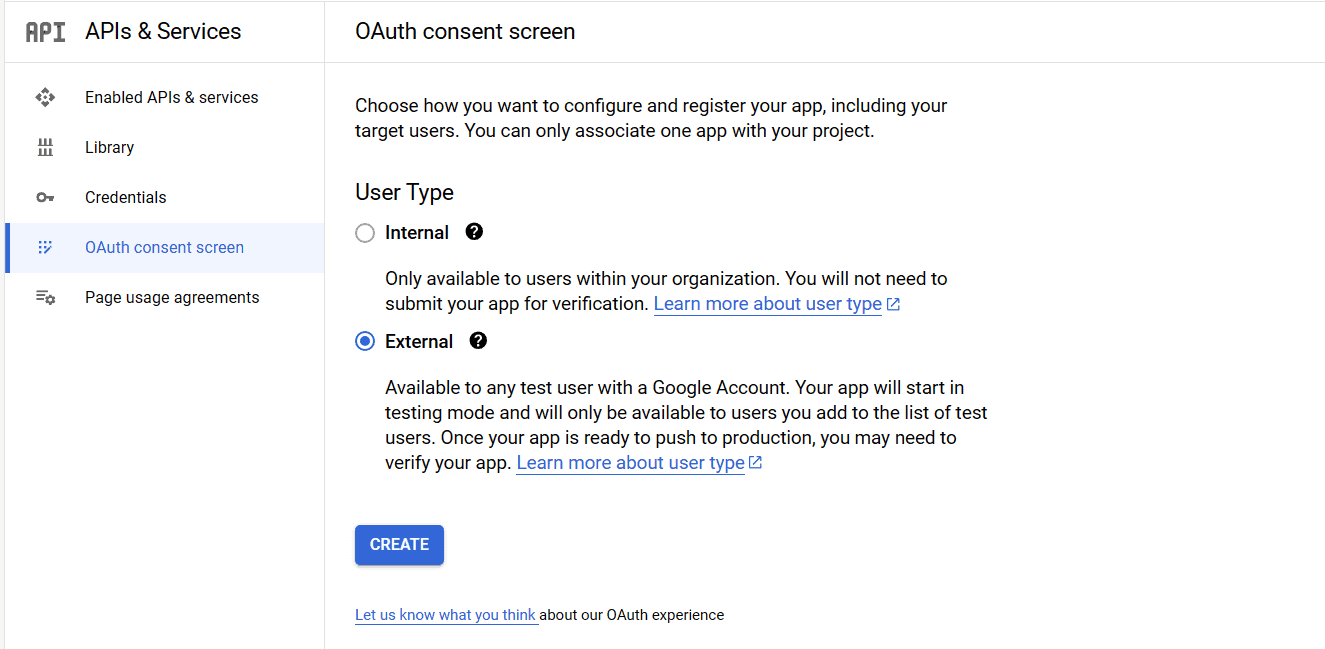
Here, we’ll choose the “External” option so anyone with a Google account can log in to our application. Next, we’ll click the “Create” button.
The next page, “Edit app registration,” asks us to introduce some information about our application. On the right-hand menu, we can see some examples of where the “App Name” will be used.
Here, we’ll want to use the name of our business. Furthermore, we can add our business’s logo, which is used in the examples illustrated. Finally, we’ll need to add the “User support email”. This point of contact is whom people wanting to know more about their consent will be reaching out to:

Before we move further, we’ll need to add an email address at the bottom of the screen. This contact will receive notifications from Google about changes to the created project (not illustrated here).
For the purpose of this demonstration, we’ll leave the fields below empty:
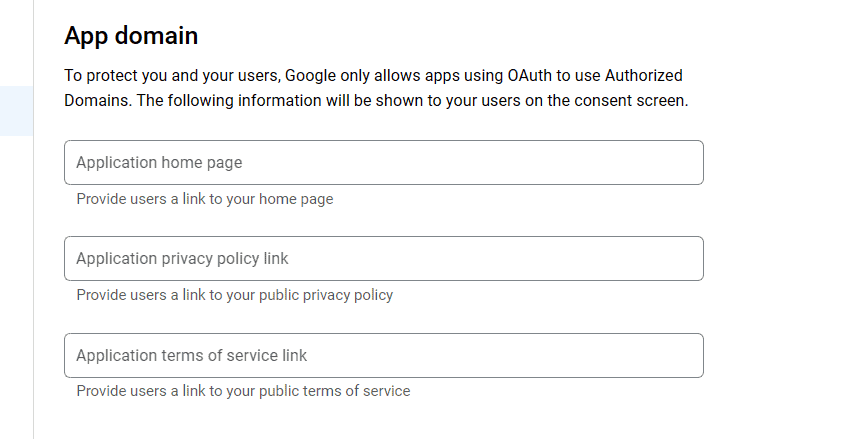
Furthermore, we’ll proceed through the next steps without filling in anything else.
When we’ve finished configuring the “OAuth consent screen,” we can proceed to the credentials setup.
2.2. Credentials Setup – Key and Secret
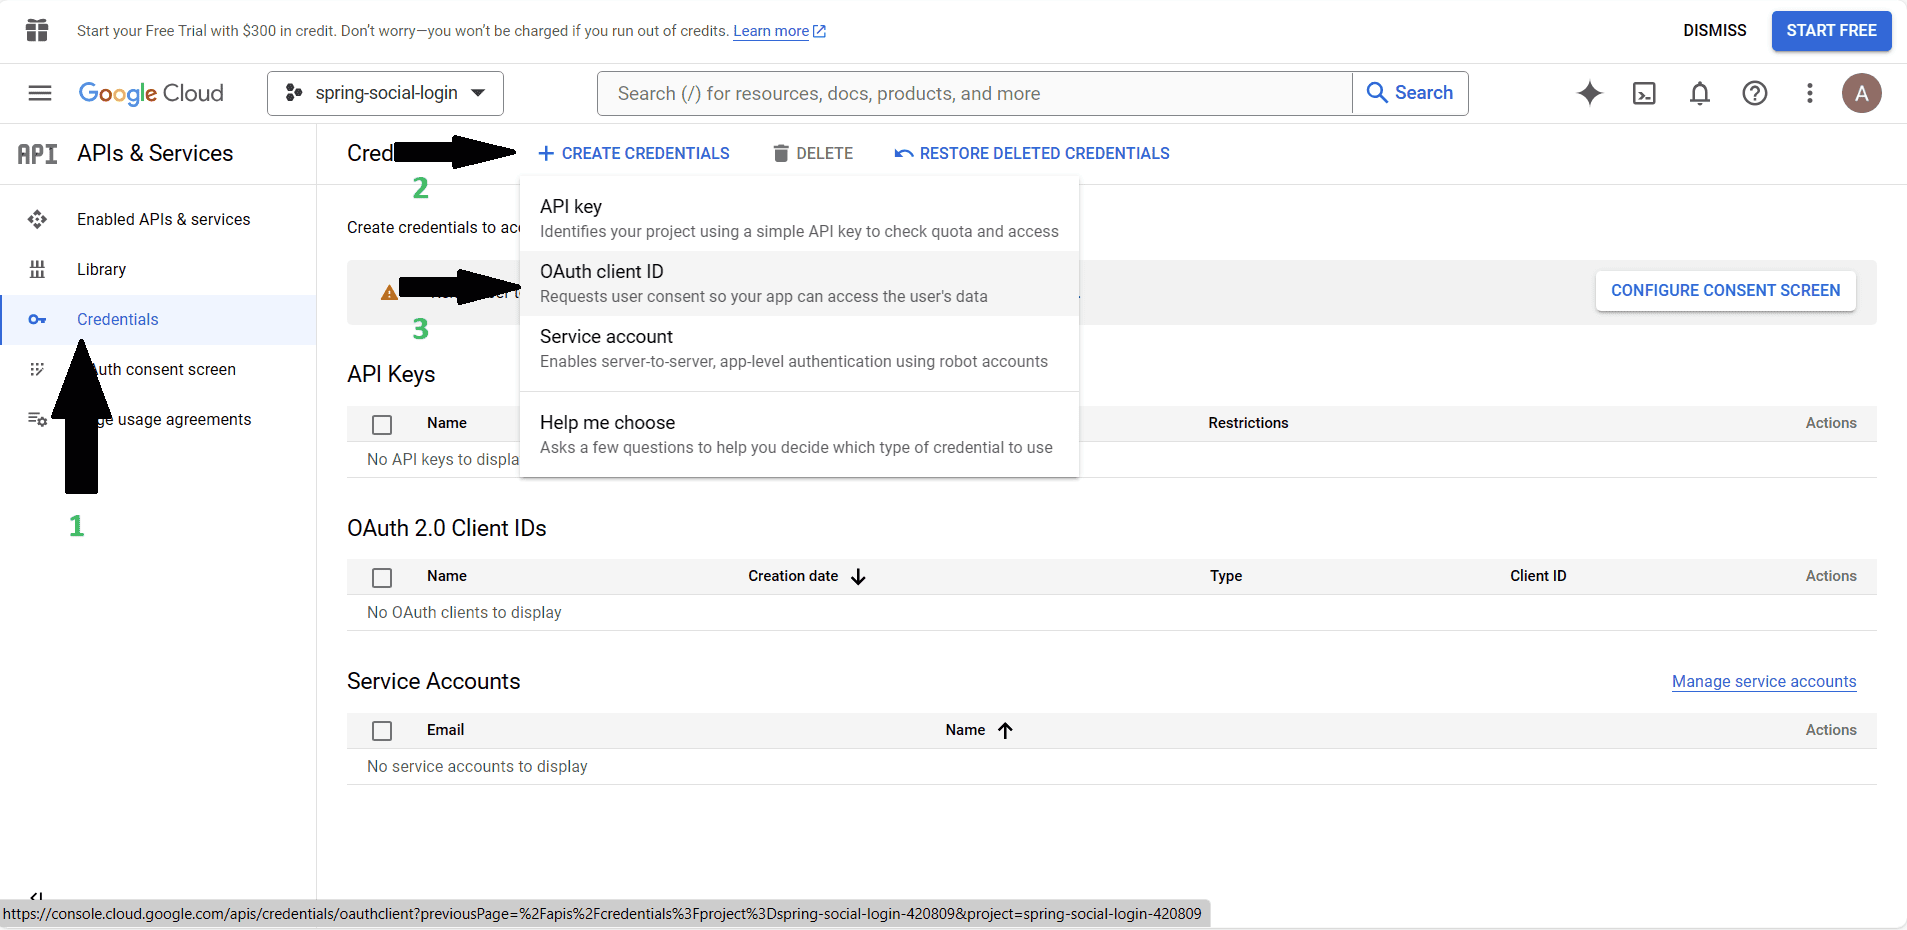
For this, we’ll need to select the “Credentials” option (arrow 1). A new menu appears in the middle of the page. On it, we’ll select the “CREATE CREDENTIALS” option (arrow 2). From the dropdown, we’ll select “OAuth client ID” option (arrow 3):
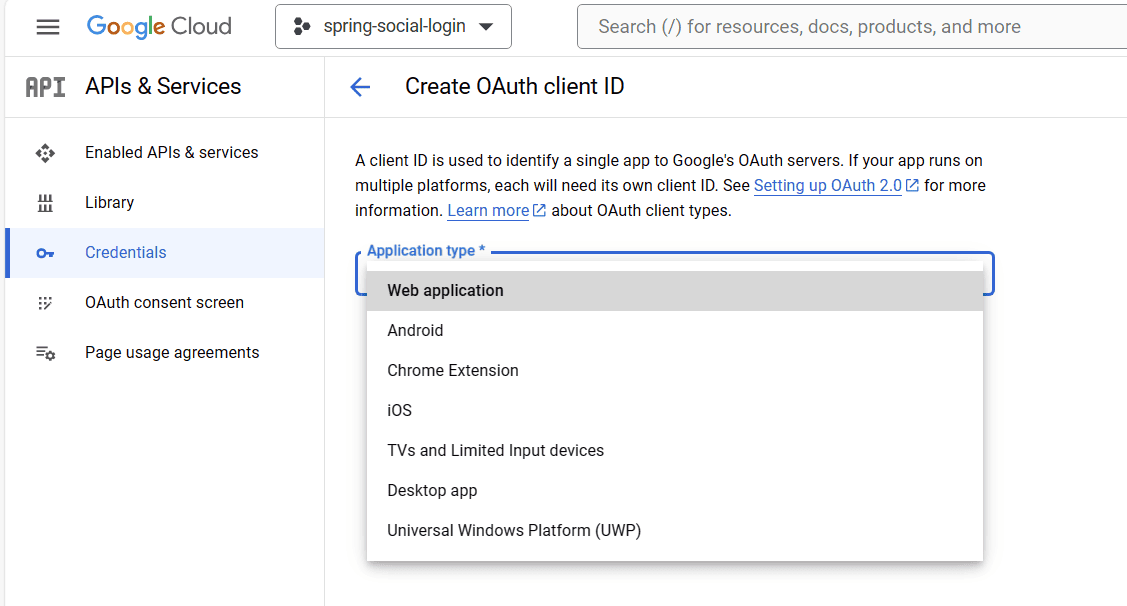
Next, we’re going to select the “Web application” option. This is what we’re building for the demonstration:
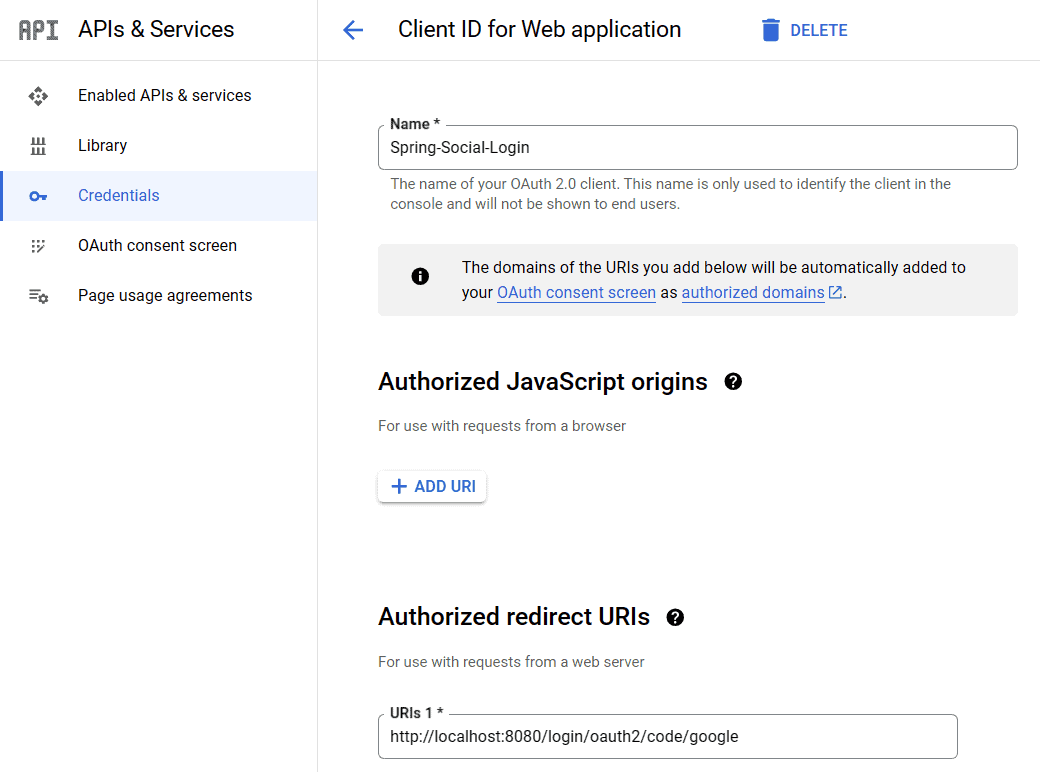
After this selection, more elements will appear on the page. We’ll have to name our application. In this case, we’ll use “Spring-Social-Login”. Next, we’ll provide the URL. In this case, we’ll use http://localhost:8080/login/oauth2/code/google:
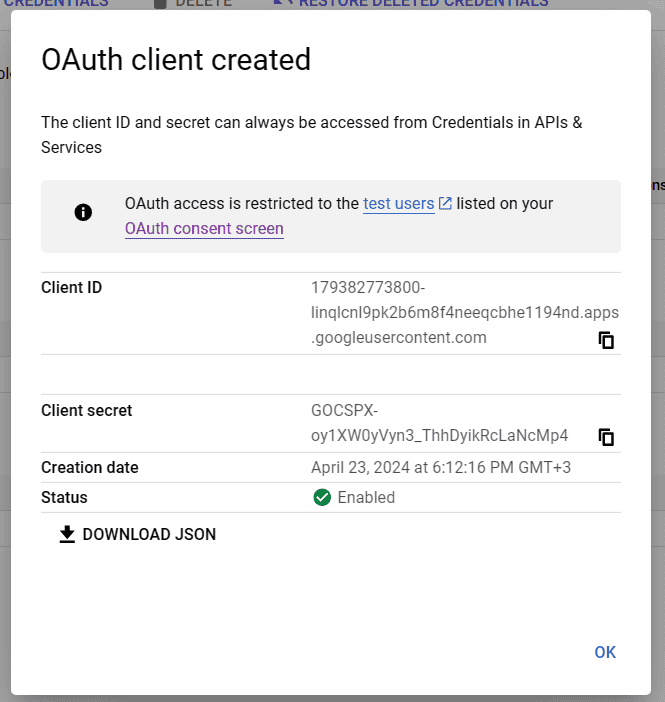
Once we’ve filled in these fields, we’ll navigate to the bottom of the page and click the “Create” button. A pop-up will appear containing the key and secret. We can either download a JSON or save them somewhere locally:
We’re done with the setup for Google. If we want to use another provider, e.g. GitHub, we’ll have to follow a similar process.
3. Spring Boot Project Setup
Now, let’s set up the project before we add the social login functionality. As mentioned in the beginning, we’re using Spring Boot. Let’s go to Spring Initializr and set up a new Maven project. We’ll keep it simple, we’ll use the Spring Web and OAuth2 dependencies:

After we open the project in our favorite IDE and we start it, the homepage should look like this:

This is Spring Security’s default login page. We’ll add the social login functionality here.
4. Social Login Implementation
First, we’ll create a HomeController class that will contain two routes, one public and one private:
@GetMapping("/")
public String home() {
    return "Hello, public user!";
}

@GetMapping("/secure")
public String secured() {
    return "Hello, logged in user!";
}
Next, we’ll need to override the default security configurations. For this, we’ll need a new class, SecurityConfig, which we’ll annotate with @Configuration and @EnableWebSecurity. Inside this configuration class, we’ll configure the security filter.
This security filter allows anyone to access the home page (auth.requestMatchers(“/”).permitAll()) and any other requests need to be authenticated:
@Configuration
@EnableWebSecurity
public class SecurityConfig {
    @Bean
    SecurityFilterChain securityFilterChain(HttpSecurity http) throws Exception {
        return http
          .authorizeHttpRequests(auth -> {
              auth.requestMatchers("/").permitAll();
              auth.anyRequest().authenticated();
          })
          .oauth2Login(Customizer.withDefaults())
          .formLogin(Customizer.withDefaults())
          .build();
    }
}
Futhermore, we use formLogin for the user and password authentication and oauth2Login for the social media login feature.
Next, we’ll need to add the ID and the secret in the applications.properties file:
spring.security.oauth2.client.registration.google.client-id = REPLACE_ME
spring.security.oauth2.client.registration.google.client-secret = REPLACE_ME
And this should be it. After we start the application, the homepage will be different. By default, it will display the message we’ve configured in the public endpoint. When we try to access the /secure endpoint, we’ll be redirected to the login page, which will look like this:

Clicking on Google redirects us to the Google sign-in page:
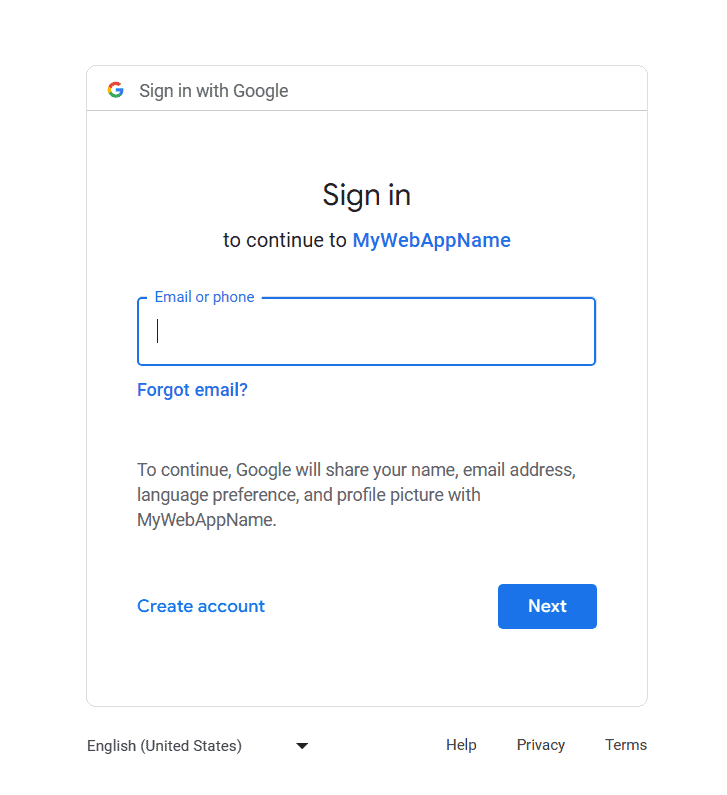
After successfully logging in, we’ll be redirected to the /secure endpoint we set up earlier, and the respective message will be displayed.
5. Conclusion
In this article, we’ve demonstrated how to set up a Spring Boot maven project using the OAuth2 social login feature.
We’ve implemented this feature using the Google API console. First, we’ve set up the Google project and application. Next, we’ve obtained the credentials. Afterward, we set up the project, and lastly, we set up the security configurations to make social login available.
As always, the code is available over on GitHub.


