Uploading a File and JSON Data in Postman
Last updated: November 13, 2025


Mocking is an essential part of unit testing, and the Mockito library makes it easy to write clean and intuitive unit tests for your Java code.
Get started with mocking and improve your application tests using our Mockito guide:
Handling concurrency in an application can be a tricky process with many potential pitfalls. A solid grasp of the fundamentals will go a long way to help minimize these issues.
Get started with understanding multi-threaded applications with our Java Concurrency guide:
Spring 5 added support for reactive programming with the Spring WebFlux module, which has been improved upon ever since. Get started with the Reactor project basics and reactive programming in Spring Boot:
Since its introduction in Java 8, the Stream API has become a staple of Java development. The basic operations like iterating, filtering, mapping sequences of elements are deceptively simple to use.
But these can also be overused and fall into some common pitfalls.
To get a better understanding on how Streams work and how to combine them with other language features, check out our guide to Java Streams:
Explore Spring Boot 3 and Spring 6 in-depth through building a full REST API with the framework:
Yes, Spring Security can be complex, from the more advanced functionality within the Core to the deep OAuth support in the framework.
I built the security material as two full courses - Core and OAuth, to get practical with these more complex scenarios. We explore when and how to use each feature and code through it on the backing project.
You can explore the course here:
Spring Data JPA is a great way to handle the complexity of JPA with the powerful simplicity of Spring Boot.
Get started with Spring Data JPA through the guided reference course:
Refactor Java code safely — and automatically — with OpenRewrite.
Refactoring big codebases by hand is slow, risky, and easy to put off. That’s where OpenRewrite comes in. The open-source framework for large-scale, automated code transformations helps teams modernize safely and consistently.
Each month, the creators and maintainers of OpenRewrite at Moderne run live, hands-on training sessions — one for newcomers and one for experienced users. You’ll see how recipes work, how to apply them across projects, and how to modernize code with confidence.
Join the next session, bring your questions, and learn how to automate the kind of work that usually eats your sprint time.
1. Overview
Postman is a popular API platform that optimizes the various steps of the API development lifecycle. Postman can test a custom API without writing any code. In addition, we can use either the standalone app or the browser extension.
In this tutorial, we’ll see how to upload files and JSON data when using Postman.
2. Application Setup
Let’s set up a basic Spring Boot application that exposes endpoints to upload data.
2.1. Dependencies
To begin with, we define a basic Spring application with the spring-boot-starter-web dependency in pom.xml:
<dependency>
    <groupId>org.springframework.boot</groupId>
    <artifactId>spring-boot-starter-web</artifactId>
</dependency>
Now, we can proceed with a basic model.
2.2. Model
Next, let’s define a simple model class for the JSON input:
public class JsonRequest {
    int id;
    String name;
}
For brevity, we removed the declarations for constructors, getters, setters, and similar.
2.3. Endpoints
Finally, let’s set up an endpoint as per the use case to handle requests as a file:
@PostMapping("/uploadFile")
public ResponseEntity<String> handleFileUpload(@RequestParam("file") MultipartFile file){
    return ResponseEntity.ok().body("file received successfully");
}
In the method handleFileUpload(), we expect a MultipartFile as input and subsequently return a 200 status message with a static text. Notably, we kept it simple and haven’t explored saving or processing the input file.
In this case, the MultipartFile is provided by Spring-Web and it represents an uploaded file. This file is then stored in memory or temporarily on main storage, which is subsequently flushed out once the request processing is complete.
Let’s also create an endpoint that handles JSON data:
@PostMapping("/uploadJson")
public ResponseEntity<String> handleJsonInput(@RequestBody JsonRequest json){
    return ResponseEntity.ok().body(json.getId()+json.getName());
}
Here, handleJsonInput(), we expect an object of type JsonRequest, the model class we defined. Thus, the method returns a 200 HTTP status code with the input details id and name, in the response.
We used the annotation @RequestBody, which deserializes the input into the JsonRequest, object. This way, we just focus on the simplistic processing of the JSON to verify the input.
3. Uploading Data
Now that we’ve set up the application, let’s check the two ways to provide input to it.
3.1. Uploading JSON Into Postman
JSON is one of the main text types for endpoints. We can follow the steps below to pass the same to the exposed endpoint.
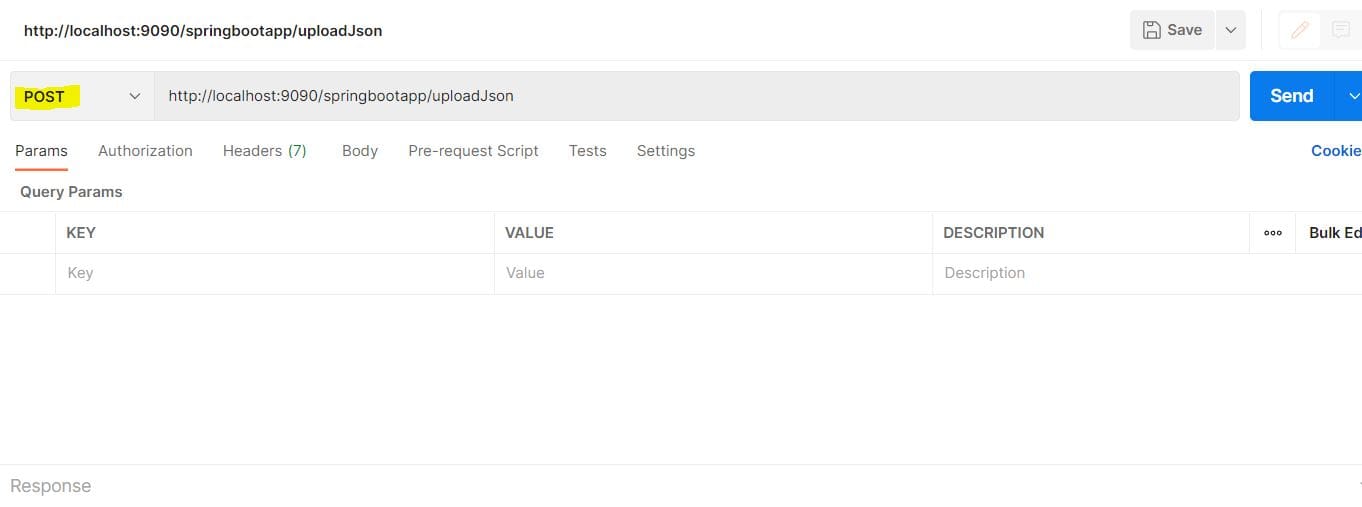
The default method is GET. So, once we add the localhost URL, we select POST as the method:
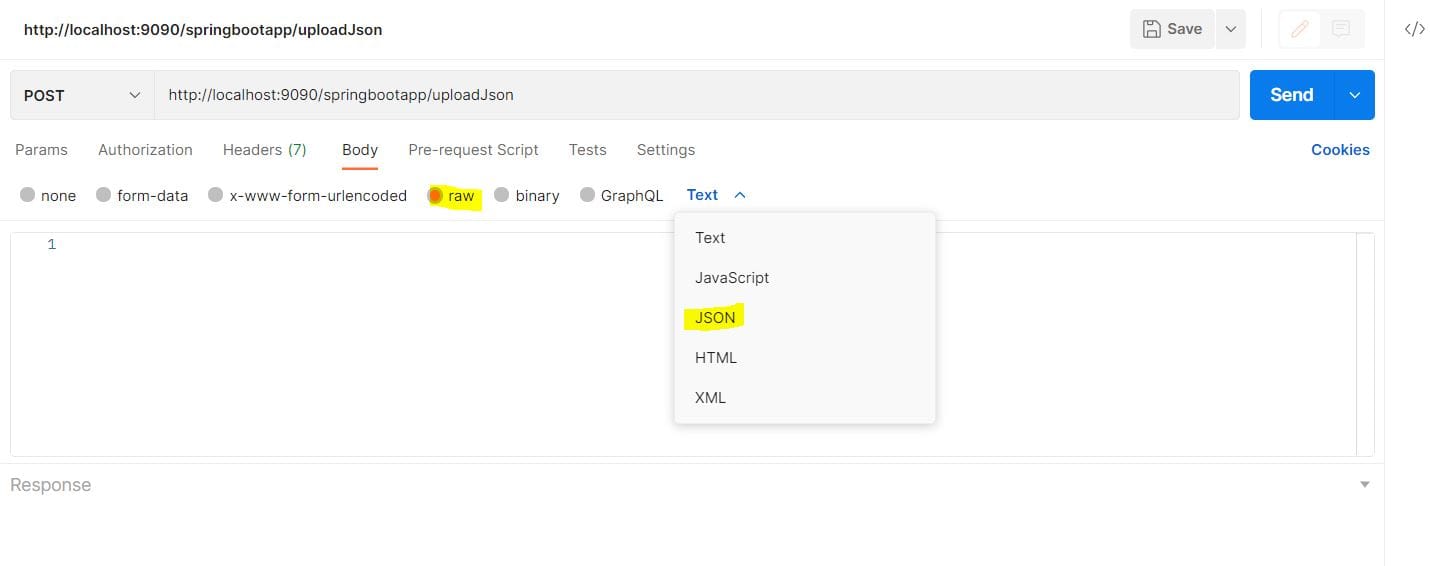
Let’s click on the Body tab, then select raw. In the dropdown which displays Text, we select JSON as the input:
At this point, we paste the input JSON and then click Send:
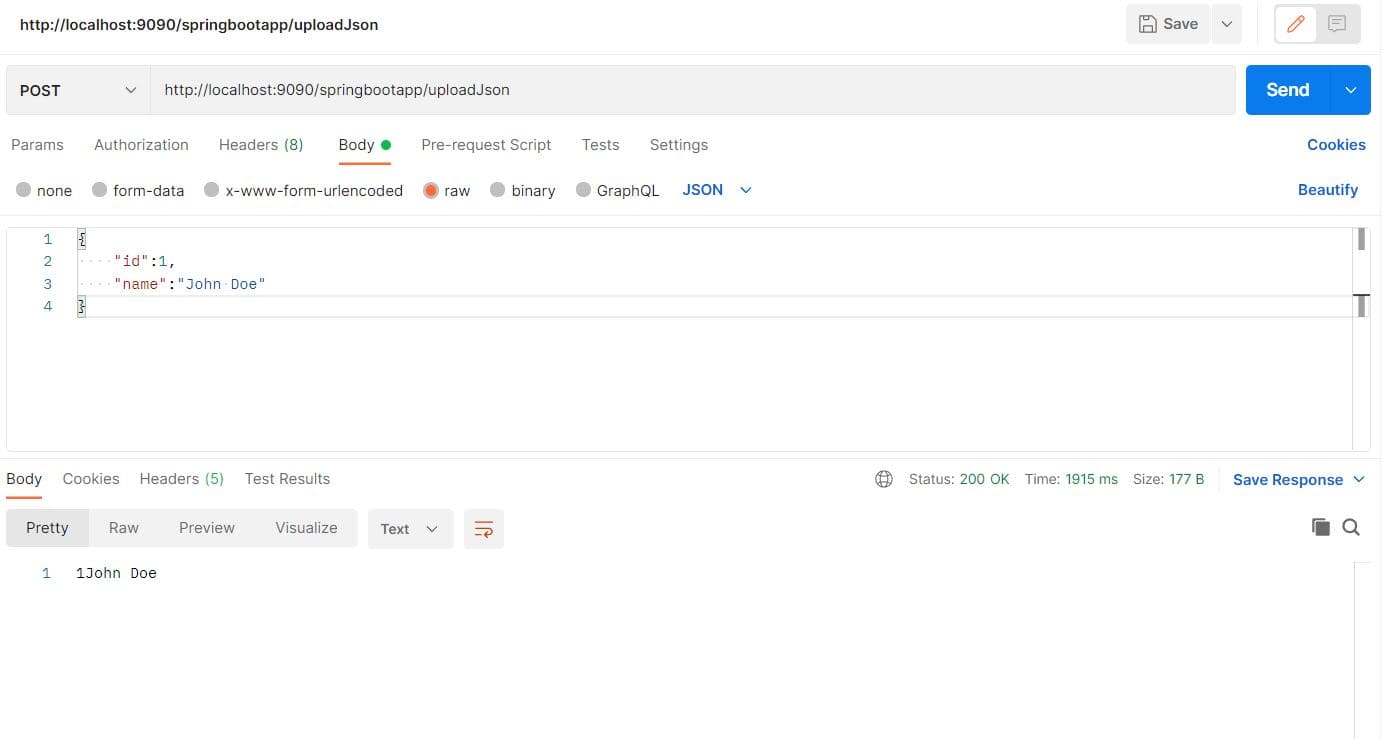
As expected, we received a 200 status code in response, as we can see at the bottom of the snapshot. Additionally, the id and name from the input are returned in the response body, confirming that the JSON was processed correctly at the endpoint.
3.2. Uploading a File Into Postman
Let’s use a document file for this example, as we didn’t define any constraints regarding the file types that the endpoint can consume.
Now, we add the localhost URL and select POST as the method since the method defaults to GET:
Let’s click on the Body tab, then select form-data. On the first row for the key-value pair, we click on the dropdown at the right corner for the key field, and select File as the input:
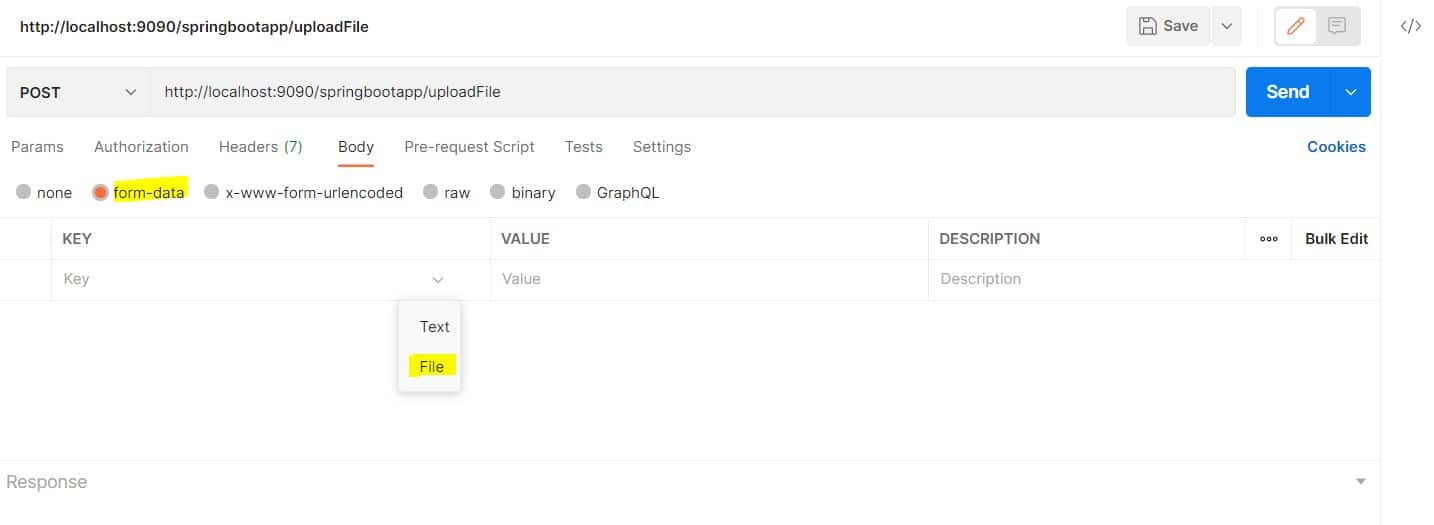
Here, we add the text File to the key column, which corresponds to the @RequestParam for the endpoint, and browse to the desired path for the value column.
Finally, let’s click on Send:
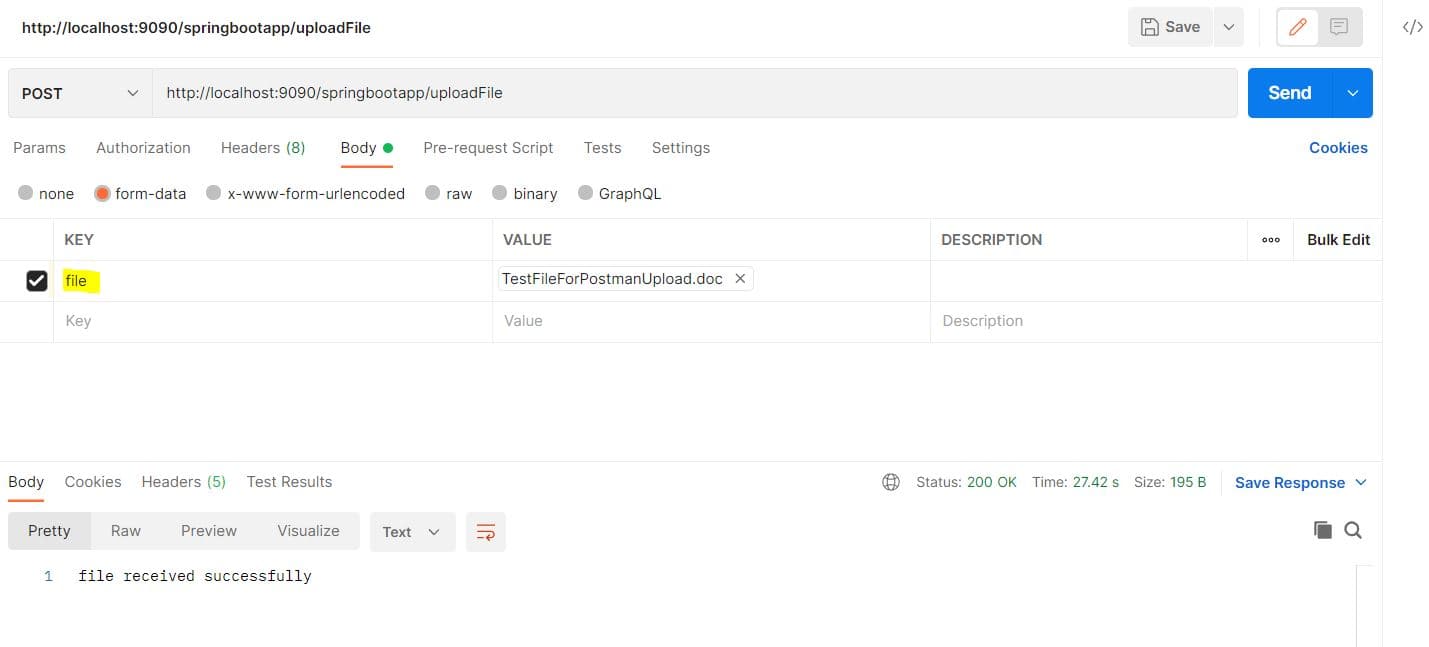
When we click on Send, we get a 200 HTTP status code with the static text defined in the endpoint definition. This indicates that the file was successfully delivered to the endpoint without any errors or exceptions.
4. Sending Multipart Data and JSON in the Same Request
Let’s see now how to send multipart data and JSON in the same request with Postman.
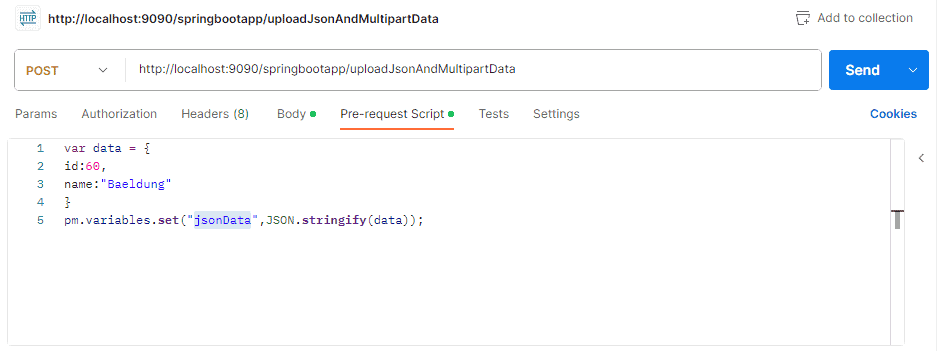
First, we configure the Postman request and set the JSON data we want to send in the pre-request script:
Second, we go to the Body tab in the request editor and select form-data as the body type. Then, let’s add the fields for the nested JSON object and the multipart file:
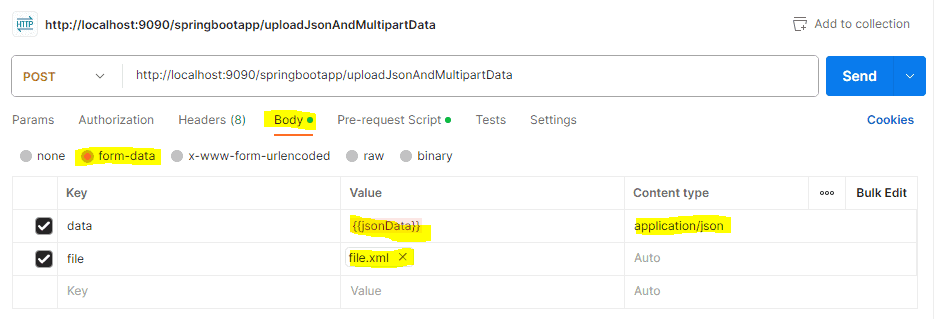
We set two rows:
- For the nested JSON, we get its value from the jsonData variable from earlier in the pre-request script, content type is application/json.
- For the file field, we click on the Choose Files button, opening a file dialog where we choose the desired file for upload. Once we choose the file, Postman includes it as part of the multipart/form-data request.
Finally, let’s create an appropriate controller to handle the multipart/form-data request and process the file and nested JSON object accordingly:
@PostMapping("/uploadJsonAndMultipartData")
public ResponseEntity<String> handleJsonAndMultipartInput(@RequestPart("data") JsonRequest json, @RequestPart("file") MultipartFile file) {
    return ResponseEntity.ok()
      .body(json.getId() + json.getName());
}
In this endpoint, the handleJsonAndMultipartInput() method accepts the nested JSON object as a JsonRequest object using @RequestPart(“data”), and the file is a MultipartFile object using @RequestPart(“file”).
5. When the Required Request Part file Is Not Present
In Spring Boot, an exception occurs when the server expects a multipart request part named file, but the incoming request doesn’t contain it. In most cases, this happens because the request in Postman doesn’t have the correct configuration or the parameter names don’t match.
To resolve this, we should ensure that the request body type in Postman is set to form-data, not raw or x-www-form-urlencoded. The key name in the form-data table must exactly match the one defined in the controller.
5.1. Uploading a File
If we’re only uploading a file, the endpoint should have the respective format:
@PostMapping(value = "/uploadSingleFile", consumes = MediaType.MULTIPART_FORM_DATA_VALUE)
public ResponseEntity<String> handleSingleFileUpload(@RequestParam("file") MultipartFile file) {
    return ResponseEntity.ok("file received successfully");
}
In this case, we send a single form-data field named file, mark it as type File in Postman, and select the desired file:
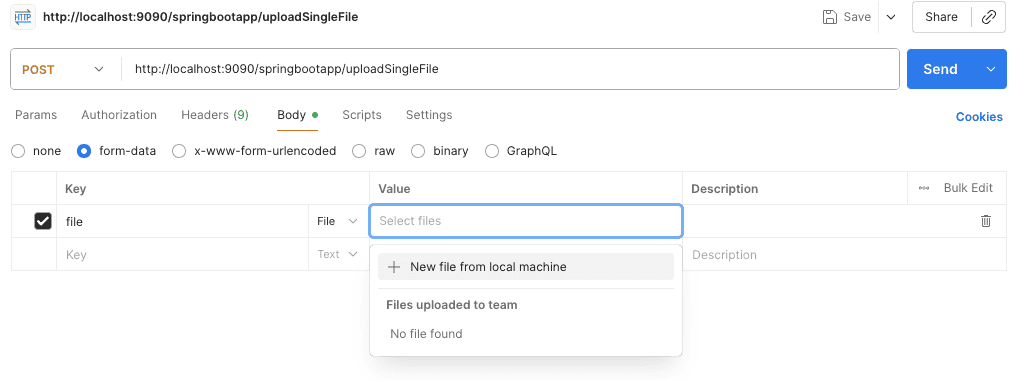
Once sent, the controller receives it correctly.
5.2. Uploading JSON Data and File
However, when we need to upload both JSON data and a file in the same request, we use the @RequestPart annotation instead of @RequestBody. This is because @RequestBody expects the entire request body to be JSON, whereas multipart/form-data requests contain multiple distinct parts.
Let’s look at a correct example:
@PostMapping(value = "/uploadJsonAndMultipartInput", consumes = MediaType.MULTIPART_FORM_DATA_VALUE)
public ResponseEntity<String> handleUploadJsonAndMultipartInput(
  @RequestPart("data") JsonRequest json,
  @RequestPart("file") MultipartFile file) {
    return ResponseEntity.ok(json.getId() + json.getName());
}
Similarly, in Postman, we should select form-data for the request body. The first key, named data, should contain the JSON object as plain text:
{"id": 1, "name": "Alice"}Then, we hover over the key field, select Text, and set the Content-Type to application/json for this specific field. These steps ensure the multipart data is correctly structured and prevent the exception from occurring.
The second key should be named file and set to type File. Next, we choose the desired file using the file picker. Once both fields are added, click Send. The endpoint now properly deserializes both parts of the request.
6. Conclusion
In this article, we built a simple Spring Boot application and looked at three different ways to provide data to exposed endpoints via Postman.


