1. Overview
In this article, we’re going to send a SOAP request via Postman. Before that, we’ll import the WSDL from our Country SOAP service into the API platform.
2. Setup
Before we can issue SOAP requests in Postman, we’ll need a functioning SOAP service. After running our Country SOAP service, the endpoint will be located at http://localhost:8080/ws, and the WSDL can be found at http://localhost:8080/ws/countries.wsdl.
3. Testing SOAP Request from Postman
There are four steps to test our endpoint with Postman.
3.1. Import SOAP WSDL
Since Postman 8.4.0, we can import our WSDL into Postman. We can directly import our countries Postman collection. Here are a few steps to create a new collection from the WSDL.
First, let’s click on Collections:

Next, let’s import our WSDL by providing its URL:

You can also import by directly using the countries.wsdl WDSL file.
Our services have been fetched from the WSDL. We’ll skip advanced settings and import with the defaults:

After importing, we should be able to see all our SOAP services:

Postman has taken care of setting the right URL, content type, and headers for each request.
3.2. Add Body Data
Next, let’s customize our request body by adding Spain as the country name and the baeldung namespace in the envelope header:
<soapenv:Envelope xmlns:soapenv="http://schemas.xmlsoap.org/soap/envelope/"
                  xmlns:gs="http://www.baeldung.com/springsoap/gen">
    <soapenv:Header/>
    <soapenv:Body>
        <gs:getCountryRequest>
            <gs:name>Spain</gs:name>
        </gs:getCountryRequest>
    </soapenv:Body>
</soapenv:Envelope>
By importing our WSDL, Postman has already set appropriate headers for us. The Content-Type is set to text/xml and works for our request. text/xml is preferable to application/xml. MIME user agents (and web user agents) that do not have explicit support for text/xml will treat it as text/plain, for example, by displaying the XML MIME entity as plain text.
If a request needs another content type, we can deselect the Content-Type header automatically added by Postman. Then, we add a new row with Content-Type in the Key field and our new content type name in the Value field.
If the service returns a status code of 500, we should add an additional header “SOAPAction: #POST”.
3.4. Send SOAP Request
Finally, let’s hit the Send button to make our call to the SOAP service. If our call is successful, Postman displays the response containing information about Spain in the lower tab:
<SOAP-ENV:Envelope xmlns:SOAP-ENV="http://schemas.xmlsoap.org/soap/envelope/">
<SOAP-ENV:Header/>
<SOAP-ENV:Body>
    <ns2:getCountryResponse xmlns:ns2="http://www.baeldung.com/springsoap/gen">
        <ns2:country>
            <ns2:name>Spain</ns2:name>
            <ns2:population>46704314</ns2:population>
            <ns2:capital>Madrid</ns2:capital>
            <ns2:currency>EUR</ns2:currency>
        </ns2:country>
    </ns2:getCountryResponse>
</SOAP-ENV:Body>
</SOAP-ENV:Envelope>
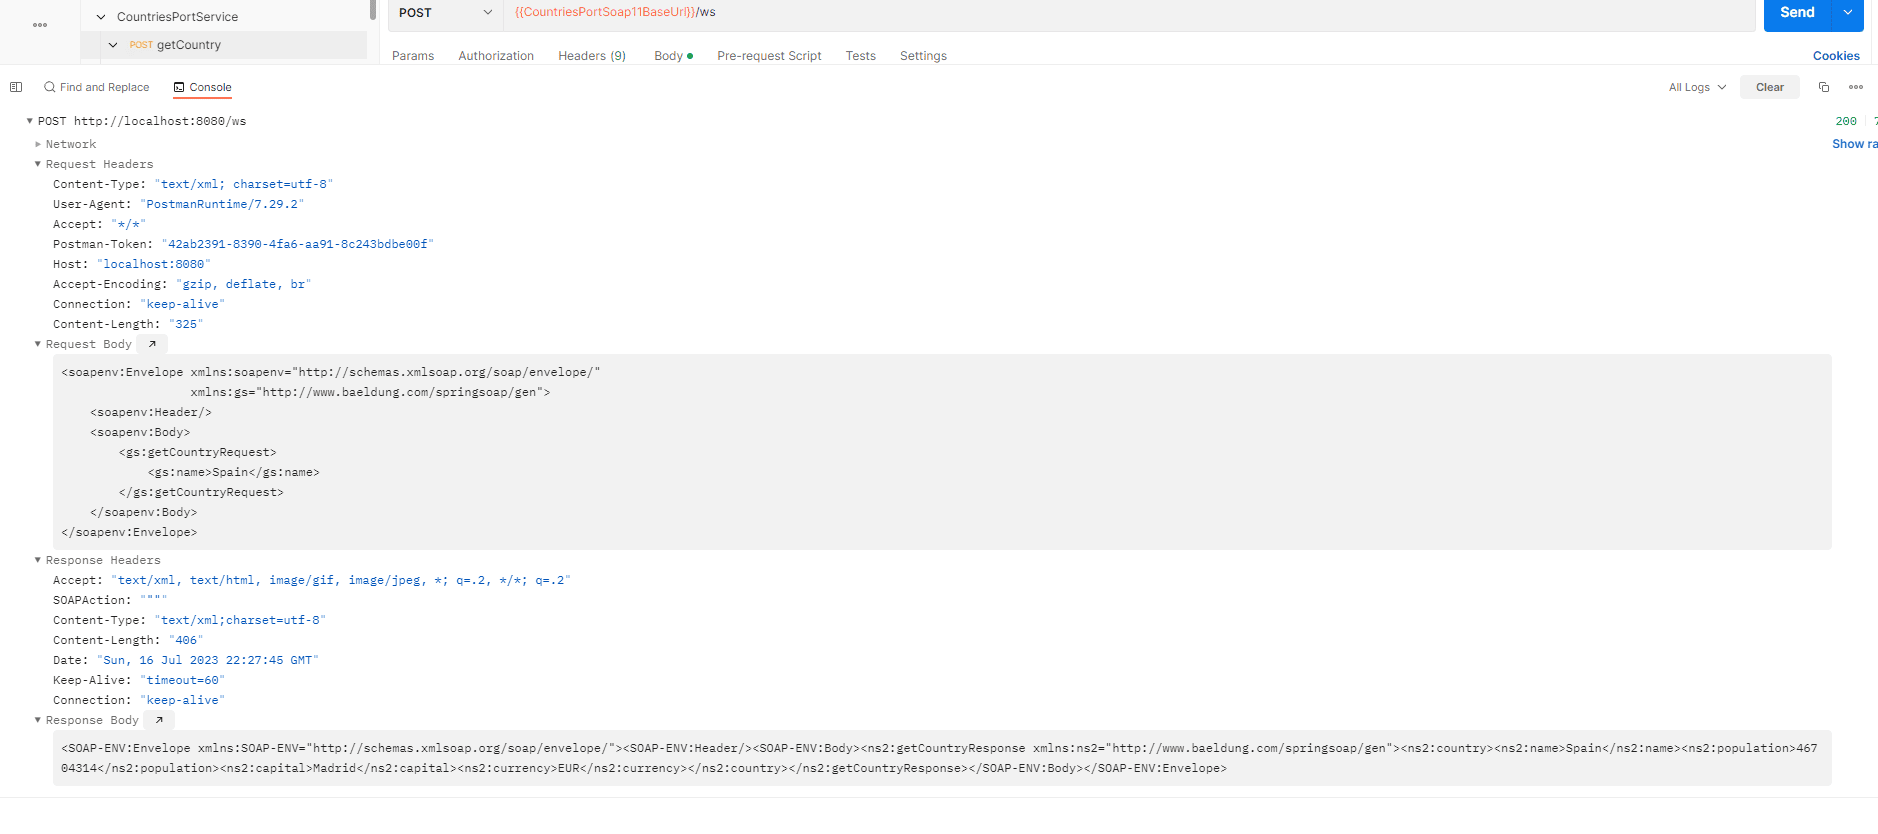
Here’s the output in the Postman console:

4. Conclusion
In this article, we learned how to send a SOAP request via Postman. We first saw how to import our WSDL into Postman. Then, we successfully sent a request to our country service.
The code backing this article is available on GitHub. Once you're
logged in as a Baeldung Pro Member, start learning and coding on the project.


