1. Overview
Every time we test an endpoint with CSRF protection enabled, we have to manually take the CSRF token from the cookies and set it in the X-XSRF-TOKEN request header. If we don’t send the CSRF token, we get a 403 Forbidden error.
In this tutorial, we’ll see how to automate the sending of the CSRF token to the server when using Postman.
2. Application Setup
We’ll not discuss how to enable CSRF protection in a Spring application, which we’ve already covered in a previous article.
As we know, we can find the CSRF token in the client’s cookies, and by default, CSRF protection is enforced for the POST, PUT and DELETE HTTP verbs.
Also, for testing, we’ll use one of the endpoints from the previous article, a POST request, which enables a user to transfer an amount to one account:
POST http://localhost:8080/transfer?accountNo=1234&amount=100
3. Postman
Firstly, we’ll run a test with the Postman client without considering the CSRF token. Afterward, we’ll run another test where we send the CSRF token and set up Postman to send it automatically.
3.1. Testing Without CSRF Token
Let’s open Postman and add a new request:

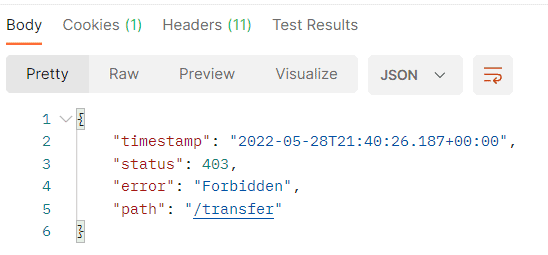
Now, we execute the request without sending the CSRF token, and we get the 403 Forbidden error:

Next, we’ll see how to fix that.
In the Headers tab, let’s add a new parameter called X-XSRF-TOKEN and the value set to xsrf-token. X-XSRF-TOKEN is the header for the CSRF, and xsrf-token is an environment variable that we’ll define after:

3.3. Environment Variable xsrf-token
Now let’s go to the Environments on the left side and create a new environment called DEV:

On the right side, let’s define the environment variable we mentioned above, called xsrf-token. We’ll leave the rest of the fields empty:

Let’s go back to the request and select the DEV Environment from the top right corner so that we can use the environment property we defined:

3.4. Script
Let’s click now on the Tests tab. We’ll add the following script here:

The script retrieves the value of the XSRF-TOKEN cookie and assigns it to the environment variable xsrf-token. Now, whatever value for XSRF-TOKEN comes from the server will be transferred to the X-XSRF-TOKEN header property.
2.5. Testing
When we execute the request, we now get the 200 OK response:

3. Conclusion
In this article, we saw how to test an endpoint of an application that has CSRF protection enabled.
We used the Postman client to automate the sending of CSRF tokens every time we execute a new request on the same endpoint. That is more efficient since we don’t have to take the CSRF token manually and set it in the request header.


