

Yes, we're now running our only Summer Sale. All Courses are 30% off until 20th July, 2026:
Learn through the super-clean Baeldung Pro experience:
>> Membership and Baeldung Pro.
No ads, dark-mode and 6 months free of IntelliJ Idea Ultimate to start with.
1. Overview
Jenkins is an open-source and easy-to-use Java-based web server often used in the development of Continuous Integration and Continuous Delivery (CI/CD) pipelines.
In this tutorial, we’ll walk through the process for enabling HTTPS on a Jenkins server by configuring SSL.
2. Using Jenkins SSL Configuration
To use HTTPS, we have to make changes to the internal SSL settings of our Jenkins server.
2.1. Generate the SSL Certificate
First, we need to generate an SSL certificate and keystore. Here, we’ll use OpenSSL to create both.
Let’s start by installing OpenSSL on our CentOS machine:
$ sudo yum install opensslIn the next step, we’ll generate the SSL public and private keys using the OpenSSL tool:
$ openssl req -newkey rsa:2048 -nodes -keyout key.pem -x509 -days 365 -out certificate.pem
Generating an RSA private key
.....................................+++++
..................+++++
writing new private key to 'key.pem'
Email Address []:
Here, the key.pem key and the certificate.pem self-signed certificates are generated. Next, let’s merge both of these files by converting them to a .p12 keystore:
$ openssl pkcs12 -inkey key.pem -in certificate.pem -export -out certificate.p12Importantly, we can use these two .pem files later, so we might want to save them. Let’s now import the .p12 file with keytool and convert it into a .jks keystore:
$ keytool -importkeystore -srckeystore ./certificate.p12 -srcstoretype pkcs12 -destkeystore jenkinsserver.jks -deststoretype JKS
Entry for alias 1 successfully imported.
Import command completed:  1 entries successfully imported, 0 entries failed or cancelled
Warning:
Now, we can use jenkinsserver.jks in our Jenkins setup.
2.2. Add JKS File to Jenkins Path
Importantly, we need to ensure jenkinsserver.jks is in a place where Jenkins can access it. JENKINS_HOME (commonly /var/lib/jenkins) is a good choice:
$ sudo cp jenkinsserver.jks /var/lib/jenkins/The /var/lib/jenkins/ path is accessible to the jenkins user by default. However, we have to change the owner of our .jks file:
$ sudo chown jenkins:jenkins /var/lib/jenkins/jenkins.jksNow, Jenkins is set to the proper keystore file for secure SSL authentication.
2.3. Configure Jenkins for SSL Communication
In order to set up Jenkins with SSL, we need to use an HTTPS keystore, an HTTPS port, and a password. Let’s use the variables in the /etc/systemd/system/jenkins.service file to set each:
Environment="JENKINS_HTTPS_PORT=8443"
Environment="JENKINS_HTTPS_KEYSTORE=/var/lib/jenkins/jenkinsserver.jks"
Environment="JENKINS_HTTPS_KEYSTORE_PASSWORD=baeldung"
At this point, HTTPS is set up in Jenkins.
2.4. Restart the Jenkins Service
So far, we’ve made all the changes to the configuration. To apply them, we reload the daemon and restart Jenkins:
$ sudo systemctl daemon-reload
$ sudo systemctl restart jenkins.service
Now, our SSL certificate is active for the Jenkins server. Hence, HTTPS is up and running, securing our data.
2.5. Verifications of Jenkins Server
Of course, Jenkins is now accessible over both HTTP and HTTPS. To illustrate, let’s access the Jenkins server with an HTTPS port:
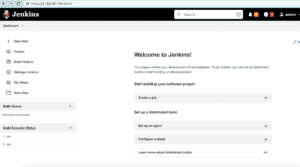
We can see that the Jenkins server runs on the 8443 port with HTTPS, secured by SSL.
3. Using Reverse Proxy
We can also run a reverse proxy server in front of the main Jenkins server to increase security. In addition, running Jenkins behind HAProxy, for example, provides a more user-friendly URL. Proxies are a type of firewall that further protect access to backend servers.
We can run HAProxy, Nginx, Apache, or Squid as our proxy server. Here, we use HAProxy as a relatively standard choice.
3.1. Install and Configure HAProxy
Using HAProxy, we can redirect the requests to Jenkins. Let’s install HAProxy on a Linux machine:
$ yum install haproxyNext, let’s change a few default settings. First, we’ll create a frontend node that listens to all connections:
frontend http-in
    bind *:80
    bind *:443 ssl crt /etc/haproxy/haproxy.pem
    mode http
    use_backend jenkins if { path_beg / }
Here, redirects go to the Jenkins backend via use_backend. Of course, we have to add a Jenkins backend node in the configuration so that HAProxy can forward properly:
backend jenkins
    server jenkins1 127.0.0.1:8080
Above, we’ve used the haproxy.pem file, which is easy to create:
$ cat certificate.pem key.pem > haproxy.pemHere, we combined the certificate.pem and key.pem from earlier to generate the haproxy.pem file. Finally, let’s reload the daemon and restart the haproxy service:
$ sudo systemctl daemon-reload
$ sudo systemctl restart haproxy
At this point, SSL should be available on the Jenkins server via HAProxy.
3.2. Verification
So far, HAProxy should be up and running, redirecting to Jenkins. To illustrate, let’s access the Jenkins server and verify the HTTPS connection:
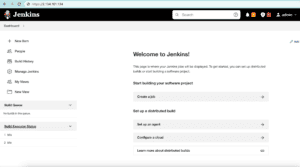
As we can see, Jenkins is using HTTPS for secure access without any custom ports.
4. Conclusion
In this article, we followed the steps to enable SSL security on a Jenkins server. Initially, we learned how to configure the HTTPS settings of Jenkins itself. Finally, to secure the SSL connections further, we added a reverse proxy server, using Jenkins as the backend.