1. Overview
In this tutorial, we’ll see how to import an existing Maven project into Eclipse. For this purpose, we can either use the Eclipse plugin for Maven or the Apache Maven Eclipse plugin.
2. Eclipse and Maven Project Setup
For our example, we will be using the latest version of Eclipse, version 2021-09 (4.21.0), which we obtained from the Eclipse Downloads page.
2.1. Example Maven Project
For our examples, we’ll use a multi-module Maven project from our GitHub repository. Once we’ve cloned the repository or downloaded the project, our multi-module Maven project’s directory root should look like:
|--multimodulemavenproject
    |--daomodule
    |--entitymodule
    |--mainappmodule
    |--userdaomodule
    |--pom.xml
    |--README.md
2.2. Minor Changes in the Maven Project
Our multi-module Maven project is itself a child project. Therefore, to limit the scope of our exercise, we’ll need to make some minor changes in the pom.xml in the multimodulemavenproject directory, which will be our project root. Here, let’s remove the lines that refer to the parent of multimodulemavenproject:
<parent>
    <groupId>com.baeldung</groupId>
    <artifactId>parent-modules</artifactId>
    <version>1.0.0-SNAPSHOT</version>
    <relativePath>../../</relativePath>
</parent>
With these lines gone, we’re ready to import our Maven project into Eclipse.
3. Import Using the m2e Eclipse Plugin for Maven
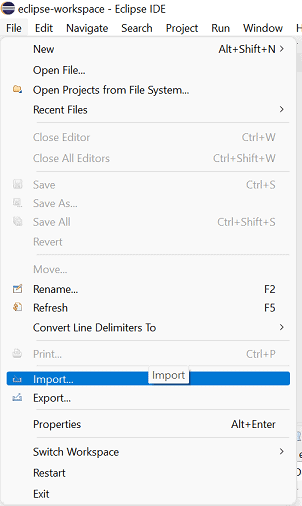
Let’s import the Maven project into Eclipse using the menu path File::Import::Maven::Existing Maven Projects. We can start by clicking on the Import option under the File menu:
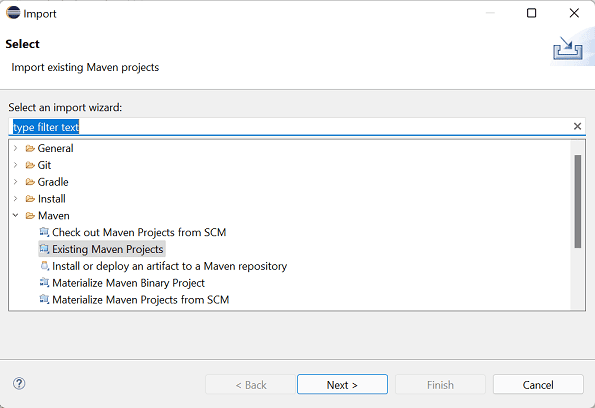
Then, let’s expand the Maven folder, select Existing Maven Projects, and click the Next button:
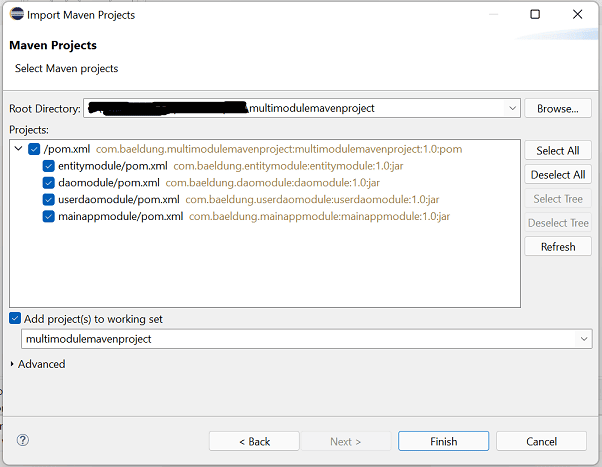
Finally, let’s provide the path of the root directory of our Maven project and click the Finish button:
After this step, we should be able to see the Package Explorer view in Eclipse:
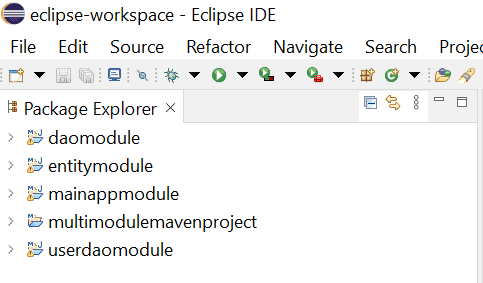
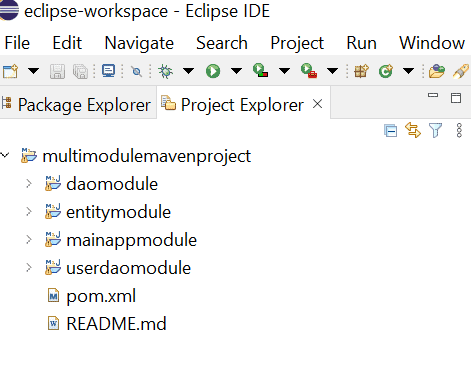
This view might be a bit confusing because we see all the modules separately and not in a hierarchical manner. This is due to the default view in Eclipse, Package Explorer. However, we can easily switch our view to Project Explorer and view the multi-module project in a tree-like structure:
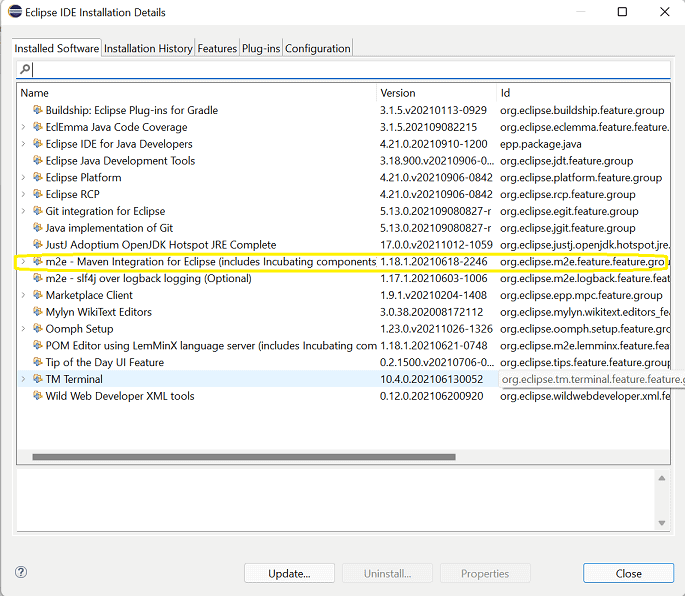
This smooth import of the Maven project was made possible by the Eclipse plugin for Maven, m2e. We didn’t have to add it separately to our Eclipse because it came built-in with the Eclipse installation and can be viewed through the path Help::About Eclipse IDE::Installation Details::Installed Software:
If we have an older version of Eclipse that doesn’t have a built-in m2e plugin, we can always add this plugin using Eclipse Marketplace.
4. The Apache Maven Eclipse Plugin
The Apache Maven Eclipse Plugin can also be used to generate Eclipse IDE files (*.classpath, *.project, *.wtpmodules, and the .settings folder) for use with a project. However, this plugin is now retired by Maven, and the use of Eclipse’s m2e plugin is recommended. More details can be found on the Apache Maven plugin page.
5. Conclusion
In this tutorial, we learned about the two ways of importing an existing Maven project into Eclipse. Since the Apache Maven Eclipse Plugin is now retired, we should be using the Eclipse plugin for Maven, m2e, which comes inbuilt with the latest versions of Eclipse.
All the code samples shown in this tutorial are available over on GitHub.


